 Do you use Facebook's Ads Manager to create ads?
Have you noticed the recent changes?
In this article, you'll discover how to navigate the updated Facebook Ads Manager and leverage its new features.
#1: View Your Ad Accounts
When you first go to your Ad Accounts page, you'll see a list of your ad accounts. If you use Business Manager and also have ad accounts outside of it, you'll see a link for both types of accounts.

One interesting part about Ads Manager is that even if you're not using Business Manager, you'll receive notifications for only your Facebook pages while inside Ads Manager. These are referred to as Business Notifications.
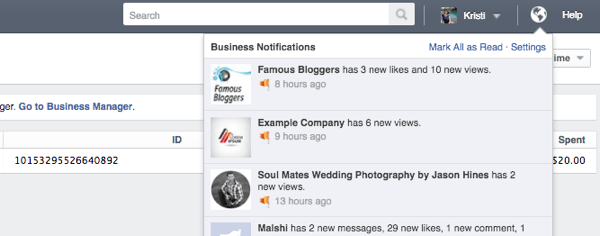
This will help keep you focused on your work instead of being interrupted by personal notifications from your profile.
#2: Review Your Ad Campaign Insights
When you click through to a specific ad account, you'll get an overview of the insights from your latest Facebook ad campaigns. You can click on a specific campaign to see more detailed insights for it or toggle campaigns on and off.
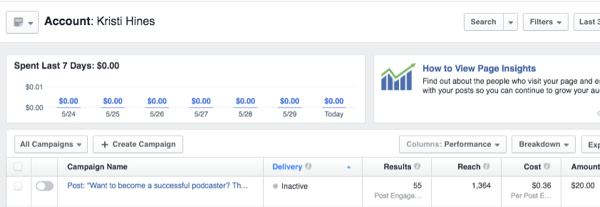
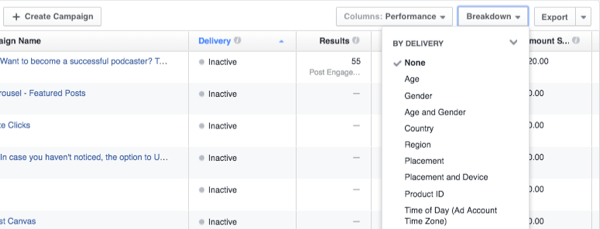
You can use the three buttons on the right side of the table header to add or remove columns of data, break down data, and export data.
Use the three buttons at the top right of the screen to search, filter, or change the date range to view specific campaigns.
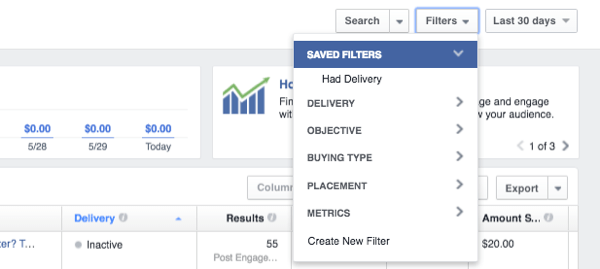
The button to the left of your account name has options to save the view as a report that can be emailed to you regularly, as well as monitor your ad campaign performance.

#3: Access Your Ads Manager Menu
When you're ready to access other areas of your Ads Manager, click on the three lines next to Ads Manager, and if applicable, hover over All Tools. This will display all of your Ads Manager features.
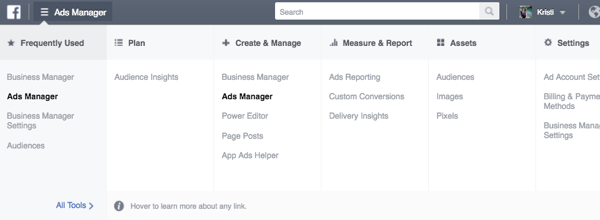
Note: Some of these options may not be available if you're not a Business Manager user.
#4: Set Up the New Facebook Pixel
If it's been some time since you've been in Facebook Ads Manager and you're interested in running remarketing/retargeting ads (ads to people who have visited your website), click on the Pixels link under Assets in the Ads Manager menu. If you see the image below, click Create a Pixel to start using the new Facebook pixel.
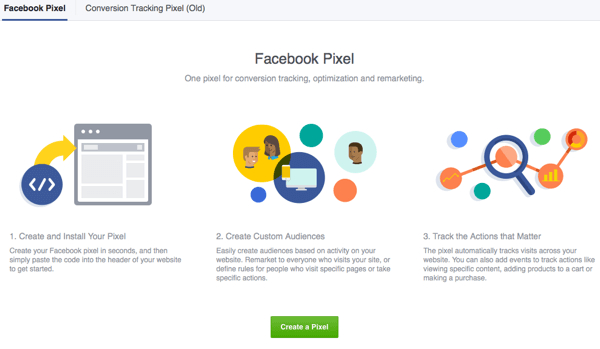
You can learn more about how it tracks your conversions here. But basically, after you click the button, give your pixel a name.
Get World-Class Marketing Training — All Year Long!
Are you facing doubt, uncertainty, or overwhelm? The Social Media Marketing Society can help.
Each month, you’ll receive training from trusted marketing experts, covering everything from AI to organic social marketing. When you join, you’ll also get immediate access to:
- A library of 100+ marketing trainings
- A community of like-minded marketers
- Monthly online community meetups
- Relevant news and trends updates
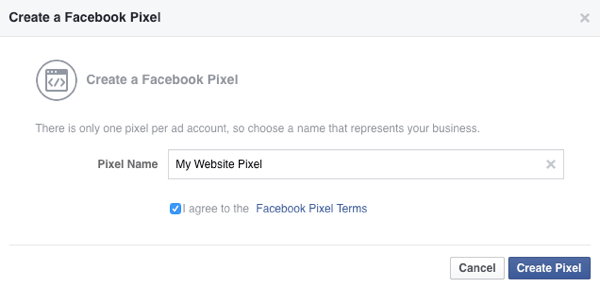
You're given the option to install the code yourself or email it to someone else who can install it on your website for you.
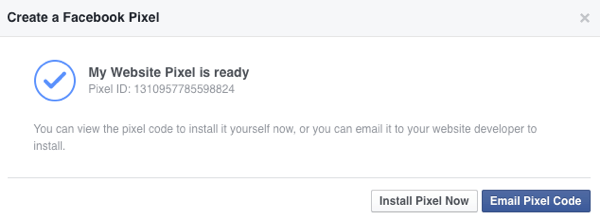
Once installed and activated, you should see a green light, and eventually some traffic gathering through your pixel code.
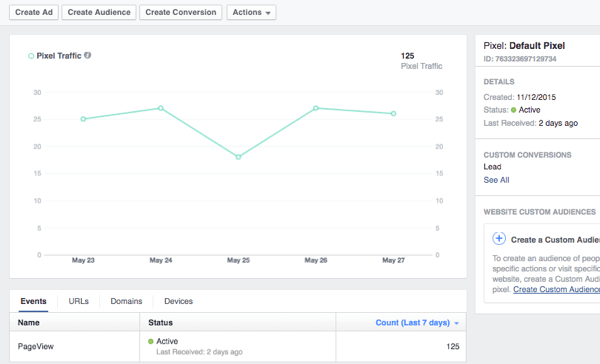
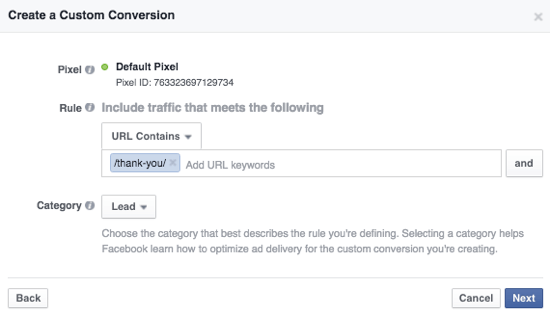
You can then click the Create Conversion button to configure Facebook to recognize when specific conversions happen on your website.
For example, when someone submits a lead form, you can tell Facebook that the lead conversion happens when a visitor lands on the thank-you page for your lead form.
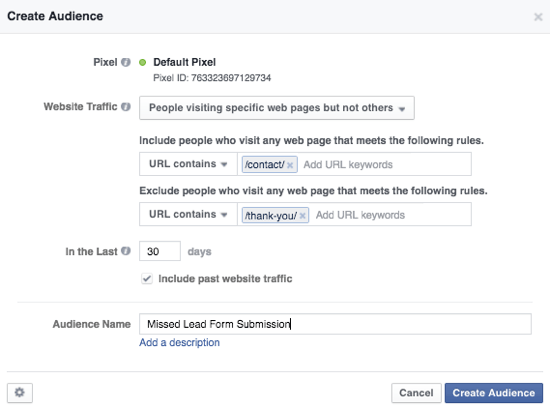
You can also create custom audiences for your remarketing/retargeting ads based on whether someone has visited any page, a specific page, or one page but not another on your website.
For example, did people go to your lead form page, but not to your thank-you page to complete the lead conversion? You might want to advertise to them and try to get that conversion.
The same could apply to a retailer whose visitors may have viewed a product or put it in their shopping cart, but didn't purchase it. Or visitors to a squeeze page who didn't convert into subscribers.
#5: Set Up Custom Audiences
Speaking of custom audiences, if you click on the Audiences link under Assets in the Ads Manager menu, you may find that you have a new option besides the traditional Customer List, Website Traffic, and App Activity.
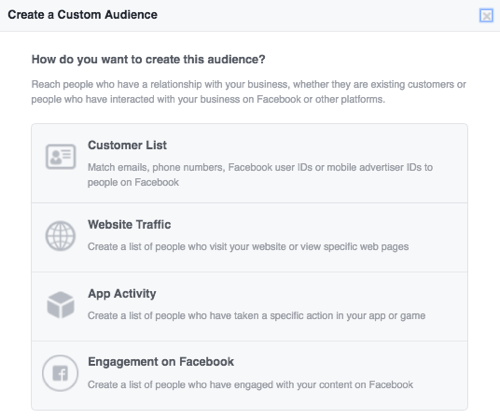
Choose the new Engagement on Facebook option to create custom audiences based on how long people have engaged with video content you posted to your Facebook page.
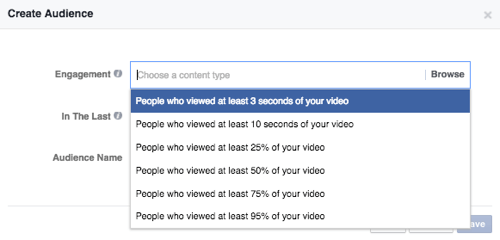
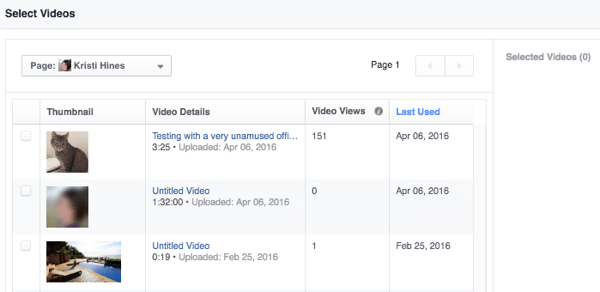
Once you choose the length or percentage of engagement, you can choose one or more videos. These include live or recorded videos.
Then you can name your audience and save it.
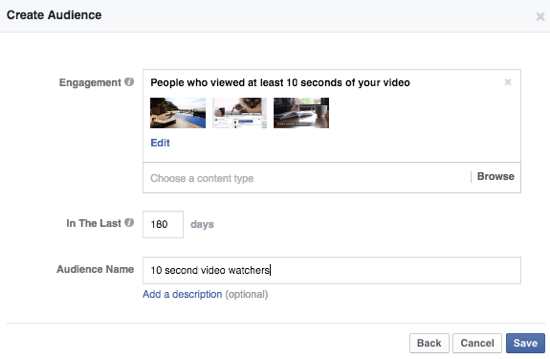
Like any other custom audience, your new custom audience must reach at least 20 people to be used for ad targeting.
#6: Create an Ad
When you're ready to create an ad, click the green Create an Ad button throughout Ads Manager. Here, you might notice a few changes.
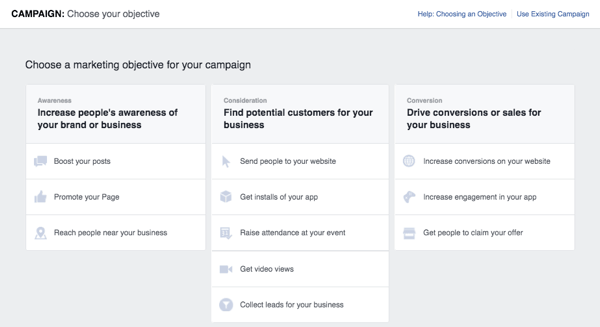
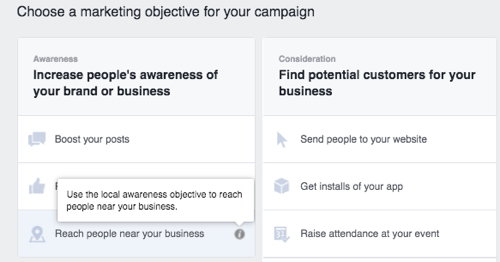
For starters, you can hover over each marketing objective to learn more about it.

Discover Proven Marketing Strategies and Tips
Want to go even deeper with your marketing? Check out the Social Media Marketing Podcast! Publishing weekly since 2012, the Social Media Marketing Podcast helps you navigate the constantly changing marketing jungle, with expert interviews from marketing pros.
But don’t let the name fool you. This show is about a lot more than just social media marketing. With over 600 episodes and millions of downloads each year, this show has been a trusted source for marketers for well over a decade.
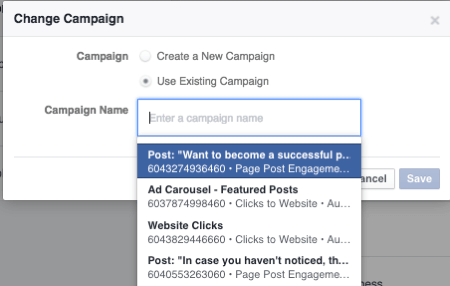
You can click on the link near the top right to create an ad for an existing ad campaign. This is useful if you want to create multiple ad variations for A/B testing in a particular ad campaign, or if you want to use a different image for each ad placement in the same ad campaign.
You might also find that for certain objectives, the ad creation process has changed. For example, if you choose to send people to your website or increase conversions on your website, you'll choose your website and your conversion pixel later in the process.
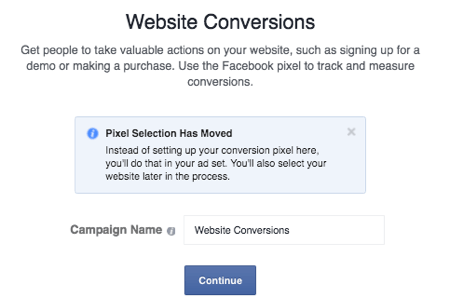
If you're starting a new ad campaign, choose your marketing objective and give it a name. When you click Continue, you'll define your ad audience.
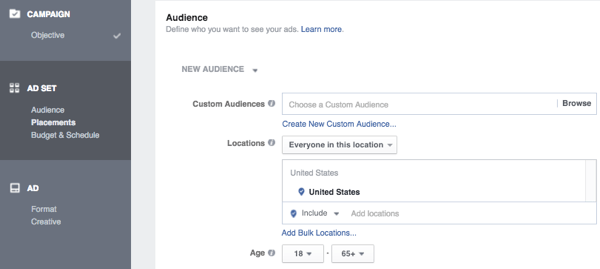
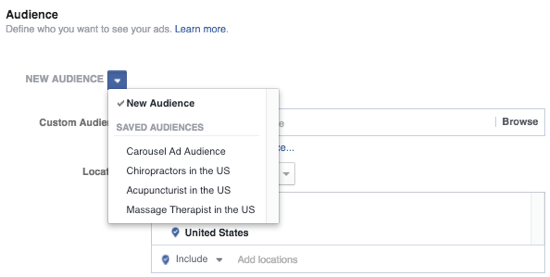
The audience targeting is still pretty standard. You can click the drop-down list next to New Audiences if you have saved audiences (audiences that you've defined previously).
You can select custom audiences to include or exclude.

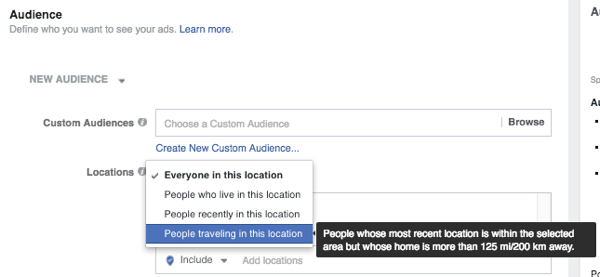
You can specify where people live or when they visit a specific location.
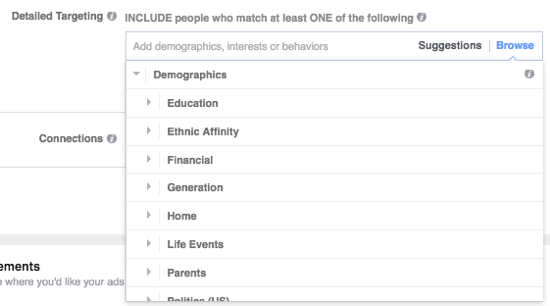
And you can choose from hundreds of different demographics, interests, and behaviors.
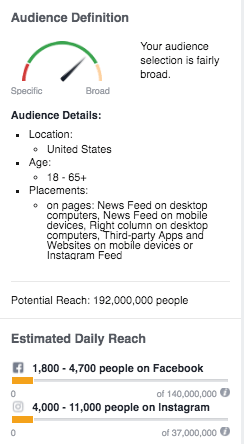
All the while, you can monitor your bar to see if your audience is too broad or too specific for your needs.
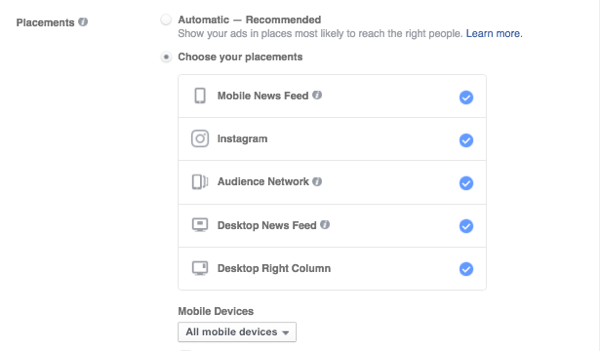
Next, you'll choose your placements. Note: You can still select or deselect specific placements later in the process when designing your ad creatives.
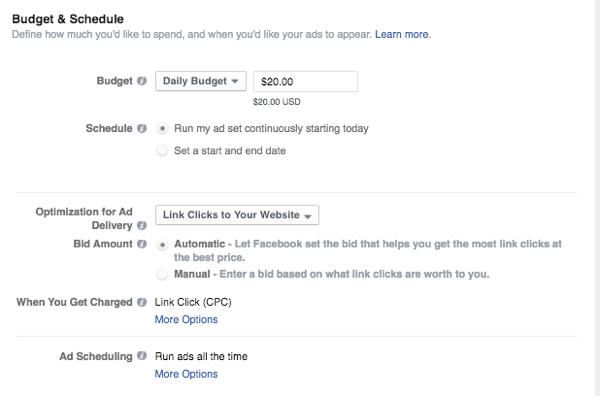
At this point, configure your budget and schedule, and name your ad set if you plan to reuse it in the future.
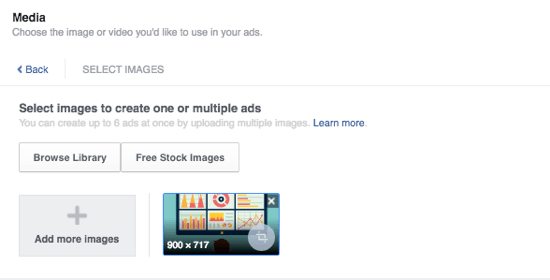
From here, you'll design your ad, starting with your media.
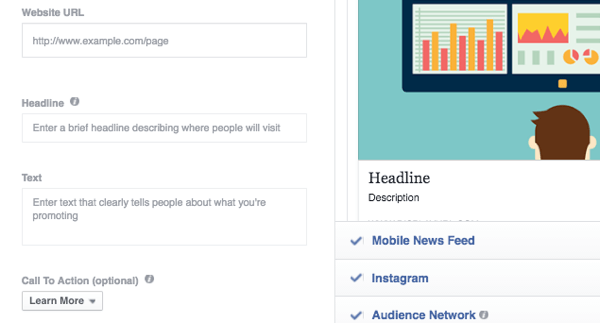
Enter the basic website URL, headline, description, and call to action.
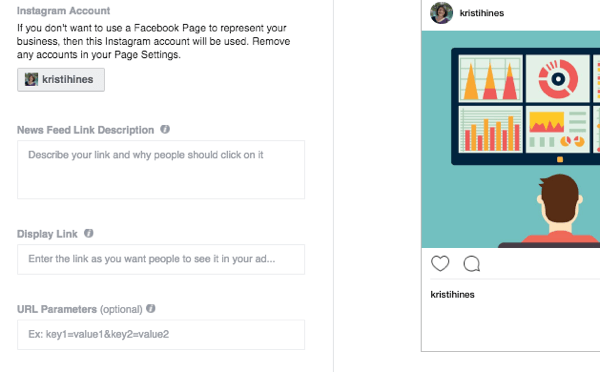
This step is followed by the Advanced Options, which you use to configure your your Instagram account, news feed description, display link, conversion pixel, and sponsor (if you have a verified page and are promoting branded content).
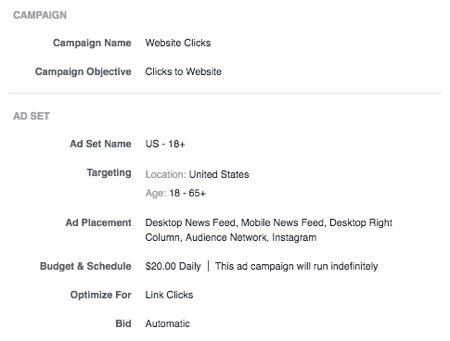
Once you're finished, review your order to see your overall settings and then submit it for review.
Once your ad is approved, you have the option to create a similar ad.
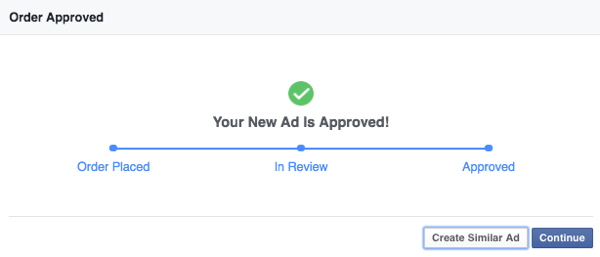
The similar ad will fall under the same ad campaign and ad set, allowing you to test different headlines, descriptions, images, and so on.
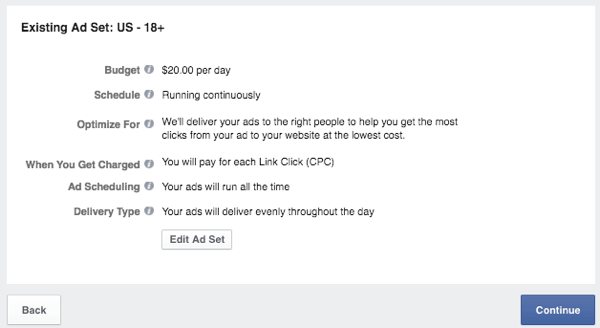
Or you can continue to your Ads Manager dashboard and review the progress of your campaigns and ads. You can also create similar ads from your dashboard by clicking down to your ad and selecting the Create Similar Ad option.

Should you choose to create multiple ads for your campaign, be sure to monitor ad performance so you can focus your budget on the ones that perform best, and drill down to each ad's insights.

This is where having the pixel conversion tracking code is essential, as you'll be able to see within Facebook which ad is actually driving conversions.

If you have a lot of ads with the same photo, it may help to click on them to see which ad text specifically is or isn't working.
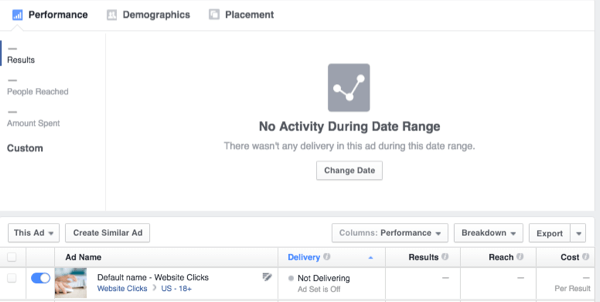
Note: You can click on your Instagram or Facebook post after it has stopped running to see how it performed down the road in terms of likes and comments. To do this, click the See Post and See Instagram Post links under each ad.
For example, this is an ad that ran last year. While there weren't any useful comments, it was good to know there were so many likes.

In Conclusion
While it might take a while to get used to Facebook changes, sometimes those changes can be for the better, as they lead to new updates and features. Hopefully, you'll get used to the new Ads Manager and find things like custom audiences built on video engagement helpful in your ad campaigns!
What do you think? Are you using the new Ads Manager in Facebook? Let us know what you think of its latest layout and features in the comments below!
Attention Agency Owners, Brand Marketers, and Consultants

Introducing the Marketing Agency Show–our newest podcast designed to explore the struggles of agency marketers.
Join show host and agency owner, Brooke Sellas, as she interviews agency marketers and digs deep into their biggest challenges. Explore topics like navigating rough economic times, leveraging AI, service diversification, client acquisition, and much more.
Just pull up your favorite podcast app, search for Marketing Agency Show and start listening. Or click the button below for more information.

