 Are you looking for new ways to use live video?
Have you considered using Facebook Live to host an on-screen walkthrough?
Using Facebook Live from your desktop opens up a new world of marketing possibilities.
In this article, you'll discover how to broadcast with Facebook Live using free open-source software.
#1: Install OBS Studio
OBS is free software commonly used by live-streamers on the Internet. It allows you to selectively share applications on your desktop and create a layered video for live-streaming. If you already have OBS installed, you can skip to step #2.
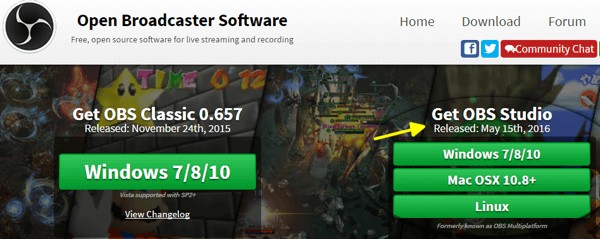
To get started, visit the OBS website and download the latest version of OBS Studio. Windows, Mac OS X, and Linux are all supported.
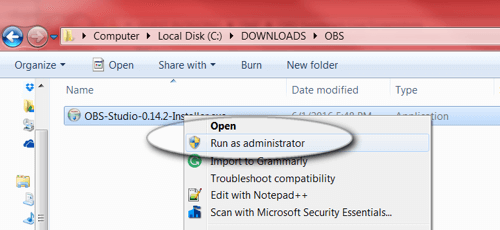
Once downloaded, go to the OBS file and install the program. If you're running Windows, choose Run as Administrator to avoid any issues with permissions when installing.
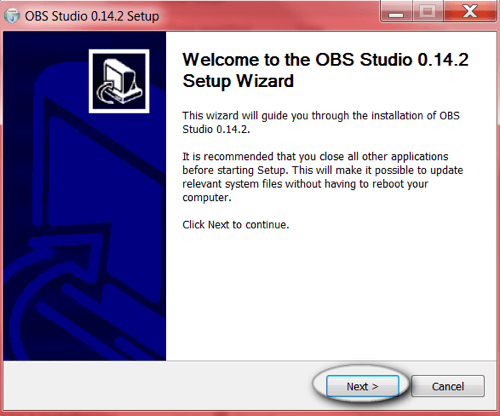
Click through each of the prompts to finish installing OBS on your computer.
#2: Set Up Your Scene
Once installed, you need to set up the scene you want to show on your Facebook Live stream. OBS lets you control the screens shown, their sizes, the audio shared, and more.
Let's walk through a basic scene setup.
When you open OBS for the first time, a new blank scene appears onscreen. At the bottom of OBS, you see the main tools: Scenes, Sources, and Mixer.
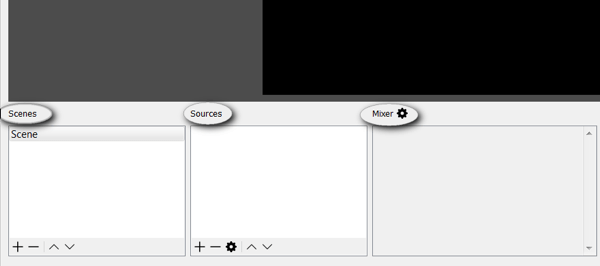
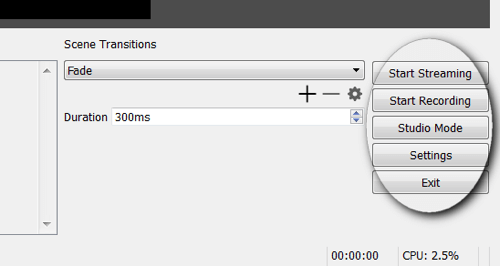
On the right, find the settings and broadcast tools.
To explain this a bit further, each scene can contain a set of sources. If you're broadcasting live video, you can switch between scenes, depending on what you want to display to your audience. One example may be a scene with just a splash screen that you switch to when you take a break.
3 Days of World-Class Training—Zero Travel!

Couldn't make it to Social Media Marketing World and AI Business World this year? Get all of the great content at a fraction of the price with a Virtual ticket.
That’s full access to recordings of every keynote, workshop, and session—the ones people travel thousands of miles to see. Don't wait. Get your Virtual ticket and enjoy actionable content that you can watch anytime, anywhere.
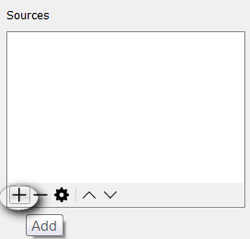
Now you need to add sources to your scene. In this example, the sources will be a microphone, webcam, and browser window. Click the + button in the Sources box to add a new source.
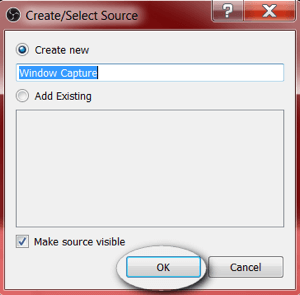
Start by adding the browser window. Click the + button and choose Window Capture.
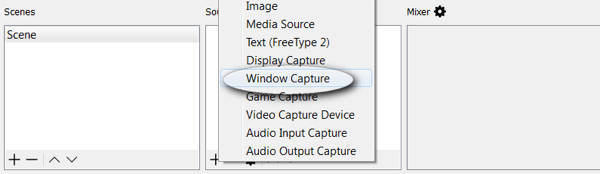
You'll see a pop-up box like the one below. For this example, just use the defaults and click OK.
OBS then asks you to pick the window you want to share. In this example, choose chrome.exe to display the browser.
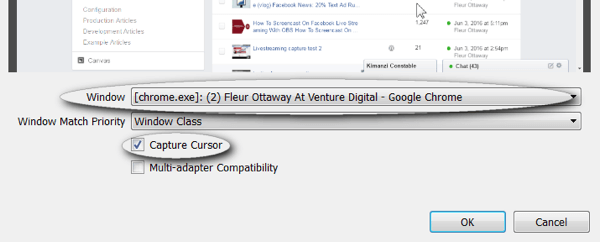
Note: You should keep the mouse cursor on if you're planning a how-to type of stream. However, you can turn the mouse cursor off at this point if you don't want it to display.
Follow the same steps to add the webcam. Click the + button and choose Video Capture Device.
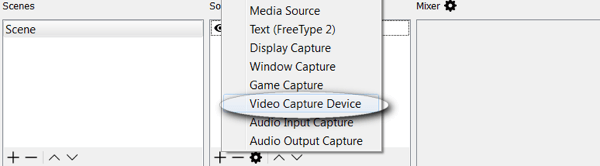
If you want to customize your webcam settings, scroll down to view all of your options. For this example, leave the defaults set and click OK.
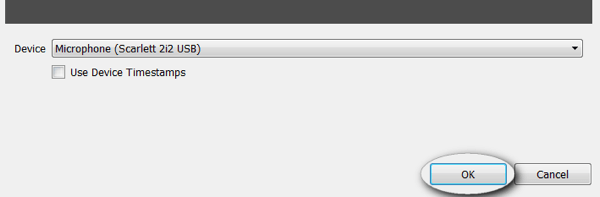
Lastly, add the microphone by clicking the + button and selecting Audio Input Capture.
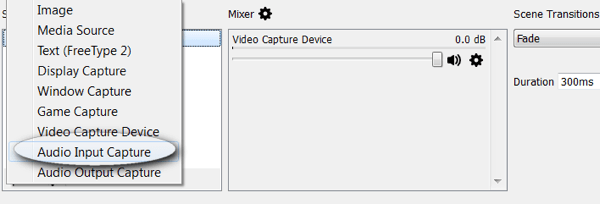
Choose your microphone from the drop-down menu and click OK.
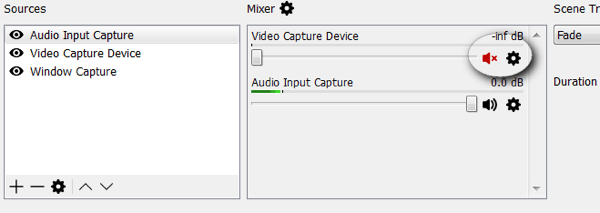
Next, double-check the mixer settings for any duplicate audio feeds. To avoid audio feedback, only one feed should be enabled.
Note: If you're using a microphone and webcam, you may see multiple audio feeds. Disable the webcam audio by muting it, as shown here.
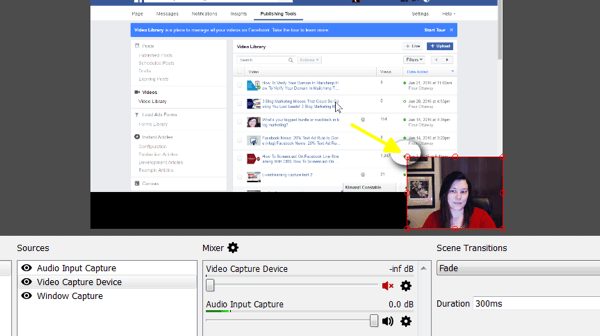
Now, set up the audience view. Drag and resize the windows in your scene to suit your preferences.
Your scene has been set. OBS will save your scene for you so it's available whenever you open the software in the future.
#3: Optimize OBS Settings for Facebook Live
Now you'll want to review the required Facebook Live settings inside OBS.
Facebook Live has maximum video output settings that the platform can support. If your stream feed is too high-quality, it may freeze or be rejected by Facebook.
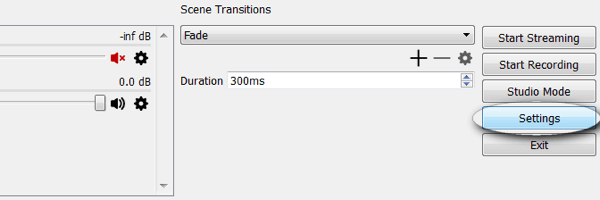
Click the Settings button in the bottom right-hand corner.
The first setting you'll need to confirm is Output. Make sure the Video Bitrate is at or below 2500.
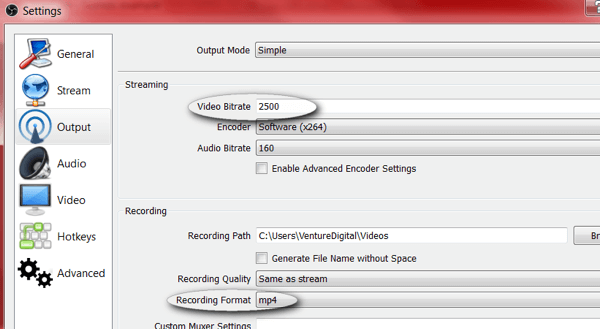
Note: If you want to save your recordings locally, you may want to set your recording format to mp4.
Want to Unlock AI Marketing Breakthroughs?
If you’re like most of us, you are trying to figure out how to use AI in your marketing. Here's the solution: The AI Business Society—from your friends at Social Media Examiner.The AI Business Society is the place to discover how to apply AI in your work. When you join, you'll boost your productivity, unlock your creativity, and make connections with other marketers on a similar journey.
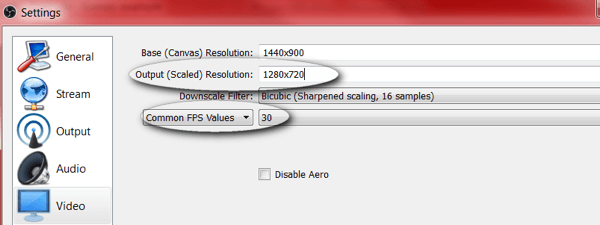
I'M READY TO BECOME AN AI-POWERED MARKETERThe next setting is Video. Set your Output Resolution and FPS (frames per second). Your Output Resolution should be no more than 1280 x 720 and your FPS should be no more than 30.
#4: Start Your Facebook Live Stream
Now that you've set the required video and output settings in OBS, you'll need to add a new Facebook Live stream key. OBS requires a stream key to connect to Facebook.
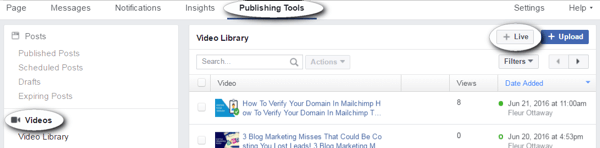
To get your stream key, you'll need to start a new live-stream session from your Facebook business page. Open your page, click on Publishing Tools, and then Videos. From here, you'll see a +Live button.
Note: Depending on the country you're in, the +Live button may be labeled +Create. In some countries, these tools may not be available yet.
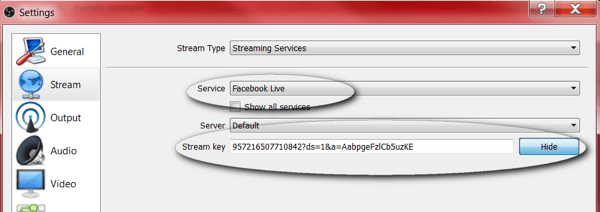
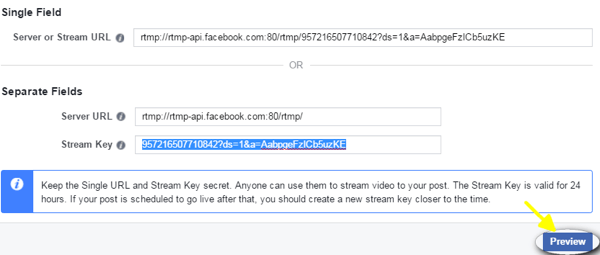
When you click the +Live button, you'll see a dialog box similar to the one below. Copy the stream key and go back to your OBS window. Do not close this Facebook window.

Note: This code may be good for 90 minutes only; you'll need a new code every time you stream.
In OBS, click Settings and click on the Stream options. Choose Facebook Live from the Services drop-down list and paste the key in the Stream Key box. Click OK when you're done.
#5: Preview and Test Your Live Stream
Before you go live, you should preview your stream using the Facebook publishing tools you left open previously. Test the video and audio to ensure there are no issues or feedback.
Note: Don't use speakers when screencasting because they can cause feedback. Instead, plug in a set of headphones.
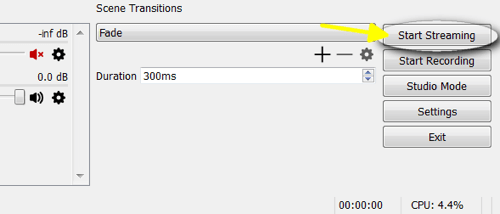
When you're ready, click the Start Streaming button in the bottom-right corner of OBS Studio. If you also want to record this video for later, click the Start Recording button when you're ready to go live.
Go back to the Facebook publishing tools you previously left open and click the blue Preview button.
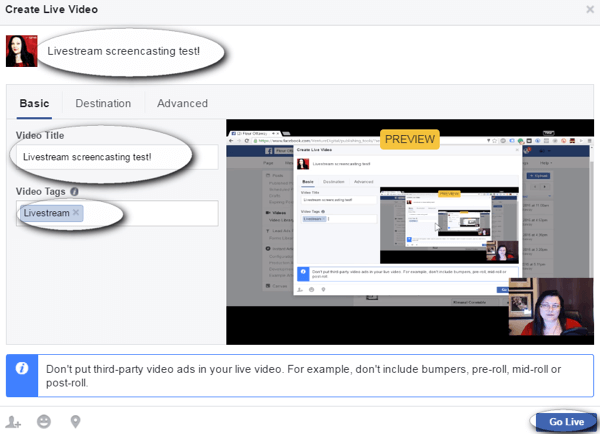
From here, you can see a preview of your video. You can also write your update and enter a title for your video. When you're done testing, click the blue Go Live button to start the stream.
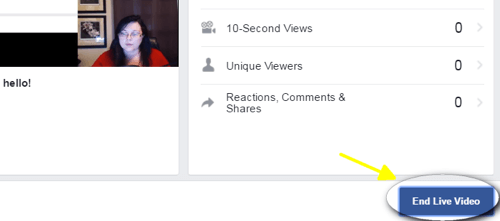
Keep the publishing tools tab open while you're broadcasting. When you're ready to end your video, go back to this tab and click the blue End Live Video button.
Note: If you're experiencing freezing issues, use a network cable while you're streaming instead of Wi-Fi.
On this screen, you won't be able to view live comments, so in the next step we'll discuss a few workarounds to ensure you don't miss your stream's comments.
#6: Moderate Comments As You Stream
To connect with your audience, it's important to view and answer comments live. You can view your comments live on your desktop or mobile device.
View Comments on the Desktop
To view comments on your desktop, open a new tab and go to your Facebook business page. Find the live video running on your page and click on the words “Click for more.” Note: the words are white and can be hard to see.
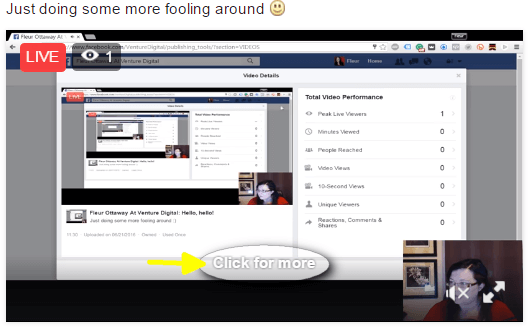
An overlay window opens and shows your live video along with a live feed of your comments.
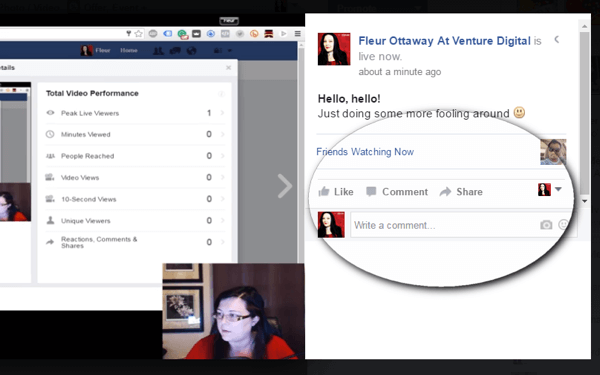
Note: Viewing comments on the desktop works well if you have two or more monitors. If you have one monitor, your audience view may be affected.
View Comments on a Mobile Device
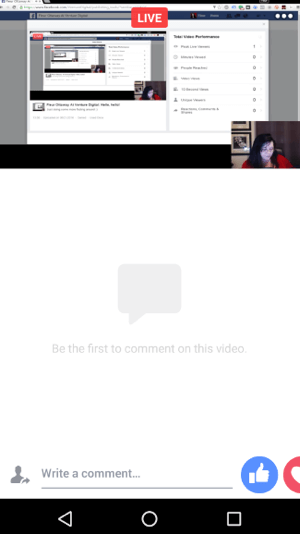
Your other option is to view comments on your mobile device. To do this, open your Facebook app and search for your page. Click on the video stream and you'll have access to the live comments.
Note: You may find yourself looking down to view comments (as shown below). Get a tripod or position your mobile device higher to avoid this.
Test both of these options for monitoring comments and see which one is easier for you to manage during your stream. The main thing is to ensure you're reading and responding to comments live. That's one of the reasons live streaming works so well to connect with your audience and grow your business.
Want more like this? Explore Facebook for Business!
Conclusion
Having the ability to screencast during a live stream is a game changer. Screencasting gives you the ability to showcase products, teach, share media, and more. It's a key tool that sets Facebook apart from other live-stream platforms.
What do you think? Have you tried screencasting on Facebook Live? What interesting idea or tool do you plan to showcase on your next screencast? Please let us know in the comments below!

Curious About How to Use AI?
Our newest show, AI Explored, might be just what you're looking for. It's for marketers, creators, and entrepreneurs who want to understand how to use AI in their business.
It's hosted by Michael Stelzner and explores this exciting new frontier in easy-to-understand terms.
Pull up your favorite podcast app and search for AI Explored. Or click the button below for more information.
