 Have you explored the Publishing Tools section of your Facebook page lately?
Wondering how the new features make marketing easier?
Your page's Publishing Tools section contains a lot of important features including video management, lead generation, and product sales.
In this article, you'll discover how to better manage your Facebook marketing with six Facebook publishing tools.
Listen to this article:
Where to subscribe: Apple Podcasts | Spotify | YouTube Music | YouTube | Amazon Music | RSS
Note: Your page's Publishing Tools may or may not include all six of these features based on what features your page has access to at this time.
#1: Collect and Download Leads
Do you want to collect leads directly from Facebook using the Facebook Ads Lead Generation marketing objective? If so, you'll need a lead form. You can design lead forms within Publishing Tools. When you first get access to this feature, you'll find a sample lead form to test.

You can preview the sample lead form and submit your own information.
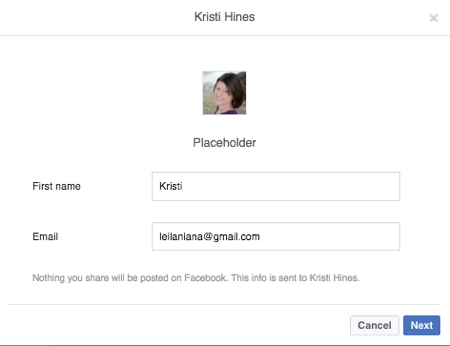
You can then download the information to see what your leads would look like.

To create your own lead form, click the Create button. You'll get the option to create a new form from scratch or duplicate an existing form.
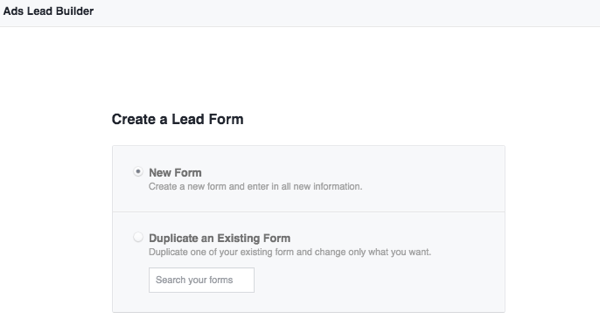
Once you click Next, add a name to your form and select the advanced options applicable to you. You can learn more about whether you need to edit your field IDs in this Facebook help document, which has specific instructions for users of Driftrock, InfusionSoft, Marketo, Maropost, Sailthru, and Sparkroom. You can also retrieve leads via the API or use third-party tools like LeadsBridge, which connects to most email marketing and marketing automation platforms.
Next, choose what to ask for on your lead form. Note that the more information you ask for, the longer your form will be.
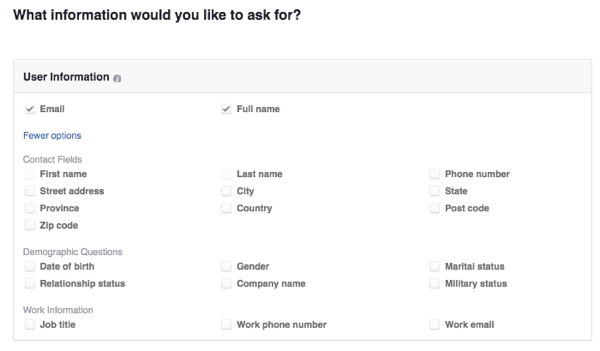
Next, add a link to your website's policies and disclaimers, or add a custom disclaimer for your form.
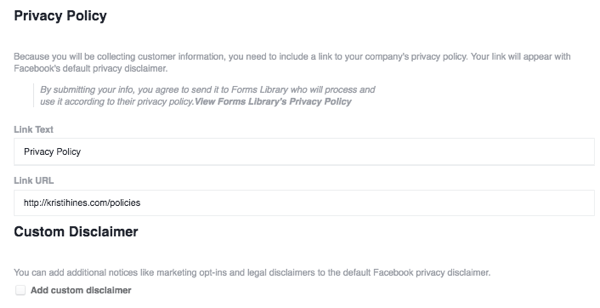
Then you'll add a link to your website where you would like your visitors to go after they complete your form. This may be a custom thank-you page, an offer page, or your home page.
Get World-Class Marketing Training — All Year Long!
Are you facing doubt, uncertainty, or overwhelm? The Social Media Marketing Society can help.
Each month, you’ll receive training from trusted marketing experts, covering everything from AI to organic social marketing. When you join, you’ll also get immediate access to:
- A library of 100+ marketing trainings
- A community of like-minded marketers
- Monthly online community meetups
- Relevant news and trends updates
Note: If you're tracking lead conversions in Google Analytics, you might want to have a custom thank-you page that lets you know that this was a lead conversion from a Facebook lead form to separate it from a lead conversion on your website or other source.

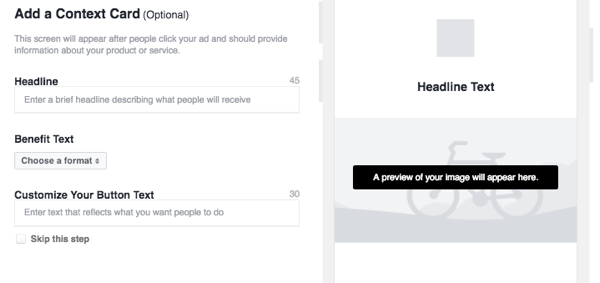
Next, you have the option to encourage people to give you their information. For example, add information and custom graphics if you're offering a free ebook or report.
Next you'll get to preview your form. If you want to add questions, click the Edit button at the top. You can also click the Next button to see how long your form will be, based on the number of questions you chose to ask your potential lead. You can go back and edit different aspects of your form, or if you're satisfied, click the Create Form button.
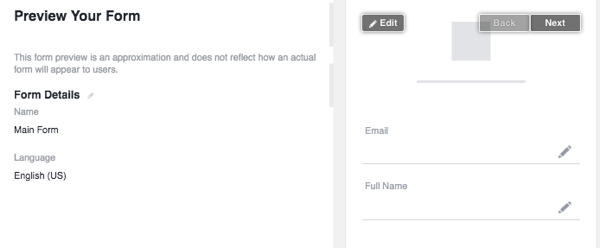
Note: Any questions you ask will be prefilled if potential leads have entered that information into their Facebook profile. If not, they'll have to enter it into the form manually. Also note that once you've created a form, you can't edit it. You can, however, create a new form based on an existing form and modify the parts you want to change.
When you're ready to collect leads, go to your Facebook Ads Manager and choose the Collect Leads for Your Business objective.
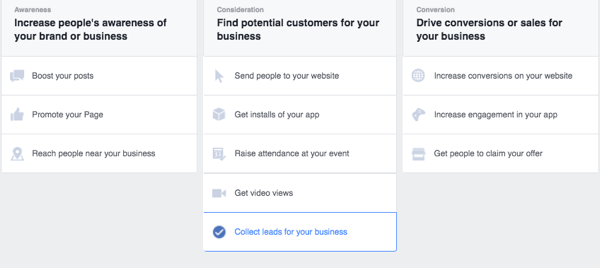
Once you configure your audience, budget, placements, and ad creative, select the form you created at the very end of the process.
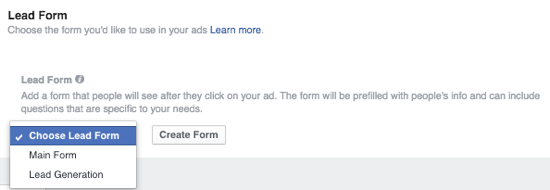
Next go back to your Publishing Tools to download your leads, or follow the directions provided based on your CRM or LeadsBridge.
#2: Manage Recorded and Live Video
Do you post a lot of video to your Facebook page? You can manage all of your videos easily using your Publishing Tools Video Library section.

Here you'll find a listing of your current videos, with indicators of whether they were live videos (noted by the person icon) or recorded videos uploaded to your page, along with view count and the date they were added. Click on each video to see detailed analytics, just like you would inside your main Insights.
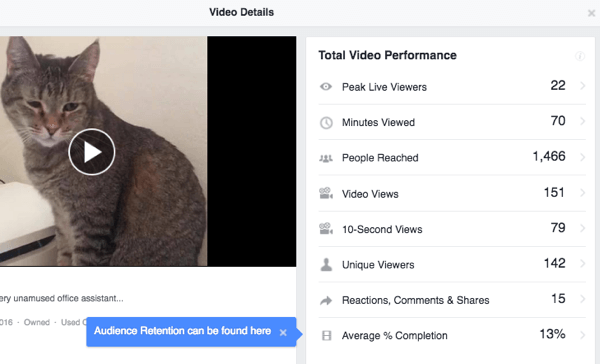
More important than your video analytics are the two options at the top right: the Live and the Upload features. Use the Live button to stream live from your desktop if you have professional recording software.
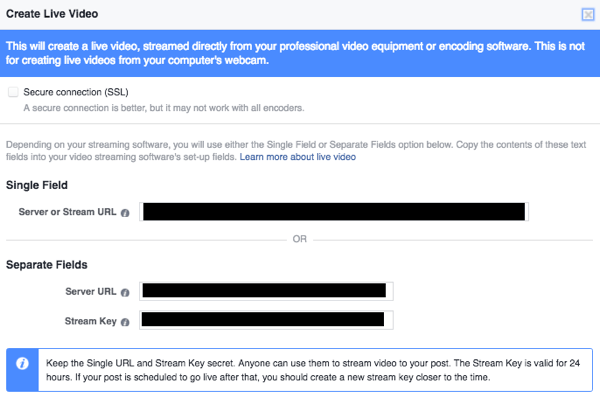
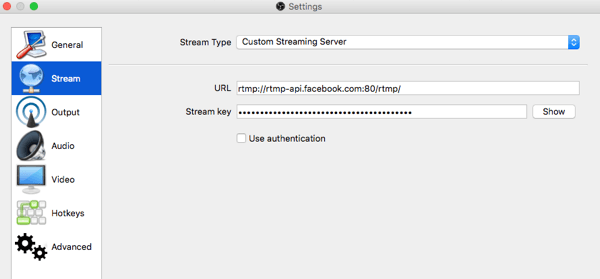
You can take this information and use it with free tools like Open Broadcaster Software. Specifically, you would place it in your settings like this. Note this is the Mac version; the Windows version may look a little different.
If all goes well after you configure your camera and audio settings, you'll start streaming on Open Broadcaster.
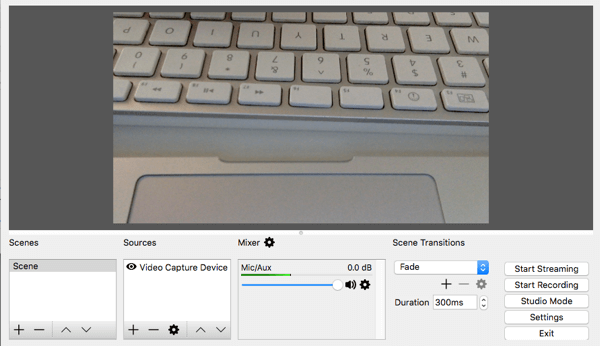
Then to test it, click Preview on Facebook. If everything connects, you should see the same video pop up.
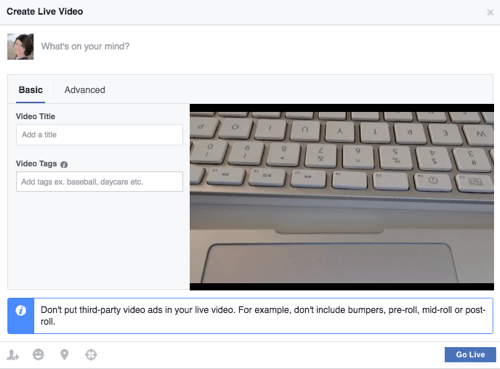
You can then set up your live video with a status update, video title, and video tag. You can also tag people, add what you're doing or how you're feeling, add a location, set your preferred audience, and click the Go Live button.
If you're looking for more professional live webcasting software, check out other tools like Telstra's Wirecast, which works for both Mac and Windows, and starts at $495.
Alternatively, if you're not interested in live broadcasting, you can simply upload video from your desktop and enter your video's title, tags, call-to-action buttons, and other details.
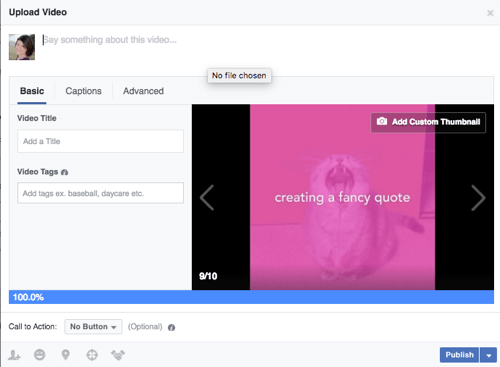
Be sure to configure the call-to-action button if you want people to go to a specific page on your website at the end.

#3: Manage Your Instant Articles Content
If you've already signed up for Instant Articles, you can manage your instant articles inside Publishing Tools, from submitting your content for review to managing your instant articles library.
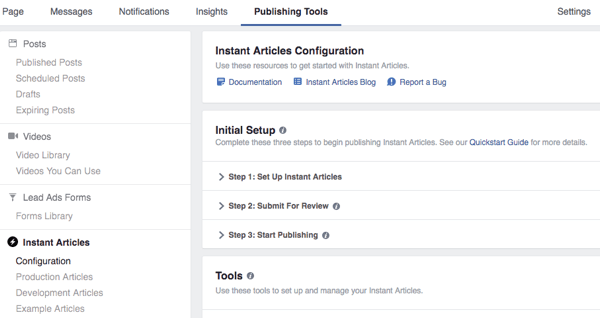
In the Configuration section, once your content has been approved, you can toggle auto-publishing of all of your content to Instant Articles via your RSS feed.
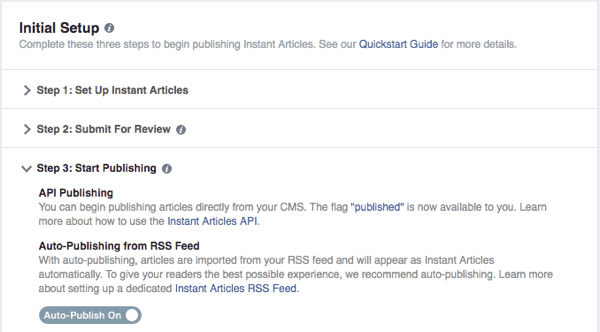
You can decide to monetize your instant articles.
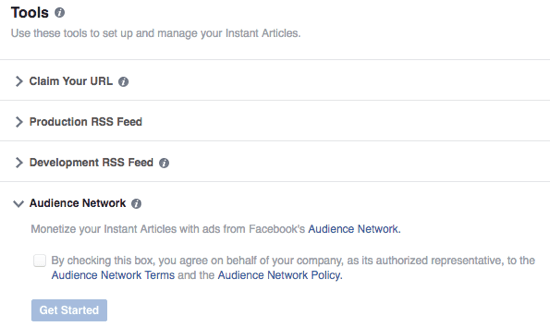
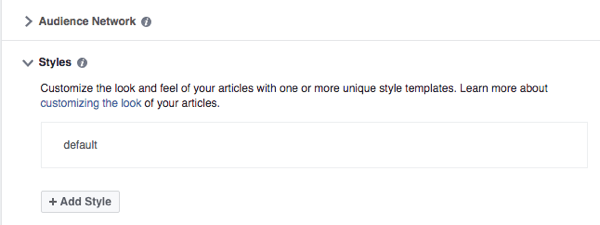
You can also update the look and feel of your instant articles.
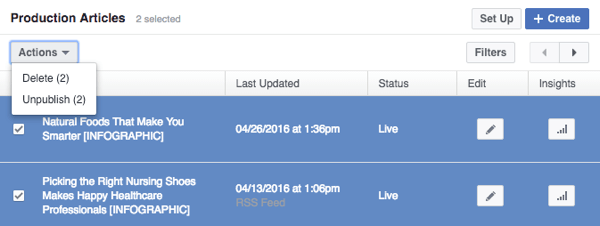
In the Production Articles section, you can view all of your articles that are either published or need to be manually published, based on whether you chose to have your content auto-published.
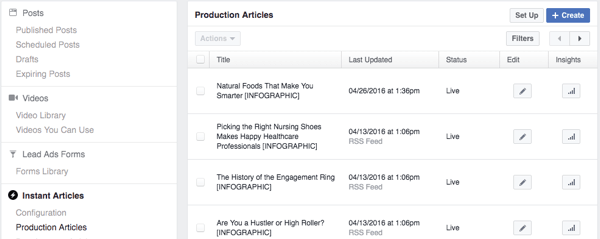
From here, you can choose to unpublish articles that you don't want to be shown as Facebook instant articles to mobile users so that they go to your website instead. To do this, check the box next to the article(s) and use the Actions drop-down menu to unpublish the article(s).
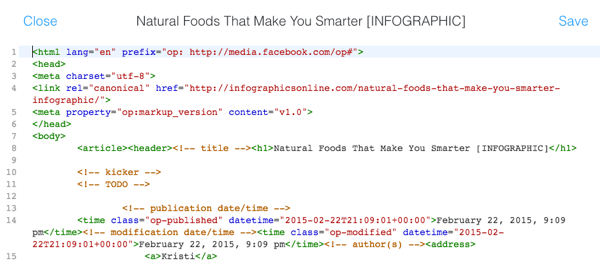
You can click the pencil icon next to an article under the Edit column and edit the Facebook Instant Article code for that specific article to insert content specifically for mobile audiences. You can reference the Instant Articles Developer's Guide for specific coding for everything from ads to video embedding.
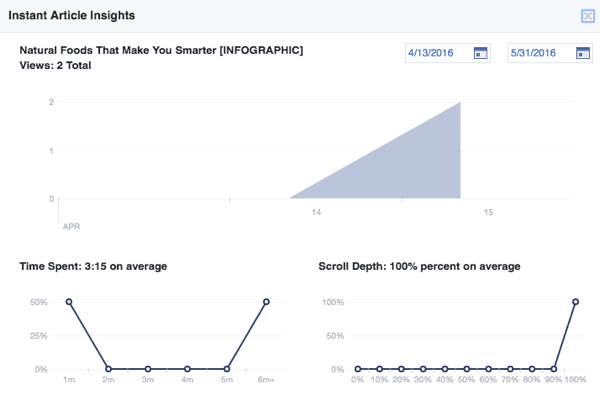
Lastly, use the Analytics button under the Insights column to get insights into each of your Facebook instant articles, once the articles have received some views.
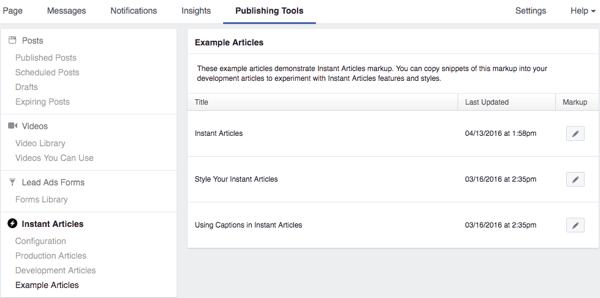
And of course, if you want to spruce up your instant articles, you can go to the Example Articles section where you'll find some articles you can view for inspiration, including coding.

Discover Proven Marketing Strategies and Tips
Want to go even deeper with your marketing? Check out the Social Media Marketing Podcast! Publishing weekly since 2012, the Social Media Marketing Podcast helps you navigate the constantly changing marketing jungle, with expert interviews from marketing pros.
But don’t let the name fool you. This show is about a lot more than just social media marketing. With over 600 episodes and millions of downloads each year, this show has been a trusted source for marketers for well over a decade.
#4: Manage Product Sales With the Shop Section
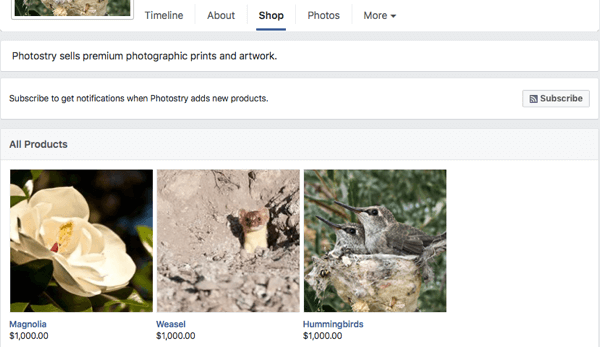
If you see the Add Shop Section link on your Facebook page's menu bar, you have the ability to add a Shop section directly to your Facebook page. This will allow your Facebook visitors to buy products directly from your page.

You can showcase your top three products at the top of your page's news feed and on a dedicated Shop tab.
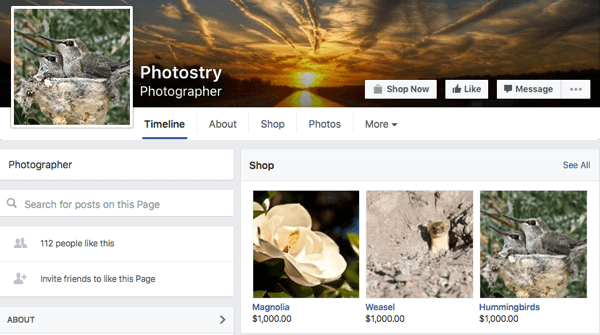
Once you've set up your shop, you can manage everything about your shop in your Publishing Tools.
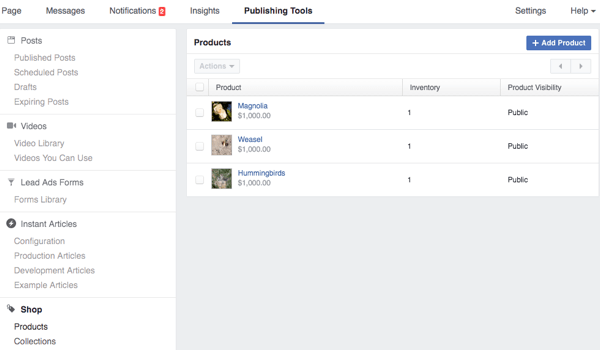
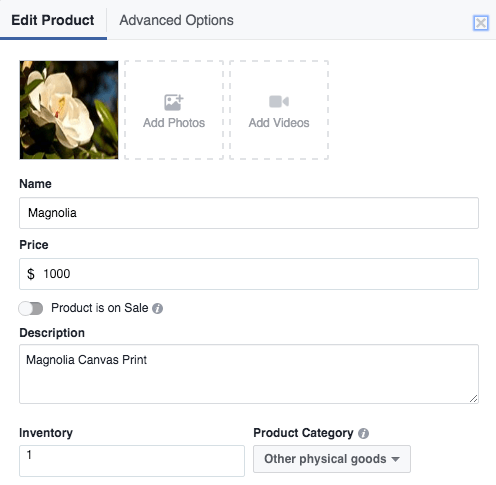
To update product details, click on the product and then click on the Edit Product button.
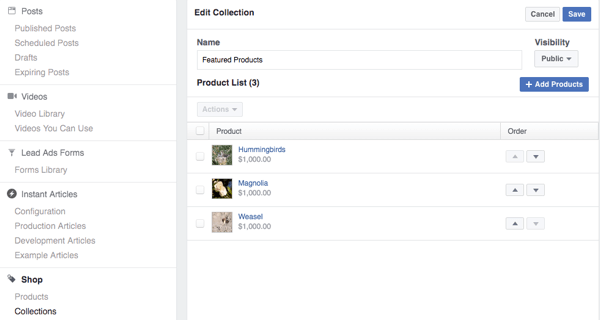
If you have more than three products, you can choose which three products should be featured above your news feed and at the top of your Shop tab by adding them to your Featured Collection.
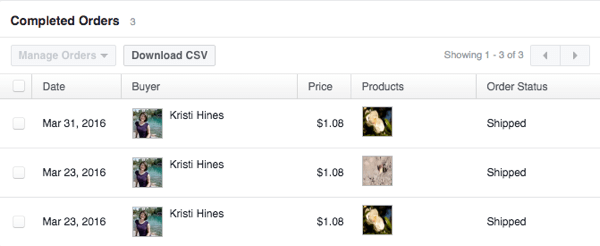
Manage Pending and Completed Orders through their respective sections in Publishing Tools. In the Pending Orders area, you can see the orders you haven't shipped, shipping information for your customer, and contact information for customers in case you need to get any additional details from them.
In the Completed Orders area, you can see orders that have been shipped and contact your customers to ensure that they're satisfied with their orders.
Click the Shop Settings link to go to where you can modify your main online store settings. This includes your business address, Stripe account connection, default shipping provider and fee, special tax rates, and additional locations that your business may ship from if applicable.
And finally, click the View Shop link to go to your page's Shop tab so you can view your shop. You may want to view this as a visitor of your page, as opposed to as an admin so you can see your shop without the edit buttons and suggestions.
#5: Create and Manage Canvas Ads
Interested in creating interactive ads for mobile users? If you have access to Facebook Canvas ads, you may want to try creating one or two of those for your mobile ad audiences. Facebook Canvas ads allow you to effectively provide interactive landing pages to mobile ad audiences that include any or all of the following elements, as described in the Canvas design guide.
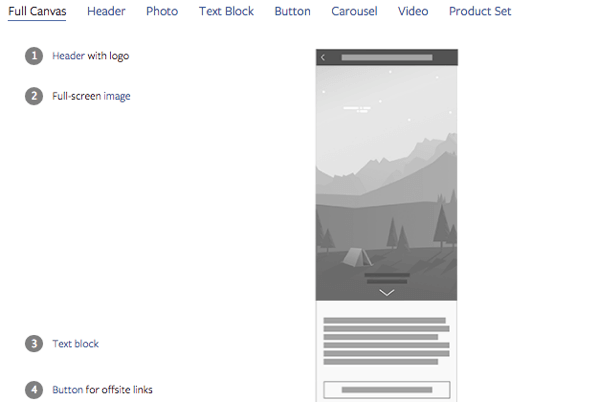
The result of a canvas is something that looks like this for Facebook mobile app users only.
If you don't see Canvas in your Publishing Tools yet, you can use this form to contact Facebook about getting it or go to Power Editor and start creating a Canvas ad there. This should make it visible in your Publishing Tools.
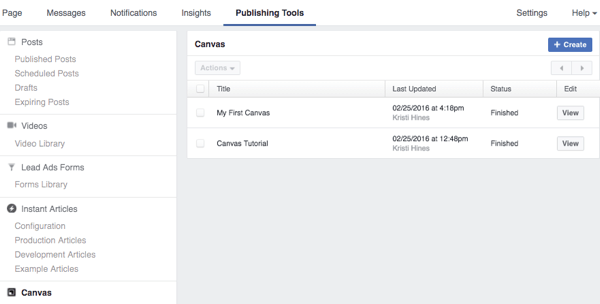
By default, you'll have a Canvas tutorial that gives you an example canvas to look at to get a feel for how one is set up. Then you can go on to create your own canvas by clicking the Create button at the top right. This brings up the Canvas Builder.
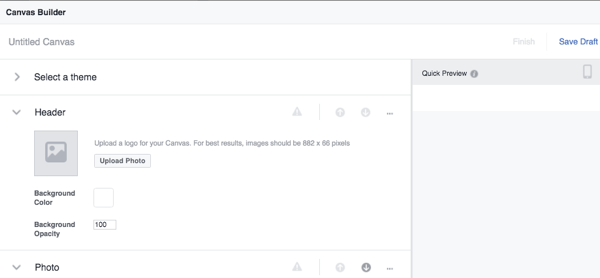
Here you can use the default components given to you to add your header, a photo, and a button for a simple Canvas design. Or you can use the controls at the top of each component to move it or delete it from your canvas. Then, you can add more components via the link.
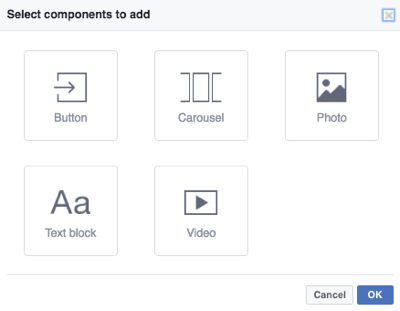
The key is to make sure that there are one or more call-to-action buttons, images, and so on that lead to your website and the specific products or services you're promoting in your ad. For more details on how to configure each component in a canvas, refer to this article on how to create a canvas.
Once you're finished with it, you can send your canvas to your mobile phone to preview it, and if everything looks good, you can finish it.
Note: When you finish a canvas, you can't edit it again. You can only create a duplicate by checking the box next to the original and using the Actions drop-down menu to create the new canvas and make your changes.

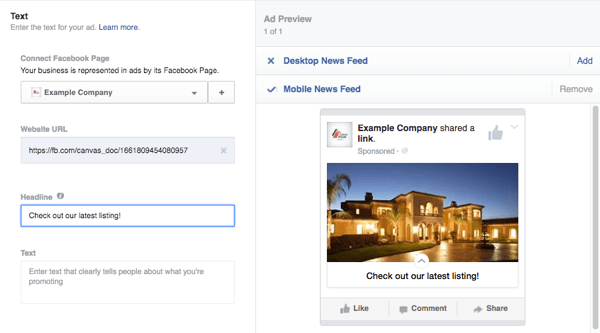
When you're ready to use your canvas in an ad, click the View button next to the canvas you want to use and click the Get URL link. Copy that link and use the Send People to Your Website marketing objective in Ads Manager. When you're creating your ad at the end, you'll paste the link to your canvas as the website you want people to visit.
Make sure that you select only Mobile News Feed as a placement option since your canvas can't be displayed to desktop users.
#6: Publish and Schedule Posts
While there are many third-party tools that can help you schedule and post to your Facebook page, your page's built-in Publishing Tools can help you do it for free. Most page editors and administrators will have the option to publish posts, schedule posts, and create draft posts from this area.
To publish a post immediately, select Published Posts in the left sidebar of Publishing Tools and click the Create button. This brings up a standard status box in which you can enter a post to be published to your page.
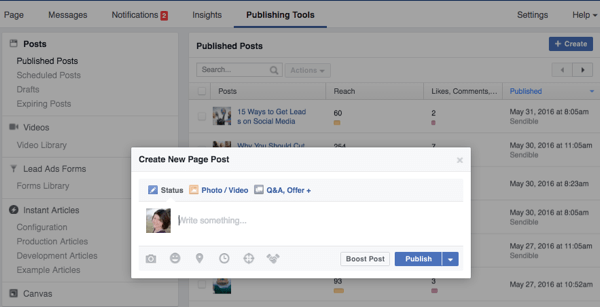
If you click on Photo / Video, you can get more media post types to choose from.
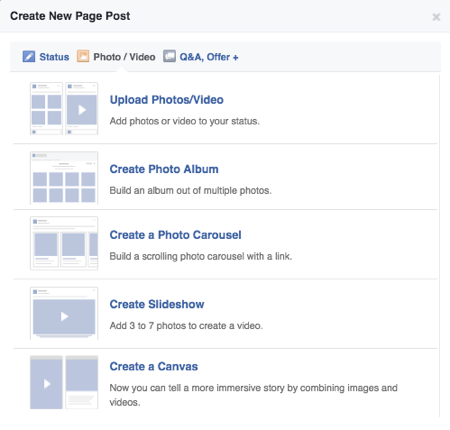
If you click on Q&A, Offer + at the top, you'll get more post types to choose from, based on your page's available features.
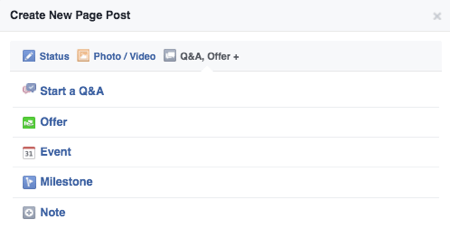
At the bottom of the status box, from left to right, depending on the features your page offers, you have the option to add a photo or video, add what you're doing or how you're feeling, add a location, set the time and date of your post, set a preferred audience for your post, and tag a sponsor for your post if it's Branded Content.
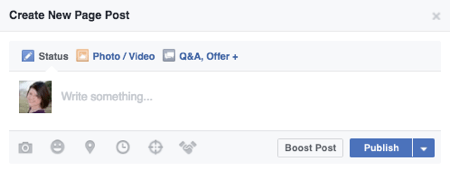
Last but not least, you can choose Boost Post if you plan to publish it immediately. If you don't want to publish the post immediately, use the drop-down menu next to the Publish button to schedule it, save it as a draft, or backdate it (which will publish it immediately, but date it in the past).
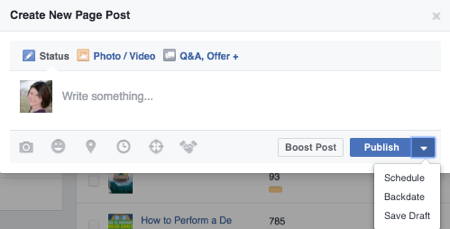
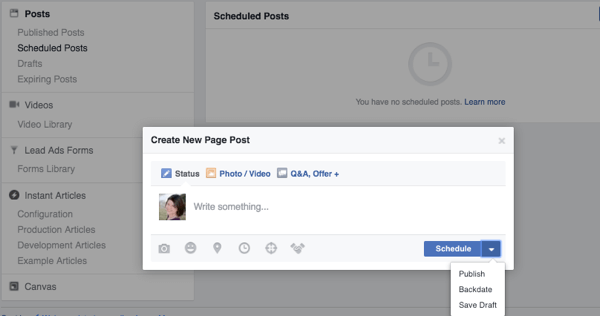
If you were to schedule or save the post as a draft, it would appear under Scheduled Posts or Drafts in your Publishing Tools. You could also click on those links in the left sidebar and then click the Create button to specifically create scheduled posts or drafts.
The same features exist under either section, but instead of having a Publish button with a drop-down menu to schedule, backdate, or save as draft, you would have a button to Schedule or Save as Draft with other options.
You can use the Expiring Posts feature to create expiration dates for videos you post. To use it, you have to update a page setting that lets administrators and editors allow for videos to have expiration dates. If you set a video to have an expiration date, it will be deleted from your Facebook page once that date arrives.
Note: Considering how well Facebook performs and the fact that you can now use Facebook video engagement as a way to create custom audiences, I don't recommend using this option.
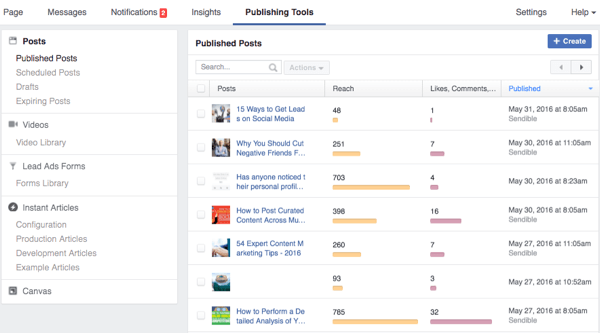
In addition to creating, scheduling, and saving drafts in Publishing Tools, you can also go here to view your page post insights. This is something everyone who has a role on your page can see, all the way down to your analysts.
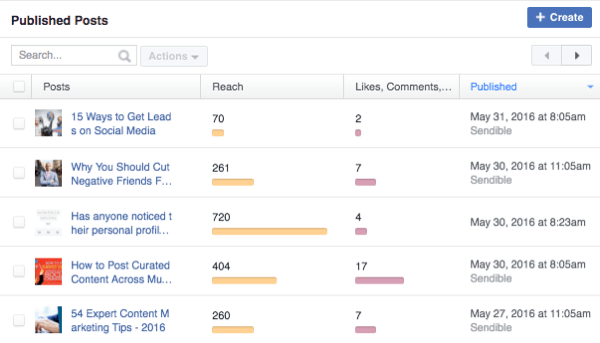
While it's not as in-depth as what you'll find in your main Insights, you will get a quick look at your reach, engagement, when you posted, and what tool you used to post with. You can also click on each post to get more in-depth analytics about each post.
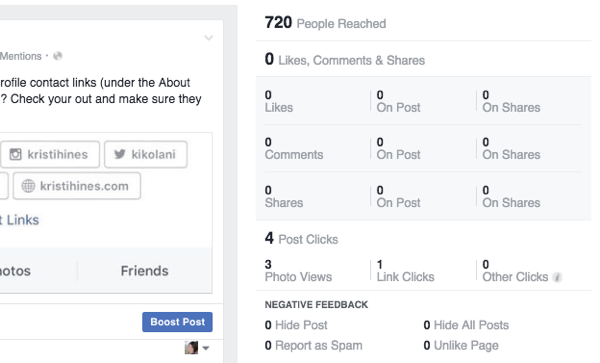
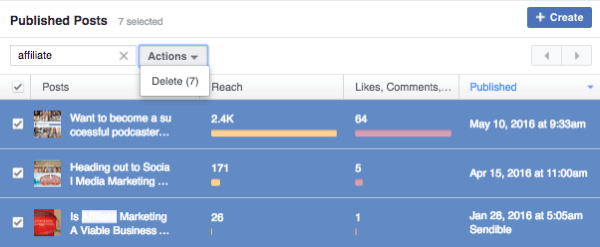
Also, if for some reason you want to rid your page of a specific group of posts, you can use the search box to find those posts by keyword, check the box to highlight them all, and use the Actions drop-down menu to delete them in bulk.
In Conclusion
Just being able to publish, schedule, and backdate posts to your wall and manage your content in bulk can be a welcome feature for a page editor or admin.
Depending on what features your Facebook page has, the Publishing Tools section of your Facebook page can help you manage many of them. You can see this section on each Facebook page to which you've been assigned a role, although what you'll be able to do with Publishing Tools varies based on that role.
What do you think? What Publishing Tools features do you use most? Please let us know in the comments!

Attention Agency Owners, Brand Marketers, and Consultants

Introducing the Marketing Agency Show–our newest podcast designed to explore the struggles of agency marketers.
Join show host and agency owner, Brooke Sellas, as she interviews agency marketers and digs deep into their biggest challenges. Explore topics like navigating rough economic times, leveraging AI, service diversification, client acquisition, and much more.
Just pull up your favorite podcast app, search for Marketing Agency Show and start listening. Or click the button below for more information.

