 Have you heard of Facebook's new mobile ad experience, Facebook Canvas – now called Instant Experiences?
Want to learn how to create Facebook Canvas ads?
Facebook Canvas lets marketers combine images, video, text, and call-to-action buttons in a single, fully immersive mobile ad experience.
In this article you'll discover how to create a Facebook Canvas ad.
Inspiration for Your First Canvas
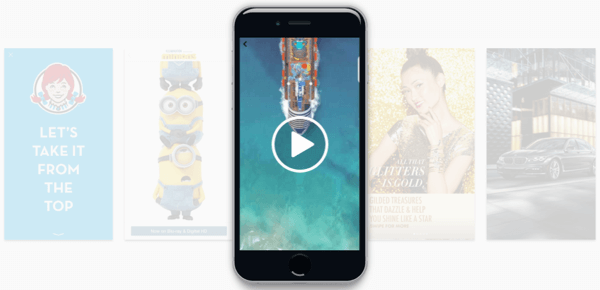
There are several ways to get inspired to create your first Canvas. For starters, you can look at the examples provided on the official Instant Experiences/Facebook Canvas page. Each will allow you to play through a big-brand Canvas ad.
Second, you can watch the video demo on the Facebook Canvas Help page from Target. It shows Canvas from the ad click to the final call-to-action button.
Third, you can look at an overview of an example Canvas layout provided on the Canvas specs page. This will give you an idea of how each of the individual components works.
You can browse your own news feed to see if you can come across some other advertisers trying out Canvases in their ads. Note that this can be a time-consuming process, especially depending on what ad audience your personal profile falls into.
And last but not least, you can think of Canvases as landing pages and use your favorite landing pages as inspiration. Not text-heavy landing pages, but graphically beautiful landing pages like those for Dropcam and eero (without their header and footer navigation areas).
#1: Access Facebook Canvas
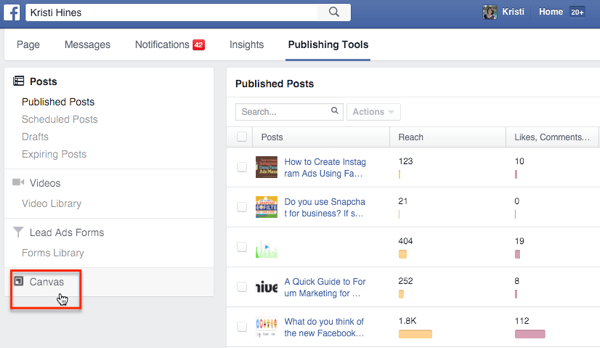
If you have access to Facebook Canvas, you'll find it by going to your Facebook page and looking under Publishing Tools. You should see it at the bottom of your left sidebar menu.
If you don't see it here, you can request access by going to the official Facebook Canvas page and clicking the Get Started with Canvas button. This will take you to a contact form where you can get directions on how to access Canvas through Power Editor or contact Facebook for access.
#2: Create Your First Canvas
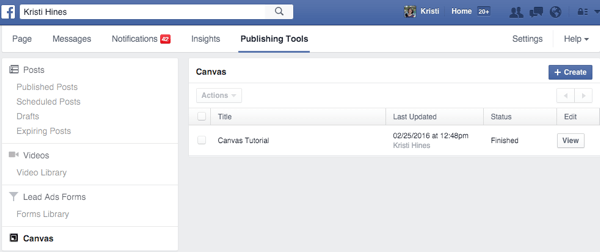
Click on the Canvas option under Publishing Tools. Then click on the blue Create button to create your first Canvas.
Get to Know the Canvas Builder
Get World-Class Marketing Training — All Year Long!
Are you facing doubt, uncertainty, or overwhelm? The Social Media Marketing Society can help.
Each month, you’ll receive training from trusted marketing experts, covering everything from AI to organic social marketing. When you join, you’ll also get immediate access to:
- A library of 100+ marketing trainings
- A community of like-minded marketers
- Monthly online community meetups
- Relevant news and trends updates
The Canvas Builder is easy to use. To get started, enter a name for your Canvas at the top, and then select a theme.
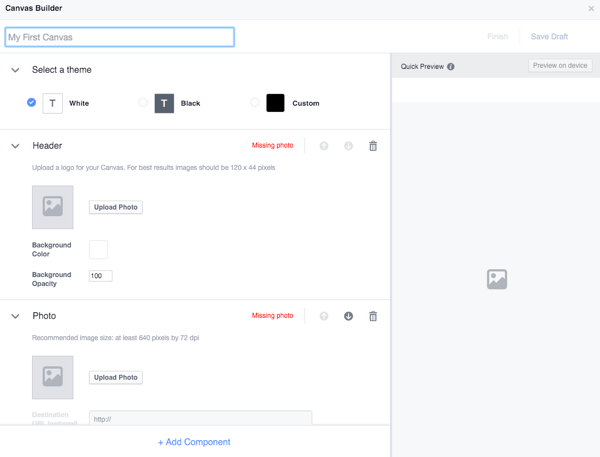
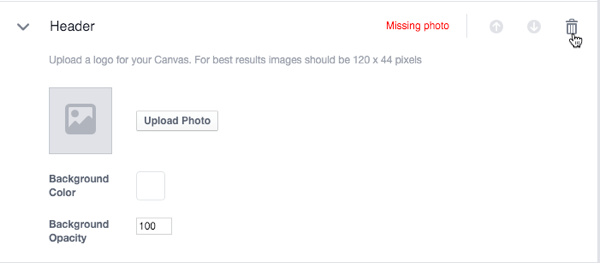
From this point, you'll see three default components to start with: a header component, a photo component, and a button component. You can move these components using the arrows at the top right of each component's box. You can also use the trashcan icon to delete a component from your Canvas.
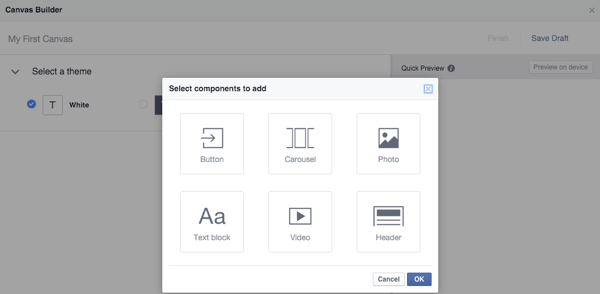
You can always add components back in or start with completely different components by clicking on the +Add Component link.
At the top right, you can click Save Draft at any time. I suggest doing this often as you wouldn't want to get carried away and lose a lot of creative work.
Businesses using Business Manager that have product catalogs for dynamic product ads set up may also have the option for a product set component, which will allow you to display up to 40 products.
Now, let's dig into each component of the main components. For the following example, I'll be using stock imagery and video from BigStockPhoto for a fictional real estate company. For test purposes, I'll use the Zillow homepage as a link since Canvas will give you lots of error messages if you use invalid URLs.
Add a Header Component
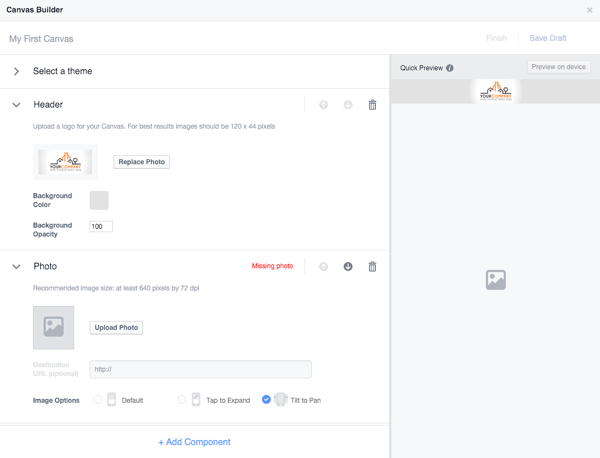
The first suggested component for your Canvas is the header that stays pinned to the top of your screen to display your logo.
The suggested logo size inside Canvas Builder is 120 pixels wide by 44 pixels high, but Facebook Canvas Design Requirements note that you can use an image up to a maximum of 882 pixels wide by 66 pixels high. No matter what your logo size is, Facebook will adjust it accordingly.
If you want to show your logo at the top of your Canvas, but don't want it pinned to the top of your Canvas, you can use a photo or text component instead so it moves when someone scrolls through your Canvas.
Add a photo component
The next suggested component for your Canvas is a photo component. The suggested photo size inside Canvas Builder is at least 640 pixels wide by 72 dpi, but Facebook Canvas Design Requirements note the following.
A full-width image is 1080 pixels wide, but you can use wider images if you select the Tilt to Pan Image Option. Note that by using this image option, you won't be able to provide a destination URL when someone taps on the image.
A full-height image is 1920 pixels tall, but you can use taller images if you select the Tap to Expand Image Option. Note that by using this image option, you won't be able to provide a destination URL when someone taps on the image.
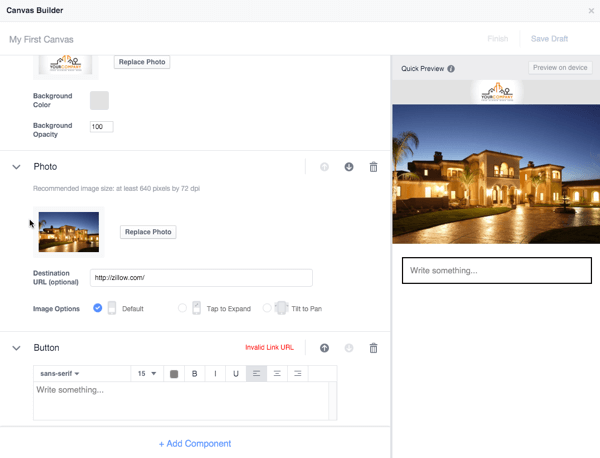
Facebook Canvas Design Requirements note that you can have a total of 20 images in your Canvas.
Add a Button Component
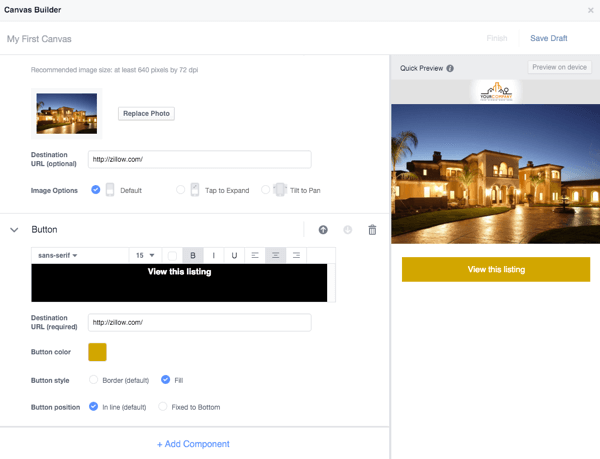
The next suggested component for your Canvas is a button component. According to Facebook Canvas Design Requirements, buttons can have up to 30 characters of text and a sans serif or serif font.
You can have one button that stays pinned to the bottom of your Canvas as the main call-to-action button that is always visible, or have all of your buttons move as your viewer scrolls through your ad.
Add a Text Component
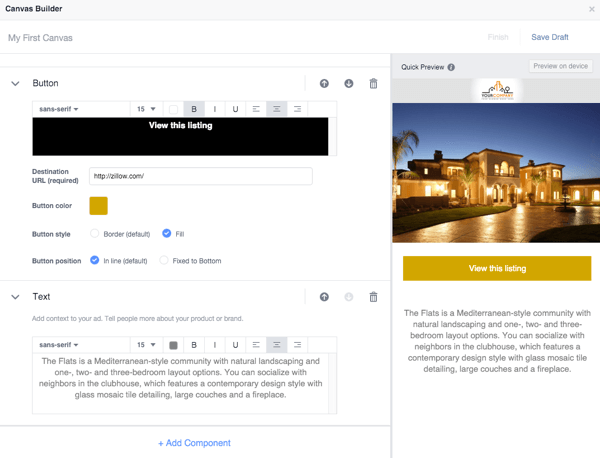
To add a text component, click the +Add Component link and click the Text Block. This will allow you to add text to your Canvas. According to Facebook Canvas Design Requirements, you can add up to 500 characters per text component with various font sizes, stylings, and alignments.
Add an Image Carousel Component
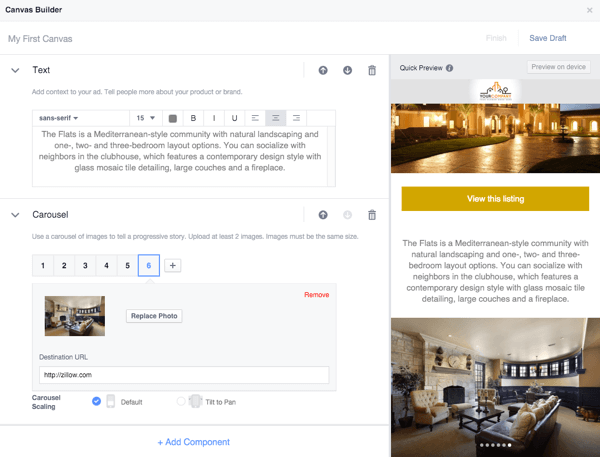
To add an image carousel component, click the +Add Component link and click the Carousel.
This will allow you to add text to your Canvas. According to Facebook Canvas Design Requirements, you can add 2 to 10 images to a carousel. Each image should be the same size, in .png or .jpg format, and with a maximum width of 1080 pixels and a maximum height of 1920 pixels.

Discover Proven Marketing Strategies and Tips
Want to go even deeper with your marketing? Check out the Social Media Marketing Podcast! Publishing weekly since 2012, the Social Media Marketing Podcast helps you navigate the constantly changing marketing jungle, with expert interviews from marketing pros.
But don’t let the name fool you. This show is about a lot more than just social media marketing. With over 600 episodes and millions of downloads each year, this show has been a trusted source for marketers for well over a decade.
Click the +Carousel Scaling button to add your images. For each image, you will be able to add a destination URL, unless you use the Tilt to Pan option to showcase wider images.
Add a Video Component
To add an image carousel component, click the +Add Component link and click the Carousel.
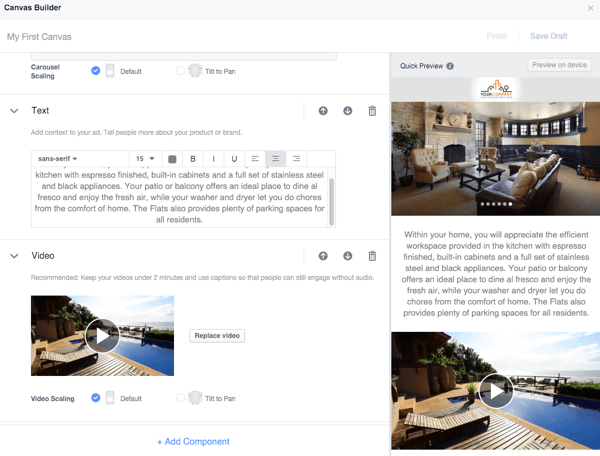
This will allow you to add text to your Canvas. According to Facebook Canvas Design Requirements, your video should be a minimum resolution of 720p, in .mp4 or .mov format, and preferably in portrait orientation. Videos in landscape orientation will resize and have black bars on the sides.
You can have multiple videos on your Canvas, but the total runtime of all of your videos must be under 2 minutes. The thumbnail of the video will automatically be the first frame and cannot be edited.
The Canvas Builder also suggests that you add captions to your video so viewers can engage if they don't have their audio on.
#3: Preview and Finish Your Canvas
Once you've finished adding all of the components you want to your Canvas, you should click Save Draft one more time and use the Preview on Device button to send it to your mobile.

This will send it to your Facebook app, and you'll receive a notification when it's ready for you to preview.
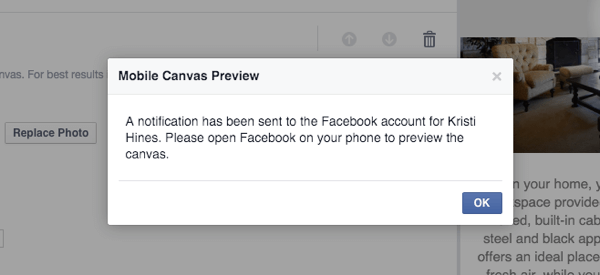
Now, you can test it out and get a feel for how it will behave for your ad audience. On your mobile, your experience should look like this.
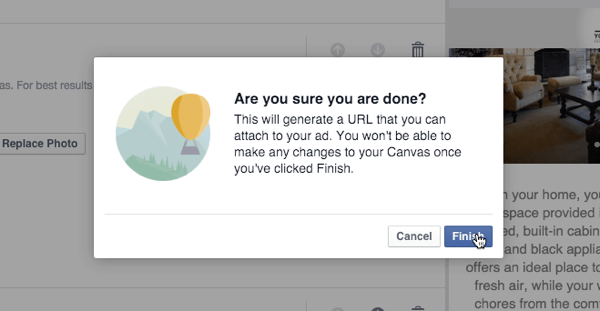
When you're certain that you're done making changes to your Canvas, you can click the Finish link. Note that when you say you're finished, you won't be able to make any more edits to your Canvas.
#4: Use Your Canvas
At this stage, you can do three things. You can create a post to share your Canvas, get the URL to your Canvas to use in a Facebook advertisement, or you can Duplicate your Canvas if you realize you need to make changes to it but don't want to start from scratch.
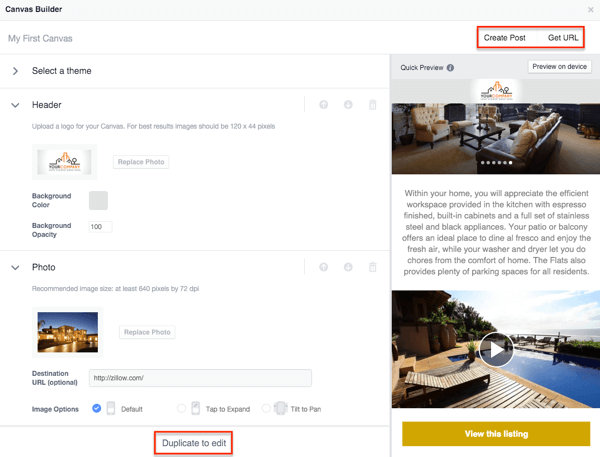
If you use the Create Post option, it will allow you to publish your Canvas to your Facebook page timeline like a regular post. Note that when someone clicks on it from their desktop browser, they'll get this message.
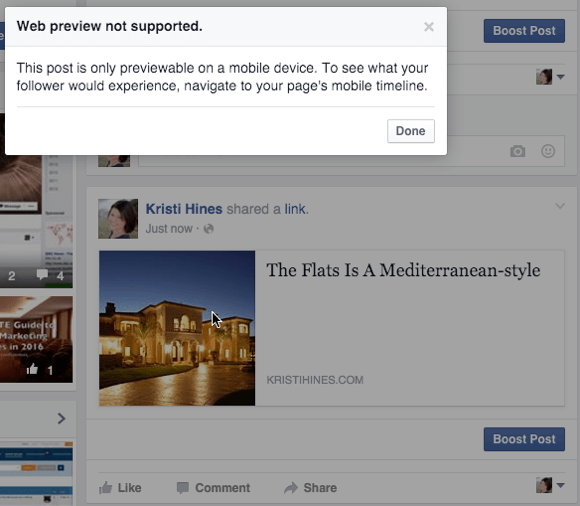
But if they view it from their mobile device, they get the chance to tap on it and view your Canvas in all its glory.
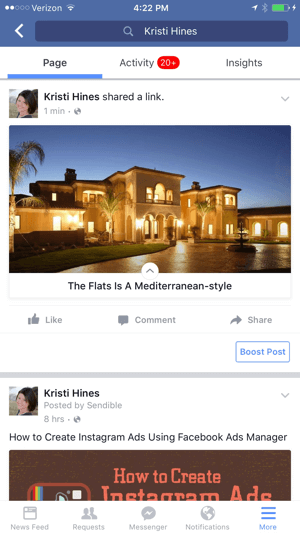
Since you can't specify that page posts be shown to only mobile users, there's no point in creating a page post with your new Canvas, as it might just annoy your desktop visitors.
If you use the Get URL option, you get a URL to copy.

You can take this URL over to your Facebook Ads Manager to use it in a Facebook ad. In an ideal world, you could share this URL with other people at your company over Facebook Messenger to preview the Canvas before using it in an ad, but when tested, the Canvas link from Messenger just opened up to the Facebook page that created it.
Hence, if you want someone to preview the Canvas before you use it as an ad, they would have to have access to your Facebook page with a page role of Advertiser or higher so they could go into Publishing Tools, access the Canvas, and click the Preview on Device button to have a notification sent to them in their Facebook app.
#5: Create an Ad With Your Canvas
When you're ready to add your Canvas to an ad, copy the URL and go to your Facebook Ads Manager. There, select the objectives for Send people to your website or Increase conversions on your website and use the Canvas URL as the destination.
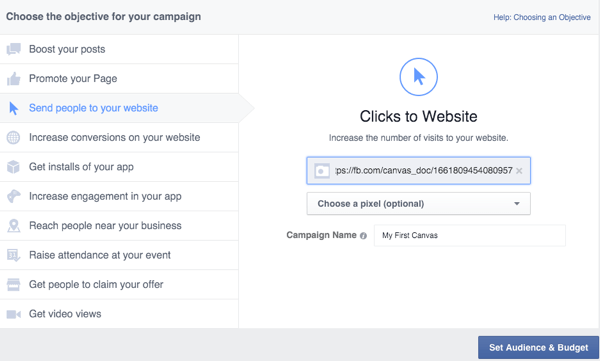
You then configure your target audience and set your budget as usual, but you'll want to choose a single image when you get to your ad creative.
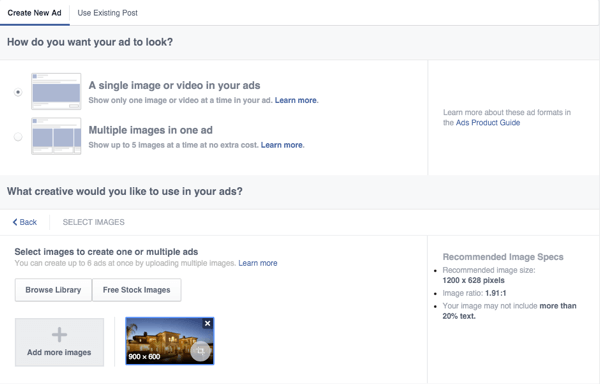
Then remove everything but the mobile news feed placement, select the page you want to associate with your Canvas, and add a headline.
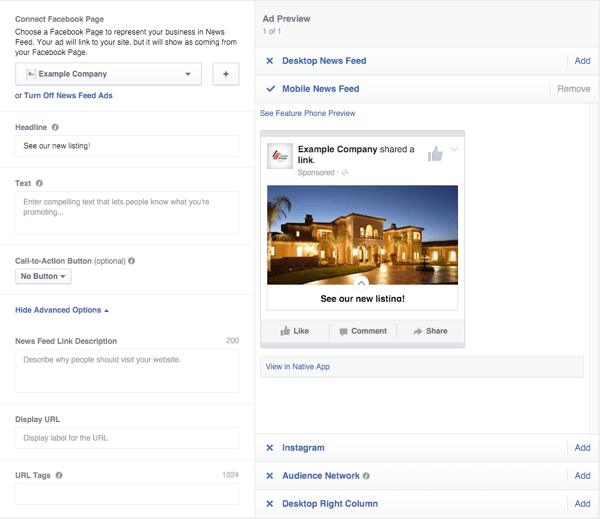
Click the View in Native App to have a notification sent to your Facebook app with a preview of what the ad will look like to your target audience.
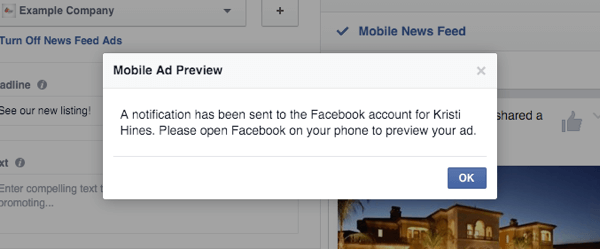
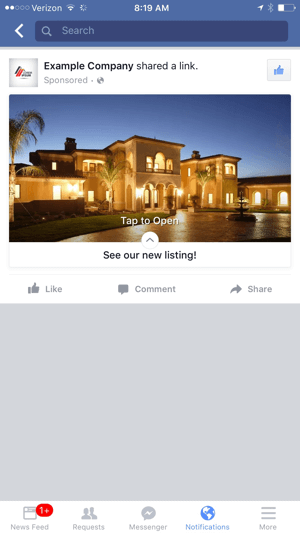
Then give it a full test run from there.
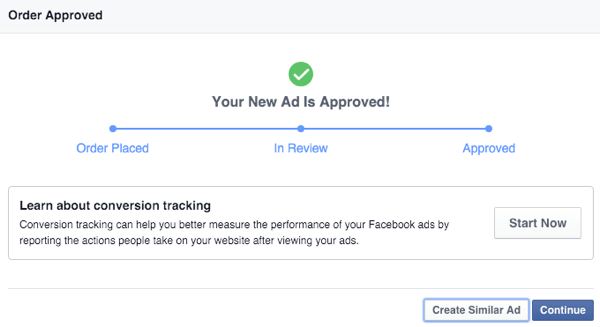
Once you're satisfied, you can review and place your order.
#6: Add Metrics for Canvas Ads to Ads Manager Insights
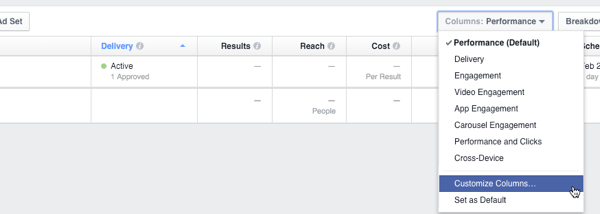
In addition to the usual metrics in your Facebook Ads Manager Insights, you can add columns for specific metrics related to your Canvas. To do this, click on Columns to customize your columns.
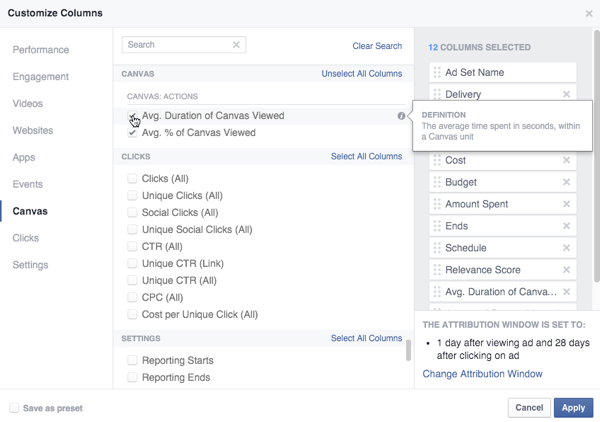
Then select the two metrics specifically related to your Canvas ad.
Rearrange your columns as you'd like to see them in your Insights dashboard.
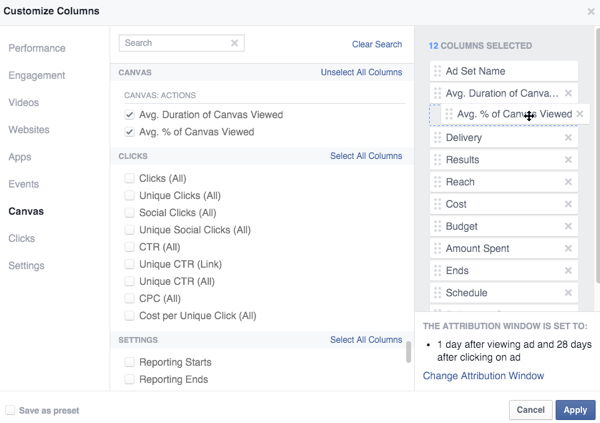
Rearrange your columns to see Canvas metrics first.
Then you will see your new Canvas metrics in your Ads Manager Insights.

Once people begin to view and interact with your Canvas ad, you'll start seeing the analytics data like you would with any other Facebook ad.
In Conclusion
As you can see, Facebook Canvas offers businesses a new way to reach their target audiences and create experiences that can lead to better first impressions, click-throughs to websites, and ultimately conversions. Be sure to give Canvas a try and see how your Canvas ads perform in comparison to your traditional ads.
What do you think? Have you tried Canvas yet? What has been your experience so far? Please let us know in the comments!
Attention Agency Owners, Brand Marketers, and Consultants

Introducing the Marketing Agency Show–our newest podcast designed to explore the struggles of agency marketers.
Join show host and agency owner, Brooke Sellas, as she interviews agency marketers and digs deep into their biggest challenges. Explore topics like navigating rough economic times, leveraging AI, service diversification, client acquisition, and much more.
Just pull up your favorite podcast app, search for Marketing Agency Show and start listening. Or click the button below for more information.

