 Have you noticed changes to your Facebook page layout?
Wondering how to use the new features?
In this article, you'll discover how to navigate and capitalize on the latest Facebook page design changes.
See What's Changed for Your Visitors
The first and most crucial thing to note is the new Facebook page layout for visitors. The previous (or current, if the new design hasn't rolled out to you) page layout looked like this.
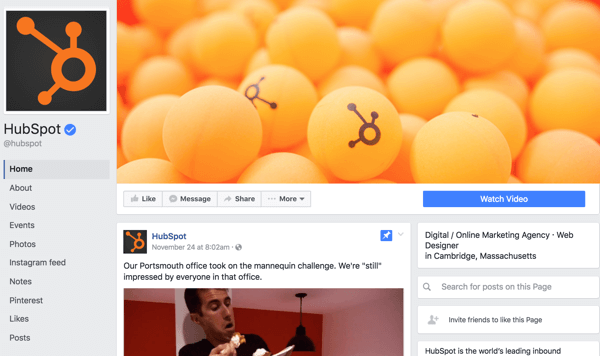
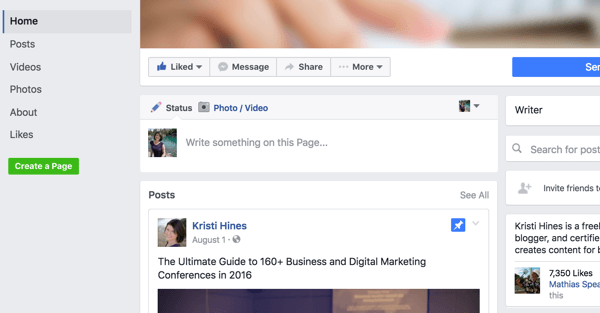
As you'd expect, sections like Videos are in the right sidebar along with the other sections that you could mostly hide or show at will, with the exception of a few required by Facebook.
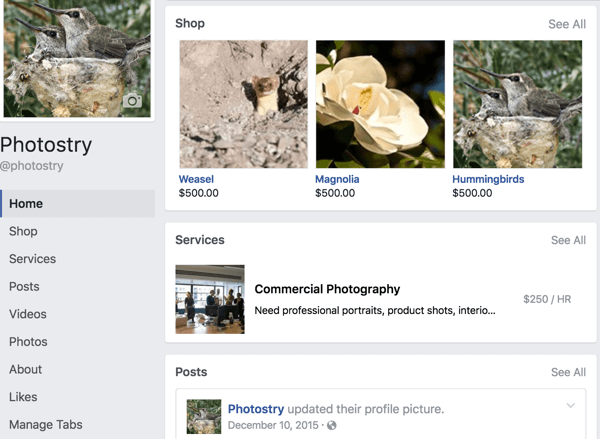
Now, let's take a look at The Awkward Yeti's Facebook page with the new design. First, you have the top section of your page, comprised of the Facebook cover photo, which is displayed as currently stated by Facebook Guidelines:
- 820 pixels wide by 312 pixels tall on desktop browsers
- 640 pixels wide by 360 pixels tall on smartphones
- Loads fastest as an sRGB JPG file at 851 pixels wide by 315 pixels tall and less than 100 kilobytes in file size
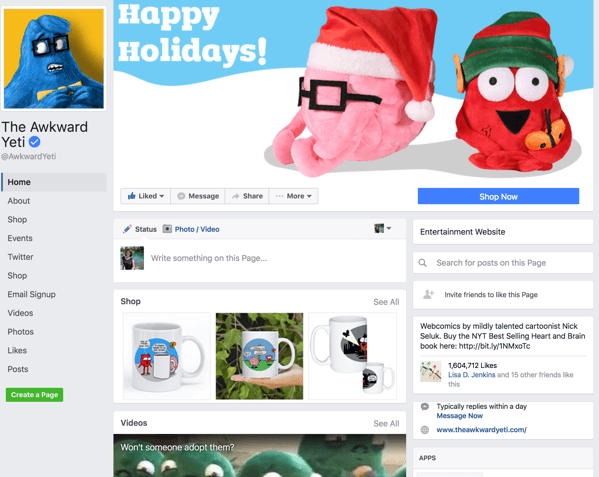
It also has the tab links in the left sidebar, just as before.
The big difference is the order of your Facebook page's timeline. There's the box where visitors and fans of the page can leave a comment, followed by your Facebook Shop or Services. Previously, the Shop or Services section would be followed by your pinned or latest posts. Now you see boxes for Videos and Photos next.
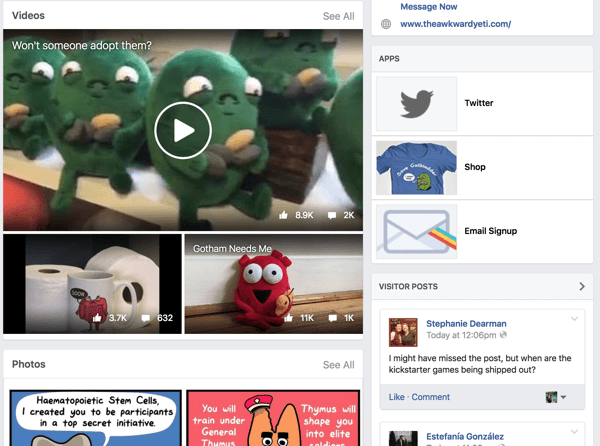
Videos and Photos are followed by your most popular posts.
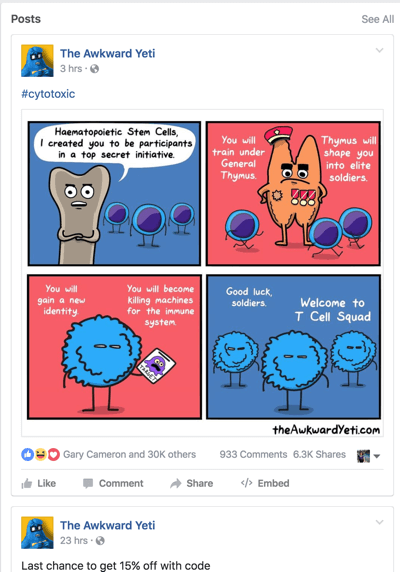
Next, you'll see the standard most recent posts.
Why are the sections in this particular order? It's based on the order of your page's Shop, Videos, Photos, and Posts tabs in the left sidebar.
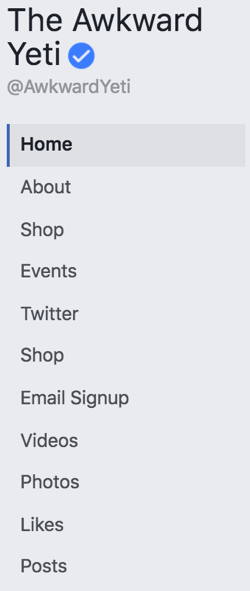
Hence, if you want one of these five sections (Shop, Services, Videos, Photos, or Posts) to be in a specific order, here's what you'll have to do.
#1: Customize Your Timeline
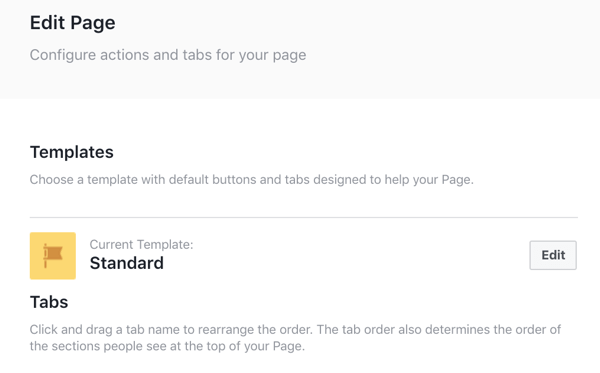
To change the order of your page's timeline (if you have the new Facebook page design), click on the Manage Tabs link in the left sidebar.
Which AI Moves Actually Matter?
That's what every marketer is wrestling with now. New AI strategies, new tools, new takes every week — but no clarity. Most marketers and business owners are trying to figure out AI alone.The AI Business Society is your trusted guide. Get expert-led training you can put to work immediately. Plus a community of marketers sharing what's actually working.
I'M READY FOR REAL AI RESULTS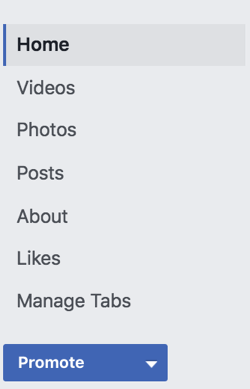
This takes you inside some of the new or updated Facebook Settings sections, such as the Edit Page section.
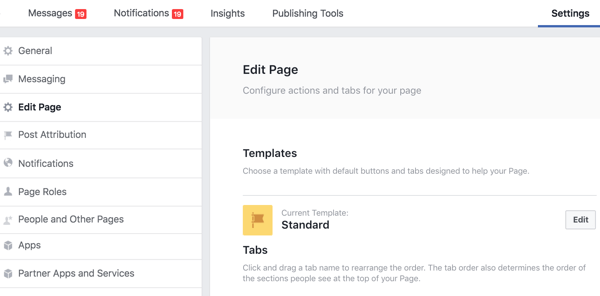
This is where you can reorder your tabs. You'll also find a direct link to a tab by clicking the Settings button next to the tab.
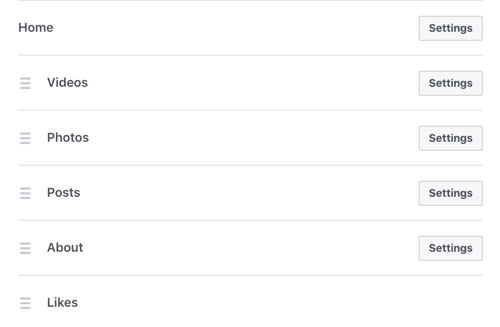
If you move your Posts tab above your Videos and Photos tabs, you'll have two posts above your videos and photos, followed by more of your most recent posts in your timeline. Either way, your posts will be in two sections. It's just a matter of whether those sections are one after the other or separate.
Of course, if you have Shop and Services tabs, you'll want those tabs to appear first.
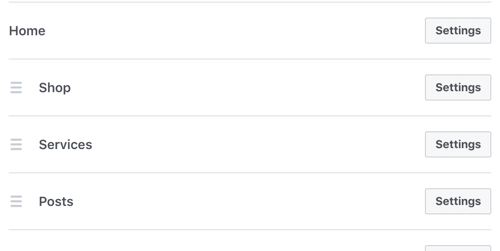
In this case, your page's timeline may look more like this:
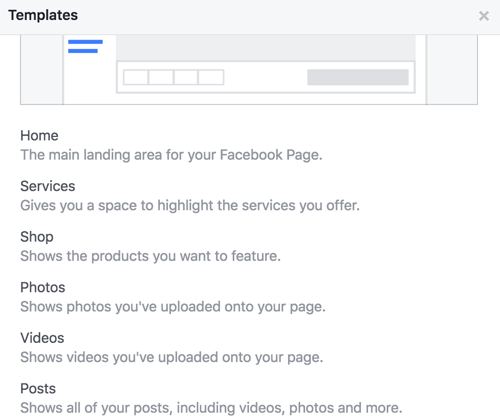
In the Edit Page settings, you may have noticed a Templates option above the tab-ordering options. Templates allow you to get the features you want for your page in terms of the right buttons and tabs.
When you click the Edit button next to the current template for your page, you can scroll through your page's template options.
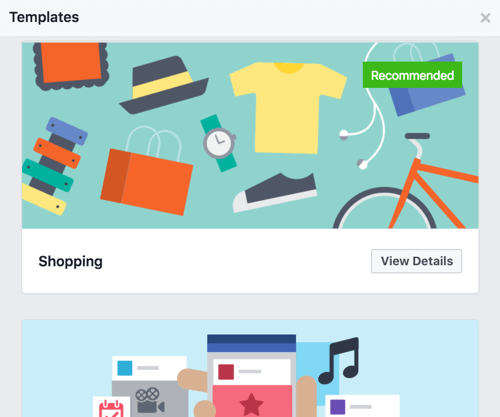
Each template provides details about buttons and calls to action that will be applied to your page (which you can customize later).
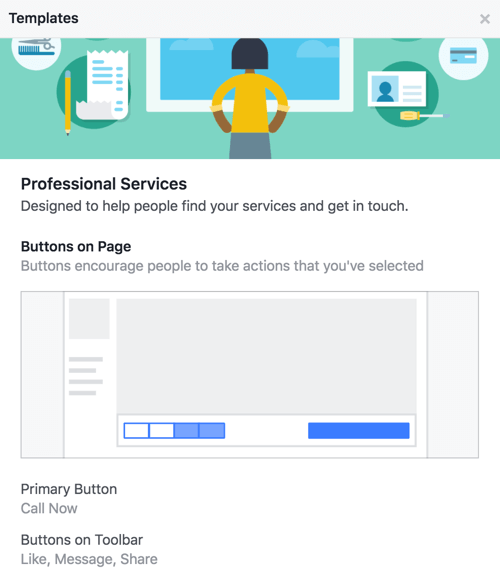
The template description also lists the tabs that will be added to your page (which you can customize later).
You'll also see a warning that if you apply a template to your page, your current template will be replaced. This means that if you have a Services tab setup, for example, and you choose a template without a Services tab, your Services tab will disappear.
#2: Update Your Media
To capitalize on your new timeline boxes for media, make sure that your most recent and ongoing photo and video descriptions link to relevant products, services, or your website in general.
If you have the time, create more quality media to go with improved posts for your Facebook page. The Photo and Video boxes on your timeline will show the most recent photos you shared on your page, and thus your latest, best-quality media.
3 Days of World-Class Training—Zero Travel!

Couldn't make it to Social Media Marketing World and AI Business World this year? Get all of the great content at a fraction of the price with a Virtual ticket.
That’s full access to recordings of every keynote, workshop, and session—the ones people travel thousands of miles to see. Don't wait. Get your Virtual ticket and enjoy actionable content that you can watch anytime, anywhere.
If you don't have media or the urge to create media from scratch, check out stock media sites that offer both stock photos and video. There are plenty to choose from including Bigstock, Shutterstock, VideoHive, PhotoDune, iStock, and Depositphotos.
Find some photos and videos that represent your products, services, or business in general and upload them. To optimize them, make sure that the photo and video descriptions link to relevant products, services, or your website in general.
Note that the only photos that will appear in your timeline Photos box are the ones that you upload directly to your posts, not the ones that appear as thumbnails for a link or otherwise.
Facebook Image Guidelines
Facebook recommends the following guidelines for images:
- Photos should be 720px, 960px, or 2048px wide.
- Avoid compression by uploading a photo with a file size less than 100KB.
- Save photos as JPEG with an sRGB color profile. This may or may not be the default based on your photo or image editing tools or software.
- Change album settings to upload HD by default.
#3: Add Partner Apps and Services
Depending on your business, you may want to check out the new Partner Apps and Services option under your page Settings.
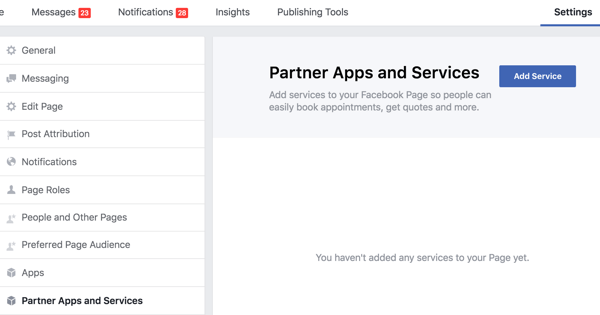
Click the Add Service button to see the services that are currently available.
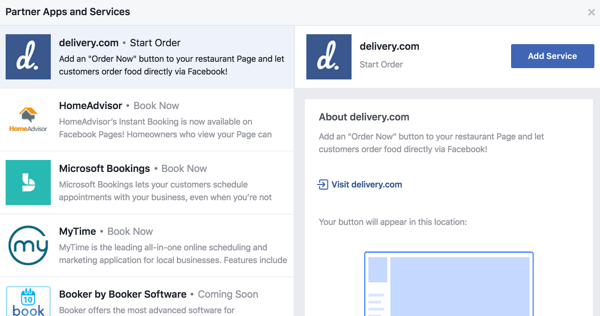
If you find a service you already use for your business or one that you could use, it may be worthwhile to see if that service can help you get clients directly from Facebook.
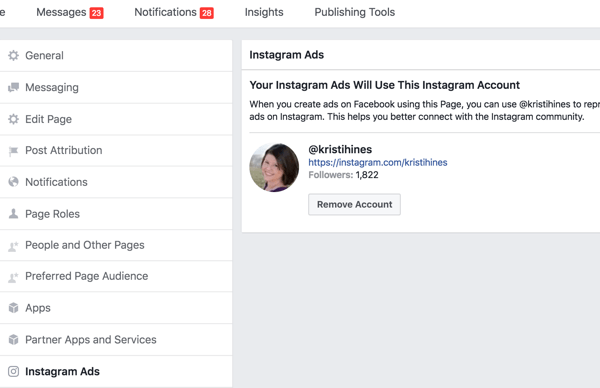
#4: Link Your Instagram Account to Your Page
If you want to start advertising on Instagram using the Facebook Ads Manager, you can link your Instagram accounts to your pages in your page Settings.
#5: Cross-post Your Videos for More Engagement
If you have multiple pages on which you want to share your videos, you can set up a cross-posting relationship between pages. This allows the pages to share videos and video post insights.
It's simply a matter of adding the other page to your Crossposting settings and vice versa.
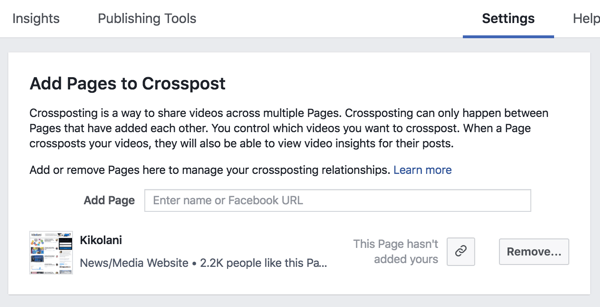
Now you'll start seeing the Crossposting tab on any videos you upload to the pages connected via your Crossposting settings.
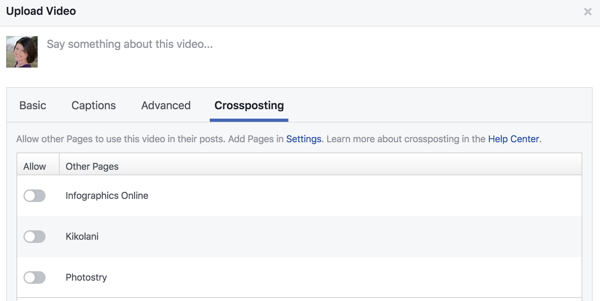
From here, if you were to select all three pages shown above, those three pages and the page you posted the video to would have the video, plus the organic insights for the video itself.
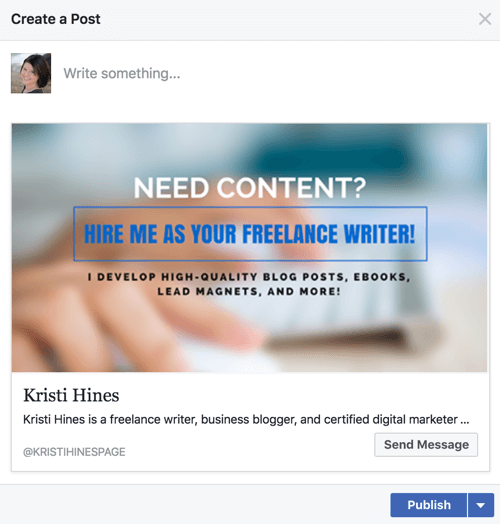
#6: Get Familiar With the New “Write Something” Box
Another change coming to Facebook pages is a redesigned Write Something box, which is geared towards helping you connect with your customers and get the results you want.
Some options will vary based on your page and its features. For example, page owners without a Shop section won't have the option to get people to view a product.
Typically, you'll see something like this:
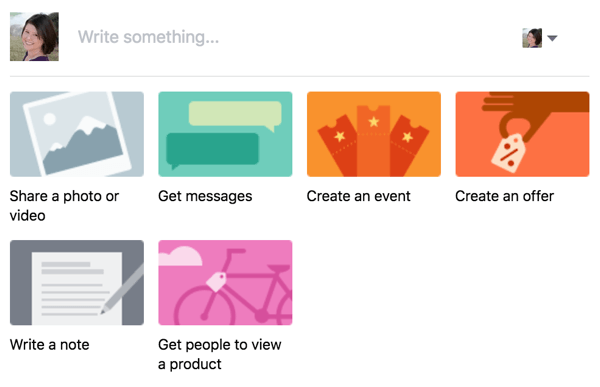
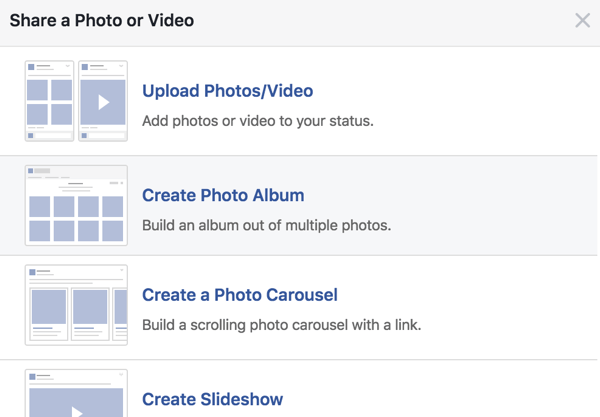
Each option allows you to choose the related posting option or goal, such as Share a Photo or Video.
This is what you see if you click Get Messages:
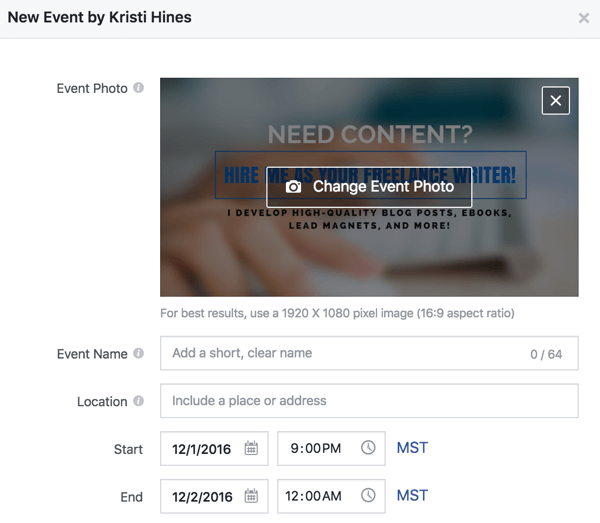
These are your options for Create an Event:
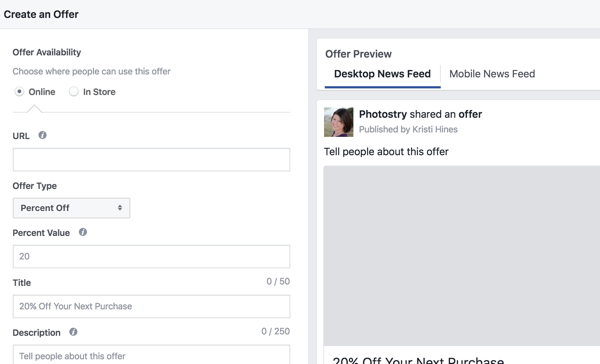
If you click Create an Offer, fill in these details:
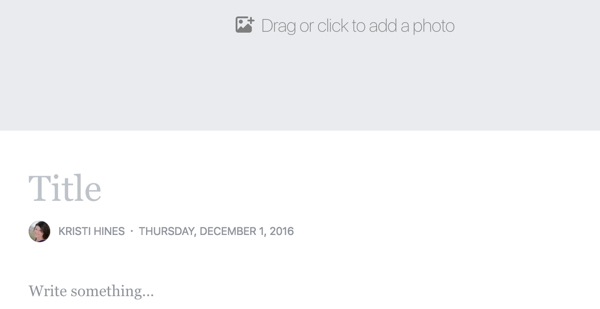
Here's what you see for Write a Note (the features of which are similar to notes on a profile):
Here's what you see for Get People to View a Product:
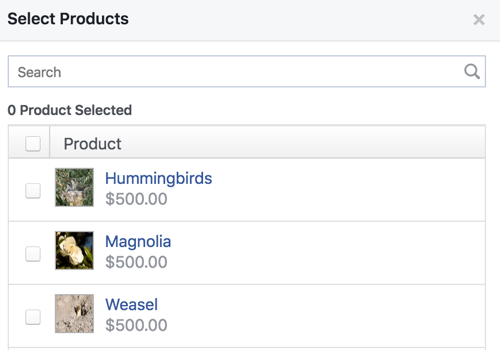
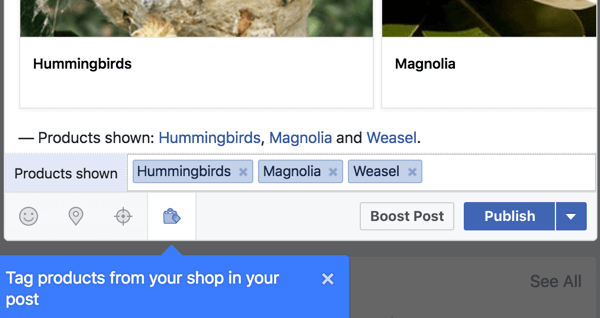
Use the Tag a Product feature for your post tag to include the product link from your shop.
If you simply want to get your original posting options box back, click in the Write Something box itself (above the default posting options).
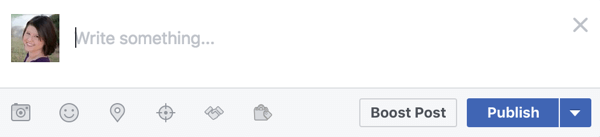
Depending on your page category, verification status, whether you sell products on your Facebook page, and so on, you'll have some or all of the features using the icons shown above. From left to right, these icons let you:
- Post photos or video, which would appear in your timeline Photo and Video boxes.
- Add what you're doing or how you're feeling.
- Check into a particular location or event.
- Select your preferred audiences for this post.
- Tag any third-party brands or products per the Branded Content Policy (blue verified pages only).
- Tag products from your shop in your post.
When you're finished with your post, you'll be able to (as usual) select your advertising options (Boost Post) and publish, schedule, or backdate your post using the Publish button or drop-down arrow to the right of it.
In Conclusion
Facebook has slowly been making changes to pages over the past couple of weeks. Some of these features may not be available to you yet, and some may continue to change before they'll be fully released to everyone. In the meantime, keep an eye on your pages for any new updates.
What do you think about the changes that have or could be coming to Facebook pages? Please share your thoughts in the comments below.

Curious About How to Use AI?
Our newest show, AI Explored, might be just what you're looking for. It's for marketers, creators, and entrepreneurs who want to understand how to use AI in their business.
It's hosted by Michael Stelzner and explores this exciting new frontier in easy-to-understand terms.
Pull up your favorite podcast app and search for AI Explored. Or click the button below for more information.
