Want to create better visuals for your marketing? Looking for tools and tips to help you easily create visual content?
To explore visual design for non-designers, I interview Donna Moritz on the Social Media Marketing Podcast.
Donna is a visual content strategist and founder of Socially Sorted. Her course is Visual Content Made Easy.
Donna shares a number of tools and apps you can use to design visually compelling content. You'll also find tips on how to get more visibility for your visuals.
Listen to the Podcast Now
This article is sourced from the Social Media Marketing Podcast, a top marketing podcast. Listen or subscribe below.
Where to subscribe: Apple Podcasts | Spotify | YouTube Music | YouTube | Amazon Music | RSS
Social Media Marketers and Visual Design
Every platform is visual these days, from GIFs to images to stories and video. That's why it's crucial for social marketers to care about design. All of these different platforms require us to be able to create visual content. On top of that, marketers are being required to mobilize quickly and create visual content easily. As mentioned early in the spring (2020) at Social Media Marketing World, stories seem to be the onramp to video.
More than ever before, we need to be visual storytellers. We need to be nimble with creating content, and yet most of us are non-designers. Even though there are skilled professionals that we can outsource our design requests to, we sometimes need to engage with our audience in the moment and create visuals quickly. There's also the budget side of it. People might not have the money to hire a designer.
If there's a way that they can somehow make it look good without hiring a designer, that's a big advantage.
Visual storytelling is what Donna calls a “trust catalyst.” The more your audience sees your videos, images, or other visual content—whether it's seeing your face on a video or just the content you create—the more affinity they feel for you and your brand. Spending time with people visually really helps move that relationship forward.
Three Things Non-Designers Struggle With
Despite budget restrictions and the hope of being able to create visuals quickly and/or in-house, three main struggles hold non-designers back from visual creation.
The first one is that we don't have enough time to create all of the content we feel we need. As with anything, there are ways to use the time we have more efficiently when creating visual content.
The second one is that we feel we don't have the skills. We're not designers but we're still being encouraged to design and create visuals. We can often be frustrated by what we perceive as the lack of skills and finesse. Fortunately, there are better ways to learn how to create visuals without having to know all of that.
Get World-Class Marketing Training — All Year Long!
Are you facing doubt, uncertainty, or overwhelm? The Social Media Marketing Society can help.
Each month, you’ll receive training from trusted marketing experts, covering everything from AI to organic social marketing. When you join, you’ll also get immediate access to:
- A library of 100+ marketing trainings
- A community of like-minded marketers
- Monthly online community meetups
- Relevant news and trends updates
The third one—which is quite a big one—is not really knowing what to post. When we finally sit down to create something—assuming we have the tools and know how to use them—we think, “Wow, what do I create now that I've got these tools and this time?”
As non-designers, we tend to try to do too many things at once. When Donna was a kid, she went tadpoling. On her way home, she carried a bucket of tadpoles on her bike thinking she could keep it balanced down a very long slope. She gradually picked up a lot of speed and it didn't end well. The bike and the bucket and the tadpoles flew through the air.
She still uses that analogy of the bike and the bucket. We're non-designers; we don't need to do everything. Just try to find the smartest way to create visual content. If you try to do everything, sometimes “tadpoles fly through the air.”
Four Things Non-Designers Need to Know About Design
As a non-designer teaching non-designers, Donna used to think that she needed to teach her students some key principles of design. But through trial and error, she's come to realize that it's actually all about paring it back. We need to flip it on its head and stop trying to be designers.
The templates and tools are there for a reason, and they're getting better and better. Pro designers are doing all of the hard work for us. They're creating these amazing templates and then we're coming along and making a mess of them (stuffing them up, in Aussie slang). So it's really about starting with less, not designing from scratch.
In fact, if you're not skilled at it in any way and you can admit that to yourself, really focus on using templates from the beginning.
Stick to the Elements of the Template
When you're starting to edit a template, feel free to bring in your brand colors, logos, and fonts, but don't rush to change everything at once. Stick to the main elements and only change one or two things at a time. You might change the colors and the text, or change the font to another similar font and the images to similar-sized images.
But if you start moving all of the borders and the structural elements and changing everything from the design end, you're going to make it look like a bit of a dog's breakfast (a real mess)!
Switch Like for Like
Just choose one or two elements, change them, have a look, and then go further if you think you're not going to cause “font-a-geddon” or “crimes against design.”
If you're changing a font, don't change a bold font on the template to a handwriting font, or a handwriting font to a big bold font. Switch it to a similar style and a similar size. If the template has two major colors, just switch to two other colors; don't switch to five colors.
Incorporate Contrast
When you put text on top of a color, make sure there's some contrast so it pops. For example, if there's a dark background, then you need a light-colored font. If it's a light background, then you need a dark-colored font. The goal here is to create that contrast so that the eye knows where to go.
Size Matters
If you're changing out an image on a template, use a similar-sized image. If the image has a lot of white space in it, choose another image with a lot of white space. Keep things as similar as possible to the original template design.
It's really about working with the pre-designs versus just trying to do everything from scratch. When you start doing it this way, you can efficiently create something that looks professionally done—that doesn't look like it came straight out of one of the DIY design tools. Plus you can probably do it in less time than it would take to email your designer.
We're not saying don't use designers anymore but these tips help for creating social content quickly and on a light budget.
Resources for Design Templates
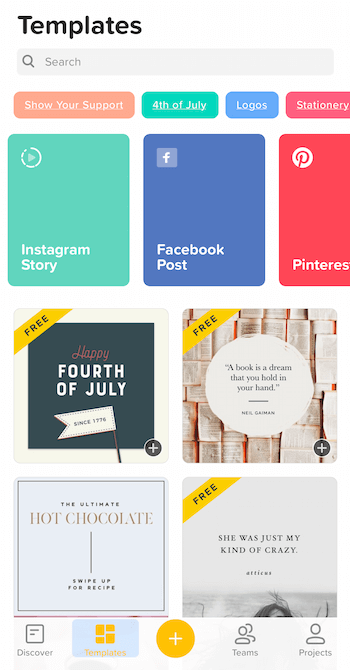
There are great templates in Adobe products. Jeff Sieh uses those when he presents on visual storytelling. But generally, for non-designers just trying to get a handle on this—especially in the early days—try the newer DIY design tools that have come out in the last few years, such as PicMonkey, Canva, and Easil.
Donna has dabbled with Photoshop and InDesign and was never really thrilled with the outcome. She felt she needed full training. But these newer tools have made it really easy to do visual content. Most, like Canva and Easil, have amazing templates. There's another tool that's mainly on mobile called Over, and they've just released a desktop tool with templates.
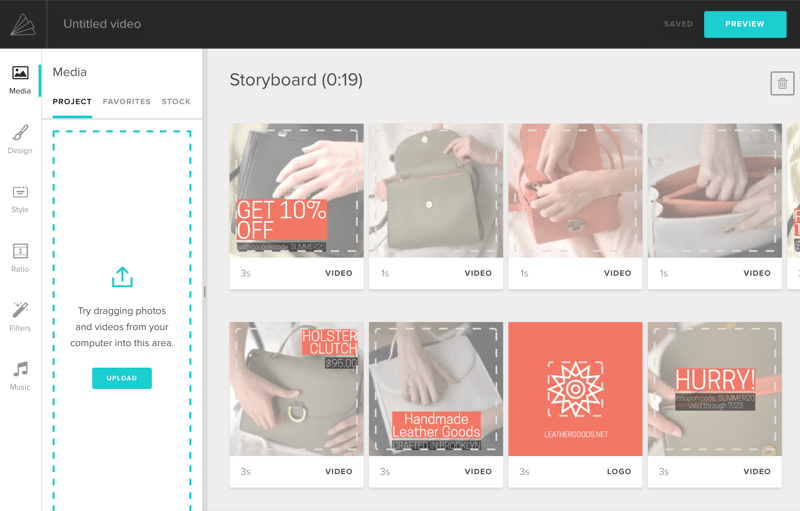
If you move into video tools, you've got Animoto, Wave.video, and Biteable. Other tools like Adobe Spark allow you to do little animations. Easil, Canva, and Crello also allow you to animate some elements.
Through the years, PicMonkey has completely shifted as a tool. It started out as a simple image editing tool. It was one of the first tools to put text on images and edit photos in cool ways without using Photoshop. Now they have a full system that's similar to Canva where you can go in and get templates.
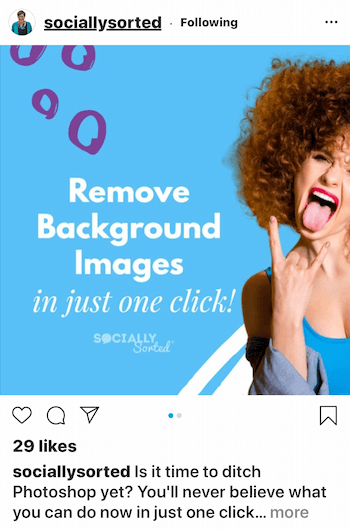
They also have a lot of other fun tools now. You can create the sticker effect that you see all over YouTube. You can remove background images. You can also remove the background from images like you can in Canva, Easil, and some of the other tools. So PicMonkey is a solid tool for non-designers, especially if you're doing a lot of photo editing.
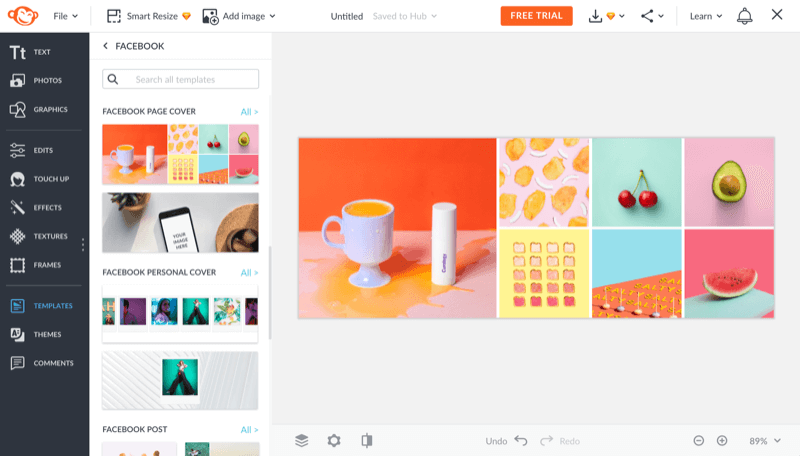
Most of these tools are also pretty on the ball with proper sizing for different social media placements. They constantly keep up with that. In some of the tools—when a new Instagram sticker comes out—they'll even create new templates that allow some space for you to add those elements. It's better than it has ever been and it's getting better all the time. You can also resize a lot of the images between different sizes for social media, usually using a paid account.
Donna mentioned the struggle to find time to create visual content. These tools speed that up because many have instructions and some have tutorials built into the app. They have little academies or training tutorials or blogs that help you out. All of these tools have really good designers and they're creating a lot of content daily.
If you're working from templates, there's no shortage of inspiration. And if you're a little bit more design-inclined, you can start to play a bit and create from scratch.
It's really just a matter of trying a tool. Do a free trial of a few and see which one resonates with you the most. You may only need one. A lot of people have one or two that they work between. Donna recommends having a paid account on at least one of these tools because it offers more functionality.
A Process for Efficient Visual Design: Batch, Binge, Boomerang
Once you find the tools that work best for you, go in and find a template you like and convert it to something that's on-brand with your colors, your fonts, or your messaging. Often, you're just changing the message. It's just a few quick changes to be able to create an image.
If you want to do it more on-brand, then that can take a little longer. You might have to use your brand kit and convert it completely. Donna has a great process that really helps with the time element of creating images.

Discover Proven Marketing Strategies and Tips
Want to go even deeper with your marketing? Check out the Social Media Marketing Podcast! Publishing weekly since 2012, the Social Media Marketing Podcast helps you navigate the constantly changing marketing jungle, with expert interviews from marketing pros.
But don’t let the name fool you. This show is about a lot more than just social media marketing. With over 600 episodes and millions of downloads each year, this show has been a trusted source for marketers for well over a decade.
Batch
If you're creating something, don't do context switching. This means doing two tasks in one hour by splitting your efforts at 30 minutes each. You're losing 10 minutes out of the hour for switching. Try to batch your content. If you're sitting down and creating images—say you're doing a quote image—copy it and then do another quote, and then another and another. If you're batching your content in one hit, you're going to be more efficient.
Donna likes tools that have good folder systems that allow you to customize your own templates and possibly have multi-page designs, which most do. That way, you can create your own templates to reuse again and again. You can batch anything: blogs, videos, podcasts, social media images, infographics, GIFs, or whatever you're focused on. It's about blocking out time and doing it more efficiently.
You can even work with a designer to get templates custom-made in the tools that you use. Ask them to create templates that you can then access and edit, or just to create a background that you can upload.
Binge
We're living in a Netflix era of serialized-episodic content. If we can get people to want “just one more episode,” “just one more IGTV,” or to swipe through some more videos on our playlist, that's very powerful. When you're creating content and batching it, think about how you can create content in playlists, or seasonal or serialized content.
There are a few types of serialized content on Instagram. You can keep watching Instagram stories or story highlights. IGTV will keep you watching as well. You've also got carousel posts, which are quite powerful for engagement at the moment. A lot of heavy Instagram users, like Sue B. Zimmerman, are doing a lot of carousel posts. That could change at any time, but at the moment, they're working quite well.
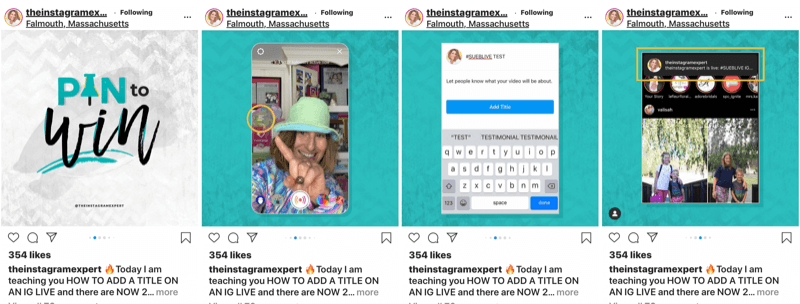
It goes back to the idea of touchpoints. The more people engage with or touch your content on Instagram, the more Instagram knows that people are engaging with your content and it's more likely to be seen. So posts that involve serialized content are quite good.
This concept also can be used for how-tos, explaining or reviewing something, or introducing a launch—there are lots of ways you can use it. But you can think about doing multi-images or multiple-step posts for a lot of different platforms.
Boomerang
Boomerang is Donna's Aussie term for repurpose. Repurpose with a purpose. For every piece of content you create, think of at least two or three ways you can use it again. This allows you to get value back for that piece of content, as well as give value to your audience.
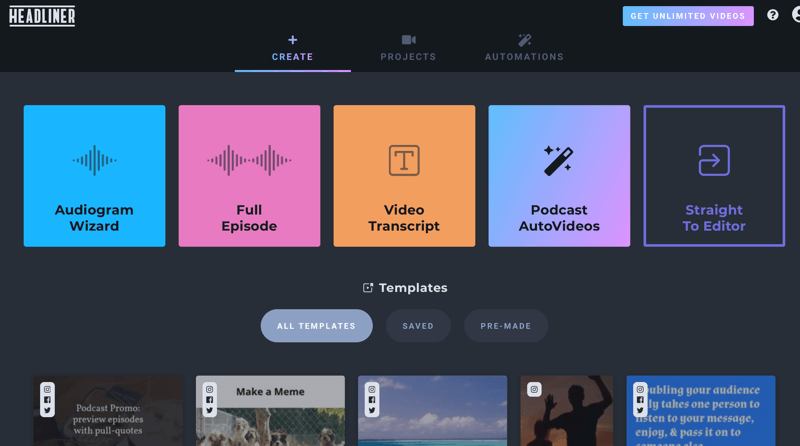
It might be that you're going to resize that image to two or three other sizes or turn it into a template. It might be that you take an infographic and turn it into slides, or slides into an infographic, or images into a video. You can turn images into a video quite easily these days. You can also use a tool like Headliner to combine image, video, and sound.
Tools for Design Collaboration and Approval
A few things Donna looks for in a visual content tool are:
- A good folder system for filing images and your designs
- Access to elements you can use such as icons or photos
- Some sort of team functionality that works even for solo operators who are working with a virtual assistant or other team members
Canva has Canva for Enterprise; Easil has their Plus level; tools like PicMonkey and Adobe Spark also have a collaboration functionality.
A lot of these tools are also starting to have approval processes built in so a designer can make sure that the users are getting branded content approved before it's sent out.
There are also locking functions in some of the tools like Easil and Canva that allow you to lock down particular elements of a template. So if you need to protect your brand integrity, you can make sure that the right logos and fonts are used, or that people can't just move elements around. These features usually come with a paid account.
PicMonkey has a live collaboration feature where you can chat on images. Canva also has chat functionality. Easil has approval processes. They all have varying levels of this and we're going to see more and more of this functionality come out.
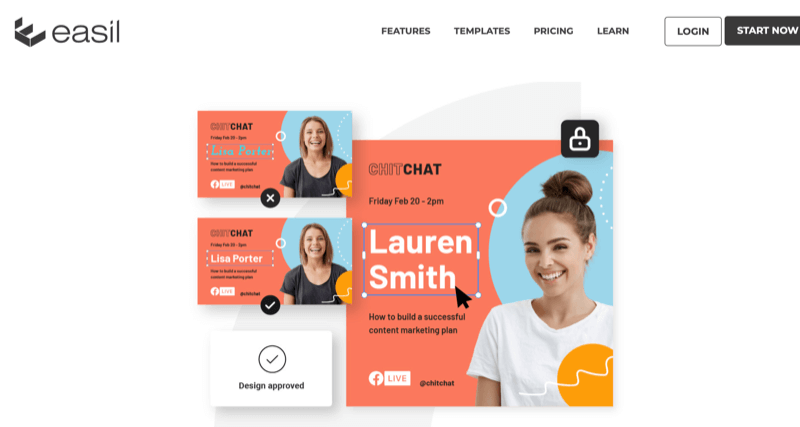
Collaboration and approval features are practically required for these visual tools if you're working with a team. It's changing the game for teams to work very efficiently. Maybe they have an in-house or outsourced designer but everything's in one place. It can be a game-changer if you're trying to be efficient with visual storytelling, especially as a brand.
Some of these tools have scheduling functions and some are developing them. Most of them will end up having some form of scheduling tool. It will be interesting to see whether they're as robust as some of the other tools specifically designed for scheduling. It's good to be able to schedule from these tools, but if you're working smart, it's not a big deal to schedule into another tool.
Inspiration for Creative Visual Content
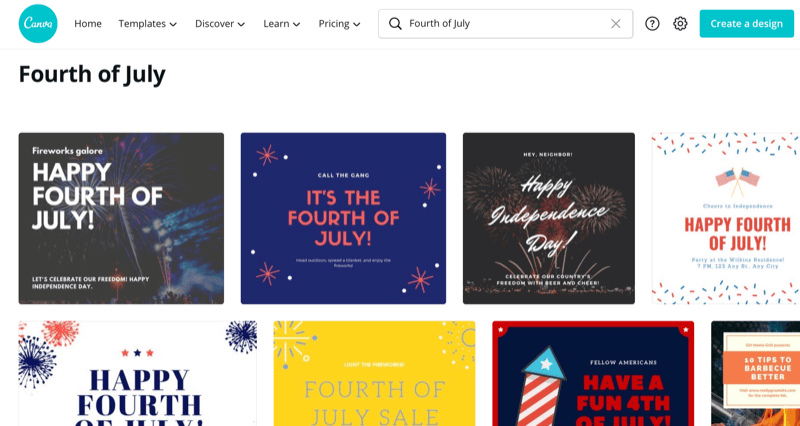
Design tools have a lot of great ideas within the templates for figuring out what to post. Search the templates under different categories—under your industry, themes, or seasonal content—and you'll get a bucket-load of ideas. Some also have content calendars with ideas for specific days of the year.
One of the biggest things we often miss is just tapping into our community. You don't always have to come up with all of the ideas yourself. Look at what your audience and customers are doing. Talk to them; ask them what they like. They're more likely to get involved if you include them and make them the hero of the story than if you're just blasting content at them. Give them the tools to tell your shared brand story.
There are probably diehard fans out there who love your business and when you say to them, “Hey, we've got these GIFs” or “We've got this new hashtag,” they'll love it. It gives them some tools, it gives them some ideas, and then you can just watch their creativity go to town.
Don't forget that you're not the only marketer on your team. Your marketing team is probably hiding in plain sight and it's bigger than you realize. It's not just you—it's your employees, clients, customers, partners, and suppliers. Is there a person on your team who loves creating stories? Can you get them to do more for your business if they're already doing it personally?
We all talk about the idea of user-generated content and it's super-powerful. People want to see content like that versus just content that's branded. But you can reverse the idea by sharing the content that they're sharing. Share it back. That's why things like Instagram story shares are great. If they tag you on that post, your team can then immediately share it into your story.
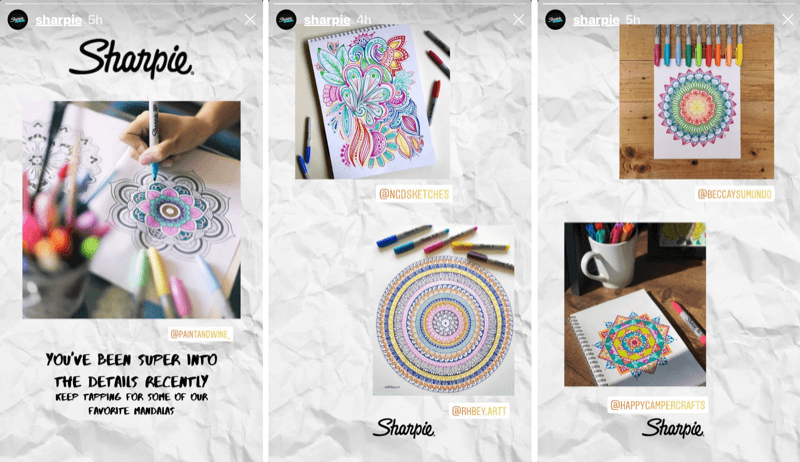
Look for those low-hanging fruit opportunities where you can share content that's out there already. Ask your audience or your customers to tag you in their stories so you can immediately share that to your own Instagram story or Facebook story.
Make sure that you're giving them tools to share content and share your brand story. Make sure they know the hashtags for your content across platforms or your business. Use things like location stickers to reach people and give them the tools to be able to share stories.
You can also share GIFs. At Social Media Marketing World, Donna did some GIFs to just demonstrate to her audience how easy it was and to encourage them to share the story about the conference. Those fun, shareable GIFs had around 400,000 views.
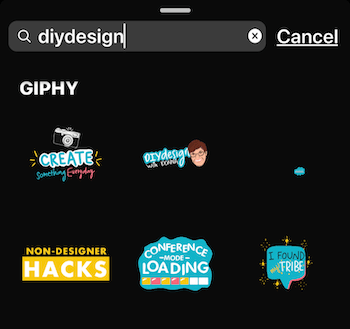
On that note, if you want to share where you are while you're listening to this podcast, there are some fun DIY design GIFs that Donna created. Go to your Instagram or Facebook stories, post your photo or video, and search on the GIF stickers for #DIYDesign or Design with Donna. Share where you're listening to the podcast, tag @stelzner, @SociallySorted, and @SMExaminer, and add the hashtag #DIYDesign.
Key Takeaways From This Episode:
- Find out more about Donna on her website.
- Follow Donna on Instagram.
- Join Donna's Facebook Group for Visual Content Creators using Canva.
- Check out some of the tools Donna mentioned: PicMonkey, Canva, Easil, Over, Life Lapse, Animoto, Wave.video, Biteable, and Headliner.
- Download Donna's Ultimate Video Ideas Generator.
- Check out the Instagram Marketing Summit at IGSummit.live.
- Download the Social Media Marketing Industry Report.
- Watch exclusive content and original videos from Social Media Examiner on YouTube.
- Watch our weekly Social Media Marketing Talk Show on Fridays at 10 AM Pacific on YouTube.
Help Us Spread the Word! Please let your Twitter followers know about this podcast. Simply click here now to post a tweet.
If you enjoyed this episode of the Social Media Marketing podcast, please head over to iTunes, leave a rating, write a review, and subscribe. And if you listen on Stitcher, please click here to rate and review this show.
What do you think? What tools and apps do you use to design visually compelling content?Please share your comments below.
Attention Agency Owners, Brand Marketers, and Consultants

Introducing the Marketing Agency Show–our newest podcast designed to explore the struggles of agency marketers.
Join show host and agency owner, Brooke Sellas, as she interviews agency marketers and digs deep into their biggest challenges. Explore topics like navigating rough economic times, leveraging AI, service diversification, client acquisition, and much more.
Just pull up your favorite podcast app, search for Marketing Agency Show and start listening. Or click the button below for more information.

