Do you manage several social media accounts?
Are you having trouble keeping them all active with fresh content?
Content curation plays a key role in keeping your social profiles and pages active, and your audience satisfied.
In this post I'll show you how to quickly and efficiently post curated content across all of your social networks using Sendible with Feedly and Zapier.

Why Sendible?
There are several reasons why I chose Sendible out of all of the other social media management tools available.
First, you're able to create multiple queues to ensure that updates go out at the best times for your audience. That means you can add the content you want to curate to Sendible, and Sendible will post it to your accounts based on the queue you set up.
Second, it connects to a lot of different platforms.
- Social Networks: Facebook (profiles, pages and your own groups), Twitter, Pinterest, LinkedIn (profiles and pages), Google+ (pages only, there's a hack to get your profile updated too), Instagram (via email), Foursquare (page) and Plurk (a microblogging site popular in India).
- Blogs: WordPress (.com and self-hosted), Blogger, Tumblr, TypePad, MovableType, Ning and Metaweblog.
- Bookmarking Sites: Delicious, Diigo, Instapaper and Pocket.
- Misc: Flickr, Scribd and SlideShare.
Each connected account counts as a service. Pricing for automation starts at $39 per month, based on the number of services.
Third, you can add RSS feeds to your account. Curate content within Sendible or set up auto posts from your feeds (each of these counts as another service). Auto posts can be set up to publish immediately, save as a draft or add to a queue.
Finally, it allows you to see analytics from your updates published through Sendible, monitor social mentions, get updates about activity from some of the top social networks in an inbox, engage with tweets (retweet, reply, favorite, etc.), invite team members, assign tasks and much more.
So effectively, Sendible is everything you want from a lot of other tools all rolled into one. I like it because of the sheer number of networks you can connect to beyond the standard Facebook, Twitter, LinkedIn and Google+.
Here's a detailed guide to how to use Sendible to curate content across multiple channels.
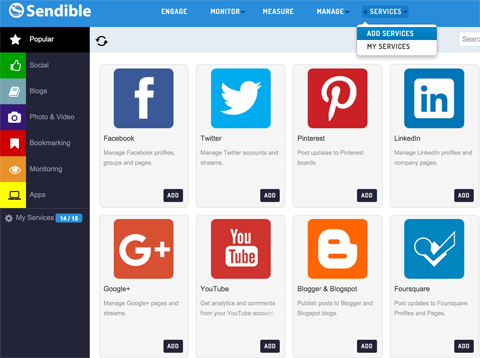
#1: Connect Sendible to Your Social Media Accounts
To get started, sign up for a Sendible account. Then, choose the social media accounts, blogs, bookmarking and other networks you want to update from Sendible.
Get World-Class Marketing Training — All Year Long!
Are you facing doubt, uncertainty, or overwhelm? The Social Media Marketing Society can help.
Each month, you’ll receive training from trusted marketing experts, covering everything from AI to organic social marketing. When you join, you’ll also get immediate access to:
- A library of 100+ marketing trainings
- A community of like-minded marketers
- Monthly online community meetups
- Relevant news and trends updates
Sendible will prompt you for the information and authorization it needs for each network.
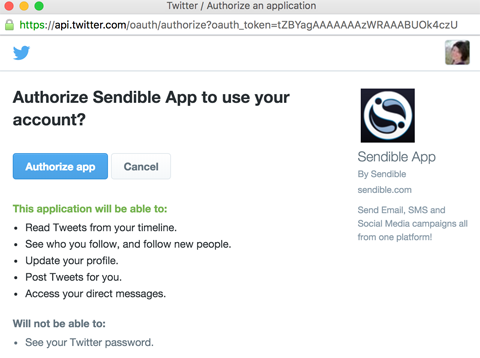
If you want to add more than one specific type of account (like Twitter), log out of the first account and then log into the next account you want to add to Sendible. Then use the Add button for Twitter in Sendible to authorize it.
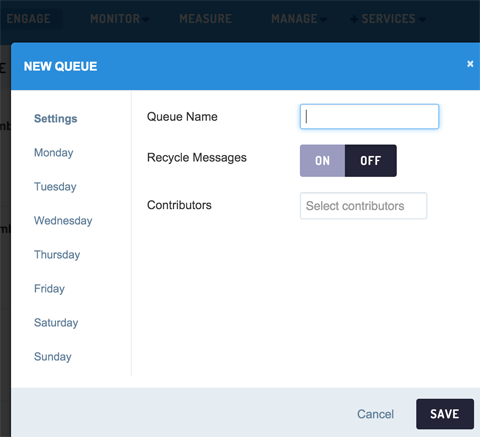
After you add the accounts you'd like to update using Sendible, create queues (schedules) for posting updates to them. To do this, go to the Engage menu, click on Queued in the left sidebar and then click the New Queue button.
Next, set up an RSS feed to auto post in Sendible. I have two set up in my own Sendible account: one is for posts I write and one is for my Feedly favorites. (This is the content I curate to all of my profiles. More on Feedly in Steps #2 and #3.)
To set up an RSS feed to auto post to your queue, first grab the RSS feed for your blog. If you have trouble finding it, I suggest using Google Chrome and the RSS Subscription Extension. This will help you find it using an icon in your address browser bar.
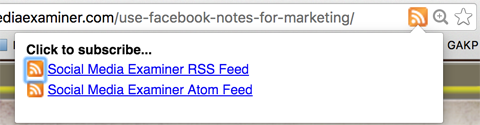
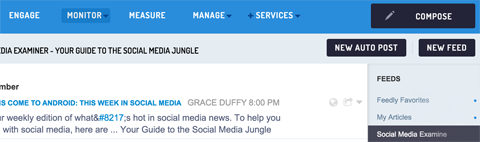
Copy the RSS feed URL and add it to Sendible. Go to Monitor, the Feeds menu and click the New Feed button.

To set up the auto post, click on the feed in the right sidebar and then click the New Auto Post button.
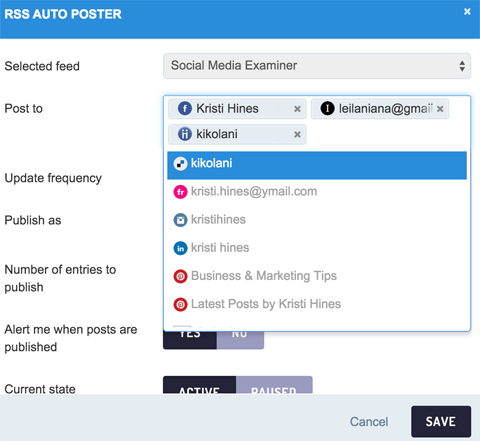
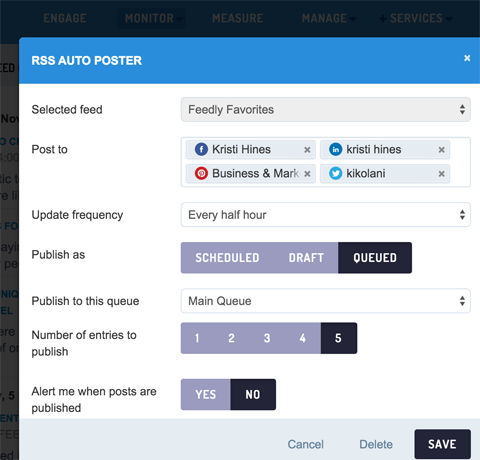
From here, you need to configure the auto post. Choose the accounts where you want to send the new RSS feed items.
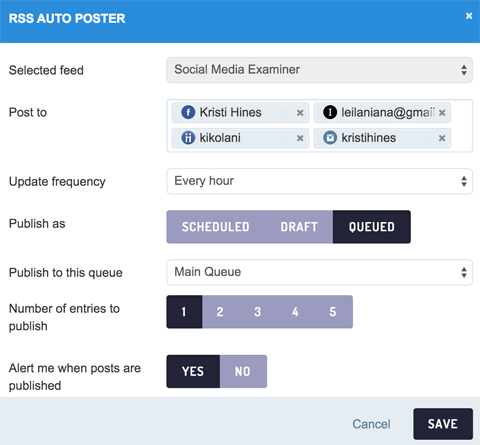
Next, choose the frequency you would like to check the RSS feed. Select Queued if you want to auto post new feed items to your queue. Also, select the queue you would like to use if you've set up more than one queue in Sendible.
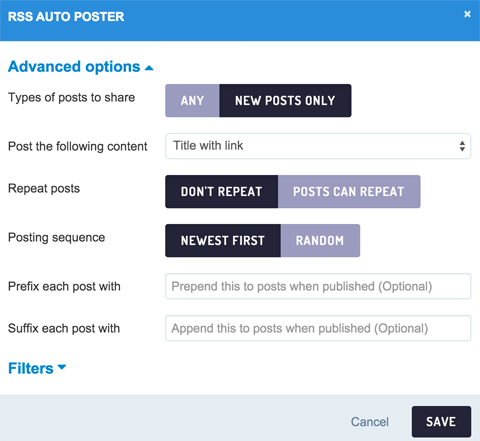
Configure advanced options to customize the updates sent to your accounts. Be sure to select New Posts Only under the Advanced Options to ensure that Sendible doesn‘t post older updates to your accounts.
Once you finish configuring your auto post, save it to make it active.
From here, you have a couple of options. Continue to add new RSS feeds to Sendible and set them up to auto post to your queue to curate content to all of your accounts. However, since Sendible counts each auto post as a service, you may want to follow the next two steps so that you only have one service (one RSS feed and one auto post) for the content you want to curate, instead of dozens.
Alternatively, you could add RSS feeds to Sendible and go into Sendible to add them to your queue each day. But the following steps make everything a little simpler in terms of overall workflow once they're set up.
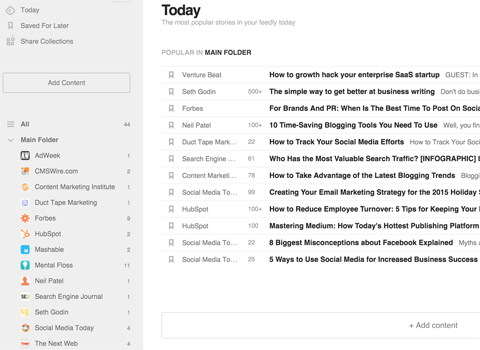
#2: Subscribe to Blogs Using Feedly
Create a Feedly account and purchase the Pro option ($65 per year) to use the integration in the next step. Then start subscribing to the blogs from which you want to curate content. Use the search box on Feedly to do this or grab RSS feeds from your favorite websites and add them using the Add Content button.
Again, you may want to use the RSS Subscription Extension (mentioned above) on Google Chrome to help you find RSS feeds for your favorite sites. A lot of blogs and publications don't publicize their RSS feed links to get you to opt into their email list instead.
After you add your favorite blogs, mark at least three posts as favorites using the bookmark link next to the post titles.

You can also bookmark favorites in the Feedly mobile app.

#3: Set Up Zapier to Curate Handpicked Content
Here comes the fun part.
Set up an account on Zapier and sign up for a free trial of the Basic plan ($20 per month). This service allows you to create custom tasks (known as zaps) between one or more services. You'll want to create a task that sends any posts you save for later inside Feedly to a custom RSS feed, created by Zapier. You'll then add that custom RSS feed to Sendible to auto post your curated content to your queue.
Discover Proven Marketing Strategies and Tips
Want to go even deeper with your marketing? Check out the Social Media Marketing Podcast! Publishing weekly since 2012, the Social Media Marketing Podcast helps you navigate the constantly changing marketing jungle, with expert interviews from marketing pros.
But don’t let the name fool you. This show is about a lot more than just social media marketing. With over 600 episodes and millions of downloads each year, this show has been a trusted source for marketers for well over a decade.
Note: If you don't want to handpick the posts, just create a task that sends any new posts in Feedly to a custom RSS feed, created by Zapier. Then add that RSS feed to Sendible to auto post for your curated content. Depending on what sites you choose, there could be a lot of posts added to your queue, since some sites like to publish 10 or more posts per day.
The “save-for-later” way allows you to handpick your curated content, and it really only takes a little time per day: 15 minutes or less if you just go by headlines.
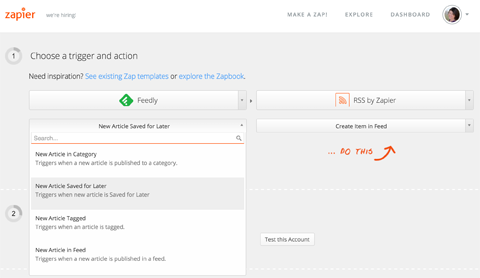
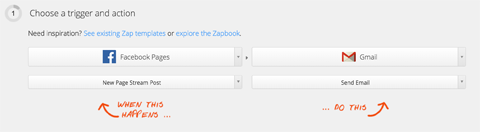
Inside Zapier, click on the Make a Zap link and configure your task.
To start, select Feedly as the trigger and RSS by Zapier as the action. Choose New Article Saved for Later to handpick your curated content, or choose New Article in Category to have any new RSS feed items from all of your subscriptions added to your custom RSS feed.
Next, connect your Feedly account.
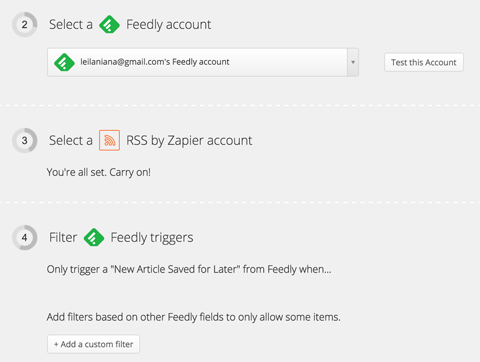
If you use the option to add any New Article in Category, you will choose the folder in Feedly with the RSS feeds from sites where you want to curate content. You may also want to use the custom filter option to include or exclude content with specific keywords in the title.
Next, configure the custom RSS feed itself, using fields from Feedly and the Insert Fields button. Add a keyword into the custom RSS feed URL, and use the button to copy it to your clipboard.
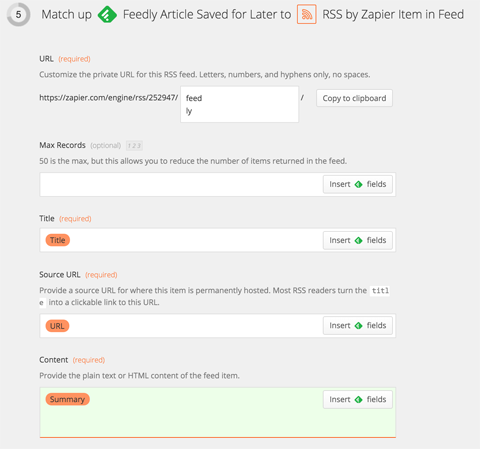
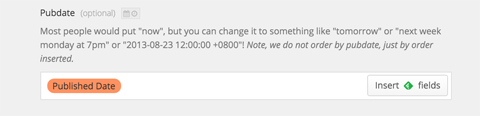
I only use the above fields that are required: Title, Source URL (the clean link to the post), Content (the Summary from Feedly) and the Pub Date near the end.
Next, test your task. If all goes well, you'll see the following.
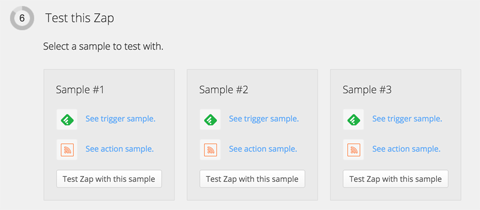
Click each Test Zap. If successful, you will get a Success message. Once everything tests well, name your task and save it.
Now, go back to Sendible to set up a new RSS feed with the custom RSS feed URL you copied from Zapier.
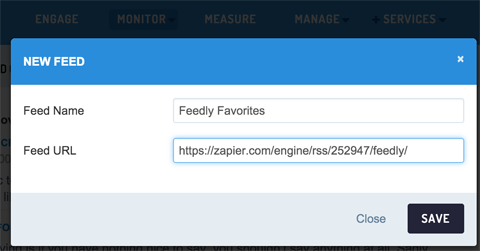
Then, set up the auto post for that feed.
Posting to Google+
Since you can't schedule Sendible to post to Google+ profiles, the way around it is to create a task in Zapier that will email you when a link is posted to another one of the networks you set up.
For this task, I set Facebook Pages as the trigger and Gmail as the action.
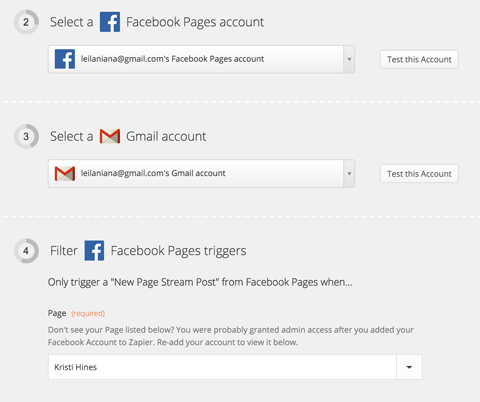
To do this, connect your Facebook and Gmail accounts and select the Facebook page you want to use.
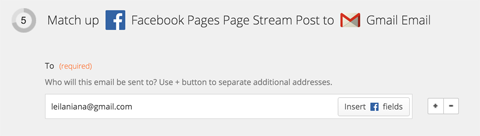
Then, tell it where to send the email.
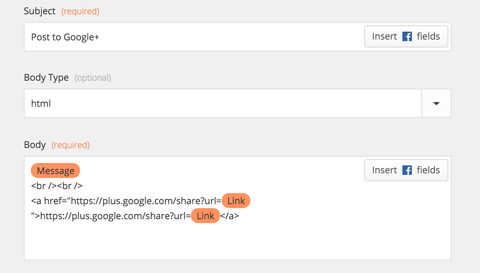
Next, configure the subject and body of the email.
When the link posts to Facebook, you'll receive an email.

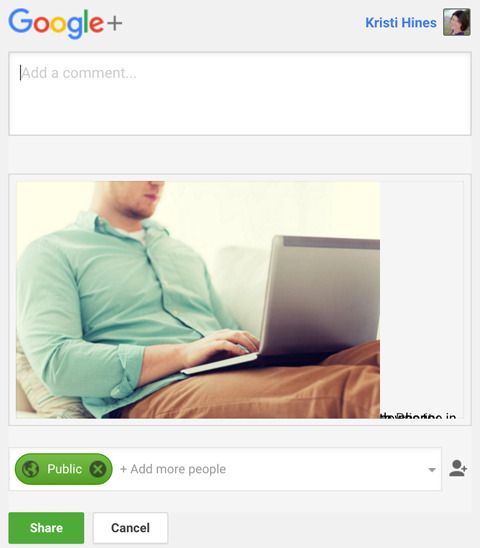
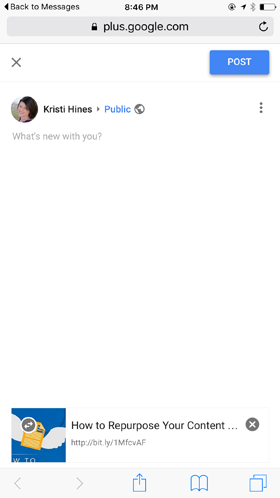
When you click the link in the email, it will set up a post to your Google+ profile with the link already inserted. It may look garbled in the preview.
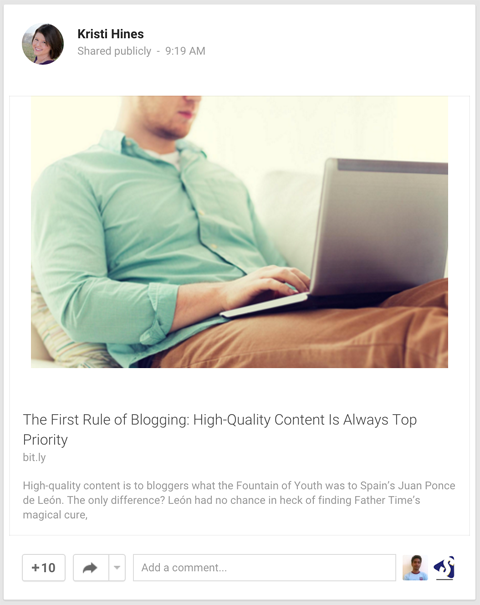
However, it'll post correctly to your Google+ profile.
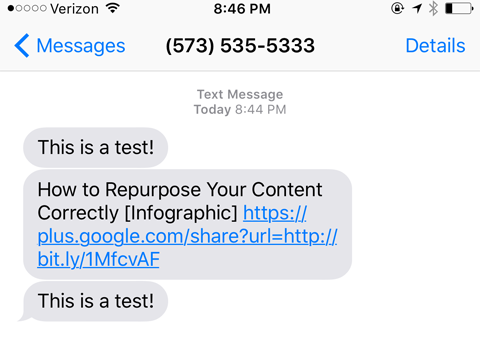
The link from your email allows you to post to your Google+ profile on mobile, if you're logged into your mobile browser. If you don't like to check your email, modify the task above to text the same message to you instead of sending it via email. Just use SMS by Zapier as the action instead of Gmail, and you'll receive a text.
Click the link, and you'll get the prompt to post the link to your Google+ profile.
This method will remind you to update your Google+ profile and gives you a fast way to do it. You'll be notified of any engagement you receive while browsing Gmail, Google or other Google products.

#4: Monitor Your Sendible Analytics
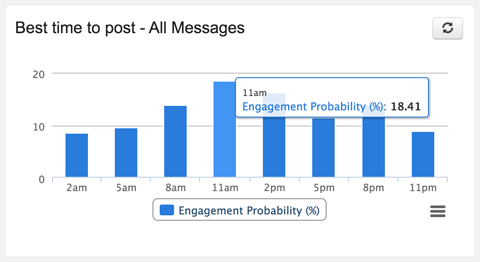
Once everything is set up and in motion, you'll want to periodically monitor your Sendible analytics. Click on the Measure menu to find interesting insights, such as the best time to post based on the schedule in your queue.
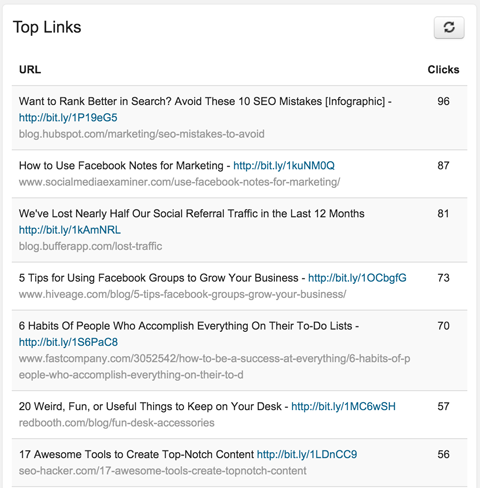
Review the most popular content you shared, based on the number of clicks each link received.
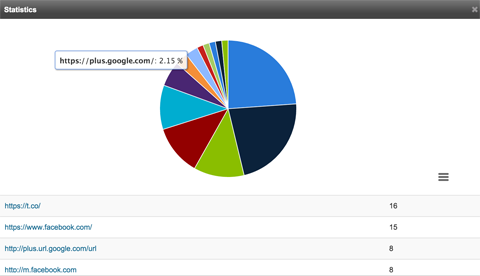
Also, click on any of the above pieces of content to see which social networks drove the most traffic to those links. Notice it even includes tracking the posts to my Google+ profile, even though those posts aren't sent through Sendible.
Go to the top of the Quick Reports screen, and use the drop-down to switch over to additional analytics reports.
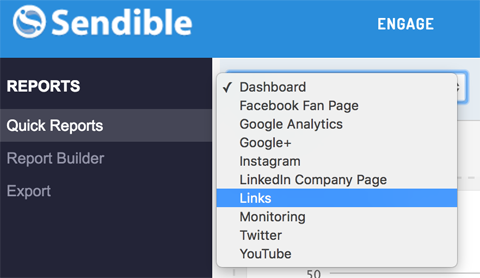
The Links report, for example, will show you which social networks drive the most traffic to the content you share.
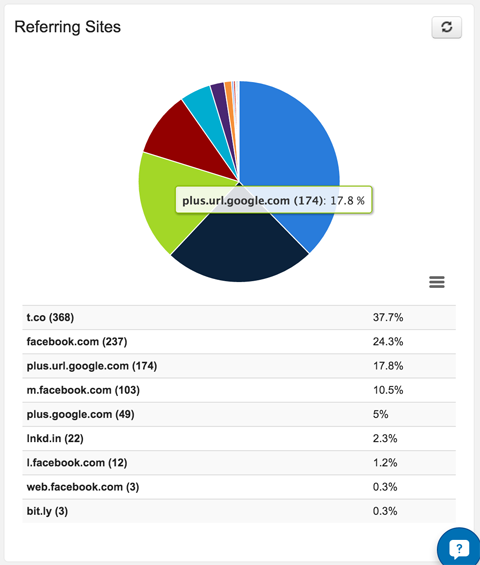
Sendible analytics may help you determine which types of content resonate best with your audience and where you have the most engaged audiences.
In Conclusion
Curating content to your accounts is not meant to fully automate your social media marketing. It's simply there to keep your accounts alive and give your audience fresh material, so they can engage with it. My engagement on Google+ and Pinterest (two accounts I otherwise neglected) has increased dramatically since I started curating content to them a few times per day.
Incorporate additional updates along with your curated content to further engage with your audiences. By the way, this is something you can also do using Sendible, if you prefer.
Remember, always reply to any comments you receive on your various social networks. It's the direct engagement that will make this strategy truly pay off.
What do you think? Have you tried Sendible? What strategies do you use to curate content to multiple accounts? Please share your favorite tactics and tools in the comments!
Attention Agency Owners, Brand Marketers, and Consultants

Introducing the Marketing Agency Show–our newest podcast designed to explore the struggles of agency marketers.
Join show host and agency owner, Brooke Sellas, as she interviews agency marketers and digs deep into their biggest challenges. Explore topics like navigating rough economic times, leveraging AI, service diversification, client acquisition, and much more.
Just pull up your favorite podcast app, search for Marketing Agency Show and start listening. Or click the button below for more information.