Are you interested in starting a blog for your business?
Want to know how to set it up to get the best results?
There are lots of design and functionality options to consider when setting up your business blog. However, only a few make a vital difference in your blog's success.
In this article you'll discover the seven critical elements you need for your business blog.
Listen to this article:
Where to subscribe: Apple Podcasts | Spotify | YouTube Music | YouTube | Amazon Music | RSS
#1: Choose the Best Blog Layout
Here are the three most commonly used blog layouts:
- Three-column layout with two sidebars and the main content column
- Two-column layout with one sidebar and the main content column
- One-column layout with only the main content column
There are advantages and disadvantages to each of these layout options.
If you're a publisher with a large amount of content that you want to promote alongside your articles, the three-column layout gives you plenty of space for promotion.
TechCrunch uses the three-column layout with two sidebars.
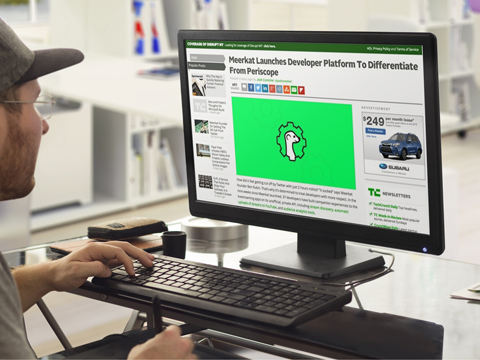
While this layout can distract readers from the main article, it might also keep them on your website longer, as they'll have plenty of related content to click through to.
The main content and sidebar option doesn't distract too much and provides areas to promote your products or services, additional content, social profiles and email list opt-in forms. If you want readers to give 100% of their attention to your content, the one-column layout is the best choice.
The Zapier Blog uses the one-column layout with just the content.
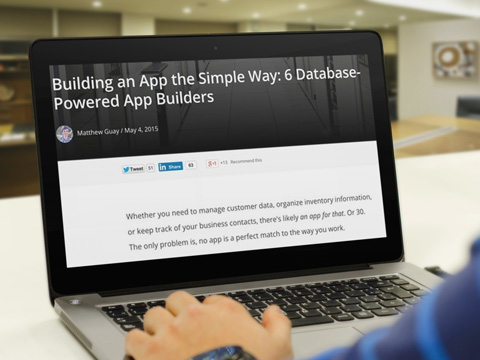
Of course, this doesn't leave you with room for promotion of additional information, except throughout or at the end of posts.
Get World-Class Marketing Training — All Year Long!
Are you facing doubt, uncertainty, or overwhelm? The Social Media Marketing Society can help.
Each month, you’ll receive training from trusted marketing experts, covering everything from AI to organic social marketing. When you join, you’ll also get immediate access to:
- A library of 100+ marketing trainings
- A community of like-minded marketers
- Monthly online community meetups
- Relevant news and trends updates
The most popular option out of all three layouts tends to be the two-column, main content plus sidebar layout. The key to making this layout work for your business is to ensure that the sidebar focuses on your business goals, with the most important elements at the top.
The Hootsuite Blog uses the two-column layout with a sidebar to the right.

For example, if you want readers to opt into your email list, your email list opt-in box should be at the top of your sidebar. Follow it with links to your social profiles, top content and other information.
Most importantly, unless you're an affiliate marketer or a publisher that generates income from advertisers, don't give visitors any external links to leave your website, unless they point back to your main website.
#2: Make It Mobile
No matter what layout you choose for your blog, make sure that it's mobile-friendly. Google recommends responsive design, which is a fluid layout that reshapes itself based on the size of the screen.
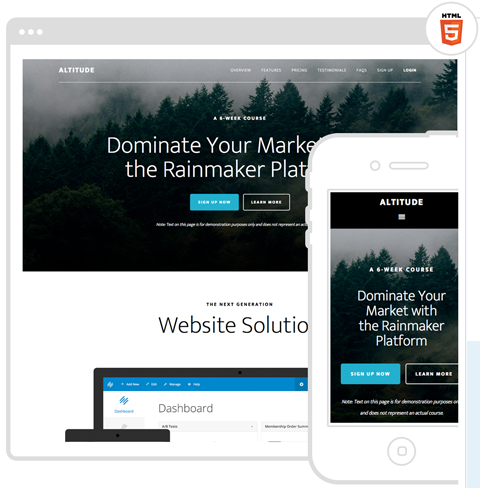
You should be able to find a responsive design or theme for whatever blogging platform you use, such as the StudioPress theme shown above. You can also use plugins, like WPtouch Mobile Plugin for WordPress, that give any blog a mobile-friendly design.
#3: Add Multiple Opt-in Forms
If you want to convert blog readers into email subscribers to promote your company's products and services, you need to have multiple opt-in forms on your blog.
There are several different ways to implement opt-in forms on your blog, and many tools to do it. Most email marketing software solutions offer a few different opt-in forms to choose from that you can add to your website using the provided code.
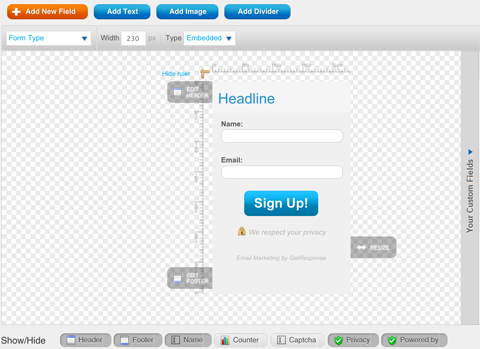
GetResponse, for example, has a Form Builder that lets you create forms to match your site design and place anywhere on your website.
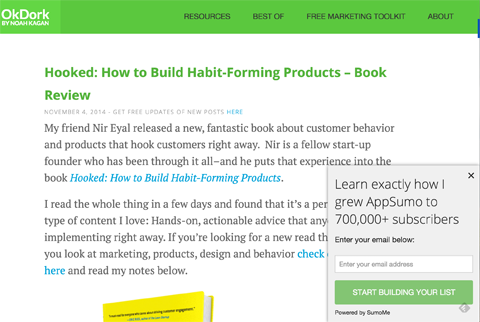
SumoMe allows you to add a variety of opt-in forms to any website (not just WordPress). You can add a smart bar at the top of your website, a scroll box that appears at the bottom right of the website or a light box pop-up that appears over the website.
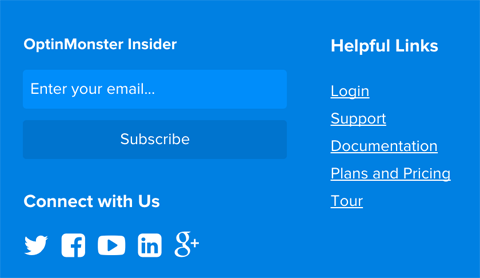
OptinMonster allows you to add a variety of opt-in forms on any website (again, not just WordPress). You can add opt-in forms anywhere on your site, including the sidebar, footer, after a post, in floating bars, in slide-ins and in pop-ups.
While you don't want to go overboard, with one opt-in form sitting next to or overlaying another, you do want to make sure that there is an opt-in form available so readers can subscribe at any time.
#4: Configure SEO Fields
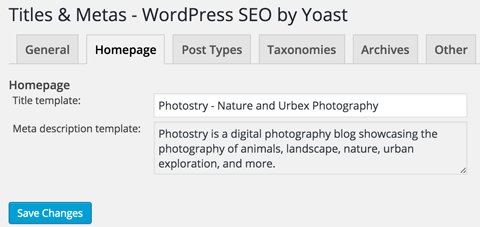
If you use WordPress, you can install free plugins like WordPress SEO to create key fields for all of your blog pages to optimize them for search engines. Once installed, start by adding the SEO title and meta description for your blog's homepage, optimized for specific keywords.

Discover Proven Marketing Strategies and Tips
Want to go even deeper with your marketing? Check out the Social Media Marketing Podcast! Publishing weekly since 2012, the Social Media Marketing Podcast helps you navigate the constantly changing marketing jungle, with expert interviews from marketing pros.
But don’t let the name fool you. This show is about a lot more than just social media marketing. With over 600 episodes and millions of downloads each year, this show has been a trusted source for marketers for well over a decade.
As you create pages and posts on your blog, remember to fill in the SEO title and meta description. You can even add these fields to your category and tag pages. Go to the appropriate menu items under the Posts section and click on the categories or tags you want to optimize for search.
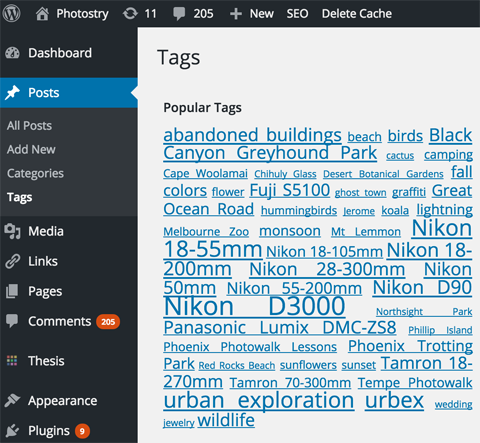
Then use the fields to optimize them for specific keywords.
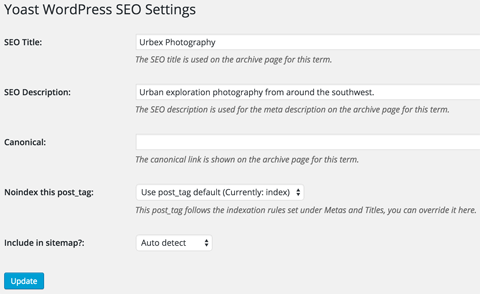
This tactic helps your blog get additional visibility in search for more keywords.
#5: Use Social Sharing Buttons
Social sharing buttons are a must for your blog post content. They make it easier for your readers to share your content on the social networks that matter to you.
If you're comfortable editing your blog design, you can choose to add the official sharing buttons from Twitter, Facebook, LinkedIn, Pinterest and your other favorite networks. These buttons pull the title, URL, description and an image (depending on the network) from the page they're installed on and allow visitors to share them.
If you'd rather use a plugin, there are a vast number of tools to turn to. Shareaholic, for example, works with most major website platforms including Bigcommerce, Blogger, Drupal, Joomla, Magento, Shopify, Squarespace, Tumblr, Typepad, Weebly, Wix and WordPress. It allows you to create share buttons for over 80 social networks in different configurations.
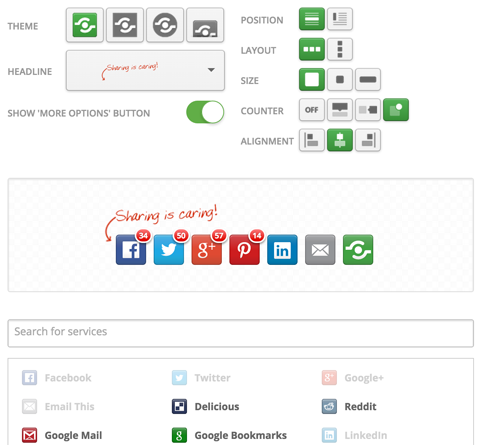
There are also extensions like Filament that work on any website and allow you to create “flare” social sharing buttons that tally up your total shares across the social networks you've selected.

The advantage of using a social sharing platform (like Shareaholic, Filament or others) rather than installing the buttons manually is the analytics. Look for platforms that will help you learn more about how your content is shared and who shares it.

Also, be sure to experiment with the social networks you include in your social sharing buttons. You want to use the social networks that get the most shares and drive the most traffic to your content.
#6: Install Content Analytics
Besides social sharing analytics, there are several additional analytics tools you will want to set up on your blog to see how well your content performs.
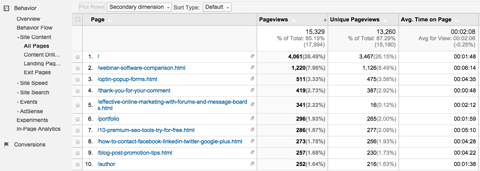
First, start with Google Analytics. The Behavior reports show you details about the traffic your content receives.
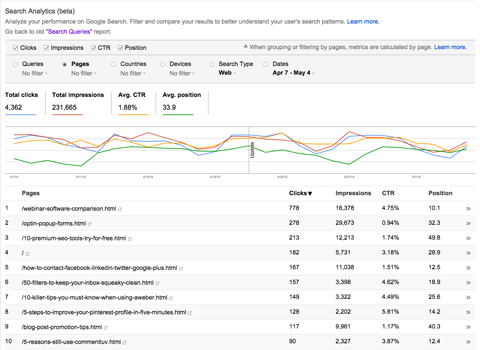
Next, make use of Google Webmaster Tools. The new Search Analytics report shows you how your content performs in search based on the number of times seen, the number of clicks and the average position in search.
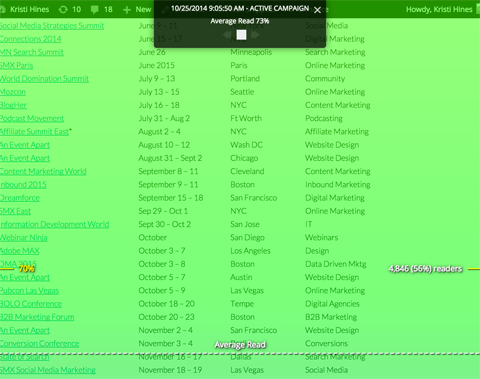
You can also add SumoMe’s Content Analytics, which will show you how many readers make it through each piece of content.
Each of these tools can help you optimize your content marketing strategy to ensure that you're getting the best results from your blog posts.
#7: Create Unique User Accounts
If you have multiple people blogging for your company, whether they're employees, guests or freelance writers, create a new user account for each person. Platforms like WordPress allow each author to have a custom author bio with their posts and an author page that archives all of their articles.

In addition, when people search for the author in Google, they might stumble upon your blog.
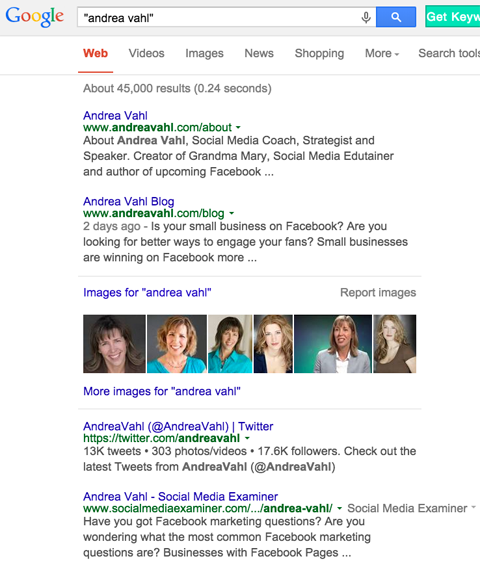
If you have dozens of popular authors, this will allow you to get additional visibility in search and increased traffic to your blog.
Conclusion
There are many ways to set up a blog for your business. These tips will help you create a blog that gets specific results.
What do you think? What are the essentials that you have set up on your blog? Please share your thoughts in the comments!
TechCrunch, Hootsuite Blog and Zapier Blog images created with Placeit.
Attention Agency Owners, Brand Marketers, and Consultants

Introducing the Marketing Agency Show–our newest podcast designed to explore the struggles of agency marketers.
Join show host and agency owner, Brooke Sellas, as she interviews agency marketers and digs deep into their biggest challenges. Explore topics like navigating rough economic times, leveraging AI, service diversification, client acquisition, and much more.
Just pull up your favorite podcast app, search for Marketing Agency Show and start listening. Or click the button below for more information.