 Do you want to create stronger Instagram story content? Looking for tools to help enhance and edit your stories?
In this article, you'll find five Instagram Stories apps for creating an attractive and engaging story.
#1: A Color Story
Using eye-catching visuals in your Instagram stories helps keep people engaged with your content. A Color Story, created by the same folks behind A Beautiful Mess, enhances the colors in your photos and lets you add a variety of visual effects such as flares, light leaks, and color fogs. The heart of the app is the four main tools—brushes, fonts, designs, and stickers—that allow you to edit to your heart's content.
A Color Story is available for both iOS and Android. While the app is free, some excellent add-on features are available for purchase in individual packs (starting at $0.99). Or you can get access to all of the filters/effects packs with an ACS+ subscription ($24.99/year; available as a free 3-day trial).
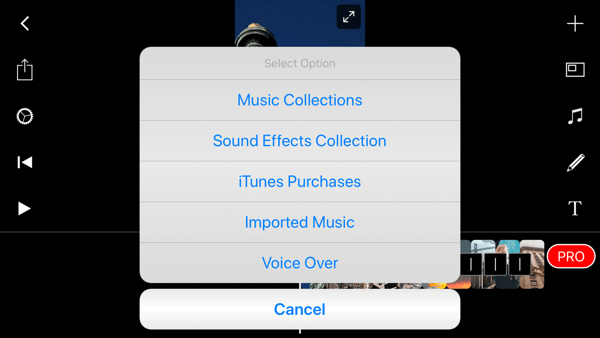
When you first open the app, you can choose from three options to upload a photo:
- Pick a photo or video from an album on your phone.
- Access your camera to take a photo.
- Select multiple photos or videos to batch-edit at one time.

Once you select a photo, you see basic editing tools that allow you to crop, rotate, or straighten the image and more. When you're done making changes, tap Continue.

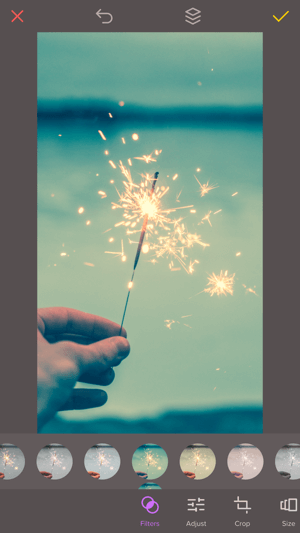
Now you can access filters, effects, and tools to enhance your photo. For this example, I tapped Effects and then Starter.

I chose the Flare effect to add some light sparkles to one of the champagne glasses. After you add an effect, tap and drag the effect to reposition it on the photo. Drag the slider below the photo to adjust the effect's intensity.

You also can mirror and flip the effect. After you make your changes, tap the checkmark to save them.
Which AI Moves Actually Matter?
That's what every marketer is wrestling with now. New AI strategies, new tools, new takes every week — but no clarity. Most marketers and business owners are trying to figure out AI alone.The AI Business Society is your trusted guide. Get expert-led training you can put to work immediately. Plus a community of marketers sharing what's actually working.
I'M READY FOR REAL AI RESULTS
If you want to adjust the color and saturation of the image, tap the Tool icon (the wrench) and then tap the color wheel. Select a color and drag the hue, saturation, and luminance sliders until you get the look you want.

When you're happy with your photo, tap Review in the top-right of the screen to save the image to your camera roll.
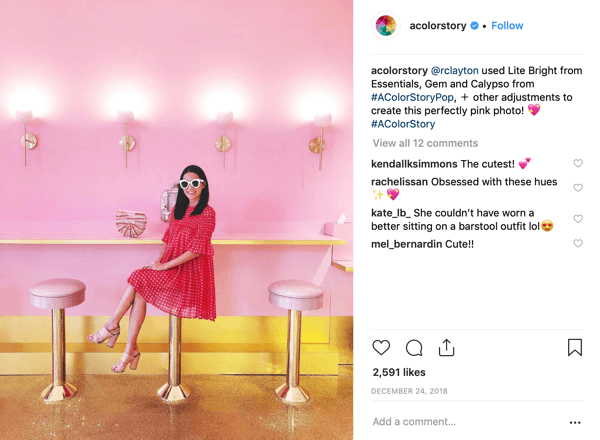
Tag your Instagram photos with the hashtag #AColorStory for a chance to get featured by @acolorstory. Their Instagram account also walks through how to use different app features.
#2: Splice
Splice is a free iOS app from the makers of GoPro that makes it easy to create vertical video from photos and video clips. One of my favorite features is the ability to add music from the in-app library or from iTunes. You can also crop and trim your content; add titles, animations, and effects; change speeds; and more. Go to #spliceapp to see what others are creating for inspiration!
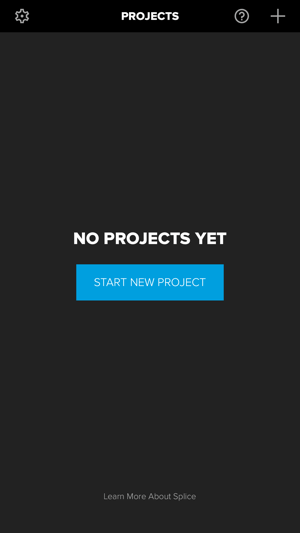
Get started by uploading your video into the app or create the video within the app. When you open the app, tap Start a New Project.
Then select the photos or videos you want to use. Choose as many as you'd like, but I've found picking 8-10 photos or short video clips is ideal. Remember, this is a video that you'll share on Instagram Stories so try to keep the finished video to under 1 minute.
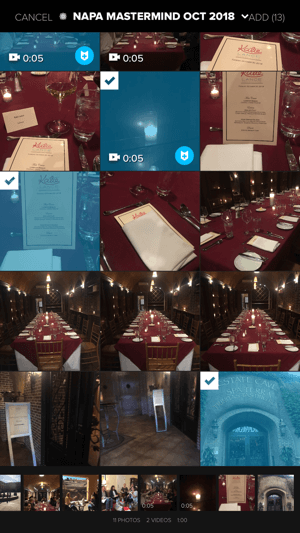
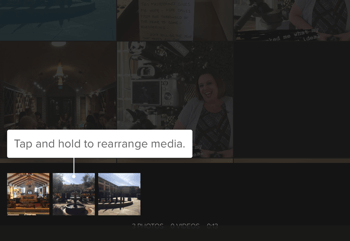
You can easily rearrange your media in any order you'd like. Just tap and drag the image or video to move it. When you're done, tap Add at the top of the screen.
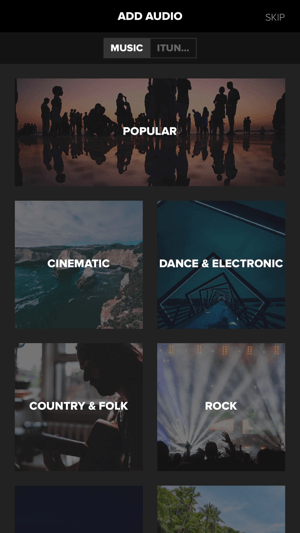
Next, you have the option to add music. Choose a music selection from the Splice library or connect your iTunes account to add music from your library (subject to copyright).
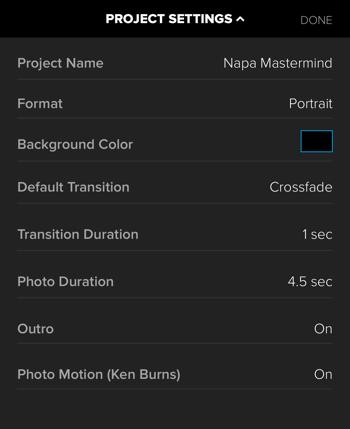
The last step is to choose your project settings. Type in a name for your project and make sure you choose Portrait mode for Instagram Stories. When you're finished, tap Done.
On the next screen, you see your completed video along with a timeline. Tap the Play button on the video to preview it. If you want to change the order of elements in your video, simply tap and drag the tiles to the desired position on the timeline.
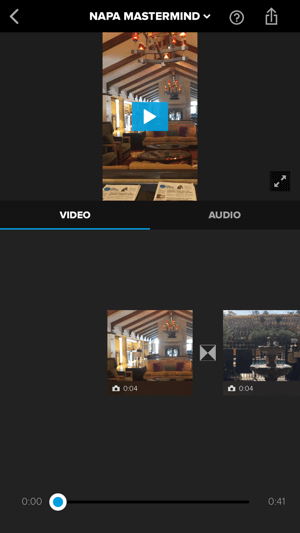
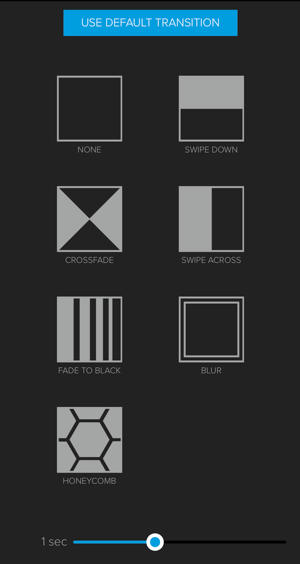
Tap the icon between tiles to select a different transition type.
To edit the video, tap the tile for the content you want to edit and then tap Edit Photo. From here, you see options to apply a filter, change the duration, add text, or turn photo motion on or off.
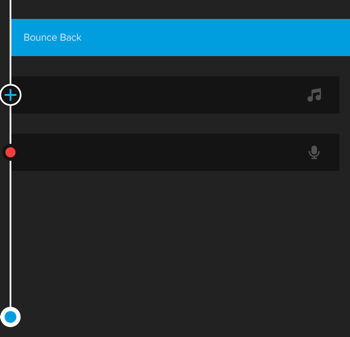
On the Audio tab, you can change the volume and duration of the music you added to the video. If you want to record a voiceover, tap the red dot and start speaking.
When you're happy with your video, tap the arrow button in the top-right corner of the screen to download your finished video. Then you can upload it to your Instagram story and add any text, GIFs, or other details that you'd like. I love how simple this app is to use.
#3: Unfold
When I discovered Unfold (available for free on iOS and Android), I was thrilled. I was looking for an app that would allow me to create collages inside Instagram Stories, and Unfold does that and so much more. It has a library of clean, modern templates, both free and paid. What I love about this app is that it's perfect for creating a cohesive story.
If you're sharing the story of your product or service, this app makes it easy to create a multi-piece story that's still on-brand. You can edit the text, fonts, and size. Unfold also lets you preview your story with Story mode, giving you a chance to see how your stories will look on Instagram before hitting Post—a marketer's dream!
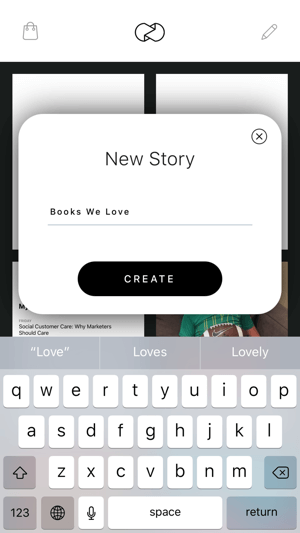
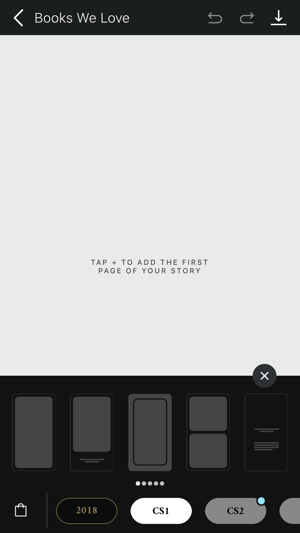
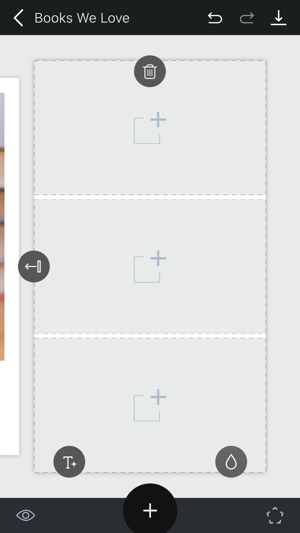
Here's how simple it is to create a story using Unfold. Open the app and tap on the + button to create a new story. In the pop-up, type a name for your story and tap Create.
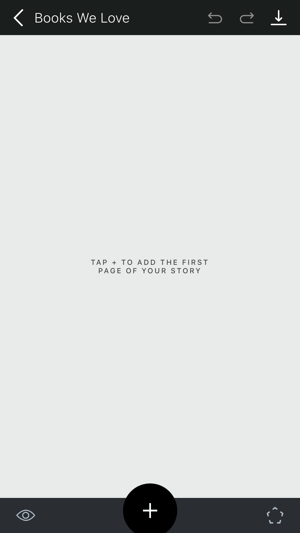
Now tap the + button to add the first page of your story.
At the bottom of the screen, choose a layout. If you're creating a collage, select a layout with the number of image containers you want to use.
Pro Tip: Make sure the photos you're going to use in your project are in the proper orientation: vertical or horizontal. You can't flip photos once you place them in the app.
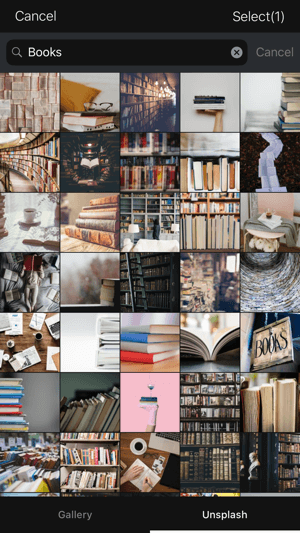
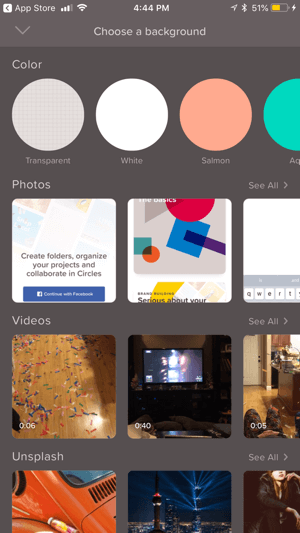
Next, tap the + sign to add a photo to your project. You can choose photos from your camera roll on the Gallery tab, or if you need some killer stock photos, Unsplash is built right into the app! Open the Unsplash tab and you'll see gorgeous stock photos to choose from. Use the search box to find the right one for your story. When you're done, tap Select in the top right of the screen.
3 Days of World-Class Training—Zero Travel!

Couldn't make it to Social Media Marketing World and AI Business World this year? Get all of the great content at a fraction of the price with a Virtual ticket.
That’s full access to recordings of every keynote, workshop, and session—the ones people travel thousands of miles to see. Don't wait. Get your Virtual ticket and enjoy actionable content that you can watch anytime, anywhere.
Once you pick your template and photo, you can move the photo to exactly where you'd like it or pinch to resize it.
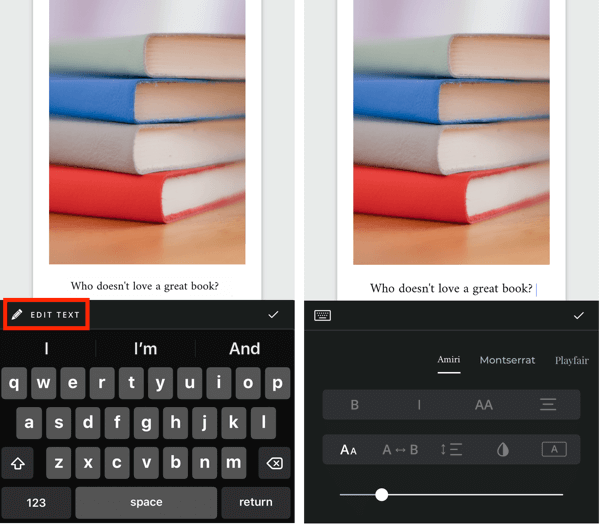
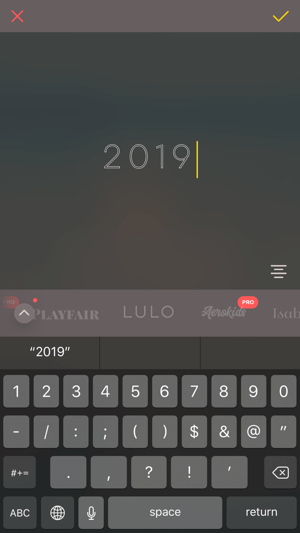
To add text, tap the shape icon in the lower-right corner and then tap the T+ icon. Double-tap on the placeholder text to edit it. Tap Edit Text to reveal options for changing the font and point size. Increasing the spacing helps a lot!
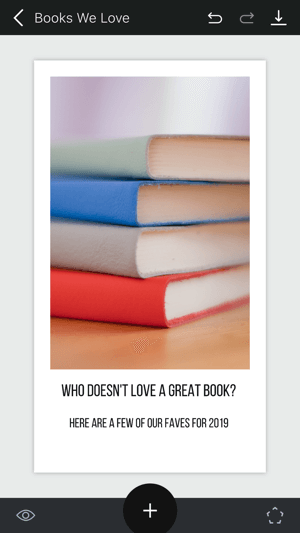
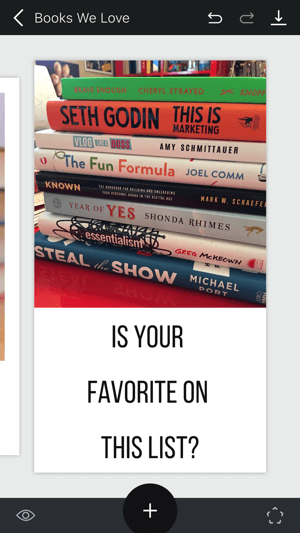
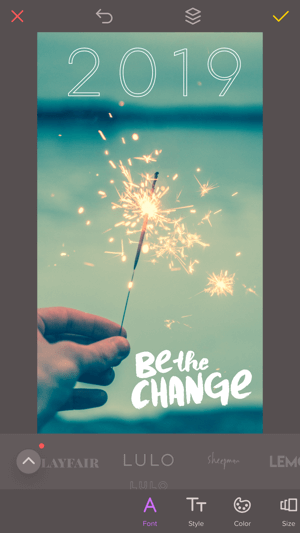
Here's an example of the beginning of a story after I picked the template, added text, and changed the fonts. This app works really well if you think about your story having a beginning, middle, and end. Tap the + icon at the bottom of the screen to add pages to your story.
If you pick a template you find doesn't work, simply tap the trash can icon to remove the page from your story. Easy!
For this story, I decided to have the next part highlight all of the books I wanted to mention. I added the photo below and then the text in a large font that coordinated with the rest of the story.
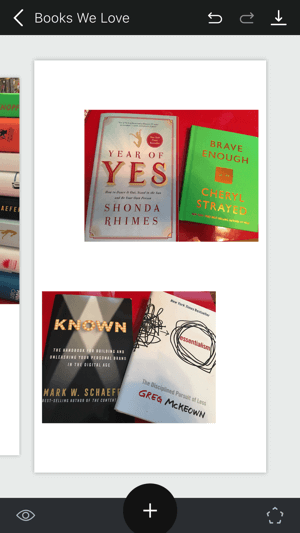
The next few templates highlight some of the books. You can see I picked templates with a lot of white space. Once I save this project and add it to my Instagram story, I'll go in and tag each author.
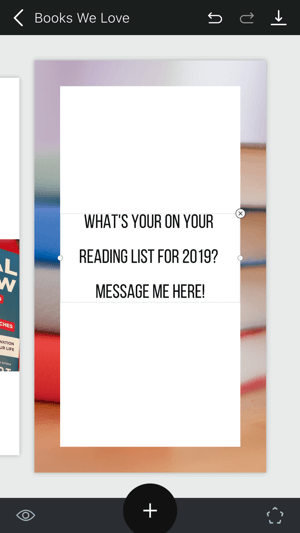
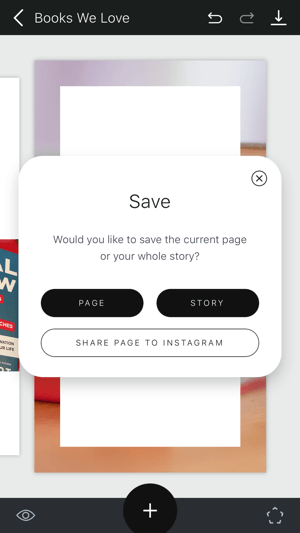
The last piece of my story uses the same image from the first part to tie it all together. I also added a call to action.
The last step is to tap the arrow button at the top-right corner of the screen to save your story. You can save the complete story or just part of it. Then go to your Instagram Stories and upload your complete story!
#4: Filmmaker Pro
If you love the look of professional video content, I recommend checking out Filmmaker Pro (available for free for iOS). This is one of the best apps for Instagram Stories because you can create professional video content right from your mobile device.
This robust app includes tons of options and tools, including expertly crafted filters, transitions, text overlays, and more. Upgrade to a paid subscription (starting at $3/month) to remove the watermark, get access to additional fonts and music, and more. Note that this is a horizontal editor, but you can use it to edit vertical video.
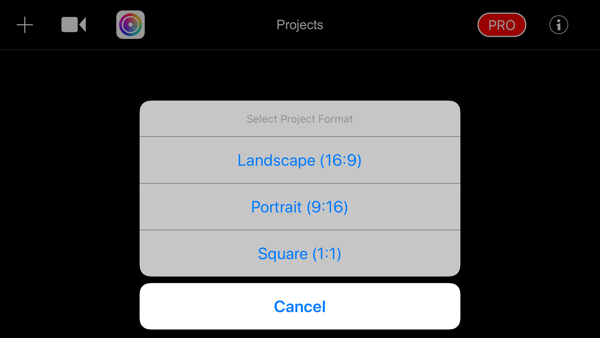
To create a quick vertical video using Filmmaker Pro, tap the + sign to start a new project. Then choose your orientation from the pop-up menu. For Instagram Stories, choose Portrait.
The next screen walks you through the navigation and editing options. Tap the + sign to start. In the pop-up menu, indicate what type of media you want to import (photos for this example).
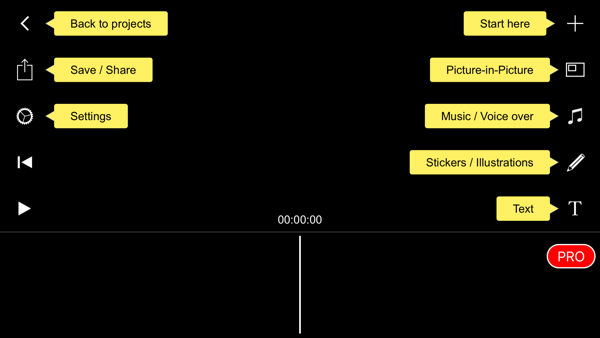
Next, decide how long the photos will appear in the video. Typically 1 second works best for Instagram Stories.

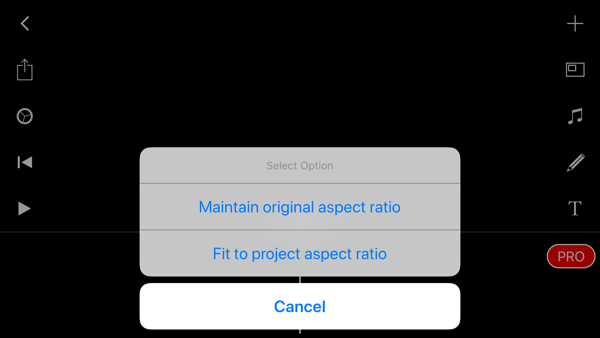
The next step is to pick an aspect ratio option. I like to choose Fit to Project Aspect Ratio, so all of the photos/videos I choose will be cropped into vertical video.
Now select the photos you want to import. When the app is done importing your visuals, you can tap the music note icon to add music or tap the pencil icon to make drawings if you want.
To add text overlay, tap the T icon and then double-tap on the screen to edit the text.

When you're happy with your video, tap the upload icon on the left to save the video to your camera roll. Then upload it to Instagram Stories!
#5: Over
Over (available for iOS and Android) has been a favorite on my iPhone for years and the makers have given it a big makeover. It's an ideal app for creating unique and engaging Instagram stories, and offers text and graphic options that you can overlay easily onto your photos and videos.
You'll love the templates the app offers or you can simply start from scratch. Over is available for free, but the Pro plan offers valuable features for brands such as the ability to upload your own logo and brand fonts, collaborate with your team, and more. Check out the community hashtag #bestofover for inspiration.
When you open up the app, tap the Create icon in the toolbar at the bottom of the screen.
From here, you have a lot of options. I like to start with a blank transparent background and build my Instagram story from there.
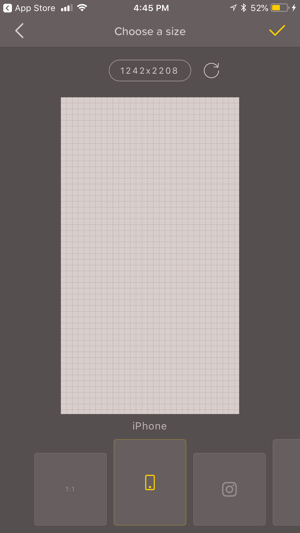
Next, choose a size for your project. I chose the iPhone template for Instagram Stories. You can create graphics in many different sizes quickly and easily with Over, making it a great tool for marketers.
Now comes the fun part. Tap Image in the toolbar to add a photo from your camera roll and then choose one of the filters to enhance it. I'm impressed with how many free options this app offers (although I've paid for a few upgraded fonts).
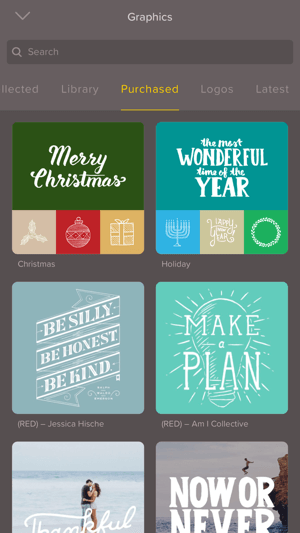
Tap Graphics to access a free library of graphics you can use and graphics available for purchase. Any graphics you've purchased are available on the Purchased tab. If you have the Pro account, you can add your logo on the Logos tab.
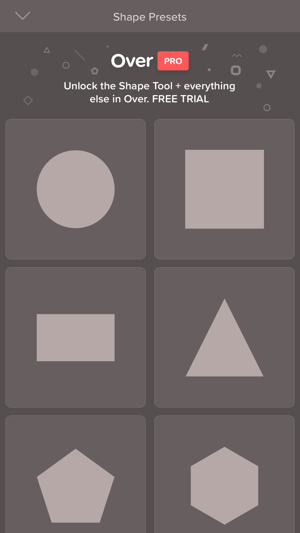
With the Pro plan, you get access to the Shape tool. This works well for adding a callout on your Instagram stories.
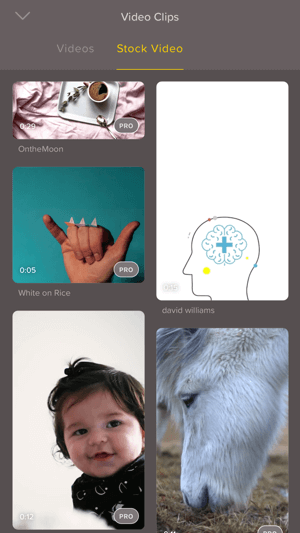
Another free option is to incorporate video. Tap the Video icon on the toolbar to access the stock video library or choose a video of your own.
If you want to add text and select fonts, tap the Text icon.
When you're happy with your design, tap the icon in the top right of the screen to save it to your camera roll. Then upload it to your Instagram story.
Conclusion
With more than 300M users, Instagram Stories has exploded in popularity and it's one of the best ways for marketers to connect with consumers. According to Brandwatch, the top types of Stories content for brands are product promotions, inside looks, and influencer takeovers. The five apps above will help you create your own professional and engaging Instagram Stories content.
What do you think? Are you inspired? Do you use any of the apps featured here? Please share your thoughts in the comments below.
More articles on using Instagram Stories for business:
- Discover a step-by-step plan to drive traffic to your opt-in form using Instagram Stories.
- Learn six tricks for enhancing Instagram Stories that will engage your audience.
- Find out how to add clickable location stickers and hashtags to your Instagram stories.

Curious About How to Use AI?
Our newest show, AI Explored, might be just what you're looking for. It's for marketers, creators, and entrepreneurs who want to understand how to use AI in their business.
It's hosted by Michael Stelzner and explores this exciting new frontier in easy-to-understand terms.
Pull up your favorite podcast app and search for AI Explored. Or click the button below for more information.
