 Are you looking for a better way to manage your Facebook ads?
Do you want access to new Facebook advertising features as soon as they’re available?
Facebook offers a powerful and often overlooked way for marketers to do amazing things with ads.
In this article I'll show you what Power Editor is, explore its benefits and show you how you can create campaigns using Power Editor.
What Is Power Editor?
The most powerful way to target your ideal audience on Facebook is with Facebook ads.
But clicking the “Boost Post” button and using the self-serve ad tool only scratches the surface. If you want to thrive and direct profits with your Facebook ads, you need to use Power Editor.
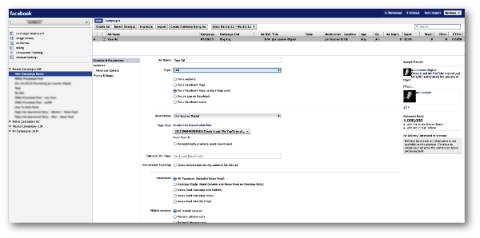
Power Editor is a free browser plugin created by Facebook that lets you bulk-edit your ads. It was initially created as a Chrome plugin. Although it does sporadically work in other browsers, you’ll likely want to use the Chrome browser when working with Power Editor.
Go to Facebook.com/powereditor to test your browser or install the plugin.
But Power Editor is much more than just a bulk ad editor. It has many advantages over Facebook’s self-serve ad tool used by the vast majority of Facebook advertisers.
Here are the benefits of using Power Editor for your Facebook ads.
#1: Get Access to Latest Features
When Facebook rolls out new advanced features, they’re sent first to the Facebook ads API (which goes to third-party tools) and Power Editor. As a result, marketers using Power Editor tend to get these features well before those who use the self-serve ad tool exclusively.
Here are some examples of features you can currently find in Power Editor, but not in the self-serve ad tool:
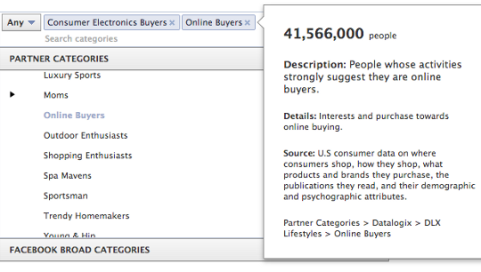
Partner Categories: Facebook has partnered with three data-mining companies (Axciom, Datalogix and Epsilon) that collect mounds of data on users related to purchase history and lifestyle. Facebook uses this data to let advertisers do some powerful ad targeting with more than 500 categories.
Here’s a sampling of the targeting you can do with the help of Partner Categories:
Get World-Class Marketing Training — All Year Long!
Are you facing doubt, uncertainty, or overwhelm? The Social Media Marketing Society can help.
Each month, you’ll receive training from trusted marketing experts, covering everything from AI to organic social marketing. When you join, you’ll also get immediate access to:
- A library of 100+ marketing trainings
- A community of like-minded marketers
- Monthly online community meetups
- Relevant news and trends updates
- Household size of 6 (8,842,800 users)
- Upscale department store credit card user (34,618,400 users)
- Home office supply purchases (2,638,300 users)
- Aftermarket vehicle purchase over 48 months ago (11,952,800 users)
- Baby food and products buyers (10,497,100 users)
- Casino vacations (4,242,000 users)
- Dog owner (12,643,500 users)
- Fitness buyers—runners (5,950,600 users)
- Teacher/educator (223,000 users)
- Donate to veteran causes (7,016,400 users)
While Precise Interest and Broad Category targeting are dependent on users keeping their profiles updated, Partner Category targeting is based on a user’s actual buying history and completion of surveys.
Lookalike Audiences: Facebook’s recent rollout of Custom Audiences to the self-serve ad tool lets advertisers upload their customer lists into Facebook to target those users with ads.
Power Editor’s Lookalike Audiences builds a similar list of Facebook users based on your customer list.
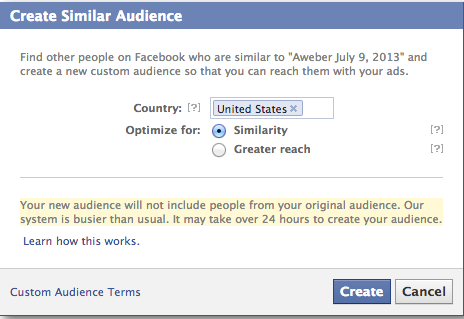
This can be useful for advertisers with small customer lists that are quickly exhausted. Facebook will review your customer list and find either the top 1% (focused on similarity) or 5% (focused on reach) of users similar to those customers whom you can then target with advertising.
Saved Audiences (or Saved Target Groups): A successful Facebook ad takes time to create because you enter all of the relevant targeting parameters. This could include the following:
- Countries/States/Cities
- Gender
- Precise Interests
- Broad Categories
- Partner Categories
- Connections (Fans, Not Fans, Friends of Fans)
- Custom Audiences/Excluded Audiences
- Relationships and Relationship Interests
- Languages
- Education
- Workplaces
That’s a lot of information and it’s a pain to re-enter this every time you create a new ad within the self-serve ad tool.
Within Power Editor, all you need to do is create a Saved Audience (also known as a Saved Target Group). Once you create a Saved Audience, you save a lot of time in the ad-creation process.

While on the Audience tab, simply select your Saved Audience and Facebook will automatically prefill all of the necessary fields for you (more on this when we step through creating ads later).
Domain Sponsored Stories: This is a powerful tool that not nearly enough advertisers know about. It’s a great way to drive traffic to your website.
Whenever a user shares a link to your website, a story is created. If you set up a Domain Sponsored Story, Facebook will then turn that share into an ad.
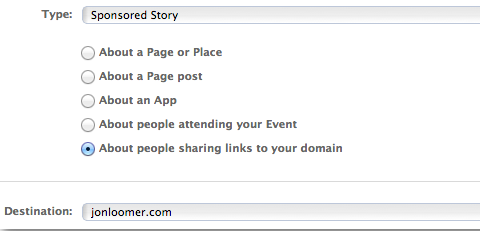
This is not connected in any way to your Facebook Page. The shining star of the ad is your friend and the link to your website. As a result, it’s more effective than a Page Post Sponsored Story at driving traffic to your website.
Conversion Specs: You’ll read more about this in a bit, but Conversion Specs allow you to get very granular within your ad bidding. You can optimize for specific actions like link clicks, video plays or post stories instead of relying on Facebook default optimization.
Others: This is constantly evolving. At one point, features like Conversion Tracking and Custom Audiences were available within Power Editor, but not the self-serve ad tool. If you want to get the cool features first, you need to use Power Editor!
#2: Control Ad Placement
Aside from new features, another reason to use Power Editor over the self-serve ad tool is the control you gain over placement of your ads.

Within Power Editor, you can target the appearance of your ads as follows:
- All Placements
- Desktop Only (Right-hand column and news feed)
- All News Feed (desktop and mobile)
- Desktop News Feed Only
- Mobile News Feed Only
Let’s take it a step further. Say you want to target mobile devices, but only particular mobile devices. This can be helpful when promoting an iPhone app, for example.
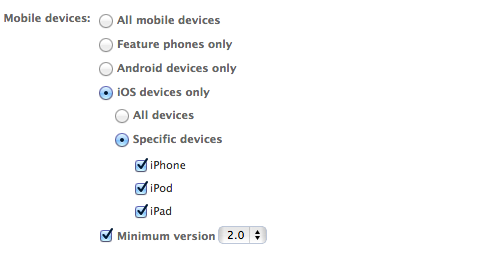
You have the ability to target specific devices (feature phones only, Android phones only or iOS devices only) and even drill down into the models of those phones and OS versions.
If you use the new Facebook ads reports, you can quickly determine which placements are providing the best bang for your buck so you can optimize accordingly.
#3: Optimize Your Ad Bidding
Here’s more about the ability to use a feature within Power Editor that I mentioned earlier called Conversion Specs. This Conversion Specs feature is not available in the self-serve ad tool. You need the Power Editor to use it. Let’s dig into what that means.
Note that within Facebook’s self-serve ad tool, you can only bid based on Optimized CPM (optimized for a specific action), CPM (cost per 1,000 impressions), CPC (cost per click) and Optimized CPC (optimized for clicks).
Within Power Editor, you can do the following:
- CPC (cost per click)
- CPM (cost per thousand impressions)
- Optimized CPM (optimized for a specific action)
In addition, within this Optimized CPM, you can choose from using default bids or manually set up bids to optimize for any of the following:
- Clicks
- Reach
- Social
- Actions
This is where it really gets fun. You can use either the default conversion specs or manually set up conversion specs.

Discover Proven Marketing Strategies and Tips
Want to go even deeper with your marketing? Check out the Social Media Marketing Podcast! Publishing weekly since 2012, the Social Media Marketing Podcast helps you navigate the constantly changing marketing jungle, with expert interviews from marketing pros.
But don’t let the name fool you. This show is about a lot more than just social media marketing. With over 600 episodes and millions of downloads each year, this show has been a trusted source for marketers for well over a decade.
You see, by default your ad is optimized for getting more Page likes if that’s your goal or for getting more engagement if you're promoting a post.
But what if you want to optimize for something else? In the image below is an example of an ad that's automatically optimized for engagement.

As you can see, the action type is “post_engagement.” You can edit this to optimize for another type of action.
Here are examples of codes you can enter to optimize for something other than general post engagement:
- comment (post comments)
- like (post likes)
- link_click (clicks on links leading to an external website)
- photo_view (views of post photo)
- post (post shares)
- post_engagement (general post engagement including any clicks)
- post_story (post stories including likes, comments and shares)
- receive_offer (offer claim)
- video_play (plays of your post video)
#4: Save Time With Bulk Editing
The Bulk Editing feature is a quick and easy way to shave off a few minutes from managing your ads.
Let’s say you create a campaign with five ads in it. All of those ads include the United States and Canada as your target countries. After looking through your results, you decide to target only the United States.
You could go into each ad individually and change your targeting or use Power Editor to highlight each ad and change one. That change will apply to all five ads.
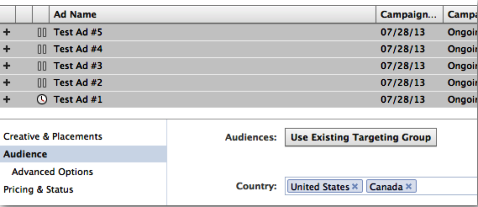
You can also quickly duplicate a campaign and all of the ads within it by clicking the “Duplicate” button while viewing the campaign.

Or you can duplicate an individual ad by clicking the “Duplicate” button while viewing the ad.

#5: Create a Campaign With Power Editor
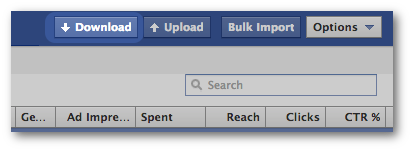
First, make sure you click the “Download” button at the top right before you get started. This updates Power Editor on all recent activity you’ve had on Facebook and includes creating ads elsewhere, creating posts that can be promoted or creating tabs that could serve as a destination.
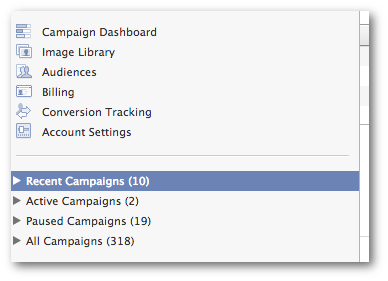
Now go ahead and highlight either “Recent Campaigns” or “Active Campaigns” on the left.
Then click the “Create Campaign” button at the top.

Now select this new campaign on the left and simply fill in a few minor details.
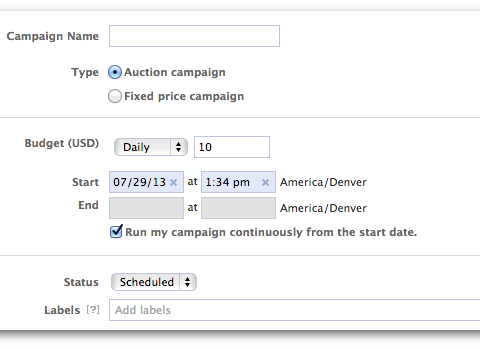
- Campaign Name: Name your campaign something descriptive to make it easy to pick out later.
- Budget: Set a daily or lifetime budget. This is the maximum that Facebook will bill you in a day or from start to finish.
- Start/End: Set a start and end date and time. You can choose to run continuously without an end date if you choose.
- Labels: This is a way to help organize your campaign into groups. Feel free to add a label here to help keep similar campaigns together.
That’s it! Creating a campaign is pretty dang easy.
#6: Create an Ad With Power Editor
Here’s how to create your ad in Power Editor. First, make sure that your new campaign is selected on the left. Then click “Ads” at the top and “Create Ad.”
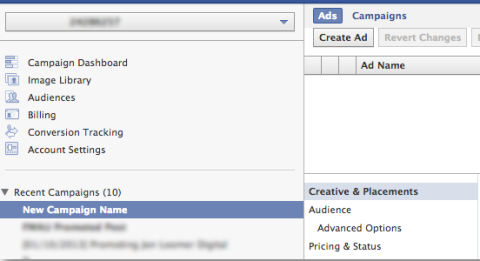
Your new ad is then broken up into three main sections and one subsection:
- Creative & Placements
- Audience (including Advanced Options)
- Pricing & Status
The Creative & Placements view will look like this:
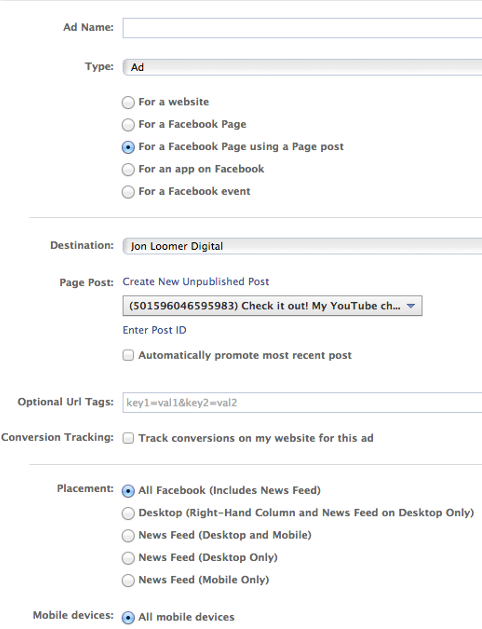
Here, you’ll need to provide the following:
- Ad Name (make it descriptive based on purpose, placement, bidding, etc.)
- Ad Type (Ad, Sponsored Story, Mobile Only Ad, Video Ad)
- Destination (Facebook Page)
- Page Post (if applicable)
- URL Tags (for tracking traffic to your website from ads)
- Conversion Tracking (for offsite conversions)
- Placement
- Mobile Devices
After reading this article on Power Editor, make sure you also experiment with different types of ads—particularly those classified as “Ad” and “Sponsored Story.”
The Audience view looks like this:
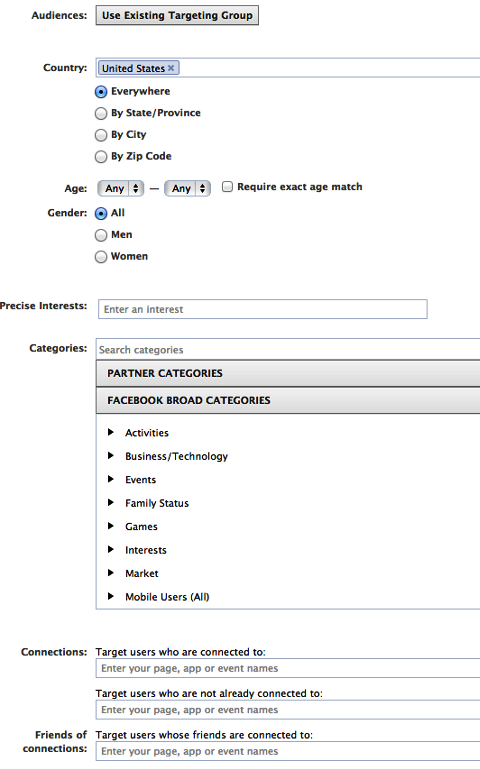
This is where you’ll do the bulk of your targeting by defining:
- Audiences (select a Saved Audience to quickly fill in targeting details)
- Country, State, City or Zip Code
- Age Range
- Gender
- Precise Interests (target by interests, activities, education, job titles or groups listed on timelines)
- Partner Categories (target based on buying histories and lifestyles)
- Broad Categories (target people who include information in their timelines related to these words or phrases)
- Connections (target users connected to your Page, not connected to your Page or who have friends connected to your Page)
The Advanced Options view looks like this:
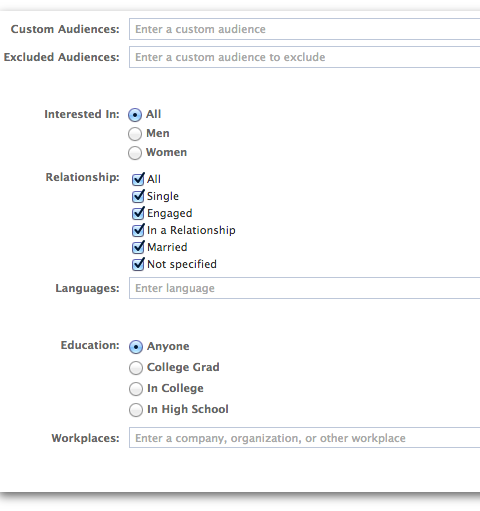
This is a continuation of the Audiences view. Target users based on the following:
- Custom Audiences (target users on your customer list)
- Excluded Audiences (exclude users on your customer list)
- Interested In (relationship interests)
- Relationships
- Languages
- Education
- Workplaces
It’s important to target languages here so that you don’t waste your money on people who can’t read your ad.
When you select one of the Education options, you can pick the precise school, graduation year and areas of study to target.
The Pricing & Status view looks like this:
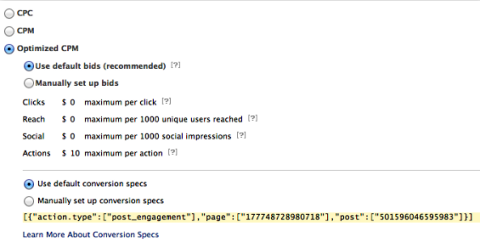
We already covered much of this under the Section #3: Optimize Your Bidding (above). But this is where you can really refine with your bidding.
- CPC (cost per click)
- CPM (cost per 1,000 impressions)
- Optimized CPM (optimized for a specific action)
I recommend split testing with each of these three options and that you consider manually assigning bids for a specific action to see what’s most efficient.
Make sure that you experiment with Conversion Specs to optimize your ad for the action that leads to success!
Don’t forget to click “Upload”!
When you’re finished creating your campaign, make sure to click the “Upload” button at the upper right-hand side.

Power Editor Results
Getting results with Facebook ads has a lot to do with whether you're properly using all of the best tools available to you. Create your ads in Power Editor and you’ll get great results.
What do you think? Do you use Power Editor? What results are you seeing with Facebook ads? Let me know in the comments below!
Attention Agency Owners, Brand Marketers, and Consultants

Introducing the Marketing Agency Show–our newest podcast designed to explore the struggles of agency marketers.
Join show host and agency owner, Brooke Sellas, as she interviews agency marketers and digs deep into their biggest challenges. Explore topics like navigating rough economic times, leveraging AI, service diversification, client acquisition, and much more.
Just pull up your favorite podcast app, search for Marketing Agency Show and start listening. Or click the button below for more information.

