Want more quality leads from Facebook? Are your Facebook lead forms set up properly?
In this article, you'll learn what type of Facebook lead form will yield the highest-quality leads, which pre-fill questions to include, and how to add custom questions that will pre-qualify your leads. You'll also discover the most important aspect of lead forms that many businesses overlook.
To learn how to optimize your Facebook lead forms, read the article below for an easy-to-follow walkthrough or watch this video:
#1: Create a New Facebook Lead Form
Facebook lead forms are a simple, streamlined way for people to sign up as a lead. The process takes place entirely on Facebook as opposed to using something like a landing page where people navigate off of Facebook to your website.
Sometimes the process of sending people to a landing page from Facebook can be problematic if your website or funnel isn't optimized for speed. It might take longer to load than the average person is willing to wait. With a Facebook lead form, the sign-up process is quick and easy.
To create a Facebook lead form, you need to go to the front end of your Facebook business page through Business Manager. In the menu at the top of the page, either click the Publishing Tools button or click the More button and choose Publishing Tools from the drop-down menu.

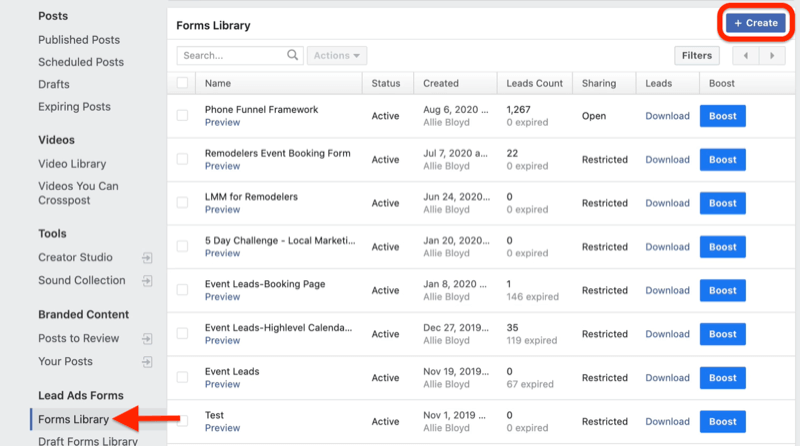
Once your publishing tools open, navigate to Forms Library on the left side of the screen. Then click Create on the right.
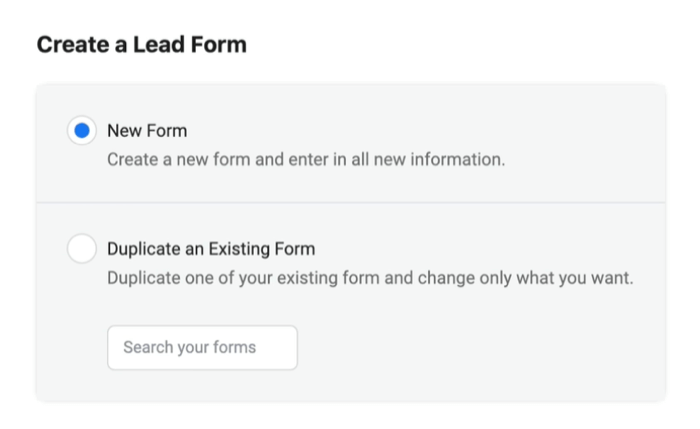
Next, you'll see the option to create a new lead form or duplicate an existing form (if you've previously created one). Click New Form.
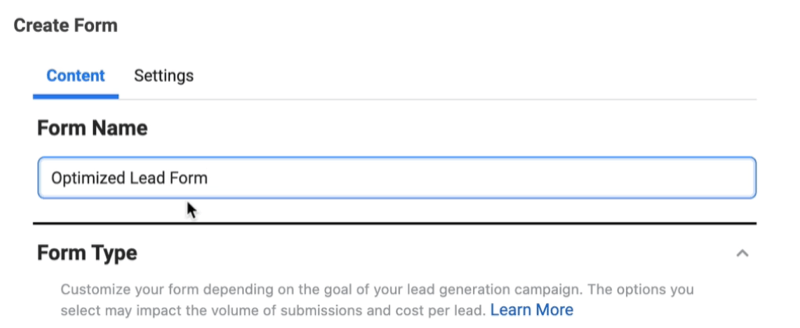
At the top of the Create Form window, name your form. Now you're ready to design your Facebook lead form.
Get World-Class Marketing Training — All Year Long!
Are you facing doubt, uncertainty, or overwhelm? The Social Media Marketing Society can help.
Each month, you’ll receive training from trusted marketing experts, covering everything from AI to organic social marketing. When you join, you’ll also get immediate access to:
- A library of 100+ marketing trainings
- A community of like-minded marketers
- Monthly online community meetups
- Relevant news and trends updates
#2: Design Your Facebook Lead Form
Often, people who've tried Facebook lead form ads complain that the leads are lower-quality or they cannot contact the lead later. Here's how to set up your lead form to get quality leads you can connect with.
Choose the Right Lead Form Type
You can choose from two types of Facebook lead forms. The first is More Volume, which is the default. This is typically what people go with when they create a lead form. If you just stick with the default, however, you may be making the wrong choice for your business.
With the More Volume option, signing up is literally a two-click process, which will allow a lot of lower-quality leads to come through. One reason for this is that people may have done it accidentally. Another is that because people don't have to go through a lot of steps to opt in, they don't necessarily have a strong commitment to the offer. While you can still get some good leads with the More Volume option, some may be less interested than you'd prefer.
I typically recommend going with the second option: Higher Intent. Going this route adds a step in your form that allows people to review their information before submitting it. So you're adding an extra button click and an additional screen for potential leads to navigate.

Add a Background Image and Text
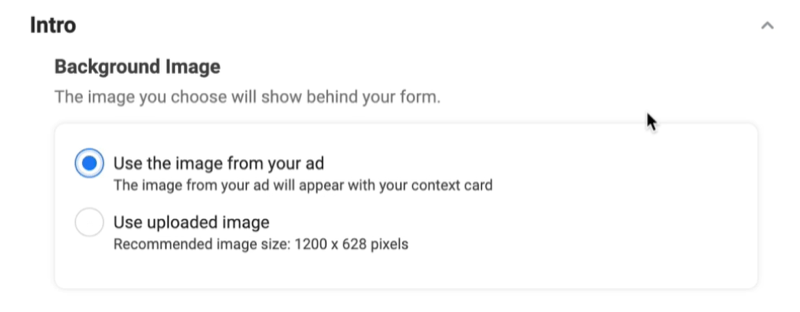
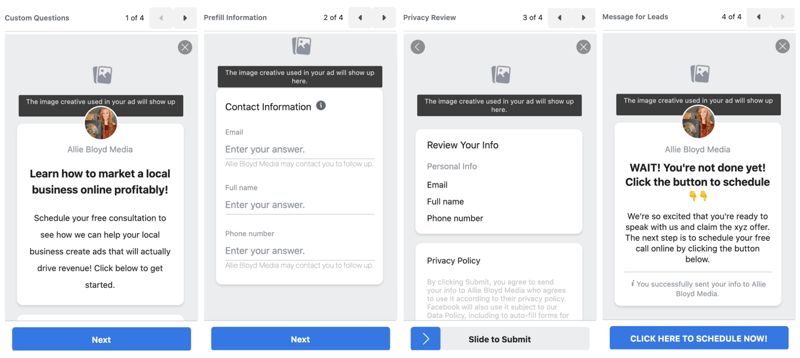
Now move to the Intro section, starting with the background image. This is the image that goes at the top of the form. You can either use the image from your Facebook ad or upload an image that will be on every ad, regardless of where people click from. For this example, you want to remind people why they're signing up so go with the image from your Facebook ad.
Next up is the Greeting section. Here you can add a headline of up to 60 characters and a description in paragraph or list form. Remember, your Facebook form is ultimately replacing a landing page that has a strong headline and opening sentence, paragraph, or call to action (CTA) so you need to put those same elements into your form.
I recommend using your headline to establish what people are signing up for and the benefits of this offer such as, “Learn how to market a local business online profitably.”
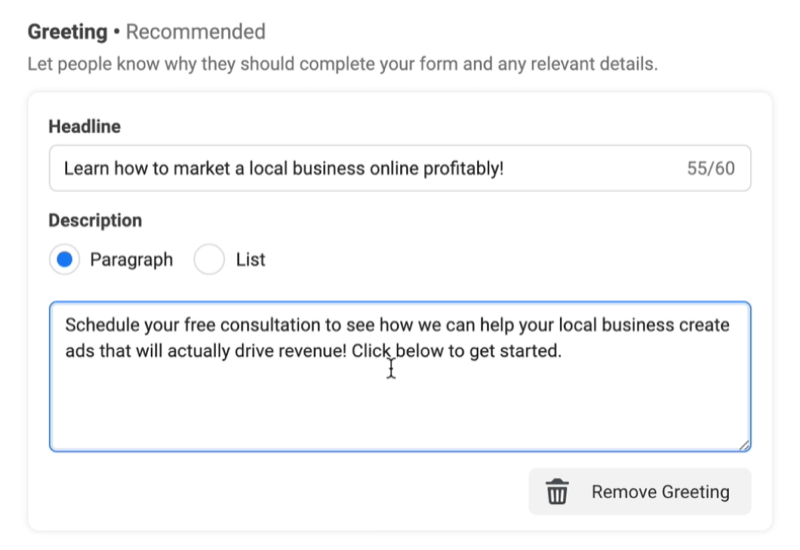
For the description, give people a reason to sign up. If you have a specific offer such as 0% interest financing or buy one get one free, focus on that.
Add Questions to Your Facebook Lead Form
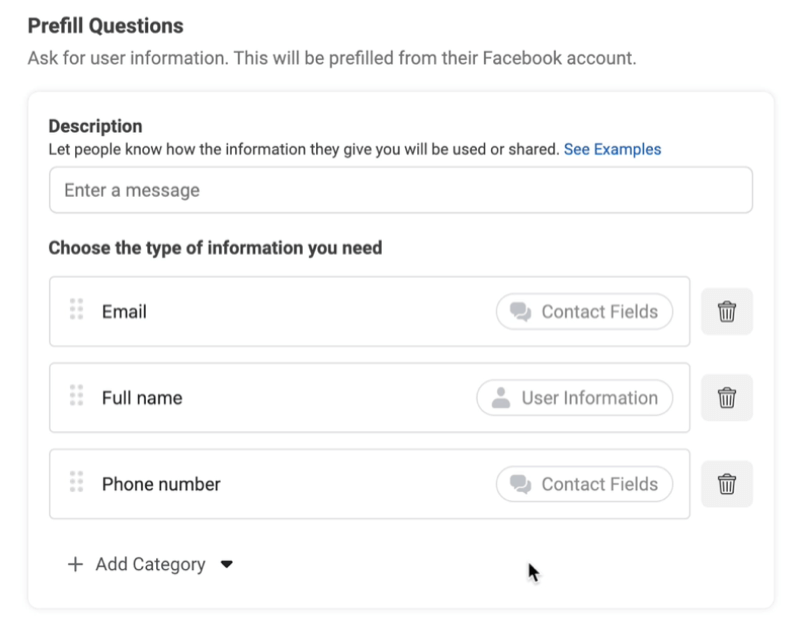
The next section is where you add questions to your Facebook lead form. The standard fields—name, email, and phone number—will be autofilled by Facebook. While this creates a more seamless signup experience, people also tend to skip over it without reviewing that information.
The email field is going to be incorrect more often than the phone number field. Phone numbers don't change nearly as often as email addresses do. And most people have connected their phone number at the request of Facebook prompts as a security measure.
Always include the phone number field on your form because it will give you the ability to send text messages to your leads. You want to use text messaging and phone calls as your primary methods of communication with leads because email addresses will frequently be incorrect.
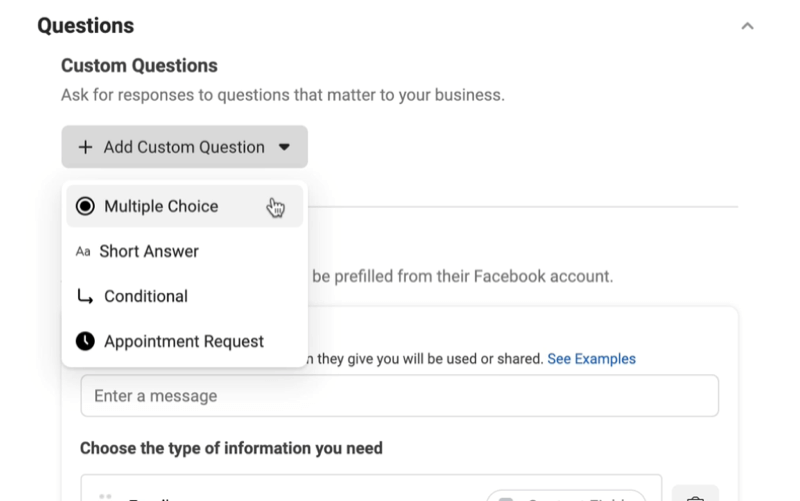
I highly encourage you to add some custom questions to your form, which will force people to actually engage with it. Facebook lets you add multiple choice questions, conditional questions, and appointment requests (which don't connect to a booking system or booking calendar). It's okay to add a few questions but don't go overboard.

Discover Proven Marketing Strategies and Tips
Want to go even deeper with your marketing? Check out the Social Media Marketing Podcast! Publishing weekly since 2012, the Social Media Marketing Podcast helps you navigate the constantly changing marketing jungle, with expert interviews from marketing pros.
But don’t let the name fool you. This show is about a lot more than just social media marketing. With over 600 episodes and millions of downloads each year, this show has been a trusted source for marketers for well over a decade.
Short answer questions are a great option because people have to type something in. Ask something that makes people really think about why they want to sign up such as, “Do you confirm that you'll answer the phone when we call?” If your potential lead doesn't actually want to talk to you, they'll realize at that moment that this isn't a form they need to fill out. Adding custom questions like this will help you weed out poor leads.
Link to Your Privacy Policy
After you've added questions to your form, move to the Privacy Policy section. If you're focusing on text message follow-up with new leads, you must have an appropriate privacy policy in place that covers your business and gives you the lead's permission. Add a link to the privacy policy on your website in the Link field.
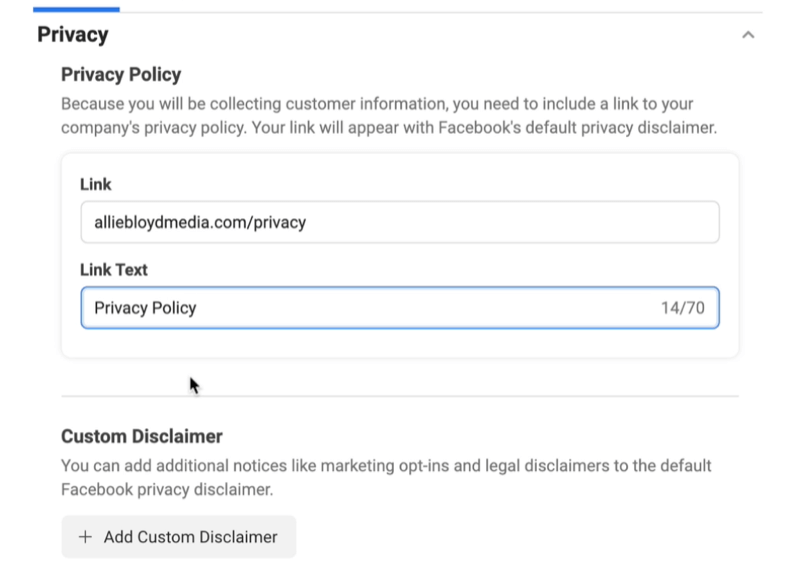
You can also add a custom disclaimer but only do that if you're legally required to do so. Otherwise, it will distract from your ultimate goal.
Next up is the review screen. You don't need to add anything here. This screen just allows the person signing up to review their email, name, and phone number. And if any of that information is incorrect, they can go back and fix it.
Add a CTA
The last section is for completion. You'll see fields for adding another headline and description, a CTA button, CTA text, and then you have an additional option depending on what that CTA is.
This is where marketers often make mistakes. They may say something like, “Visit our website to learn more” or something irrelevant to getting this lead to the next step. The headline we're going to use for this example is, “WAIT! You're not done yet! Click the button below to schedule.” I also like to use emojis because they're a bit different and draw people's attention.
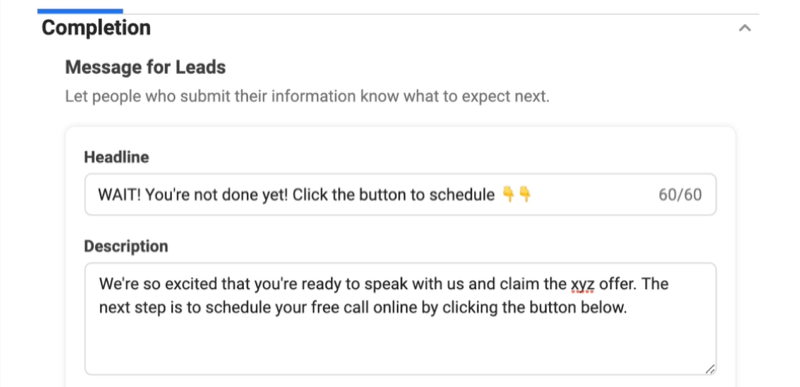
Depending on what you're asking people to opt into, tell them why there's another step in the description. You don't want to give a ton of details because all you care about in this moment is getting them to click the button.
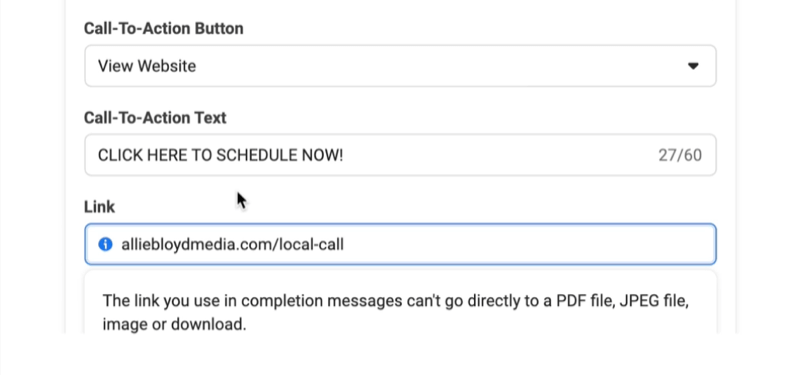
For the CTA text, let's go with View Website and change the CTA text from View Website to “CLICK HERE TO SCHEDULE NOW!”
Add a link that goes directly to the page with your calendar so your lead can select a date and time to book an appointment. Don't send them to the first page of your funnel; you already have their information. You need them to go one step further and schedule an appointment.
#3: Review and Publish Your Facebook Lead Form
Once you've completed your Facebook lead form, double-check that all of the options and links you've added are correct and rectify any errors that are flagged by Facebook. After you publish this form, you won't be able to go back and edit it. You can duplicate it but it will be a completely separate form. Having to duplicate an existing form adds steps and increases the likelihood you'll make a mistake and leads won't be delivered.
You may also want to check the Settings tab. This is where you can change the language of your form if you want to reach people who speak a language other than English. You can also add your tracking parameters here, so if you have additional forms, you'll be able to see which Facebook form is producing the leads that are ultimately converting.
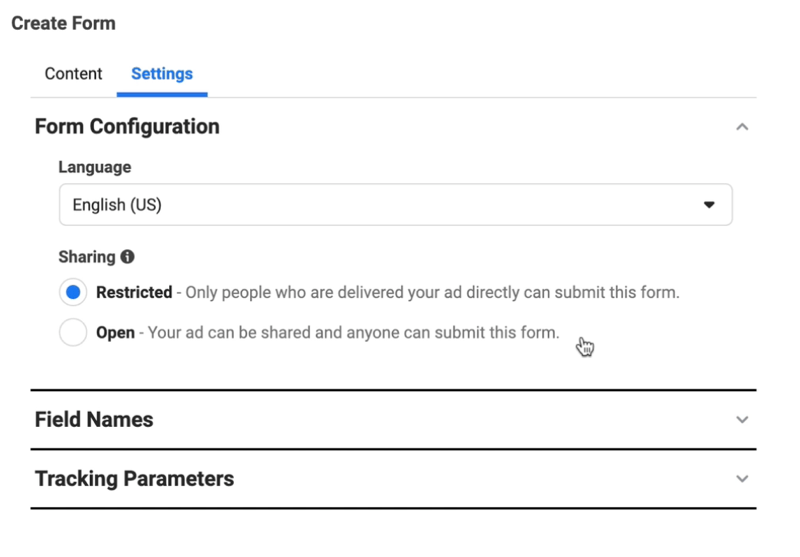
Another option is to change from Restricted to Open forms, which will allow anybody to see your form. Otherwise, the only people who are going to see it are those you served an ad to.
There's also an option to change the field names but that's probably not something you'll need to do.
If everything looks okay and you're ready to finalize your form, hit Publish. Your new form will then appear in your forms library and you'll be able to use it in your Facebook ads. If you save your form as a draft, you'll find it in the draft library.
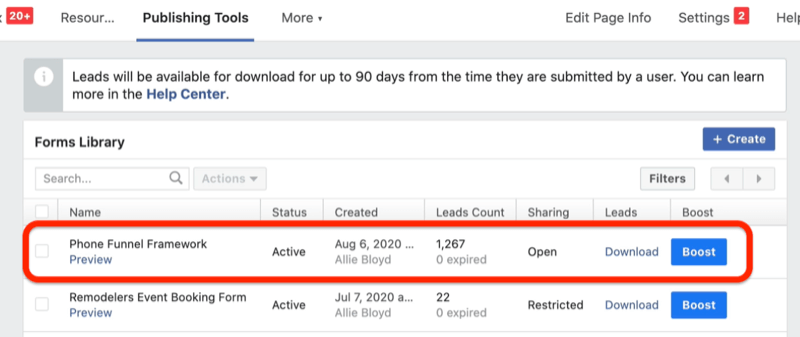
#4: Use Your Facebook Lead Form in an Ad
After you've published your form, it's ready to be used in a Facebook ad with the Lead Generation objective only. This is the only objective that allows you to use Facebook lead forms.
Once you launch a Facebook lead ad campaign and start generating leads, it's important to note that Facebook won't automatically notify you when you get leads. If you go to the Leads Setup section in your Publishing Tools, you can connect your CRM to Facebook so it will automatically notify you of new leads.
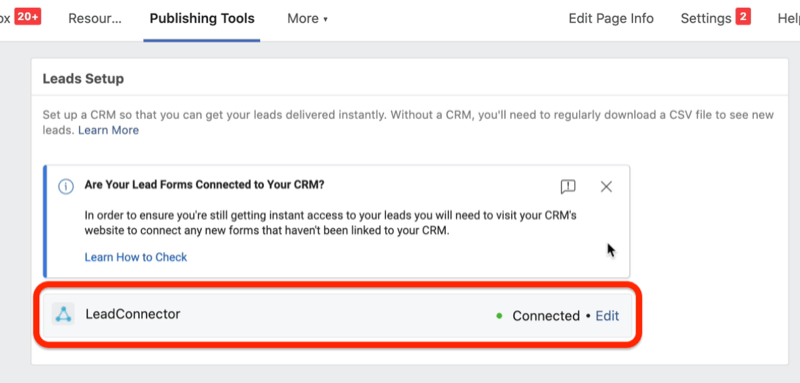
You could also connect your CRM with a platform like Zapier, or if you use a program that has a direct connection to lead forms, you can set it up that way.
Pro Tip: It's important to have a notification that comes to you when you get a new lead, preferably via email and text message, so you can follow up with them immediately.
Conclusion
Optimizing your Facebook forms is essential for driving quality leads—and ultimately sales—for your business. Make sure you choose the appropriate Facebook lead form type, include the right pre-fill questions, and add relevant custom questions to pre-qualify your leads. Also take steps to ensure you get notified via email and text about any new leads that come in so you can follow up right away.
What do you think? Which of these tips will you try to optimize your Facebook lead forms? Share your thoughts in the comments below.
More articles on Facebook ads:
- Learn how to write Facebook ads that reduce the barrier to purchase.
- Find out how to grow your email list with Facebook ads.
- Discover how much you should spend on Facebook ads.
Attention Agency Owners, Brand Marketers, and Consultants

Introducing the Marketing Agency Show–our newest podcast designed to explore the struggles of agency marketers.
Join show host and agency owner, Brooke Sellas, as she interviews agency marketers and digs deep into their biggest challenges. Explore topics like navigating rough economic times, leveraging AI, service diversification, client acquisition, and much more.
Just pull up your favorite podcast app, search for Marketing Agency Show and start listening. Or click the button below for more information.

