Is video an important part of your social media marketing? Looking for an efficient way to create video for multiple social platforms?
In this article, you'll discover a six-step video workflow to produce more social media video content for your business.
Why You Need a Social Video Workflow
You've heard the news: Video is king on social media. Unfortunately, picking up the crown to rule your own video kingdom isn't as simple as hitting Record on your camera. Here's why the social video landscape is more complicated and challenging than ever:
- Platform algorithms like LinkedIn and Facebook are prioritizing native video (content uploaded directly to their platform) over links to videos hosted off-platform.
- YouTube is still a juggernaut, but the treatment of creators on the platform and the value of the YouTube algorithm are controversial at best.
- The prevalence of mobile devices means we need to set aside classic video paradigms like aspect ratio and audio if we want to see the video engagement that gives us a preference in social media algorithms.
- Live streaming—whether through Facebook, Twitch, or even future contenders like LinkedIn—is still a big question mark for brands.
Capitalizing on these opportunities can mean revising your video production workflow. The good news is that social video presents a big opportunity for your business. The bad news is that your brand will lose if your video strategy is to export to widescreen, upload to YouTube, and then blast the link across your social media properties. Video is different now and here's how you should adapt.
When I talk with businesses about using more video, one of the biggest obstacles is production. Making great videos can be labor-intensive, and if you follow the recommendations in this article, you may be realizing you need to put even more time into creating your videos. Don't despair, though. There are ways to make this less painful.
What follows is the workflow my team uses to minimize the friction of creating social video on a consistent basis. This is, of course, not the end-all of how video teams should operate. However, if you're new to regularly producing social media video, it may help you skip many of the challenges that commonly disrupt teams.
Note: The software I cover in this article—Premiere Pro—is part of the Adobe Creative Cloud (available as a 7-day free trial, with plans starting at $20.99/month).
There are other tools you can use to edit videos and create images, but using some industry-standard tools allows you to do more involved projects in the future (without having to learn a new suite of tools). Also, in terms of efficiency, the tools within the Adobe Creative Cloud integrate well with each other, which can save you a lot of time.
#1: Shoot Your Video
Video snobs like myself fought the rise of vertical cellphone videos, and we lost. No matter how many times we commented about rotating the camera to film in widescreen, the vertical mobile habit couldn't be broken. Today, the whole of the mobile web experience is built around vertical screens, which means Instagram, Twitter, and Facebook social experiences are likely to remain in this format.
In video production, we call this the “aspect ratio.” If you divided a screen into units, the ratio of width to height is how you get the aspect ratio.
As social media marketers, the evolution of our preferences for a vertical screen, or a vertical aspect ratio, means that:
- The “feed” format is built on scrolling up and down through a stream of content.
- Natively, Facebook, LinkedIn, and Instagram support “non-traditional” aspect ratios like 1:1, which means you can use a square video to occupy more space in the feed.
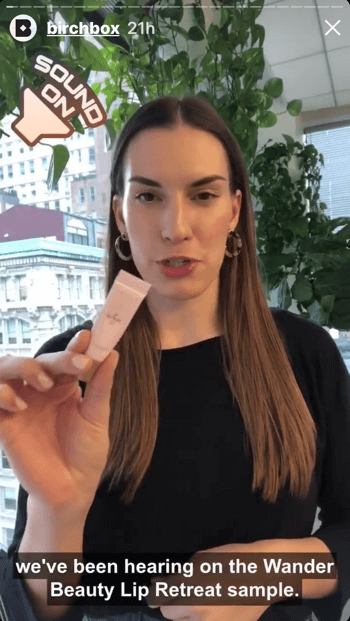
- Purely vertical video (a 9:16 aspect ratio) is the norm for venues like Instagram Stories and Snapchat.
- Widescreen videos (the 16:9 aspect ratio that's now the norm for cinema and television) take up less real estate in a vertical feed.
3 Days of World-Class Training—Zero Travel!

Couldn't make it to Social Media Marketing World and AI Business World this year? Get all of the great content at a fraction of the price with a Virtual ticket.
That’s full access to recordings of every keynote, workshop, and session—the ones people travel thousands of miles to see. Don't wait. Get your Virtual ticket and enjoy actionable content that you can watch anytime, anywhere.
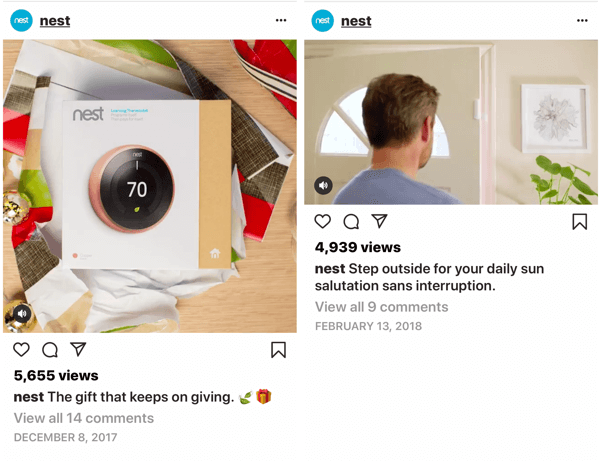
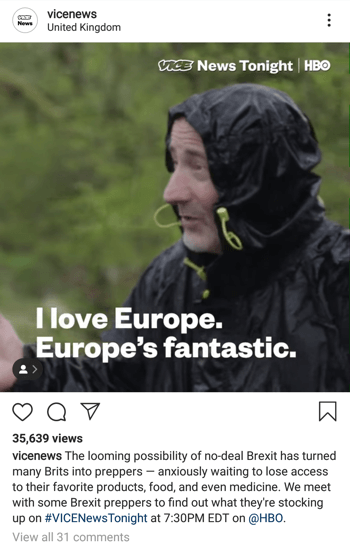
Before we even get to the point of talking about the quality of your content, the initial traction of your video can come down to how you choose to format it. A video uploaded to Facebook natively with a 1:1 aspect ratio will occupy more space in the feed, which in turn means it will be harder for users to ignore. At the same time, producing video this way is also likely to be a better experience overall for your fans because it fits more naturally into the ecosystem they're playing in.
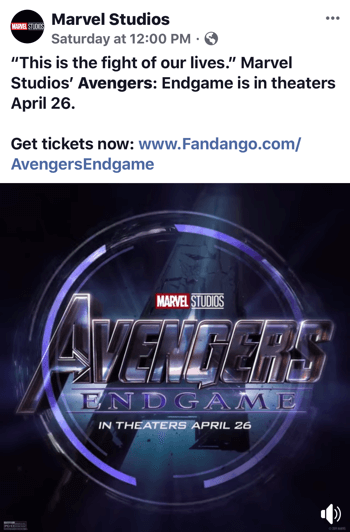
This is so important that major Hollywood studios are promoting film trailers on Facebook in a 1:1 aspect ratio. These are people who do nothing but create great film experiences, and they're adopting this approach. If they are, so should you!
If you shoot a video with widescreen conventions in mind, however, and then upload it to your Instagram story, much of the action that occurs at the edges of the screen is likely to be cut out. That not only looks amateurish—which isn't great for the credibility of your business—but also weakens the content experience. You'll need to take a thoughtful approach to how you produce video content for social media platforms.
Here are some points to keep in mind about aspect ratio:
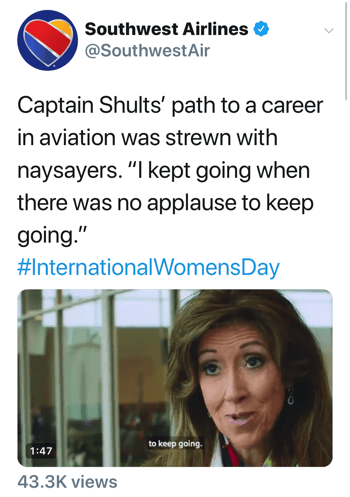
- For Facebook, Instagram, and LinkedIn feed posts, use a 1:1 aspect ratio instead of a 16:9 aspect ratio.
- If you're creating video for Snapchat or Instagram Stories, use the vertical aspect ratio of 9:16 (either filming in that format or editing your video to suit that format in post-production).
- Having a presence on YouTube is still a good idea for most brands, so when you invest in creating video that has a decent shelf life, you should probably also export your content to 16:9 and add it to your YouTube channel.
The production hurdles of working in new aspect ratios can be frustrating, but using non-widescreen formats actually is easier for social media marketers to make video content more engaging. To do this, you have to be mindful of how social media users interact with video.
One of the easiest ways to simplify your video workflow is to follow good production best practices, starting with planning the shoot. This process is guide-worthy in itself, but here are the basics:
- Invest in a high-quality microphone, as well as some light kits.
- Frame the video with the 1:1 or 9:16 aspect ratio in mind. In other words, frame your subjects in the middle of the shot so they don't get cropped off the edge later.
- When possible, film in 4K so if you need to zoom and crop, you won't substantially decrease quality.
- When possible, film videos in batches (according to the topics on your content calendar) so you can edit in bunches rather than individually—a powerful way to make everything more efficient.
When you start the editing process with a quality video, your post-production workload should be much lighter.
#2: Create Separate Projects for Your 16:9 and 1:1 Social Videos
If you create separate projects for your 16:9 and 1:1 videos in Premiere Pro, you can eliminate some of the troubles of frequently changing the aspect ratio within a single project.
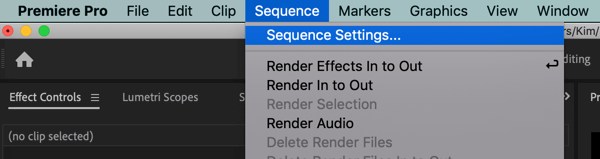
To change the aspect ratio in Adobe Premiere Pro, navigate to Sequence > Sequence Settings.
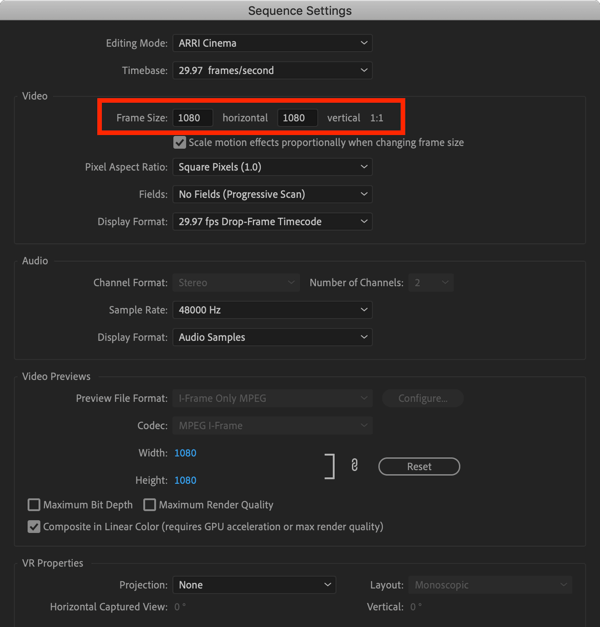
In the window that appears, set the frame size to 1080×1080 for a 1:1 aspect ratio and 1920×1080 for a 16:9 aspect ratio.
Pro Tip: You may also need to adjust the video preview dimensions to properly view your sequence while you edit. Make sure the width and height under Video Previews match your video settings.
#3: Edit the 16:9 Video First
If you opt to use the layout style where the top third is some sort of video title or catchy copy, the middle third is the video itself, and the lower third is for captions, editing in widescreen gives you two big efficiency boosts:
- You'll have the widescreen format to upload to a traditional video platform like YouTube (which is handy for embedding the video in your blog later).
- You won't have to re-render the 1:1 video if you follow the upcoming advice for auto-generating captions.
As you edit in 16:9, give some consideration to how the video might change if you make it 1:1 later, which might mean cropping the edges depending on the end format you choose. If you use the split thirds template, your video itself won't get cropped, though it will be a bit smaller than if it occupied the full screen.
#4: Upload the 16:9 Video to YouTube for Auto-Transcription
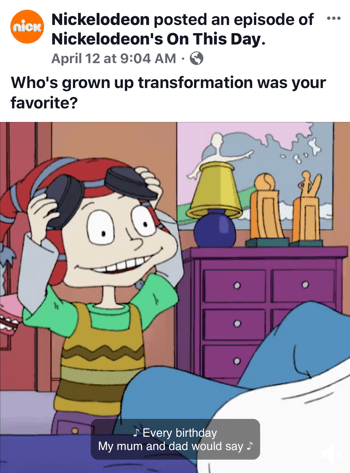
By now, you should have noticed that captions on social videos have become the norm. While headphones are certainly common, many social media users browse Facebook, Instagram, and LinkedIn with their sound muted.
Want to Unlock AI Marketing Breakthroughs?
If you’re like most of us, you are trying to figure out how to use AI in your marketing. Here's the solution: The AI Business Society—from your friends at Social Media Examiner.The AI Business Society is the place to discover how to apply AI in your work. When you join, you'll boost your productivity, unlock your creativity, and make connections with other marketers on a similar journey.
I'M READY TO BECOME AN AI-POWERED MARKETERIf your video features any dialogue—and with many brands using “edutainment” as their preferred format, this is almost certainly the case—you should add captions. Otherwise, the soundless users will just keep scrolling by your video instead of pausing to watch.
If you take the above advice on aspect ratio, you'll have more space above and below your videos for additional graphics. Captions fit comfortably in the lower third of a 1:1 formatted video, which is much better than having to overlay the text on top of the video itself.
You don't have to cover up any of your great camera work with text, and you can better control the background/foreground color combinations of background action with the color of the text (so the text can be perfectly readable for 100% of the video).
As for the top third of a 1:1 video, you now have an additional opportunity to catch the eye of feed browsers with some snappy graphic design. Instead of filling the top third with video, use it to hook potential viewers with text and graphics that make them want to watch the video.
It seems like a minor opportunity, but this is a rare moment when you can use text that's larger and brighter than what your social platform of choice allows natively. Take advantage!
This same advice applies generally to 9:16 videos—Snapchat and Instagram Stories—but you have a bit more versatility here because of user expectations. When people view an Instagram story, for instance, they're more likely to have audio on, so full captions may not be necessary. However, some text is still helpful to reduce the “bounce” to the next story.
Most labor-intensive social video will likely end up living on YouTube in some form or another. As a content library, YouTube is more user-friendly than a platform like Facebook, and it also makes embedding video pretty simple for you and your fans. Even if YouTube isn't a big part of your video marketing strategy, you might as well post there if you're making video.
For this step, however, the real reason you're uploading to YouTube is to take advantage of YouTube's auto-caption system. Once your video is uploaded, YouTube will eventually auto-transcribe and auto-populate captions. I say eventually because sometimes the delay is significant, so plan accordingly.
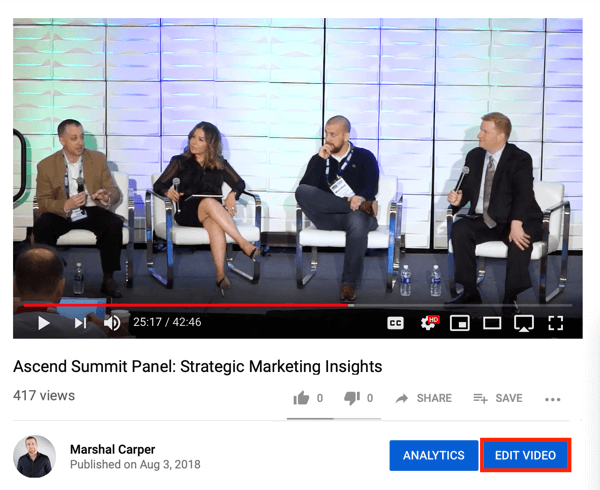
Once your video is uploaded to YouTube, click the link to watch your video. Then click the Edit Video button in the lower-right corner below the video.
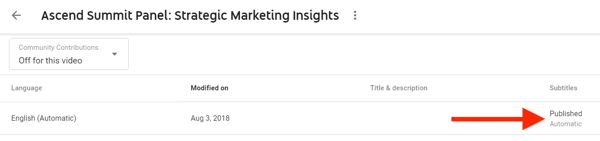
When YouTube Studio opens, click the Transcriptions tab.
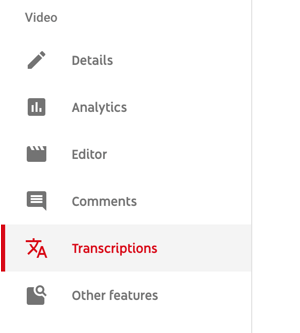
For the video in this example, the language is English (Automatic). To access the auto-caption system, click on the Published/Automatic field.
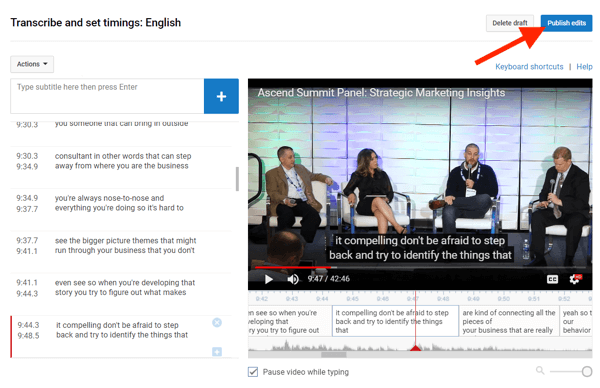
When the subtitle screen for the video opens, click Edit in the upper-right corner to modify the transcript.
YouTube's caption system isn't perfect, but it's far faster than typing captions by hand and it's reasonably accurate if your audio is clear. Make your updates to the transcript. Don't forget that you can use the sliders on each individual caption to adjust when and where captions are timed to your video. When you're done, click Publish Edits.
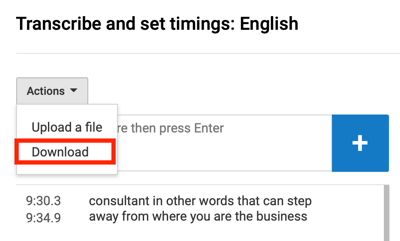
Once your edits are made, click the Actions drop-down menu and download the .srt file.
#5: Bring the 16:9 Video Into Your 1:1 Project
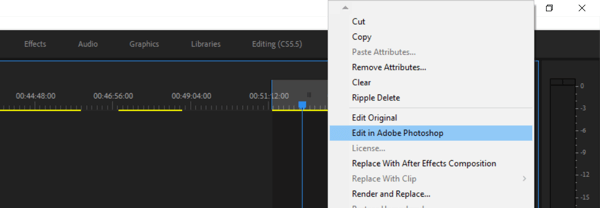
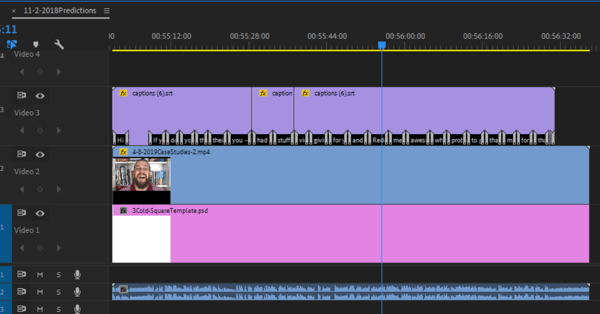
Now that you've uploaded your 16:9 video to YouTube, you might as well just drag that video into your 1:1 sequence. As far as the graphics you want to put around this video (like your video title and the space for captions), I recommend that you create the graphics file in Photoshop and import it into Premiere as a .psd file.
If you reuse a similar format from video to video, which is common among many marketing videos, right-click the .psd file in the sequence and select Edit in Adobe Photoshop to quickly switch to Photoshop, update your text, and switch back. This technique will save you an immense amount of time. You'll avoid having to save and resave, and import and re-import graphics, because Premiere will automatically update the video project with the most recent .psd file.
#6: Place the .srt Captions File in Your Social Video
The final step in this video production workflow is to drag your captions file into Premiere Pro and position it over the video.
If you double-click the captions file in the sequence, the Captions window opens, allowing you to edit the look and feel of your captions—type font and size, and text color, background, and style.
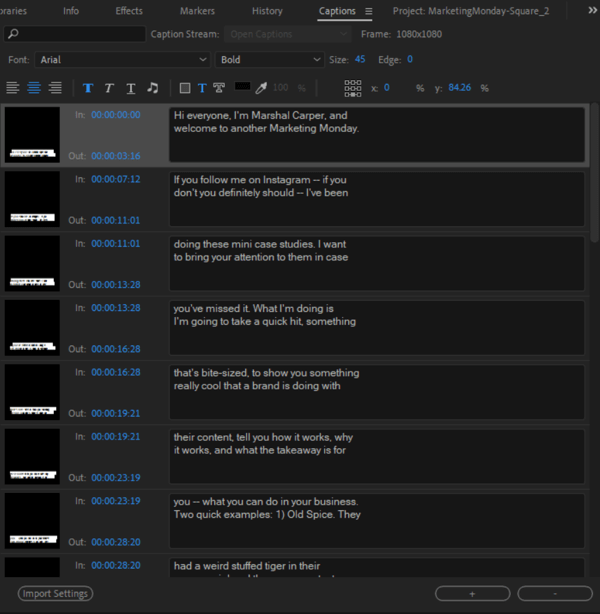
Remember that all of your captions need to be selected in the Captions window if you want your format changes to be universal—and you probably do. You may also need to drag the captions around a bit in your Program window to position them just right. As is always true with captions, pick your text color and text backgrounds for maximum readability.
From here, you're pretty much set. However, when you export the 1:1 video, double-check your export settings to make sure you're exporting to 1:1.
Considerations for Live-Stream Video
Live-streaming video is a deep topic with its own set of strategic considerations and best practices, especially when you start to dive deeper into the unique platform features of Facebook Live, Twitch, Mixer, Periscope, and YouTube Live. For our purposes here, we'll operate under the assumption that if this is part of your social media marketing, you're delivering it in 16:9 (the typical format for most streaming platforms).
If you aren't using live streaming, here are some quick tips to consider:
- Building a presence on a platform like Twitch can take a significant amount of work and investment, but the audience engagement can be incredible.
- You can live stream through a platform like Facebook Live casually and for special occasions, such as an event or a special moment happening within your business.
- If you have a podcast, a live-stream component can be a great way to get new viewers and foster more interaction.
- You can cut live-stream content into smaller videos that use the formatting best practices discussed above.
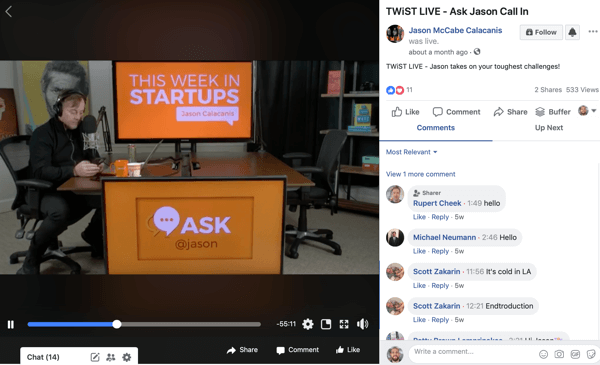
That last point is key if you're making the investment in producing live-streamed content with any sort of quality. Clip funny moments. Caption interesting nuggets of wisdom. Create teasers for larger videos. And do all of that in a 1:1 ratio with text.
Conclusion
The reign of social video is unlikely to end anytime soon. The trend toward a platform preference for native video is showing no signs of slowing, though marketers should keep tabs on how various feeds and algorithms treat video because the specific nuances may change, even if video continues to dominate. With these best practices and this workflow to start from, you should be well-equipped to perform in the present and adapt to whatever future may come.
What do you think? Will you try this workflow to create your social video content? Share your thoughts in the comments below.
More articles on social media video:
- Discover five affordable social media video tools for marketers.
- Learn how to incorporate video into your social media marketing campaigns.
- Find 10 tips from the pros on how to improve your social video content.

Curious About How to Use AI?
Our newest show, AI Explored, might be just what you're looking for. It's for marketers, creators, and entrepreneurs who want to understand how to use AI in their business.
It's hosted by Michael Stelzner and explores this exciting new frontier in easy-to-understand terms.
Pull up your favorite podcast app and search for AI Explored. Or click the button below for more information.
