 Wondering how to add subtitles to your videos?
Frustrated with the inaccuracy of automated transcription?
In this article, you'll learn how to create a customized SRT file to add time-stamped captions to your videos.

What Are SRT Files?
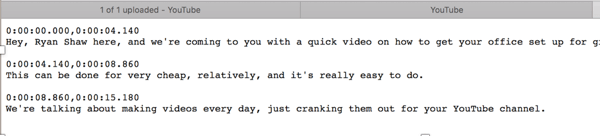
SubRip Subtitle files (SRT) are plain-text files that contain subtitle information. They include start and stop times next to the subtitle text, ensuring they'll be displayed at exactly the right moment in your video.
SRT files work on most social media sites that let you upload captions. You can create a single file and upload it to your videos on each platform, instead of having to enter the subtitles manually into systems that may not work 100% correctly to begin with and can be cumbersome to edit to perfection.
Because videos autoplay on many social platforms, a high number of viewers watch without sound. By uploading SRT files for your videos, you'll get more engagement and higher viewer retention rates.
You'll also get immense SEO benefits. When you upload SRT files to native video platforms like Facebook and Instagram, they're indexed by Google and become crawlable. All the keyword phrases in your video become searchable, which helps you show up in more searches.

With SRT files you get full control over your video's subtitles. Automated transcription services are helpful but not foolproof, and otherwise great videos can look slightly less credible if the subtitles are sub-par.
While you can't currently add SRT files directly to LinkedIn, Twitter, Instagram's organic content, and Pinterest, you can add subtitles to your videos with video editing software like Camtasia. The video file will have the subtitles hardcoded into it, similar to a text overlay. You won't get the SEO benefits with hardcoded subtitles, but you'll get the engagement benefits of having subtitles on your video.
You can create SRT files several ways. We'll look at how to create SRT files in a text editor or through YouTube, and then upload them.
#1: Use a Text Editor to Create and Format Your SRT File
You can create SRT files with almost any text editor that you have installed on your computer. For example, Notepad will work for Windows users and TextEdit for Mac users.
When you create an SRT file in a text editor, you need to format the text correctly and save it as an SRT file. This format should include:
[Section of subtitles number]
Which AI Moves Actually Matter?
That's what every marketer is wrestling with now. New AI strategies, new tools, new takes every week — but no clarity. Most marketers and business owners are trying to figure out AI alone.The AI Business Society is your trusted guide. Get expert-led training you can put to work immediately. Plus a community of marketers sharing what's actually working.
I'M READY FOR REAL AI RESULTS[Time the subtitle is displayed begins] –> [Time the subtitle is displayed ends]
[Subtitle]
To format the timestamps correctly, show:
Here's an example:
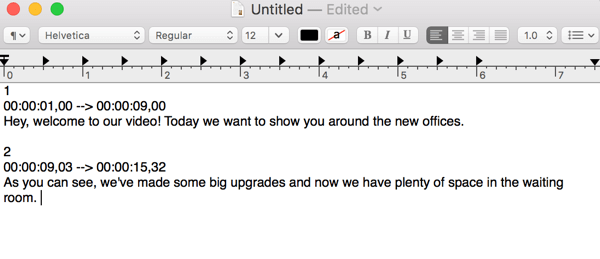
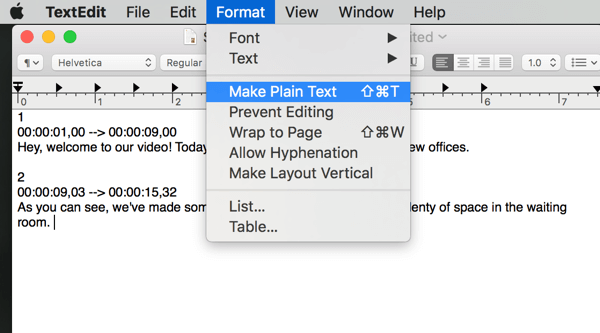
Once your subtitle file is finished, convert your file to plain text (many text editors automatically have rich text set as the default) and then save it as an SRT file. If needed, change the “.txt” in the filename to “.srt” manually.
#2: Use YouTube's Video Creator to Create Your SRT File
Want to skip a few steps? While some people prefer to use a text editor to create SRT files, it can be less time-consuming to create them through YouTube.
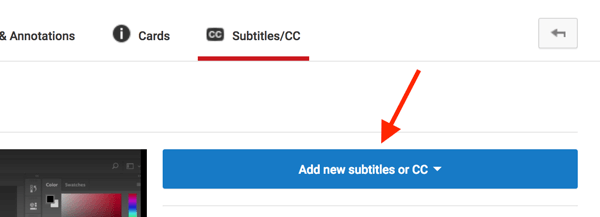
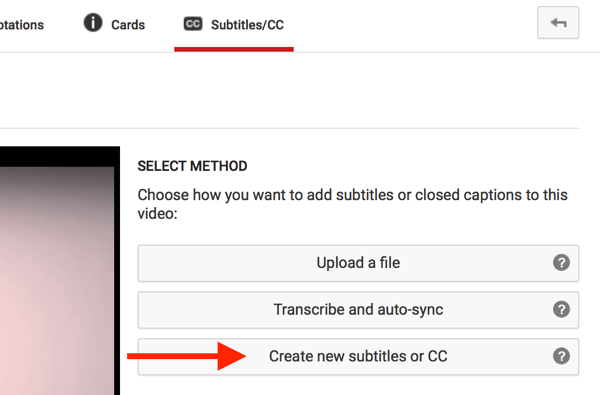
To do this, go to Video Creator and click Edit next to the video you've already uploaded. On the Subtitles/CC tab, click Add New Subtitles or CC.
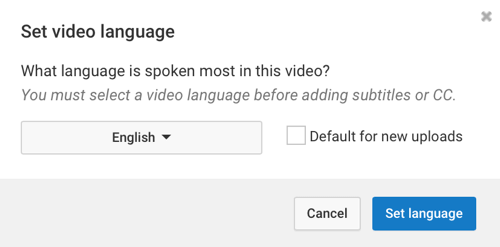
Next, choose the primary language spoken in the video if you haven't set a default already.
From here, you can choose from two options for creating an SRT file: Transcribe and Auto-Sync, or Create New Subtitles or CC.
3 Days of World-Class Training—Zero Travel!

Couldn't make it to Social Media Marketing World and AI Business World this year? Get all of the great content at a fraction of the price with a Virtual ticket.
That’s full access to recordings of every keynote, workshop, and session—the ones people travel thousands of miles to see. Don't wait. Get your Virtual ticket and enjoy actionable content that you can watch anytime, anywhere.
Auto-syncing may sound faster, but you get more control when you create your own subtitles. Auto-sync may not line up the text on the screen to your liking or consistently mistake one keyword for another. In these cases, it would take longer to edit the subtitles than to simply create them from scratch.
To transcribe the video manually, click Create New Subtitles or CC and start typing subtitles in the text box on the left. Make sure the subtitles sync up with the video and add sections of subtitles at a time. Remember that all of the sections will be displayed at once so don't be afraid to break up text.
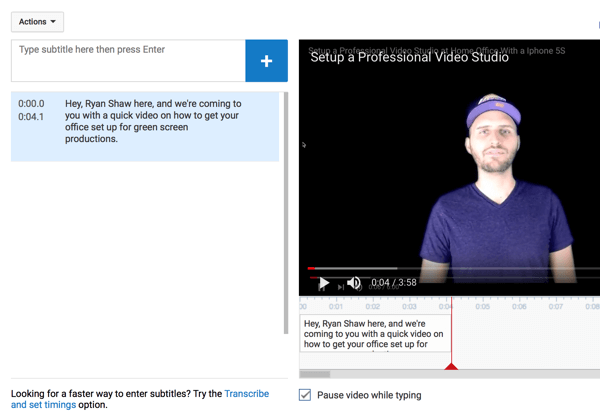
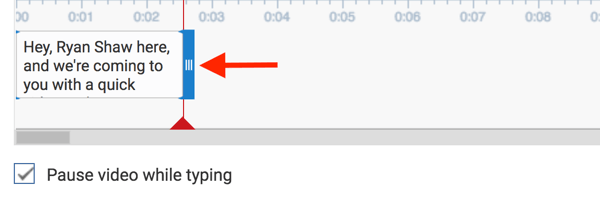
If you want to adjust when the text starts and ends, drag the blue borders under the video.
After you transcribe the full video, watch it a few times to double-check spelling and make sure everything works well. When you're happy with how the subtitles line up, click Actions and select Download from the drop-down list.
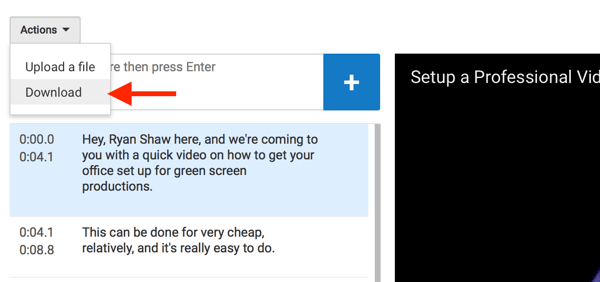
Next, you'll see a screen with the SRT code. Copy and paste the SRT code into a text editor, and save it as an SRT file.
#3: Upload Your SRT File to Each Natively Hosted Video
Once you've created your SRT files, you can upload them directly to native videos on Facebook pages, in Facebook and Instagram ads, and on YouTube.
Note: To get the engagement benefits of subtitles on Instagram's organic content, LinkedIn, Twitter, and Pinterest, add the SRT file to a video editor like Adobe Premiere or Camtasia and then upload your video file natively to each platform.
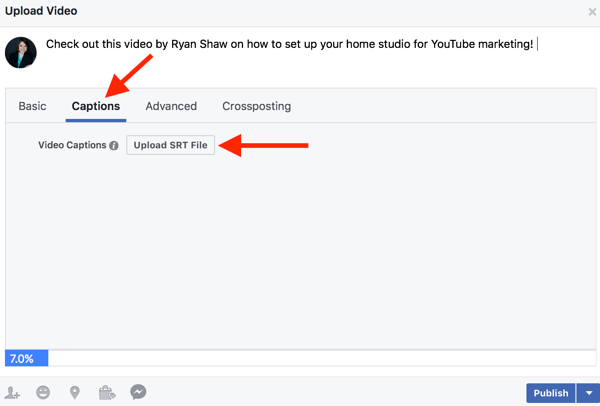
Facebook Pages
Facebook allows pages to add captions to videos. When you upload a video to your page, click the Captions tab and upload the video's SRT file.
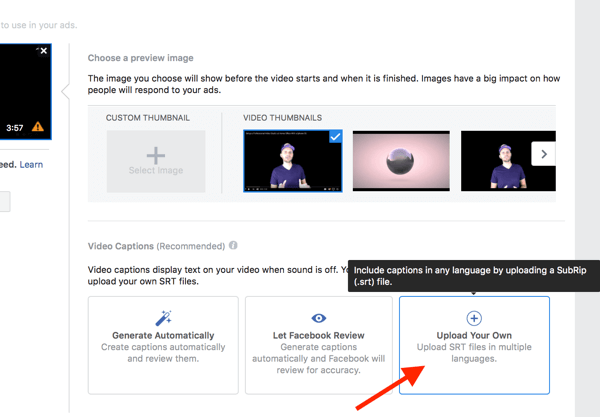
Facebook and Instagram Ads
With Facebook and Instagram ads, you need to wait until the video is loaded to get the option to upload an SRT file. Follow this filenaming format to be accepted by Facebook:
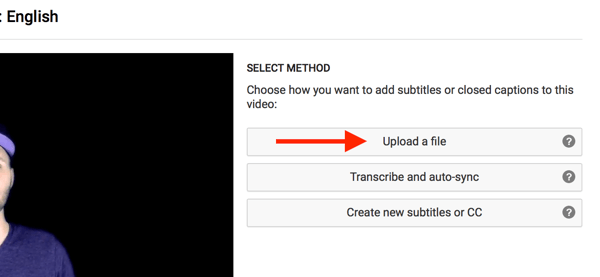
YouTube
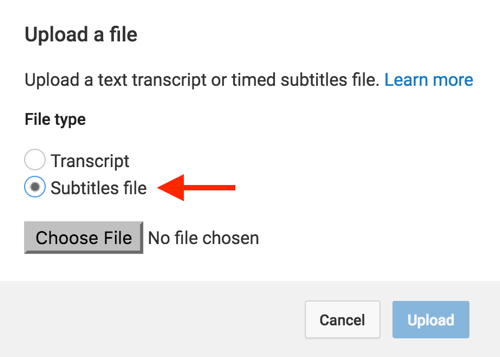
Uploading SRT files to YouTube videos is just as easy. Open your video in Creator Studio, go to the Subtitles/CC tab, and click Upload a File.
On the next screen, select Subtitles Files, navigate to your file, and click Upload to upload it.
Final Thoughts
Adding subtitles to your social media videos can increase viewer retention rates so you can't afford not to have them. However, many small businesses are frustrated with trying to add them. Automated transcription features on social media aren't always accurate and everything else can seem so technical it's intimidating. This only increases if you need to add subtitles for the same video several times on different social media platforms.
The easiest way to add subtitles to the same video on multiple social channels is to create a single SRT file. You'll get SEO and visibility benefits, and grab the attention of viewers watching with the sound off.
What do you think? Do you use SRT files to add subtitles to your videos? Which tools do you use to create SRT files? Share your thoughts, knowledge, and experience in the comments below!

Curious About How to Use AI?
Our newest show, AI Explored, might be just what you're looking for. It's for marketers, creators, and entrepreneurs who want to understand how to use AI in their business.
It's hosted by Michael Stelzner and explores this exciting new frontier in easy-to-understand terms.
Pull up your favorite podcast app and search for AI Explored. Or click the button below for more information.
