 Are you wondering how Pinterest could increase your blog readership?
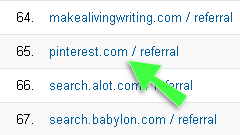
Pinterest drives more traffic to websites than YouTube, Reddit, Google Plus and LinkedIn combined according to new research.
With this in mind, here are six easy steps for tapping the power of Pinterest to drive more traffic to your blog.
#1: Choose the Best Blog Posts to Pin
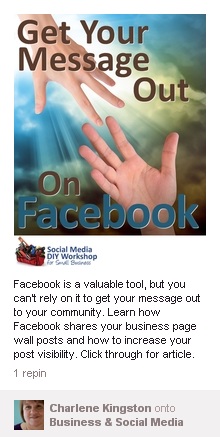
You don't need to pin every blog post on Pinterest. You'll get better results if you selectively pin your blog posts on subjects that already have an audience on Pinterest.
This means you need to do a little research on Pinterest to find if people are already pinning items on your blog post topics.
It's easy to do research on Pinterest, and you don't need an account to get started. Pinterest has a search feature that lets you find one or more keywords throughout the site.
For each search, Pinterest shows you:
- Pins that contain the search term in the description
- Boards that contain the search terms in the title or description
- People who have the search terms in their profile
Tip: Pinterest never returns a list of every possible match. You should try each search several times to see how the results change.
For each blog post you consider pinning:
- In the search box, type a word or phrase that fits the blog post topic.
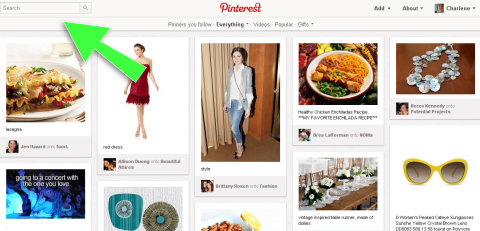
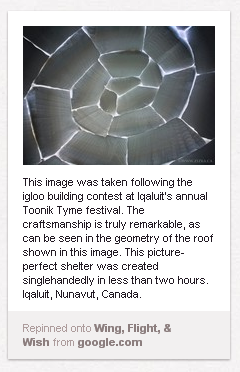
Type your search term in the Search box and click the magnifying glass. - Pinterest displays a list of pins that contain your search term in the pin description.
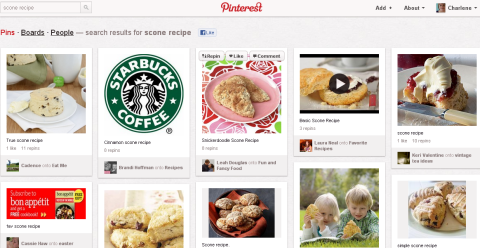
Pinterest displays a selection of pins that contain the search term "scone recipe." - Review the list of pins to see how your blog post topic would fit into this list. Make a note of the words used in the pin descriptions.
Tip: Modify your search terms to see if there are different words that people are using for your topic. - Click Boards to review all boards that contain your search term in their title or description.
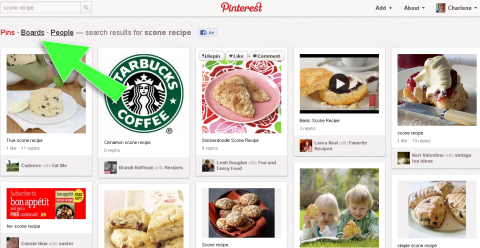
Pinterest collects search results for pins, boards and people each time you search. - Pinterest displays a list of boards that contain your search term in the board name or description.
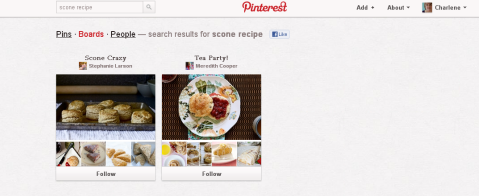
Pinterest displays some of the boards that contain pins for your search term. - Review the pins in each of these boards.
Make a list of the search words and most common words found in the pin descriptions. You want to consider using these terms in your pin description as well.
After spending a little time using Pinterest and figuring out how it works, you're ready to start using it to drive traffic to your blog.
Tip: As you do your research, why don't you start following some of the people who are actively pinning on related blog post topics? It's a great way to make a connection to people who may be interested in your blog.
#2: Select or Create Your Pin Image
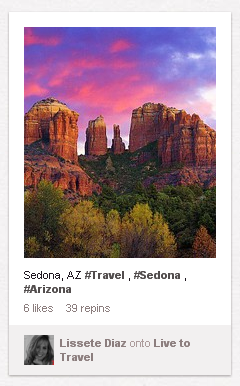
Choosing the image for your blog post pin is the most important decision you make. A good image encourages people to share your post.
There is no right or wrong choice. You want an image that is eye-catching and related to your blog post content. You want to invite people to click through the pin to visit your blog. The best image should clearly identify your blog post content to Pinterest users.
Which AI Moves Actually Matter?
That's what every marketer is wrestling with now. New AI strategies, new tools, new takes every week — but no clarity. Most marketers and business owners are trying to figure out AI alone.The AI Business Society is your trusted guide. Get expert-led training you can put to work immediately. Plus a community of marketers sharing what's actually working.
I'M READY FOR REAL AI RESULTSReuse Blog Post Images
You can reuse your blog post images as the pin. You chose the blog post image because it conveys the idea of your post. However, taken out of context, the image can appear meaningless.

Reusing a blog post image usually doesn't provide enough information to explain the article's content. If someone repins it and changes the description, the image's meaning is lost.
Instead, you may want to use the blog post image as the background and customize it with the blog post name or contents. This doubles the effectiveness of the blog post image.
Create a New Image
You can create a new image for your blog post pin. An effective custom image uses the blog post title on a plain background.

Tip: Your image must be available online (have a unique web address). If you customized your blog post image or created a custom image, upload it to your blog and make note of the image's web address. You will need it later.
#3: Write Your Pin Description
The pin description appears under the pin image and provides additional information about your blog post. You should always write a pin description. No one else can write a better blog post description.
Your description appears every time someone pins your post directly from your blog. However, each Pinterest user can delete your description and write his or her own description.
3 Days of World-Class Training—Zero Travel!

Couldn't make it to Social Media Marketing World and AI Business World this year? Get all of the great content at a fraction of the price with a Virtual ticket.
That’s full access to recordings of every keynote, workshop, and session—the ones people travel thousands of miles to see. Don't wait. Get your Virtual ticket and enjoy actionable content that you can watch anytime, anywhere.
Writing your pin description is like writing your blog post summary or excerpt. In it, always tell people the benefit of reading further.
Your pin description should:
- Tell people what to expect in your blog post.
- Leave a little bit of mystery so people want to read more.
- Include all search terms appropriate for the blog post.
While you can use up to 500 characters in your pin description, shorter is always better.
You can also add a web address and hashtags in your description. Hashtags are search words that start with the hash or pound symbol (#).
For example, if you include the hashtag “#socialmedia” in your description, people can click on the hashtag to instantly search through Pinterest to find all pins with this search term.
#4: Add the Pin It Button to Your Blog Post
The Pin It button allows blog visitors to easily pin your blog post. You provide all of the pin description information when you add the button to your site. This way, your blog visitor can click the button and pin your post quickly and easily.
Unlike other social media sharing buttons, you must add the Pin It button individually to each blog post. This is a little extra work on your part, but it only takes a couple of minutes to set up and install.
In return for this effort, you get to choose the image and set the default description for everyone who pins your post from your blog.
To add the Pin It button to your blog post:
- Log into Pinterest (if necessary).
- In the top right menu, choose About | Pin It Button.
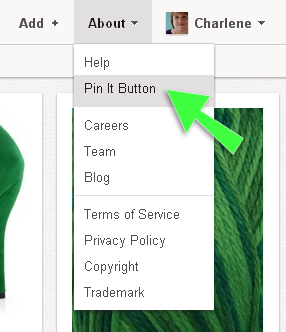
The About menu contains the Pin It button option. - Pinterest displays the Goodies area.
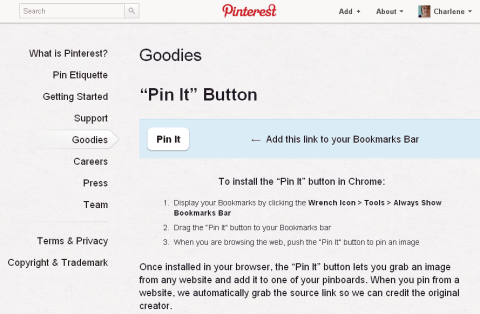
The Pinterest Goodies area. - Scroll down to the Pin It Button for Web Sites area.
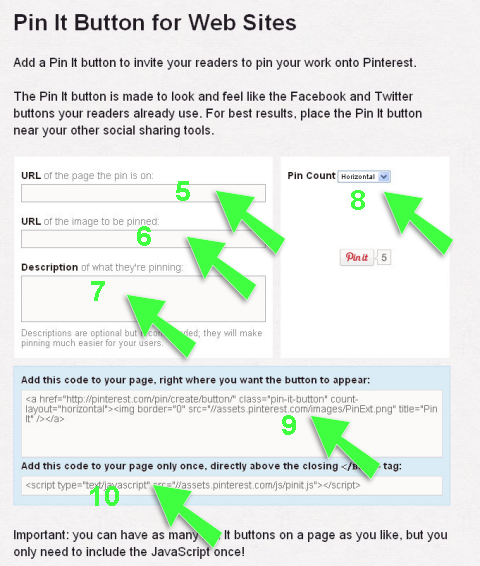
The Pin It form collects the information you need to create your Pin It button and displays the code in the boxes. - Provide the blog post web address for “URL of the page the pin is on.”
- Provide the web address for your chosen pin image for “URL of the image to be pinned.”
- Provide the pin description.
- Choose your pin count format (horizontal, vertical or no count).
- Copy the top code box contents. Open your blog post and add this code where you want the Pin It button (top, bottom or both).
Tip: You must insert the code from steps 9 and 10 into the HTML view of your blog post. Consult the help for your blogging software if you are not sure how to do this. - Copy the bottom code box contents and paste at the bottom of your blog post.
- Save and publish your blog post. The Pin It button appears where you pasted the code in step 9.
- For WordPress users, Phil Derksen has an excellent plugin called Pinterest ‘Pin It' Button.
#5: Pin Your Blog Post
You have created a pin for your blog post. You can be the first person to pin your blog post in Pinterest by adding it to a board in your Pinterest account. This step is not necessary if you don't have a Pinterest account. However, at this point, your post does not yet appear in Pinterest. You have only created a pin for someone to use.
To use the new Pin It button to add a pin for your blog post on Pinterest:
- Display your blog post.
- Locate the Pin It button.
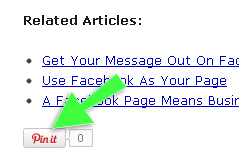
The Pin It button on your blog post before any pins.
- Click Pin It. Your blog displays the pin window.
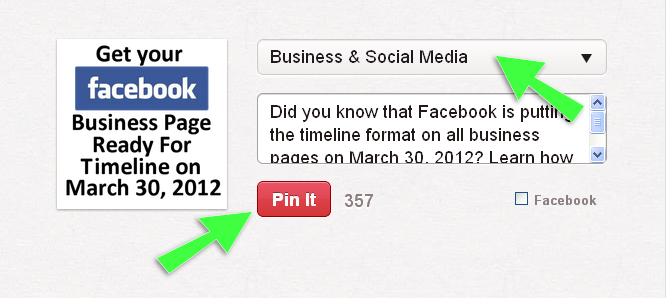
The Pinterest pin window with the image and description you set up with the Pin It button for this blog post.
- Choose the appropriate board for your blog post pin.
- Click Pin It. Pinterest adds your pin to the board.
#6: Track Traffic to Your Blog from Pinterest
The pin for your blog post appears in your pins and in your selected board. Everyone who follows your pin has a chance to see it. Anyone who checks out your pins can also see it.
Other people see your pin, and if they find it interesting, they will click through to your blog post. They may also repin your blog post to share it with the people who follow them.
There are several ways you can track the traffic to your blog post from Pinterest. Use whatever traffic monitoring tools you have in place on your blog. For example, you might use the blog statistics in JetPack for a WordPress blog, or Google Analytics.
It's Your Turn
What do you think? Have you found an audience for your blog on Pinterest? Have you created customized images for your posts on Pinterest? What is working well for you? Share your insights and experiences in the box below.

Curious About How to Use AI?
Our newest show, AI Explored, might be just what you're looking for. It's for marketers, creators, and entrepreneurs who want to understand how to use AI in their business.
It's hosted by Michael Stelzner and explores this exciting new frontier in easy-to-understand terms.
Pull up your favorite podcast app and search for AI Explored. Or click the button below for more information.
