Need to set up standard events and custom conversion tracking for your Facebook ads? Want a better way to retarget leads from Facebook?
In this article, you'll discover how to set up standard events and custom conversions to better track leads from your Facebook ads.
To learn how to set up Facebook standard events and custom conversions, read the article below for an easy-to-follow walkthrough or watch this video:
#1: Set Up Facebook Standard Events
All tracking is made possible thanks to the Facebook pixel so you need to have it installed on your website. If you haven't already installed it, check out this video, which walks you through the process.
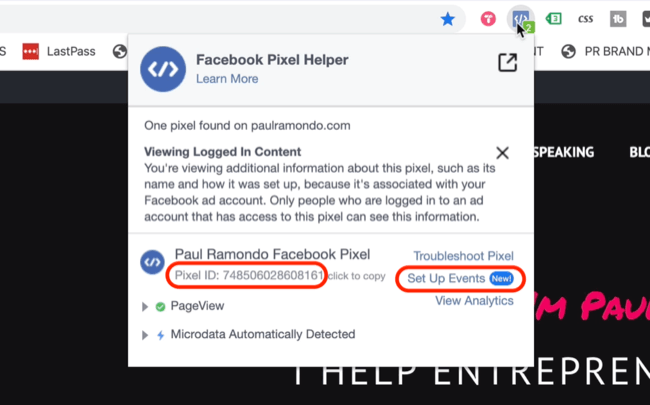
To check that you've correctly installed the Facebook pixel on your website, open Google Chrome and download the Facebook Pixel Helper tool from the Google Chrome extension store.
Once you've downloaded the extension, it'll show up in your browser toolbar. Click the Facebook Pixel Helper icon to see if your Facebook pixel has been installed correctly. You want to make sure the Facebook pixel ID matches what's in Facebook Ads Manager.
If everything looks okay, click Set Up Events.
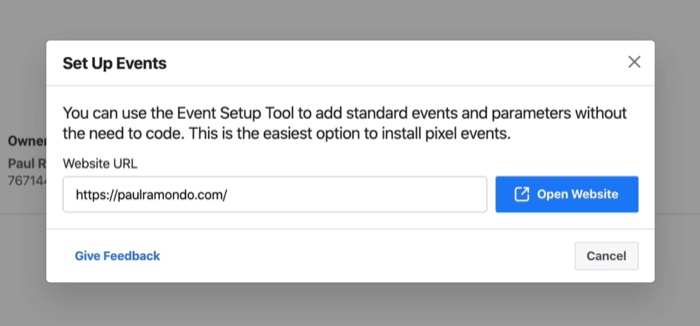
This will fire up Facebook Ads Manager and display the Set Up Events window. Make sure your website URL is correct and click Open Website to open the Facebook Event Setup Tool.
Setting up Facebook standard events is extremely important because it arms Facebook and its algorithm with the data needed to effectively optimize and deliver your ads to the right people at the right time, based on your overarching business goals.
The easiest way to think about it is that Facebook doesn't really know what's happening on your website so you need to show the algorithm which events are most important to your business.
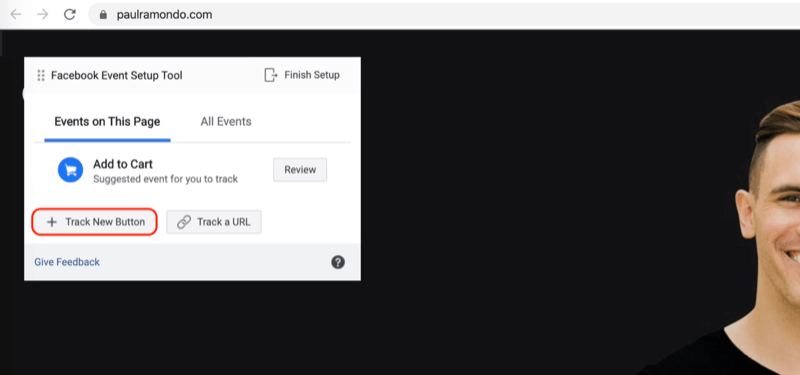
Let's say I want to track a new button. I want to give Facebook some data to allow me to track when people view my case study. To set up a new event for this action, click Track New Button.
Get World-Class Marketing Training — All Year Long!
Are you facing doubt, uncertainty, or overwhelm? The Social Media Marketing Society can help.
Each month, you’ll receive training from trusted marketing experts, covering everything from AI to organic social marketing. When you join, you’ll also get immediate access to:
- A library of 100+ marketing trainings
- A community of like-minded marketers
- Monthly online community meetups
- Relevant news and trends updates
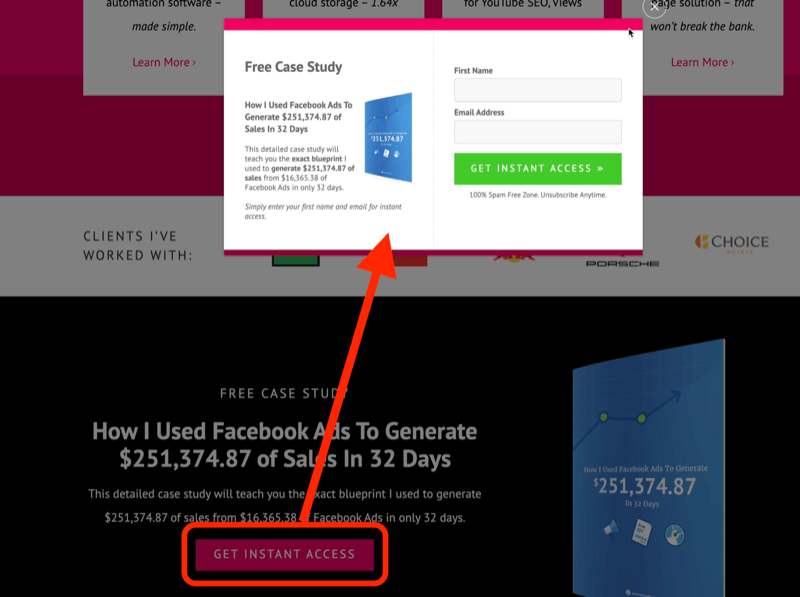
The button that we'll be tracking is the Get Instant Access button, shown here.
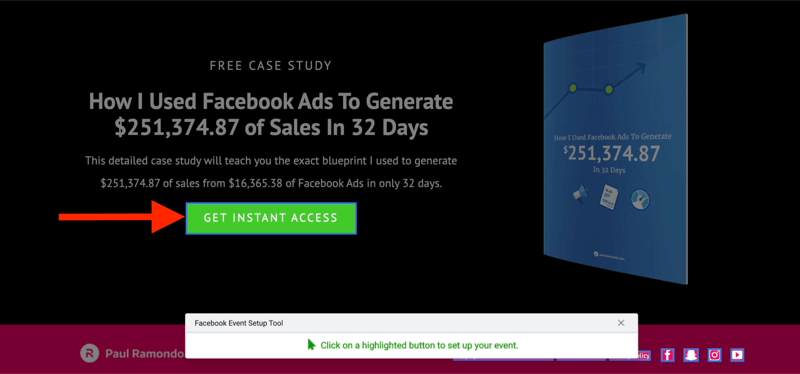
Just because you can track every button and piece of content on your website doesn't mean you should. Less is more when it comes to setting up your events.
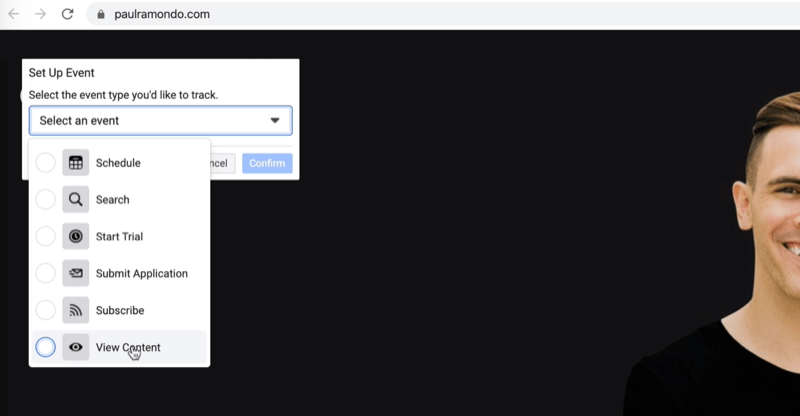
For this event, select View Content as the event type and then click Confirm.
Now, we've got View Content and the button text is, “Get Instant Access.” This event will be triggered whenever someone clicks on the button with the text, “Get Instant Access.”
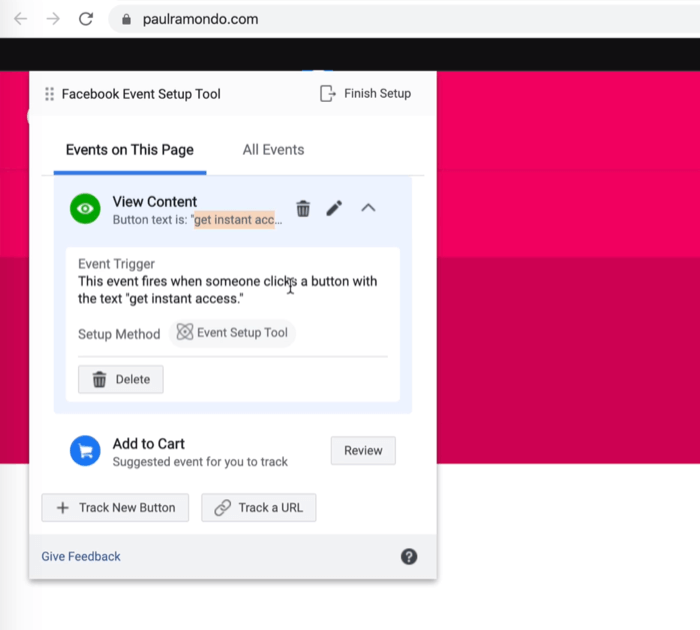
The business you're in will dictate what events are most important for you to track. The most important events for me to track are email opt-ins, which are essentially leads, and specific view content, because at the moment, I'm not selling anything on my website.
If you're an eCommerce website, the most important events for you to track would be Add to Cart, Abandon Cart, Add Payment Information, Purchases, and maybe Leads.
To complete the setup of this event, simply click Finish Setup.
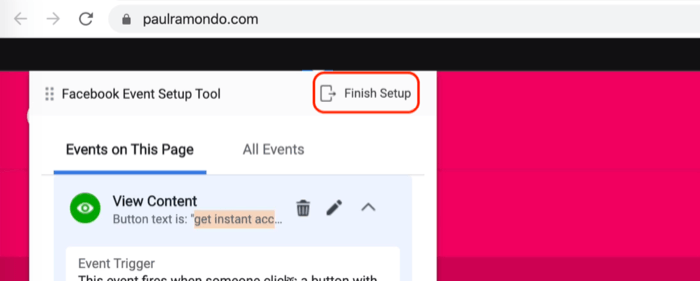
On the next screen, click Finish.
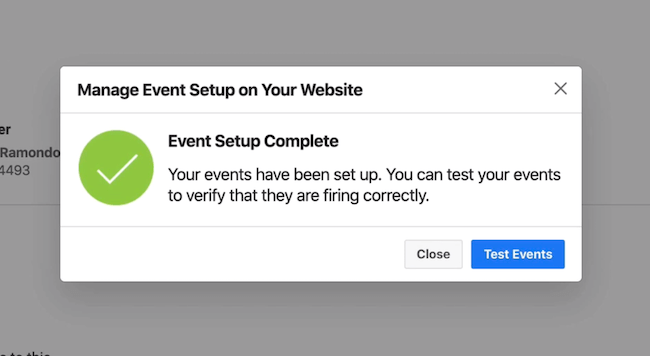
Now that your event has been set up, you need to make sure it's working correctly. To do this, click the Test Events button.
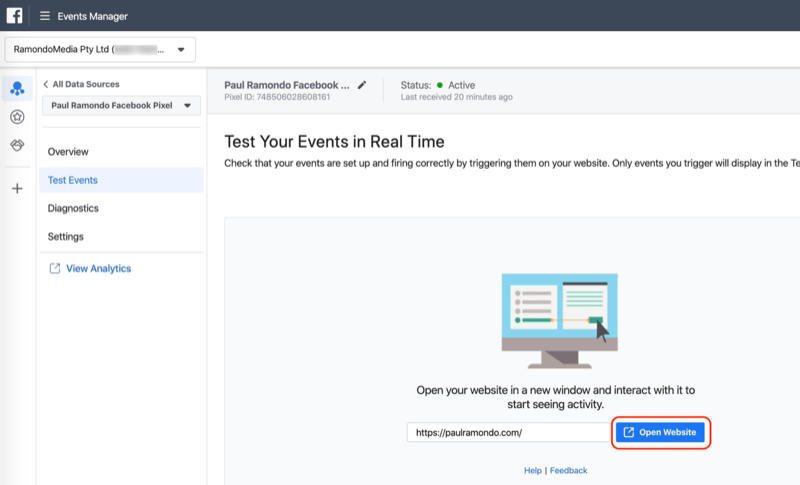
On the next screen, click Open Website to fire up your website.
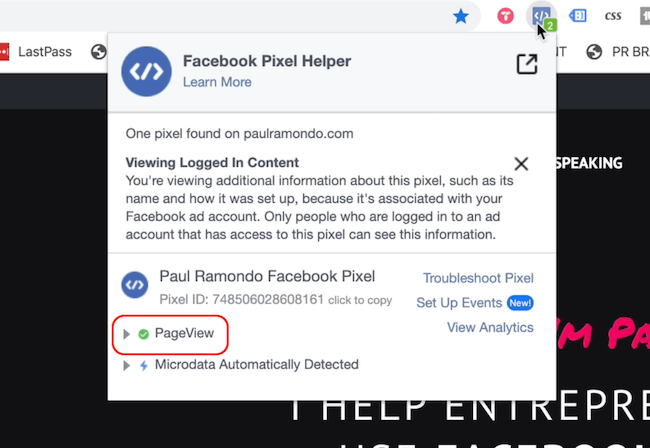
To verify that your standard events are firing properly, use the Facebook Pixel Helper tool.
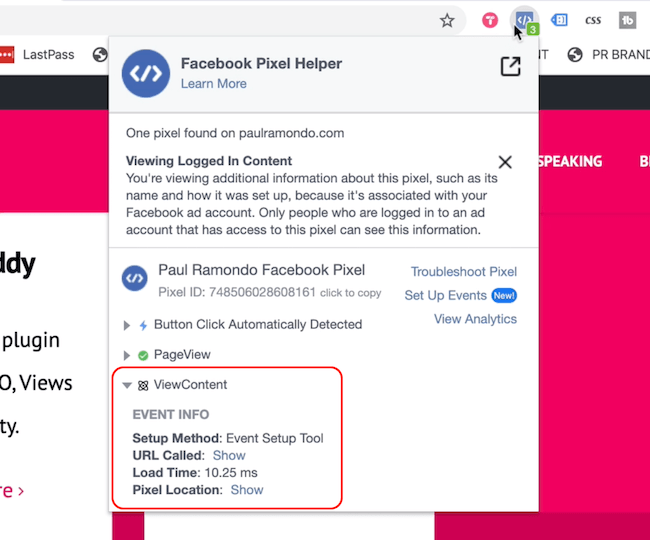
For this example, remember that we set up a View Content event to be fired when people click on my case study. If we check the Facebook Pixel Helper tool, we can see that only Page View has been fired at this point.
Now scroll down and click the Get Instant Access button. This will fire up my case study, which will fire the View Content event we created earlier.
If you look at the Facebook Pixel Helper screen again, you can see this event has been populated. It's as easy as that.
#2: Set Up Facebook Custom Conversions
In addition to creating events with the Facebook Event Setup tool, you can also create custom conversions based on a specific URL that your audience member visits.

Discover Proven Marketing Strategies and Tips
Want to go even deeper with your marketing? Check out the Social Media Marketing Podcast! Publishing weekly since 2012, the Social Media Marketing Podcast helps you navigate the constantly changing marketing jungle, with expert interviews from marketing pros.
But don’t let the name fool you. This show is about a lot more than just social media marketing. With over 600 episodes and millions of downloads each year, this show has been a trusted source for marketers for well over a decade.
Let's say that I'm running Facebook ads to grow my Facebook group and I want to track the conversions that result from all of my ads as well as people joining my Facebook group.
To do this, go into Ads Manager and click on Events Manager.
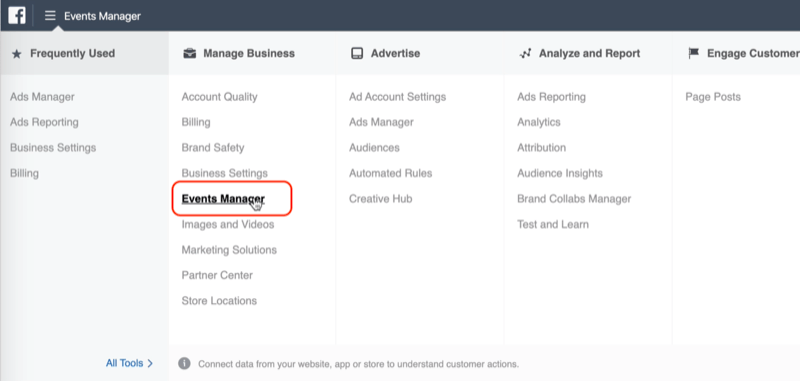
Make sure you select the correct account ID, which is associated with the correct pixel. Then click on Custom Conversions on the left and Create Custom Conversion on the right.

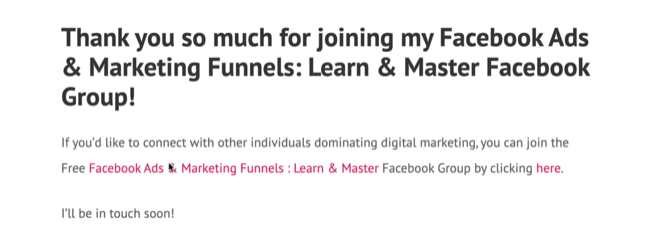
In the Create a Custom Conversion window, type in a naked URL—without http or https. For this example, I want the URL to contain “paulramondo.com/thank-you,” which maps to this thank-you page.
Next, select Contains from the URL drop-down menu. You don't want to select Equals because you want to capture every possible version of this URL as a lead, including those URLs that have UTM parameters connected to them. The best way to do this is to choose Contains.
Once you've done that, name your lead. For this example, we'll name it “Facebook Group Sign Up” because that's what's occurring on that thank-you page. For the category, we'll choose Lead.
It doesn't really matter what category you choose. The categorization of the custom conversion just needs to reflect its purpose for your business.
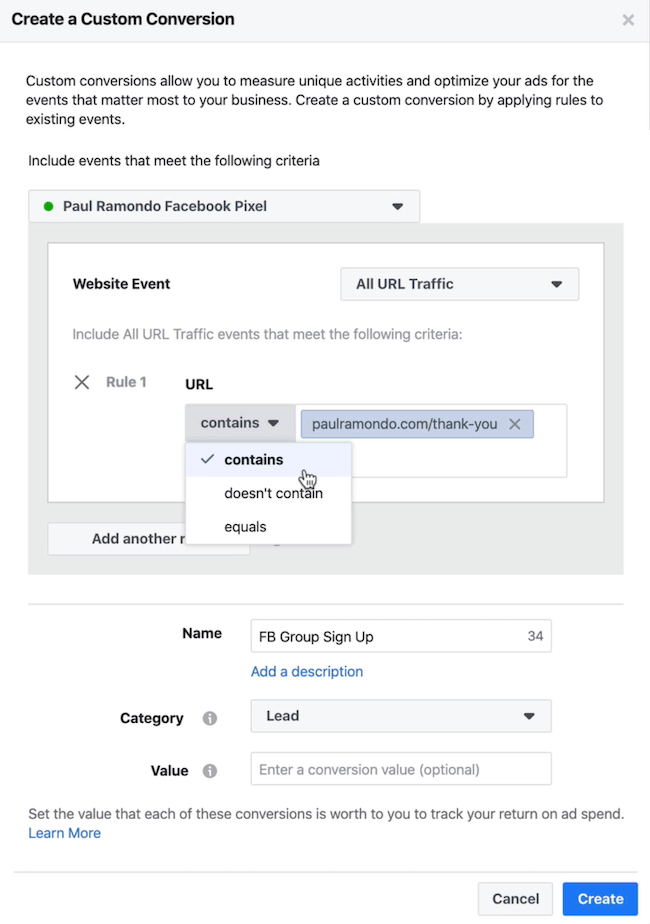
When you're finished, click Create to complete the setup.
#3: Create Facebook Custom Audiences Based on Custom Conversions You've Set Up
Now suppose you want to retarget people who have completed your signup or opted into your lead. An easy way to do that is to transform that custom conversion into a custom audience.
This should show up, in theory, in this area of your Event Setup tool. For whatever reason, Facebook removed this feature for me.
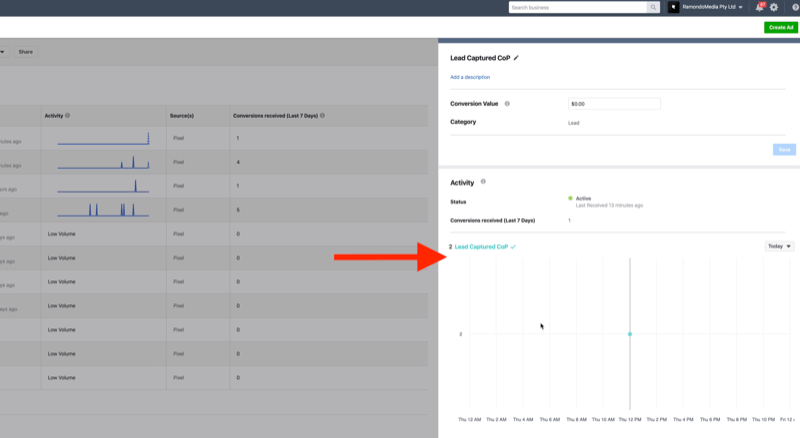
A workaround is to simply take the same URL you used to set up the custom conversion and create a custom audience.
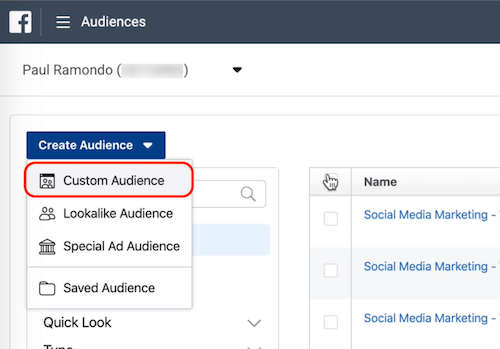
To set up your custom audience, go into Audiences, click Create Audience, and select Custom Audience from the drop-down menu.
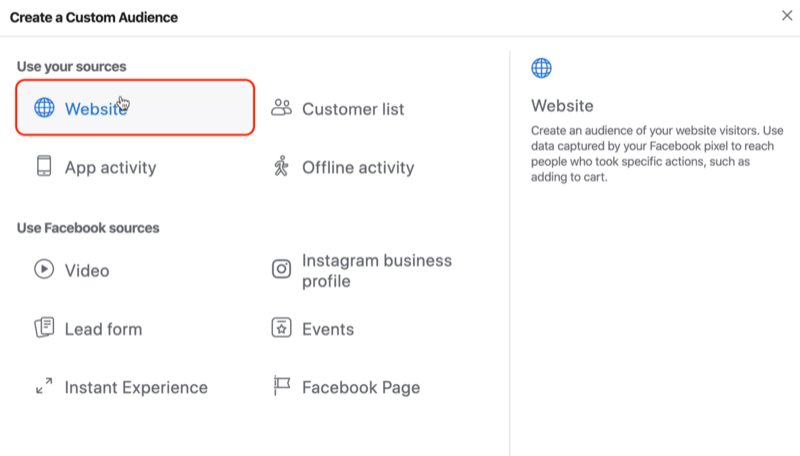
In the Create a Custom Audience window, select Website as the source.
In the drop-down menu under your pixel, select People Who Visited Specific Web Pages. We'll keep the default of 30 days but you can go up to 180 days if you want.
For the URL, select Contains (not Equals) and type in the thank-you page URL.
The last step is to name your audience. I recommend naming the audience the same as the custom conversion you set up so everything's synced across your account.
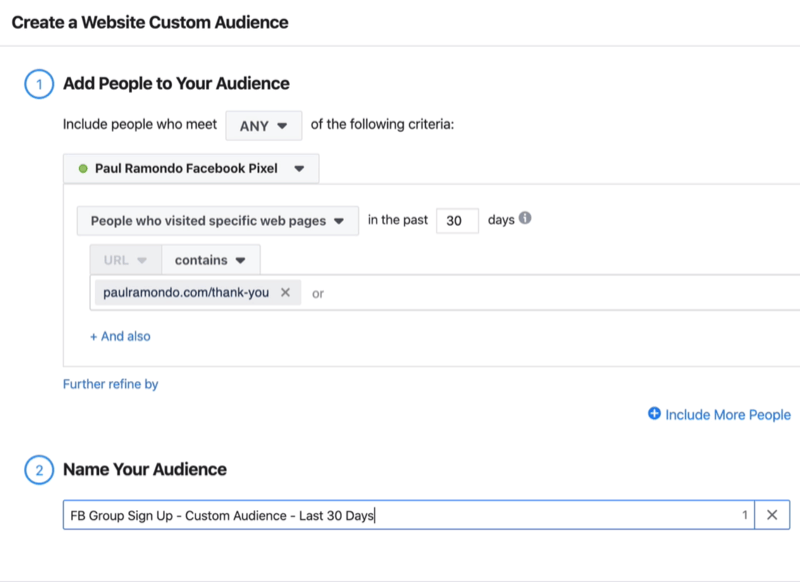
When you're done, click Create Audience.
#4: Create Facebook Custom Audiences Based on Custom Events You've Set Up
Another option is to create audiences based on the custom events you've set up. So instead of choosing All Website Visitors, select PageView, Lead, or ViewContent.
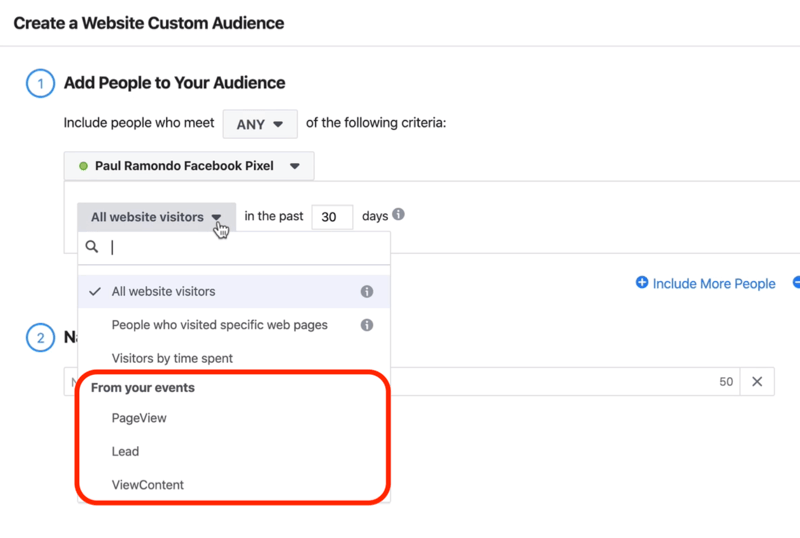
I want to retarget people who have opened up my opt-in form on the homepage of my website so I'll select PageView.
Next, set the date range. Let's say it's 30 days and I want to create this audience to target people who've opened up this lead form but haven't converted as a lead. So I'll target this audience for lower-funnel retargeting.
For the audience name, I'll use “V30 Opened Case Study” (V30 for “viewed in the last 30 days”).
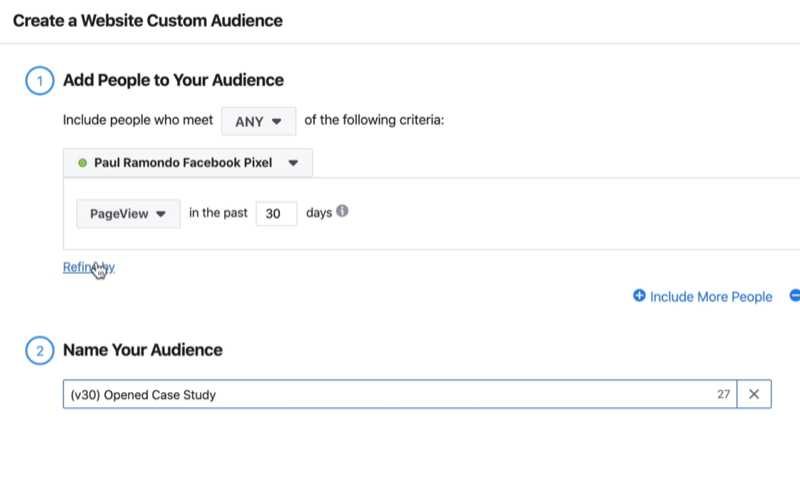
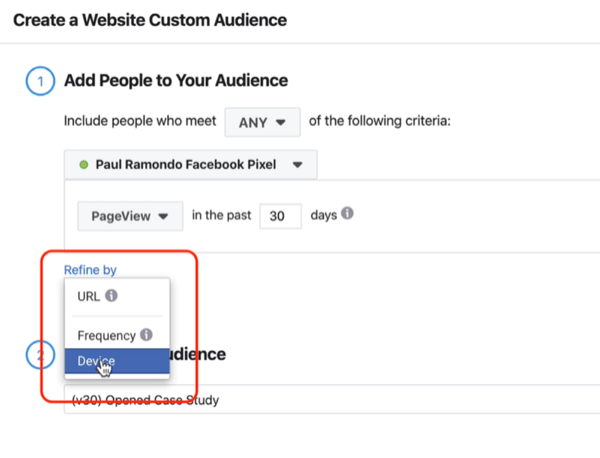
If you want to refine this audience even further, click Refine By and select URL, Frequency, or Device.
When you're done, click Create Audience.
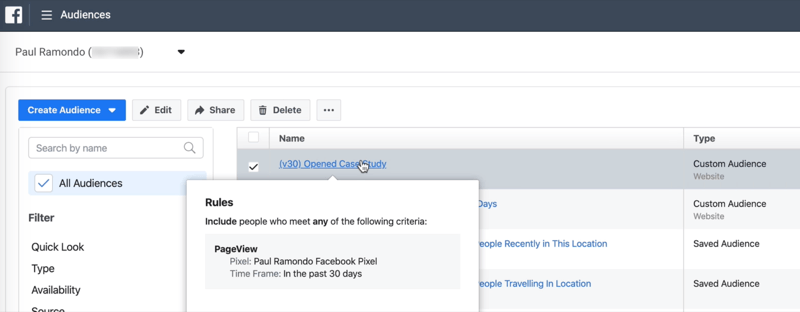
Once this audience has populated, I can target every person who has opened my case study in the last 30 days. I can exclude all leads that have signed up so when I'm targeting these people, I'm not spending any money on ads to people who are already on my email list.
Conclusion
Facebook standard events are critical to the success of your Facebook ad campaigns. Track the events that matter to your business and use the Facebook Pixel Helper tool to verify that your events are firing properly. You can also create custom conversions to track the leads from a specific URL and transform custom conversions into custom audiences for bottom-of-funnel retargeting.
What do you think? What events are most important for you to track for your business? What custom conversions will you transform into custom audiences? Share your thoughts in the comments below.
More articles on Facebook ads:
- Discover four horizontal and vertical ad-scaling techniques for Facebook ads.
- Learn how to retarget Facebook ad traffic for conversions.
- Explore three important considerations when starting your first Facebook ad campaign.
Attention Agency Owners, Brand Marketers, and Consultants

Introducing the Marketing Agency Show–our newest podcast designed to explore the struggles of agency marketers.
Join show host and agency owner, Brooke Sellas, as she interviews agency marketers and digs deep into their biggest challenges. Explore topics like navigating rough economic times, leveraging AI, service diversification, client acquisition, and much more.
Just pull up your favorite podcast app, search for Marketing Agency Show and start listening. Or click the button below for more information.

