Looking for ways to create useful social media content from your videos, live video, and podcasts? Wondering how to easily transform that content for social media?
In this article, you'll discover how to repurpose video and audio into multiple formats you can share on your social media channels.
Have Your Tech in Place
Creating content for your social media channels can be an arduous and time-consuming task. This is why savvy social media marketers will get the most out of any content they create.
When an opportunity arises to capture live video content, record a podcast, or film a webinar, have a plan in place before you start recording that outlines the key points, promotional aspects, and opportunities you can maximize when repurposing your content.
Before recording a video, make sure you're set up to capture the maximum amount of content including both video and audio. I also recommend using a transcription app to capture the audio and transcribe it to written format.
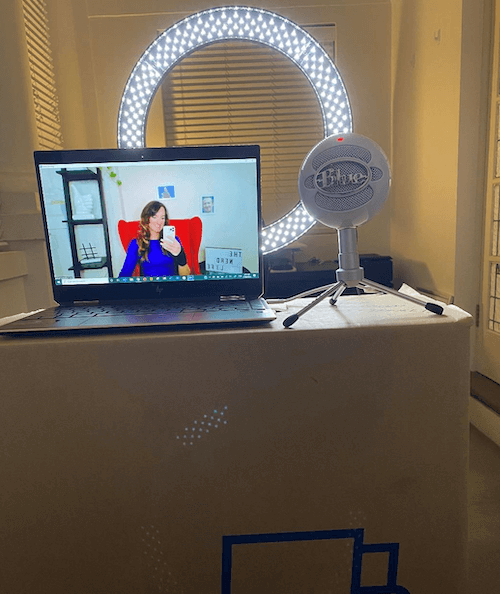
Here's an example of a simple at-home podcast setup that will capture good-quality audio using an external microphone. The light will help improve the clarity of the video content. And when you're not taking selfies, the phone can grab the live transcription.
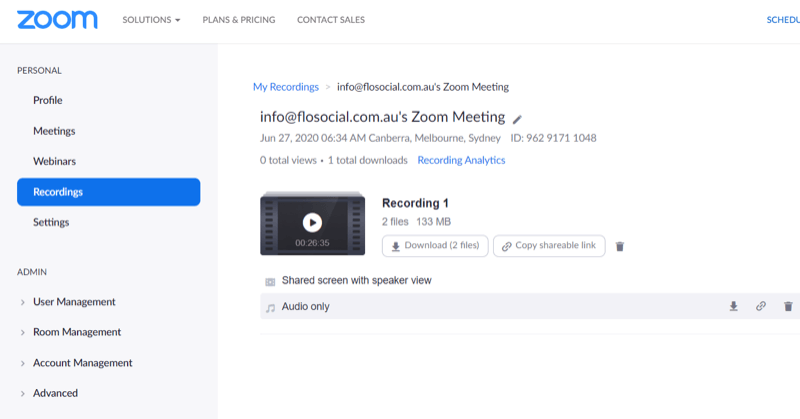
An easy way to capture both video and audio is to use a tool like Zoom and its cloud recording feature. This feature is available with a premium subscription, which costs around $15 per month per host. Skype also offers similar features.
#1: Strip the Audio for Podcasting and Sound Bites
Zoom's cloud recording allows you to capture and download the audio file separately from the video. This produces a high-quality audio file suitable for podcasts because it records the speakers' audio directly from their input sources. Zoom's cloud recording can be used even in areas with weaker internet connectivity.
Once you download your file, you can edit it in the audio software of your choice or send it to your podcast editor to optimize for distribution.
#2: Transcribe the Recording for Blog Posts
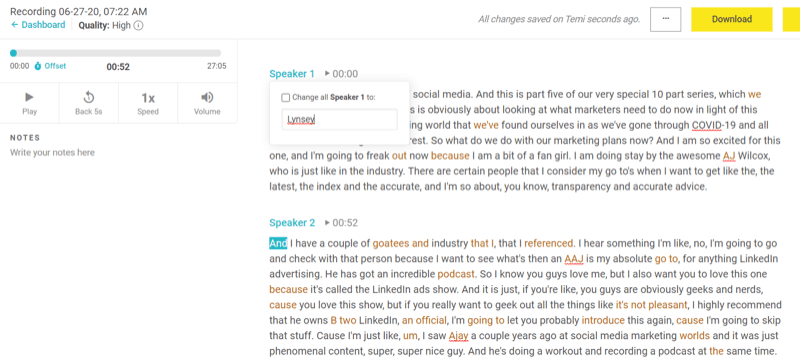
Using a transcription app like Temi is a great way to simplify blog creation. Temi can record and transcribe your content for $0.25 per minute. The transcript will include timestamps and identify individual speakers, and is downloadable as a Word document you can use to create your blog. This makes it easier to highlight certain timestamps and sections of the article without having to map it out yourself.
To use the app, simply tap Record. When you're done recording, tap Save and then Transcript to upload the transcript for full clearing.
Which AI Moves Actually Matter?
That's what every marketer is wrestling with now. New AI strategies, new tools, new takes every week — but no clarity. Most marketers and business owners are trying to figure out AI alone.The AI Business Society is your trusted guide. Get expert-led training you can put to work immediately. Plus a community of marketers sharing what's actually working.
I'M READY FOR REAL AI RESULTS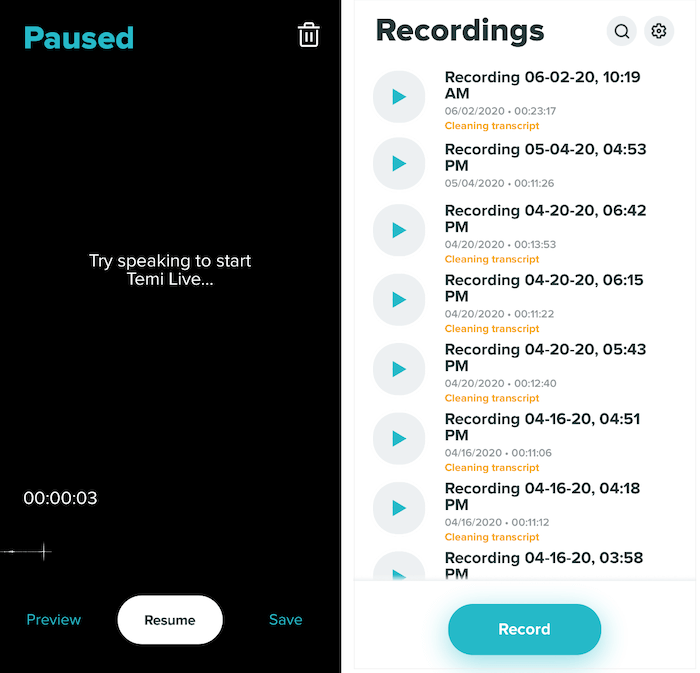
You'll be able to view the transcript as an editable Word document online. To edit the speaker names, tap the pencil icon next to the Speaker box.
Temi uses machine learning and is about 90%–95% accurate so it's helpful to proofread your content for spelling, grammar, and accuracy before downloading it.
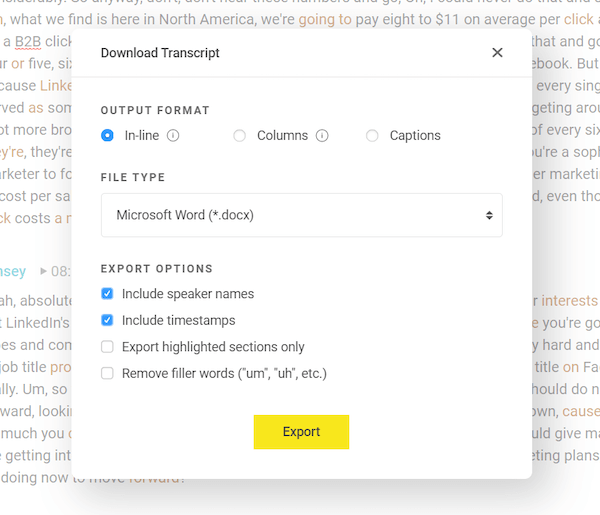
When you're ready to download the transcript, click Download in the upper-right corner of the screen. In the pop-up window, select your file format, decide if you want to include timestamps and speaker names, and then click Export.
#3: Upload the Video Capture to YouTube
If you import the video file into a simple video editor, you can create a full-length feature video for YouTube.
For this type of content creation, you don't need an expensive or overly complicated video editor. For this walkthrough, I'm going to use Movavi Video Editor Plus, which is a simple, drag-and-drop, desktop video editor for Windows and Mac. Movavi's video packages start at around $40, take up less memory, and are more cost-effective than more powerful video editing tools. Free trials are available.
First, you'll need to download the video file from your Zoom cloud recordings.
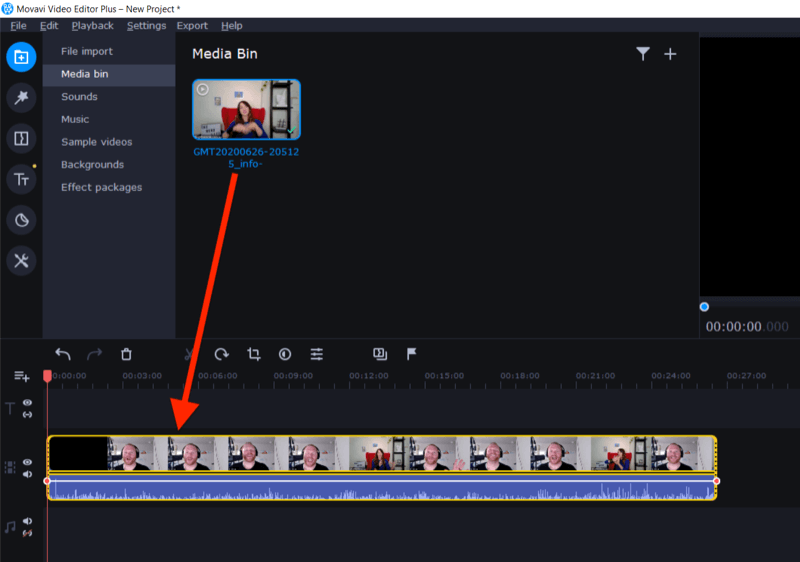
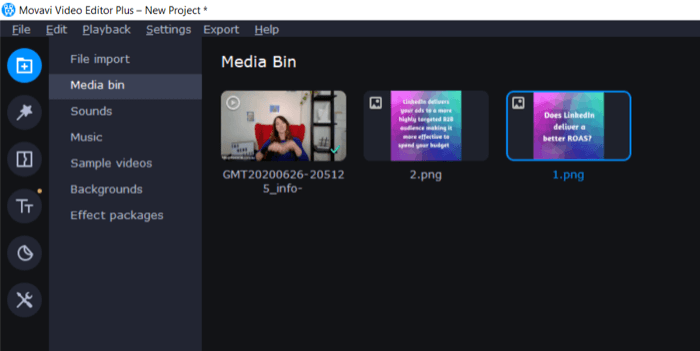
Once you have that, open Movavi Video Editor Plus and drag your file to the Add Files area to import it into the app.

Next, drag and drop the video file into the editing field.
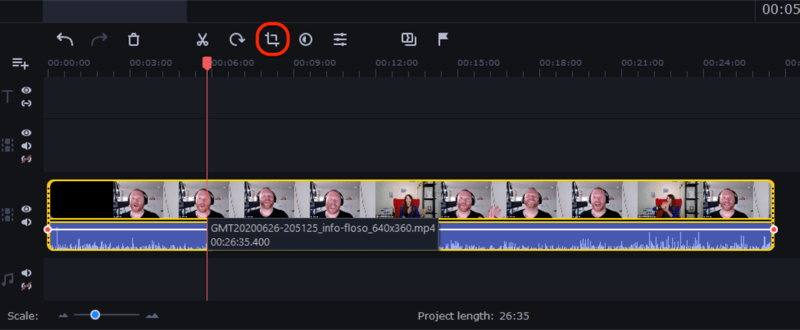
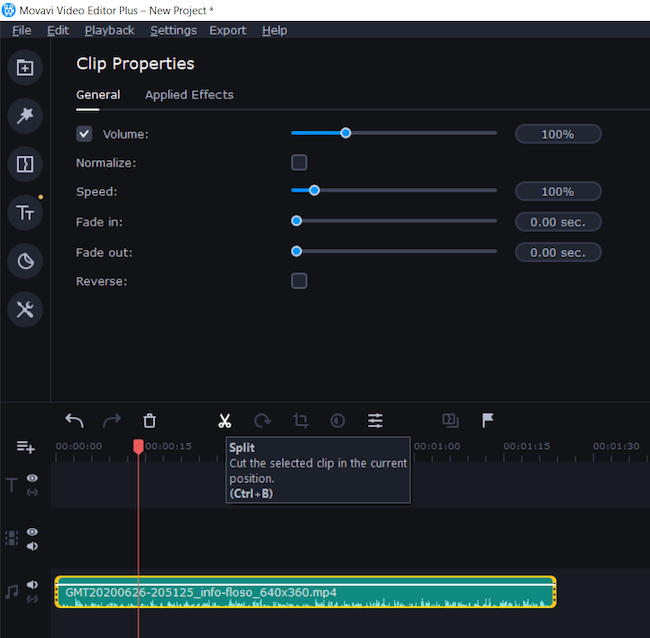
Use the crop tool to slice off the beginning and end of the video where you're starting the camera and turning it off.
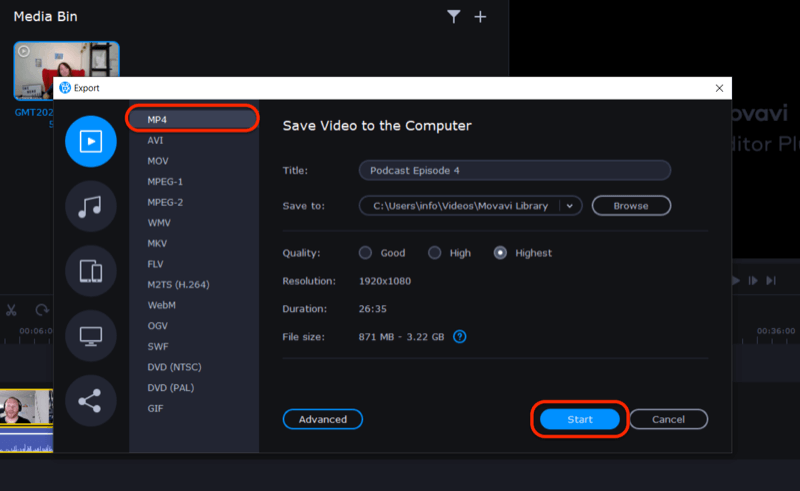
When you're done, click the Export button on the right side of the screen. In the Export window, click Start to export an MP4 or other suitable video file ready to upload to YouTube.
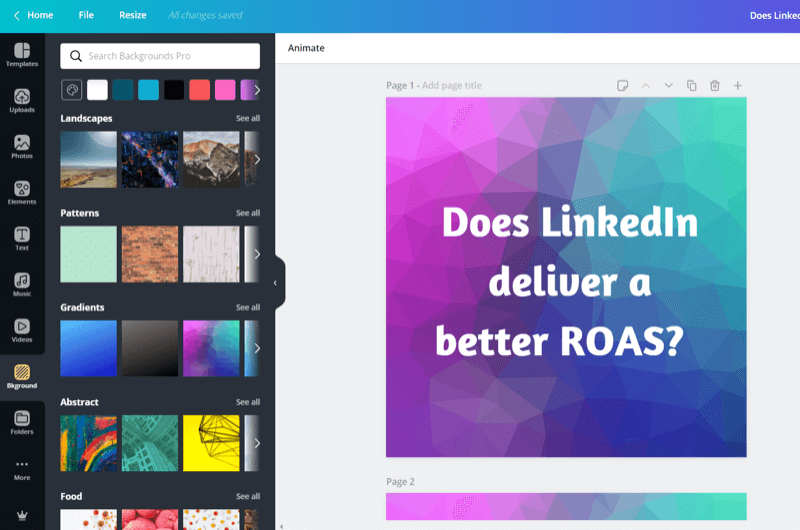
To make your video stand out on YouTube and in a playlist, create a custom thumbnail with screen grabs from the video content. In this example, I used Canva to create a custom thumbnail with the video title.
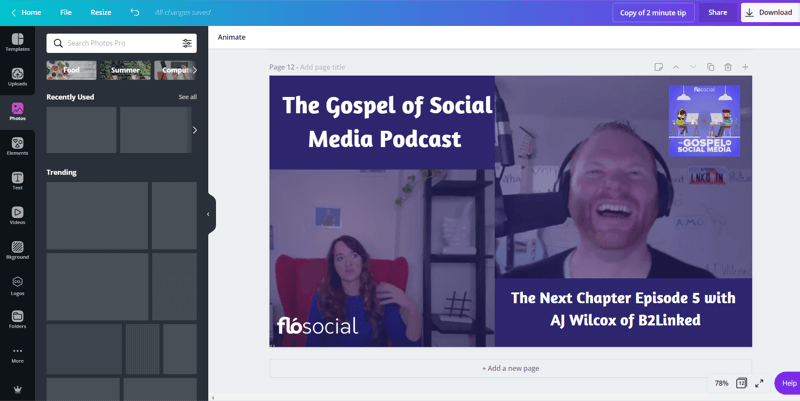
Now when you upload your video to YouTube, you can use the custom thumbnail you created.

Cut the Video Into Nuggets for Facebook, LinkedIn, and Instagram Feeds
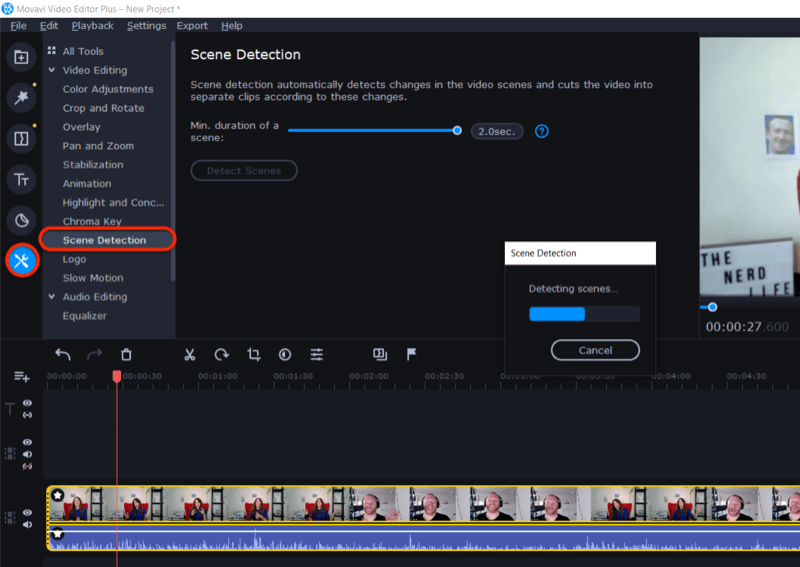
Your long-form content will contain multiple nuggets of great information that you can repurpose for evergreen content. With Movavi's scene detection, you can quickly segment the video into different scenes or moments from speakers within your presentation.
To use this feature, click the Tools menu on the left side of the screen and choose the Scene Detection option. After you click Detect Scenes, Movavi will start slicing up your content into different scenes.
When it's finished, review each scene or reference your timestamped transcript to find the nuggets of content you want to crop for social media. When you're finished editing these video clips, export them as described earlier.
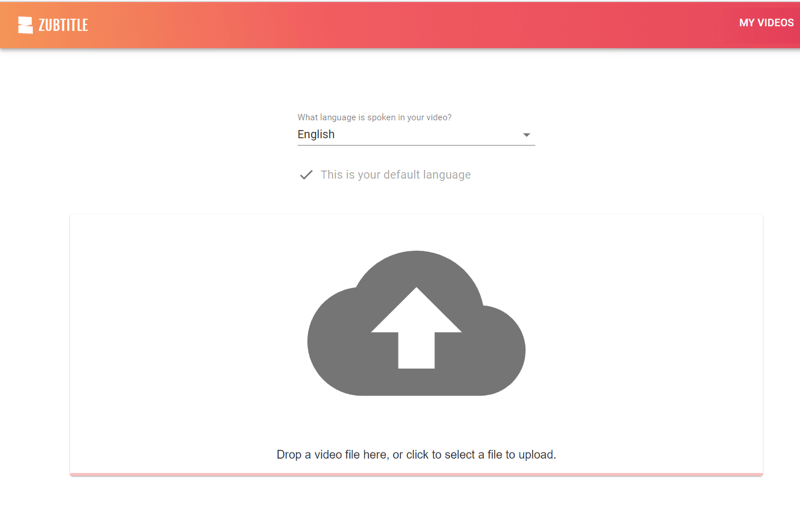
The next step is to import the files into a tool like Zubtitle to add captions. The free trial for this online tool lets you download one video for free. After that, you'll need to sign up for a paid plan, which start at $19 per month for up to 10 videos.
After you sign into Zubtitle, click Add New Video. Then select your featured language and drag your video where indicated on the screen.
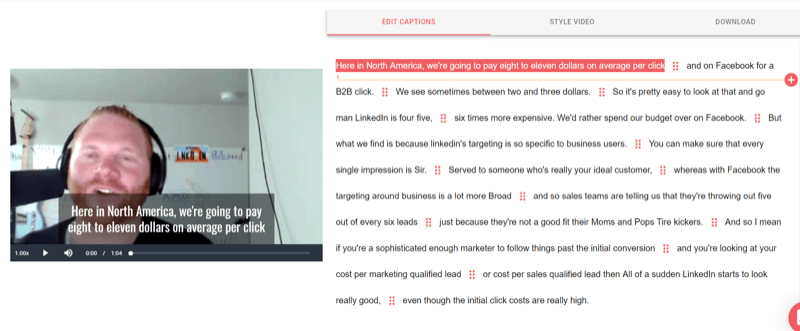
Once the upload process is complete, you'll see the captions generated from the audio. You can edit the captions for spelling, grammar, and accuracy.
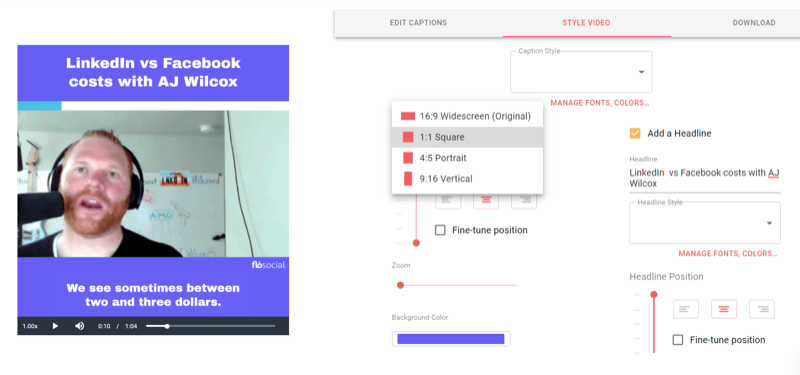
Next, go to the Style Video tab and select the aspect ratio you want to use for your video.
Pro Tip: Square video works well on mobile feeds and suits many social media placements.
Then select the background color. You can enter the hex codes for your brand colors or select colors with the color picker.
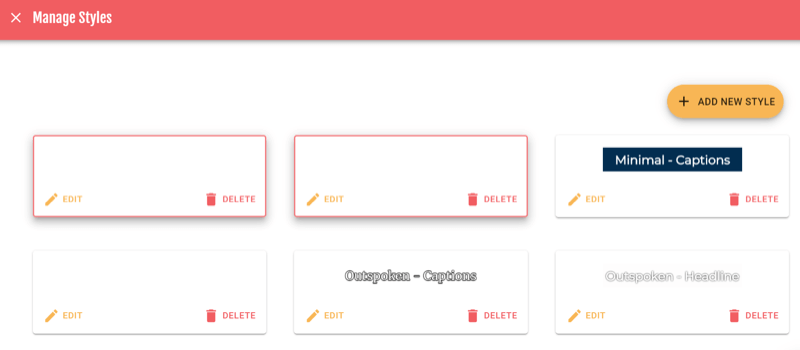
Zubtitle allows you to style the captions by choosing the color, style, and font. If you click “Manage Fonts, Styles…,” you can edit caption styles and save them to use again later. Simply click Edit for the style you want to modify.
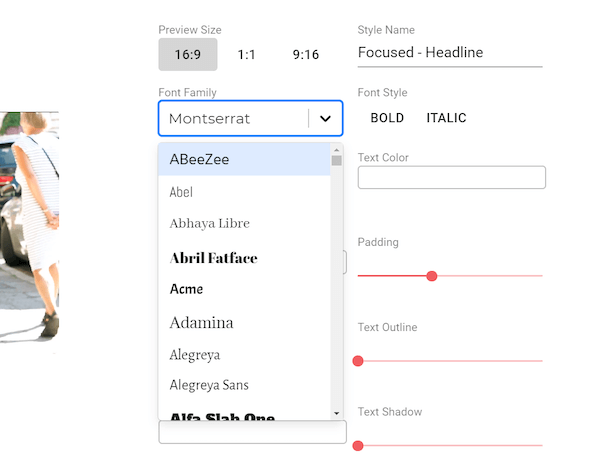
From here, you can choose the font, font weight, color, and position of your captions. When you're happy with the design, click Save.
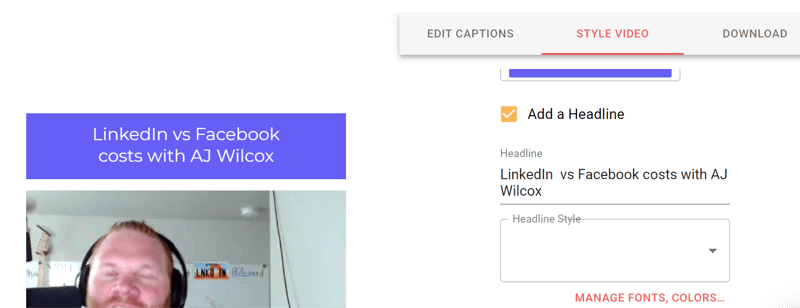
Now you can add a headline and make further changes to customize the font style you want to feature above your video. Zubtitle also lets you choose the position of your headline to fine-tune the layout.
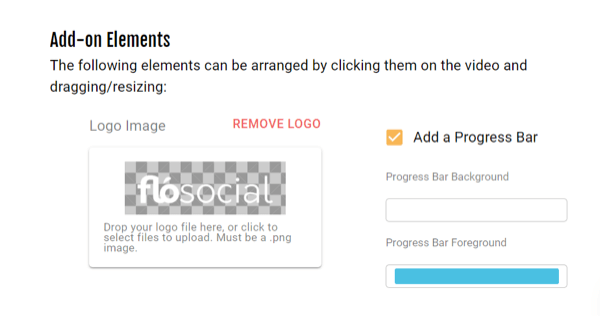
Under Add-on Elements, you have the option to add a logo and progress bar. Zubtitle lets you drag and drop both elements to position them in the right place on your video.
Pro Tip: Progress bars can help increase your video engagement rate.
When you're satisfied with the style of your video, click the Download tab to download your video using one of your 10 video credits allocated per month. Zubtitle will let you re-edit the video once you've finalized your design if you need to but you won't get your video credit back.
3 Days of World-Class Training—Zero Travel!

Couldn't make it to Social Media Marketing World and AI Business World this year? Get all of the great content at a fraction of the price with a Virtual ticket.
That’s full access to recordings of every keynote, workshop, and session—the ones people travel thousands of miles to see. Don't wait. Get your Virtual ticket and enjoy actionable content that you can watch anytime, anywhere.
If you don't want to create a header and background for your video, you can use a simple captions service like Rev.com to create your subtitles as an SRT file. You can then upload the SRT file with your video to Facebook, LinkedIn, YouTube, and so on. Adding captions to your videos on social media is always recommended because most videos are watched with the sound off.
Rev captions start at $1.25 per minute of footage and you can download the file in different formats to suit your placement and channel.
#4: Create Audiogram Graphics
You can use an online tool like Wavve to create sound bars matching the audio from your video and use them in visuals to share across your social media platforms. Wavve is available in both free and paid plans, starting at $10 per month.
Extract Your Audio Clip
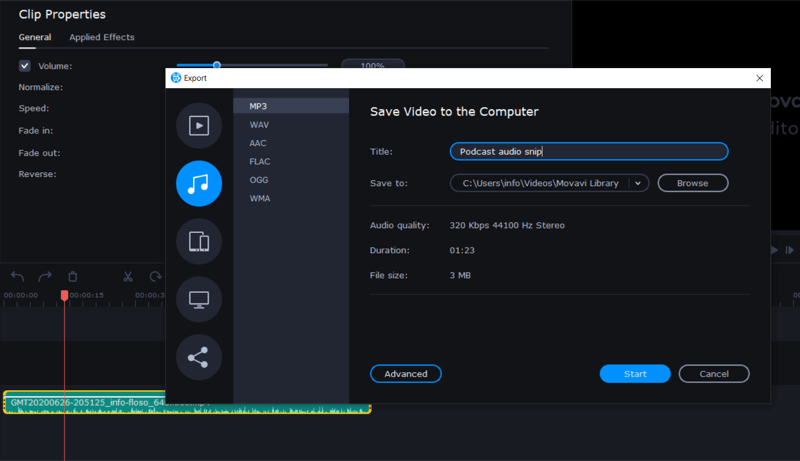
Before you get started in Wavve, use Movavi to extract the audio snippet you want to use in your audiogram. Use the drag-and-drop feature to highlight the audio file and drag it down to a separate line in the editing field.
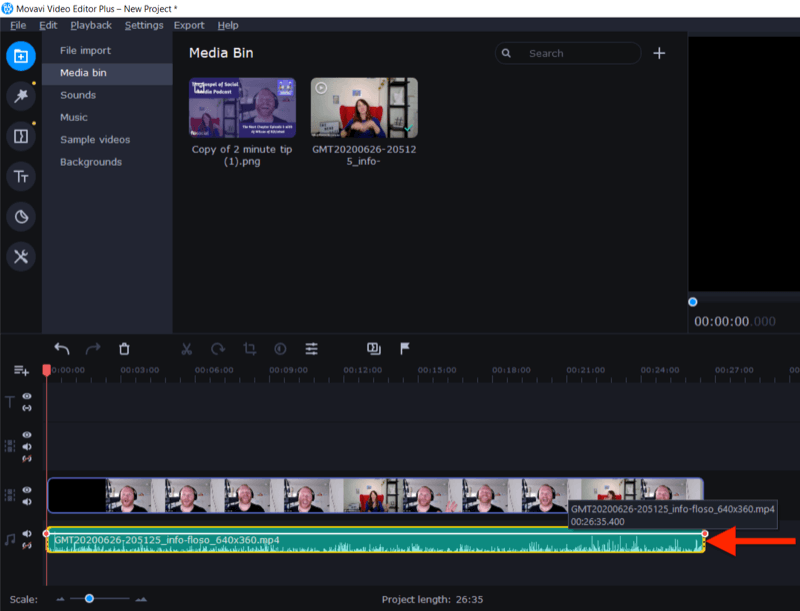
Now delete the video file and trim the audio to find the segment you want to use.
The last step is to export the file as an audio clip such as an MP3.
Create Your Audiogram
Now that you have your audio file in hand, you're ready to create your audiogram in Wavve. This is a two-part process: First, you create the graphic, and second, upload your audio file.
To create your background graphic, log in and click New Design. If you've previously used Wavve, you'll have the option to select one of your previous designs.
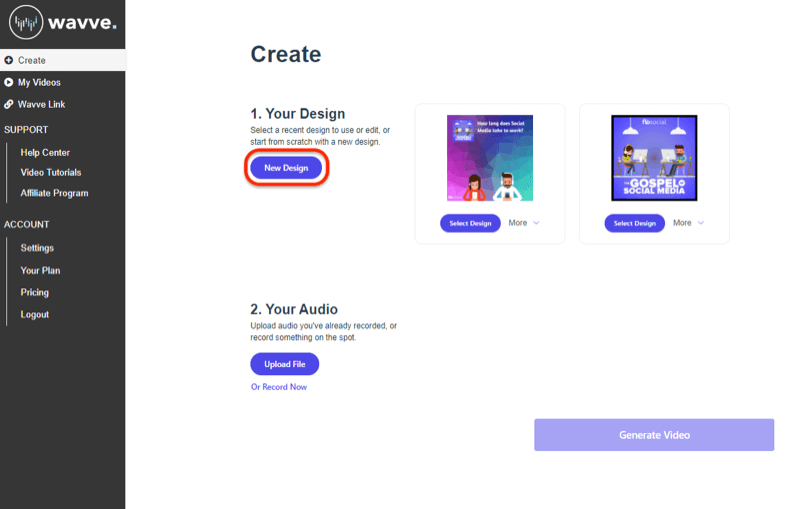
On the next screen, choose whether you want to start from scratch or use one of Wavve's templates.
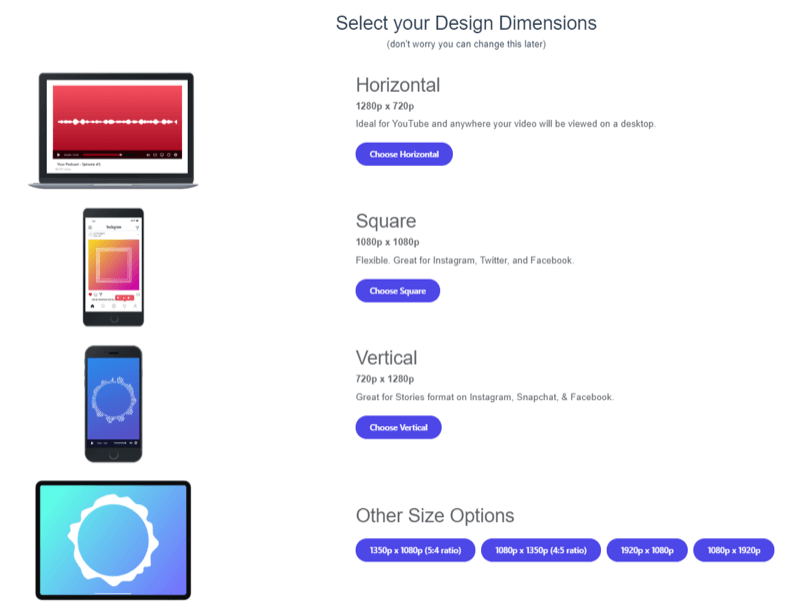
If you're starting from scratch, select your design dimensions.
Now you're ready to upload your image. At the bottom of the screen, click Image and then Upload and navigate to your image file. For this example, I'm using an image I created in Canva that leaves space to overlay the sound bar.
Next, click Waveform at the bottom of the screen and select the style of audiogram or sound bar you want to add to your design.
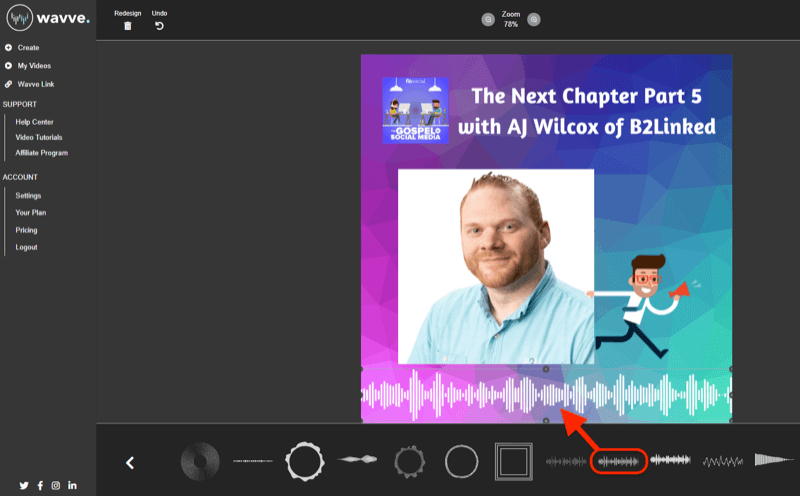
Using the drag-and-drop editing tools, you can also add progress bars, captions, and text overlays if you want. When you're finished, click Save in the upper-right corner to save your design.
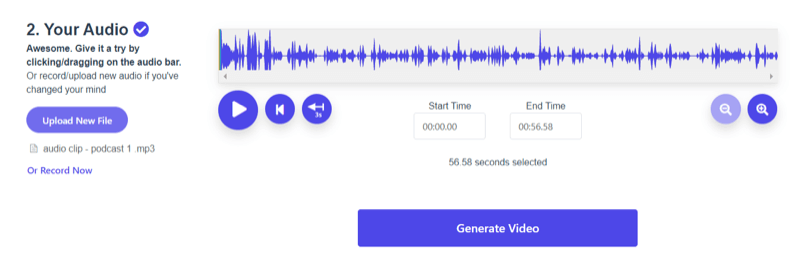
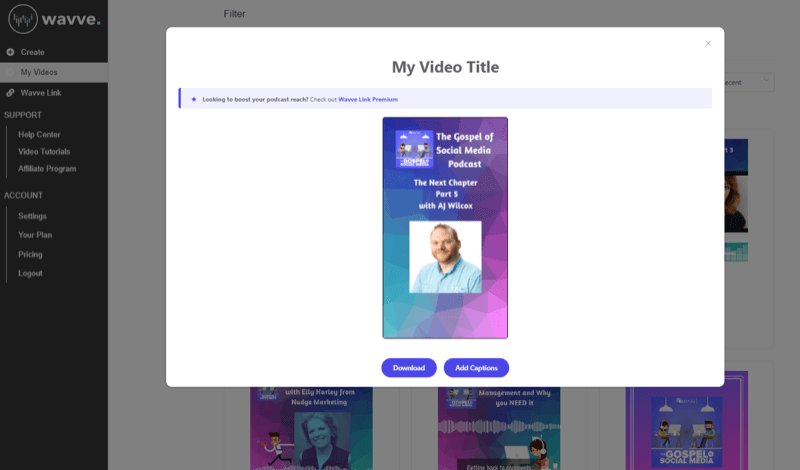
The final step is to upload your audio clip to create the sound bar. Click Upload New File and navigate to the audio snippet you extracted from Movavi. When you're done, click Generate Video.
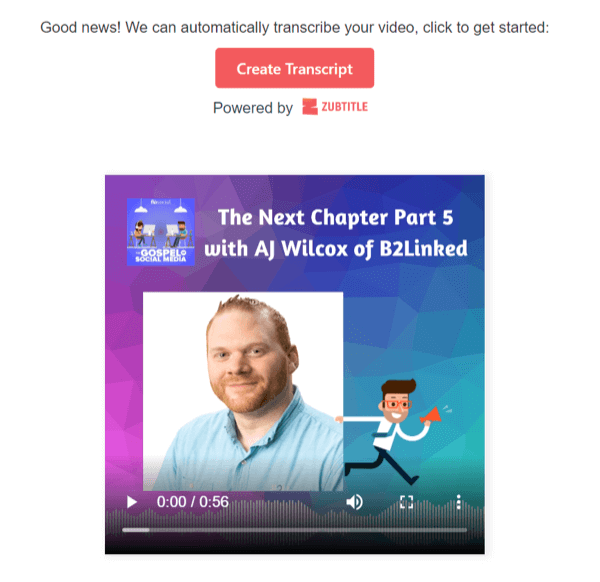
Once Wavve has finished creating your video, you'll have the option to insert captions and add them to your audiogram using Zubtitle's transcription and editing services. Wavve is part of the same company as Zubtitle.
#5: Create Quote Graphics
Another way to repurpose your content is to review your transcript and look for short, powerful, or unique quotes that would be highly shareable on social media. With a free mobile app like Word Swag (available on iOS and Android), you can quickly turn them into quote graphics.

Word Swag offers more than 50 free backgrounds and 25 text styles with multiple layout options so it's easy to create highly visual and engaging quote graphics. With the pro plan ($4.99 per month), you'll get access to a wider range of styles and more features including the ability to add your logo to your design.
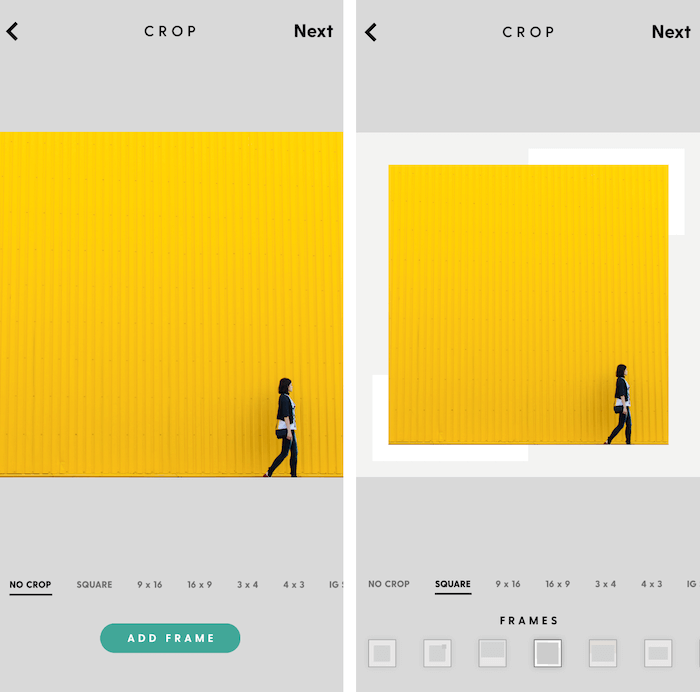
Start by choosing whether you want to take a photo, upload a photo, or use one of Word Swag's free backgrounds for your design.

Next, select your post size and add any frame effects you want.
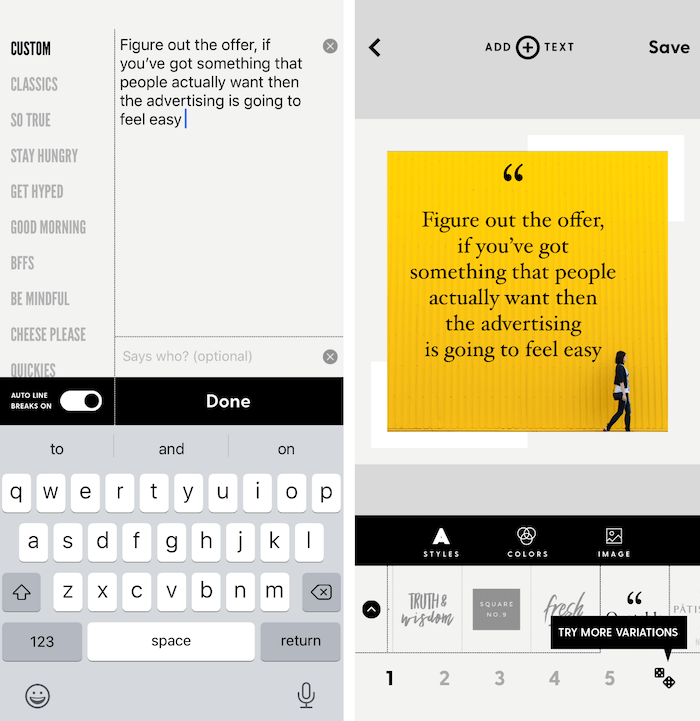
After you tap Next, add your quote in the text box and select the font style you want to use. You can change the layout of each style by using the number options 1–5 underneath, as well as alter the color and add filter effects to your image.
When you're satisfied with your design, save the file to your camera roll and then upload it to your social media channels.
Vertical Videos for Instagram Stories and LinkedIn Stories
Even if you recorded the original video in a traditional 16:9 landscape aspect ratio, you can use editing tools to repurpose it for the Instagram, Facebook, and LinkedIn Stories 9:16 format. (Currently, the placements for LinkedIn Stories are available only in Australia, Brazil, the UAE, and the Netherlands, with more countries expected to roll out in the next few months.)
In this example, I'm going to show you how to use Movavi's split overlay tool and 9:16 editing aspect ratio plus some simple graphics from Canva to create a short Q&A–style video. The first part of the story will be the interviewer asking a question accompanied by a graphic. The second part will share the guest's answer accompanied by another graphic with the answer summary.
This is a simple, concise way to adapt small snippets into interesting, engaging content for vertical placements.
Start by creating your Q&A graphics in the design app of your choice.
Next, import the graphics into Movavi.
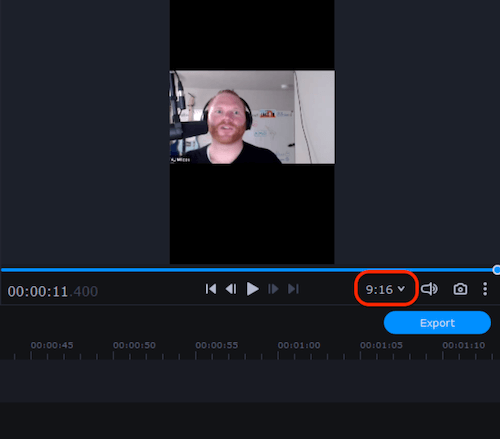
In the upper-right corner of the screen, select 9:16 from the video ratio drop-down menu, as shown below.
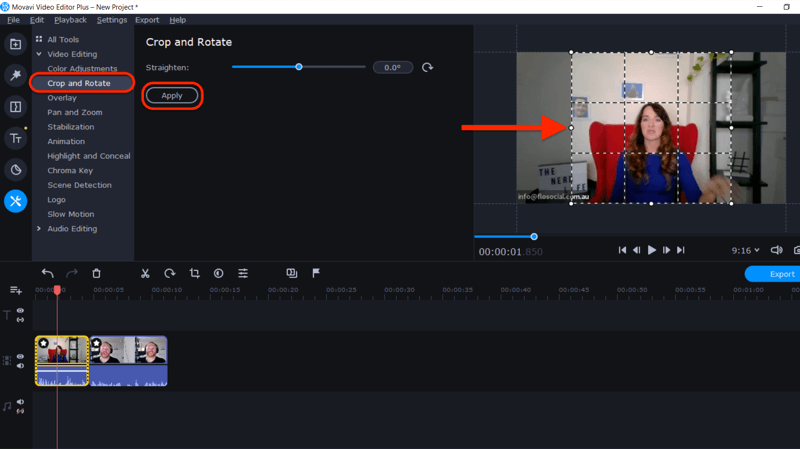
Now crop the video into two segments: one for the question and one for the answer. Double-click on the first segment to select it and open the clip editing tools. Then click the Crop tool.
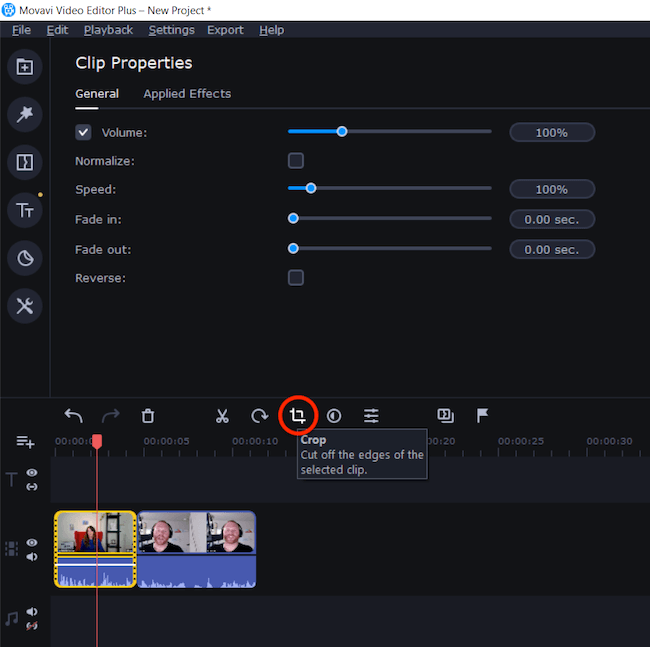
From the drop-down menu, select Crop and Rotate. Then on the right side of the screen, use the selection handles to crop the video into a square. When you're done, click Apply.
Repeat this process for the second video.
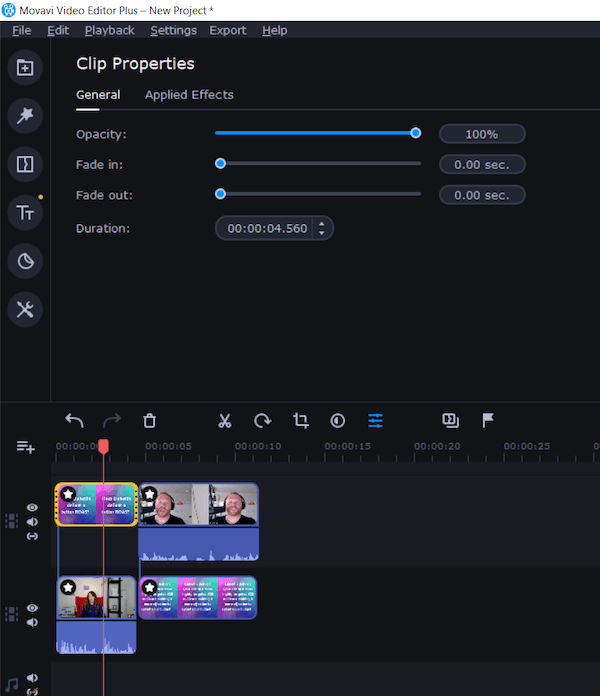
Next, drag your graphics into the timeline. Drag and drop the videos and graphics to place them in the correct order.
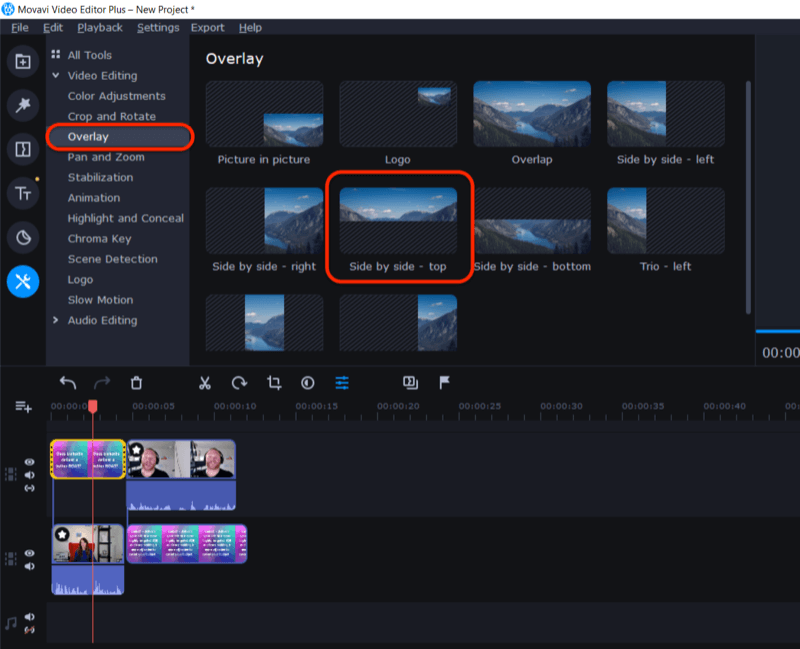
When you're done, open the Tools menu and select Overlay. Highlight the top graphic and video, and select the “Side by Side – Top” layout to show them at the top of the story.
Repeat the process to show the bottom video and graphic at the bottom of the story by selecting the “Side by Side – Bottom” option.
The video will now be sized to display on stories and use graphics to enhance the Q&As between the guest and interviewer.
Another way to create a vertical video for stories is to use Zubtitle's 9:16 layout and design a background graphic to match, leaving space to add the sound bar to create a vertical audiogram. You can use a shorter snippet of the audio for a single story (up to 15 seconds) or create multiple stories for longer content.
Conclusion
It's easy to repurpose your audio and video content into multiple formats suitable for different platforms. As long as your subject matter is rich and interesting to your audience, you can cut, crop, and restyle one initial piece of content in a variety of ways to work across all of your social media platforms.
In this article, I featured a few simple editing tools to show that repurposing content doesn't need to be a technical, difficult, or expensive endeavor. Different editing tools are available depending on your operating system and level of expertise.
Look for every opportunity to bring longevity to your content and repurpose it in as many ways as you can to reduce your overall content production budgets, maximize your time, and increase your content's exposure.
What do you think? Are you inspired to repurpose your audio and video content in new ways? Do you have any favorite tools for repurposing audio and video? Share your thoughts in the comments below.
More articles on social media video:
- Discover practical tips to produce polished videos that perform well on social media.
- Learn how to use Facebook Live to quickly create content.
- Find a checklist of tips and tools to create HD-quality live video broadcasts from your laptop or desktop.

Curious About How to Use AI?
Our newest show, AI Explored, might be just what you're looking for. It's for marketers, creators, and entrepreneurs who want to understand how to use AI in their business.
It's hosted by Michael Stelzner and explores this exciting new frontier in easy-to-understand terms.
Pull up your favorite podcast app and search for AI Explored. Or click the button below for more information.
