 Do you include shareable images with your articles and updates?
Can you create them yourself, or do you think you lack design skills?
It doesn't make sense to hire a graphic designer every time you need an image.
In this article I'll show you three online design tools to make your own shareable images–no formal design skills necessary.
#1: Create Reusable Images With Layers
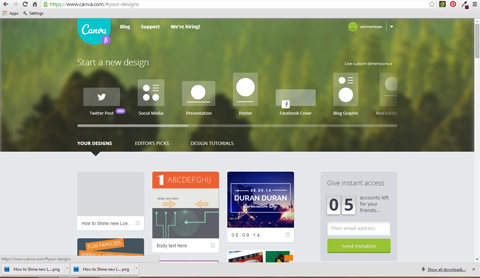
Canva is an online tool built by designers who had non-designers in mind. When you open your account, Canva offers a quick tutorial and five Starter Challenges to get you going. You can also check out the other design tutorials on the home page–each one takes about three minutes.
This particular design tool is an excellent choice if you want to create a template and then switch out the background, text or other elements as needed. And because Canva saves your work in layers, you can go back and make changes hours, days or months later.
If you need inspiration for a new image, take a look at Canva's Editor's Picks on the home page. When you get going, don't worry about making a mistake. Canva makes it easy to experiment and change things as you go along. When you're done, you can save your work right on your home page.
You'll find lots of flexibility with Canva. They offer free and paid options for backgrounds, icons and pictures—or as with most design tools, you can upload your own images.
Canva's paid options are only $1. Once you buy them, they're only available for 24 hours and for one project only. Canva's inexpensive photos are a great time-saver and can make the difference between ho-hum and amazing.
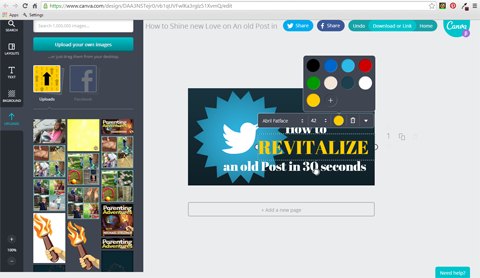
To find an image, click in the search box and choose the type of image you're looking for. For example, to find the Twitter icon below, I chose Buttons and searched for Twitter. If you're doing an article on Pinterest and creating your image in Canva, you can search for ‘Pinterest' and you'll get other icon options.

Want to change the color of something—your text, perhaps? Click on the text and then click the color circles to change colors easily. Canva doesn't have a color picker (a dropper to select colors already in your image), but they do have a color wheel under the +.
My favorite thing about Canva color is that it saves your recent colors, which is nice when you know you're going to be using your company colors often.
Like any new-to-you tool, there is a learning curve, but you get through it pretty quickly. Once you get used to it, you'll find the Canva process that works best for you.
I use Canva when I'm collaborating on an image or creating a template I'll be reusing. I also use Canva for their fantastic photos and basic structure.
Get World-Class Marketing Training — All Year Long!
Are you facing doubt, uncertainty, or overwhelm? The Social Media Marketing Society can help.
Each month, you’ll receive training from trusted marketing experts, covering everything from AI to organic social marketing. When you join, you’ll also get immediate access to:
- A library of 100+ marketing trainings
- A community of like-minded marketers
- Monthly online community meetups
- Relevant news and trends updates
#2: Add Interest With Fonts
PicMonkey is known for its fun, user-friendly interface and its huge collection of fonts. This tool is free, but if you get a paid account you can get the ad-free version that includes premium fonts and layouts.
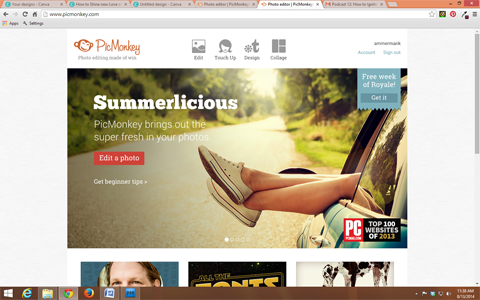
For many people, PicMonkey's selection of fonts is a huge draw. There's even an option for adding specialized fonts, meaning if your business uses a specific font, you can upload it and use it in PicMonkey.
With PicMonkey, changing background and text colors is a snap. You can choose a specific color if you know the hex code, use the color picker or use the dropper tool select a color right from your image.

Discover Proven Marketing Strategies and Tips
Want to go even deeper with your marketing? Check out the Social Media Marketing Podcast! Publishing weekly since 2012, the Social Media Marketing Podcast helps you navigate the constantly changing marketing jungle, with expert interviews from marketing pros.
But don’t let the name fool you. This show is about a lot more than just social media marketing. With over 600 episodes and millions of downloads each year, this show has been a trusted source for marketers for well over a decade.
In the example below I used the dropper tool to duplicate the color of the liquid and used that color for the middle row of text.
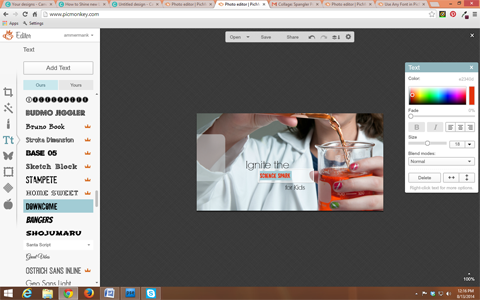
PicMonkey makes it simple to try out fonts and colors, but it's usually a good idea to stick to one or two fonts and one to three colors for your overall image.
There may be times when you need to create an image and make duplicates in different sizes. No problem. You can open another tab for PicMonkey and simply copy and paste your text from the original image to your new image in the new tab. PicMonkey copies the colors and fonts, enabling you to recreate another image quickly—and you can resize however you like.
The downfall of PicMonkey is that you have to save your work to your computer. When you close your work in PicMonkey, it's gone forever! If you upload and open your saved image in PicMonkey it will be flattened, which means you can't change colors, fonts or move the text around.
When you save your image to your computer you can name the file, choose either .jpg or .png, set the quality and resize as needed.
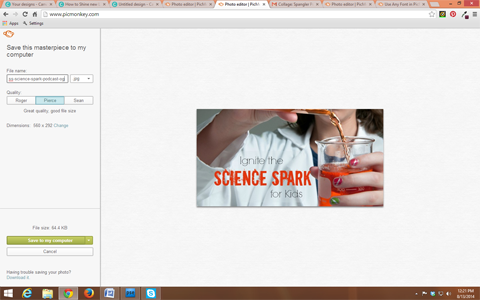
Few can resist the lure of PicMonkey's font library, and many love how fast the interface is.
I use PicMonkey when I'm doing one-time images, working solo or using my own photography.
#3: Make Quick Images on Mobile
WordSwag is a mobile-only tool that's perfect for making quick quotes.
You can upload your own camera picture or use their set backdrops. Either way, backgrounds are easy to swap out later, so go ahead and experiment. I often use WordSwag's library of photos, but it's somewhat limited.
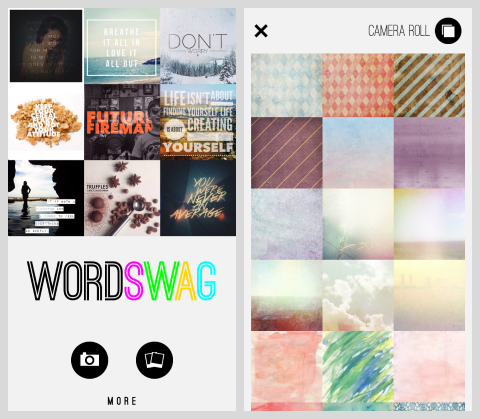
After you choose your backdrop, you can add text. You can use pre-created quotes or select Custom from the menu and make your own.
To add text, double tap in the center of the image to bring up the text box. I usually turn off the Auto Line Breaking option so I can choose how my text wraps. You can create your own line breaks by tapping the Return button.
In the example below you can see where I moved the word ‘others' to the next line because I want that word to start the second line of text.
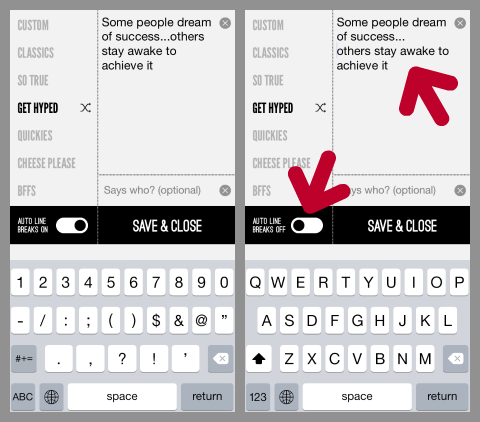
When you're done, click Save and Close to move on to text color, style and transparency. The fun really begins when you swipe and click on different font styles! If you've ever manipulated text layouts manually, you'll appreciate this feature!
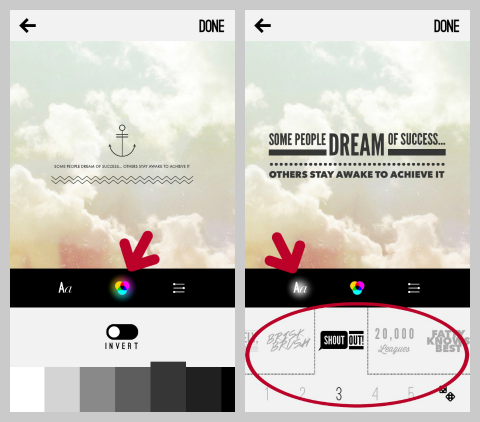
When everything's ready to go, click Done and you'll have the chance to share your image to Facebook and Twitter right then and there. You can also email the image to yourself or save and download it into your social scheduler to post later.
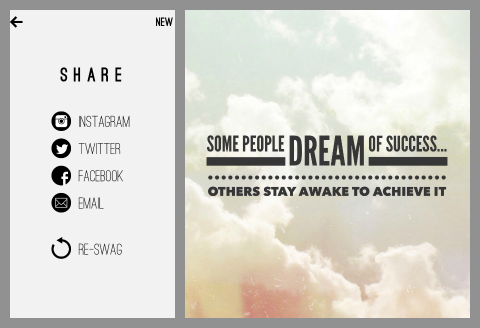
If you decide you want to make changes to your current WordSwag, click the back arrow and make changes. You should know, though, that WordSwag only holds one image and its layers at a time. Once you start working on a new image, the old one is gone.
Wrapping Up
Whether you have a background in design or not, Canva, PicMonkey and WordSwag are useful tools that let you create and share social media images quickly. You don't have to take a college course or watch lengthy YouTube tutorials to figure out how to use them. Just dig in and experiment.
What do you think? Do you make your own social media images? Have you used any of these tools? We'd love to hear what you have to say. Please leave your comments below.
EDITOR'S NOTE: This article has been changed to reflect the fact that WordSwag is now a paid app.
Attention Agency Owners, Brand Marketers, and Consultants

Introducing the Marketing Agency Show–our newest podcast designed to explore the struggles of agency marketers.
Join show host and agency owner, Brooke Sellas, as she interviews agency marketers and digs deep into their biggest challenges. Explore topics like navigating rough economic times, leveraging AI, service diversification, client acquisition, and much more.
Just pull up your favorite podcast app, search for Marketing Agency Show and start listening. Or click the button below for more information.

