 Want to improve your social media images?
Looking for easy-to-use tools for creating high-quality visual content?
Visual content is an absolute must for generating engagement on social media, whether it's in the form of videos, graphics, or emojis.
In this article, you'll discover six tools for creating unique, professional-looking visuals for social media.
#1: Add Emojis to Graphics
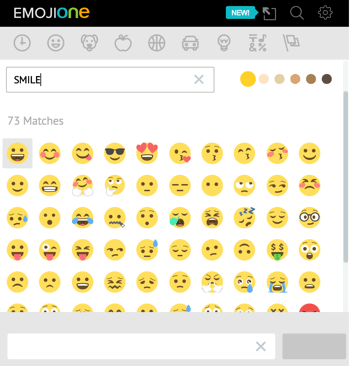
Emojis have become ubiquitous in online conversations as a way to add personality to content. The team behind EmojiOne is always on top of the newest emoji updates so you never have to wait long to use the hippest visuals available. The app makes it easy to use emojis on social media and lets you incorporate them in custom graphics.
EmojiOne is available as a desktop browser extension for Chrome, Firefox, and Opera. Once you install the extension, click the unicorn icon on the toolbar to access your emoji library.
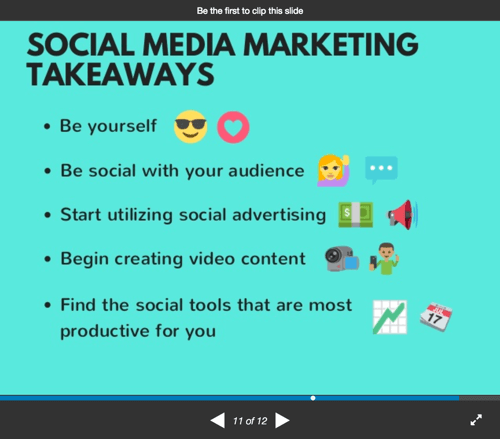
You can also download the art files for the complete emoji library to use them in your other communications such as posters, infographics, or SlideShare decks.
EmojiOne is completely free to use. If you're using their art files commercially, they ask that you give them attribution in the form of a link.
#2: Produce Animated Videos
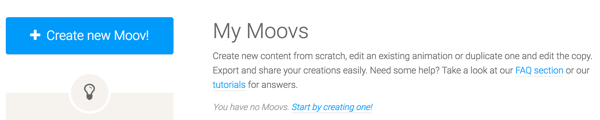
Moovly lets you create animated videos and presentations and then export and share them on social media.
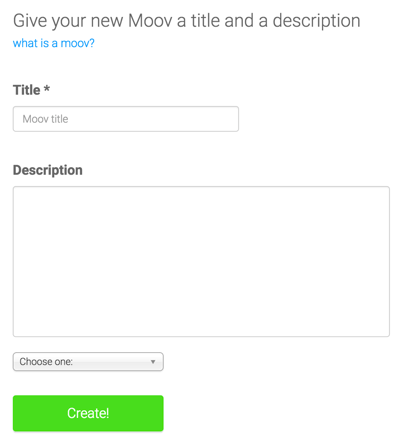
After you register, click Create New Moov.
Next, enter a title, description, and category for your video. Then click Create.
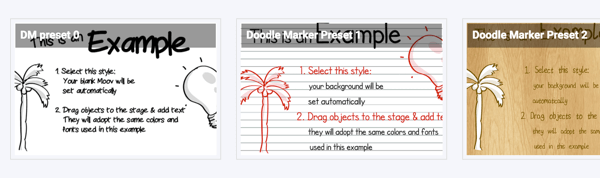
Now decide what video style you want to create, such as an animated video, presentation, or display ad. You can either use one of Moovly's templates or create a moov from scratch.
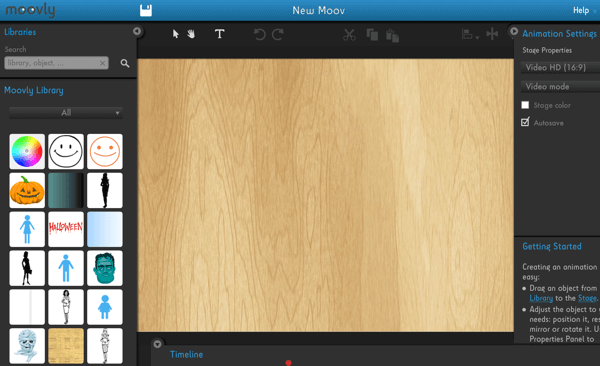
Now you're in the Moovly editor window where the magic happens! From here, you can add objects from the Moovly Library and access the text, color, animation, sound, and voice tools. The tool also lets you upload your own content in the form of pictures, graphics, and sounds.
3 Days of World-Class Training—Zero Travel!

Couldn't make it to Social Media Marketing World and AI Business World this year? Get all of the great content at a fraction of the price with a Virtual ticket.
That’s full access to recordings of every keynote, workshop, and session—the ones people travel thousands of miles to see. Don't wait. Get your Virtual ticket and enjoy actionable content that you can watch anytime, anywhere.
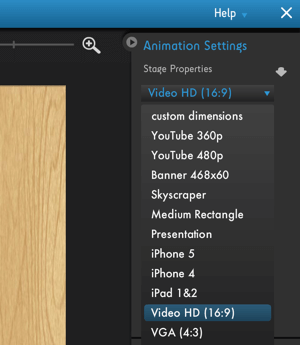
When you're finished creating your video, decide what platform or device to optimize the video for such as YouTube 480p, iPhone 5, iPad, Presentation, or custom dimensions. Then save your video and return to your dashboard.
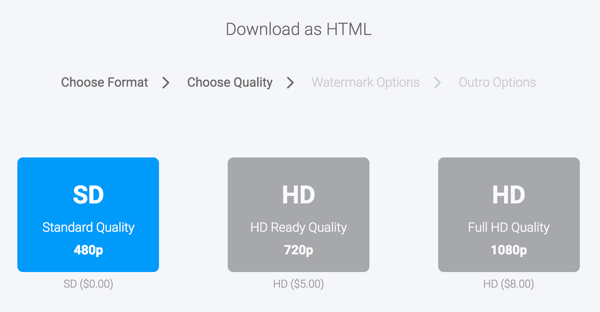
Downloading your video is easy. First, choose the file format and video quality you want. (It costs up to $8 to export in HD.)
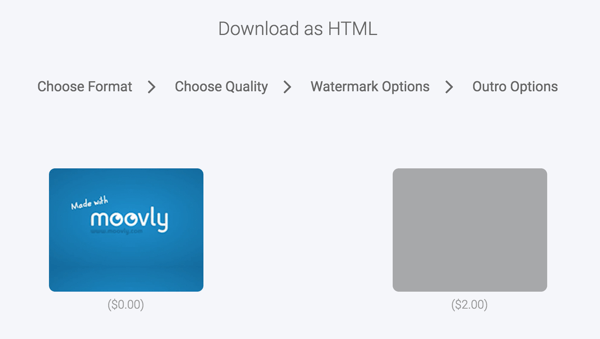
Then decide if you want the Moovly watermark on your video; it's $3 to remove it.
Finally, choose whether you want to remove the “Made with Moovly” outro. (This will set you back another $2.) You can export your video and then upload and share it.
You won't find many tools that let you create professional-grade animated videos and presentations for under $15. Moovly offers an easy-to-use interface and with a bit of tinkering, you'll soon be creating high-quality videos like this for your social media channels.
#3: Build Infographics
Infographics are a must for your social media marketing. With Piktochart, you don't have to be a graphic designer to create attractive infographics.
A limited version of the tool is available for free and offers 10 infographic templates to choose from. For a monthly fee, you get access to hundreds of templates and icons, as well as integration with SlideShare, PDF, and more.
After you choose a template or start your own design, begin adding your content. Everything is customizable so you can tweak and edit the graphics, background, text, and more. You can also upload your own files.
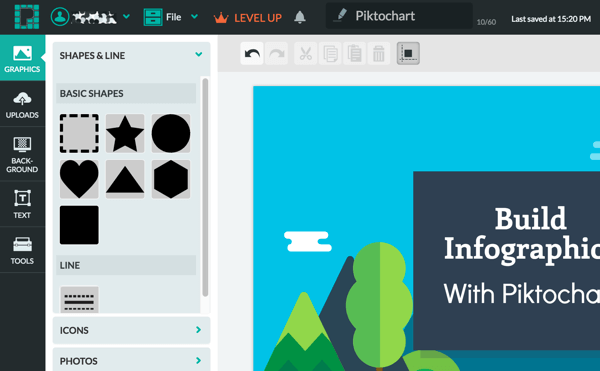
The Tools section lets you add charts, maps, and videos to your infographic.
Want to Unlock AI Marketing Breakthroughs?
If you’re like most of us, you are trying to figure out how to use AI in your marketing. Here's the solution: The AI Business Society—from your friends at Social Media Examiner.The AI Business Society is the place to discover how to apply AI in your work. When you join, you'll boost your productivity, unlock your creativity, and make connections with other marketers on a similar journey.
I'M READY TO BECOME AN AI-POWERED MARKETER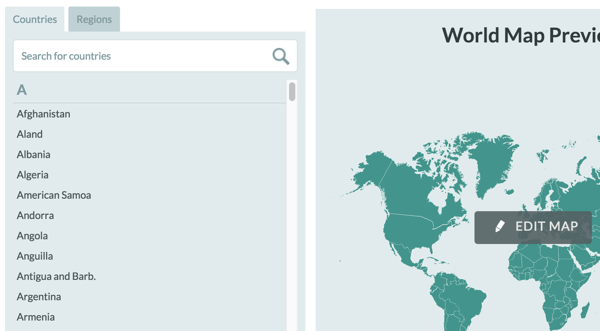
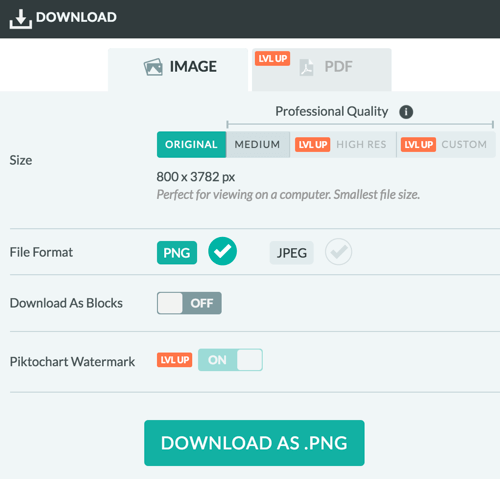
When you're happy with your design, download your infographic. Your choices are limited with the free version, but if you're just starting out, you'll be able to share an impressive-looking infographic with your social media followers.
#4: Create GIFs
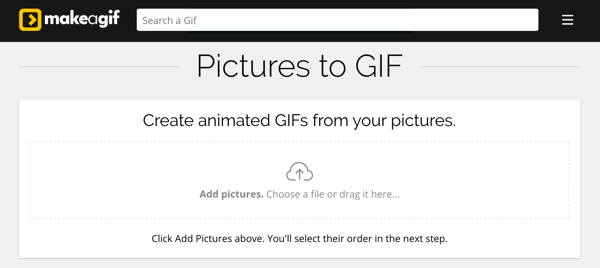
GIFs are powerful tools for showcasing your brand, products, and company culture on social media. MakeaGIF lets you create GIFs from your own images, YouTube videos, webcam, and other video files.
To build a GIF from images, select the images you want to use such as pictures of your latest company event, office activities, or something else.
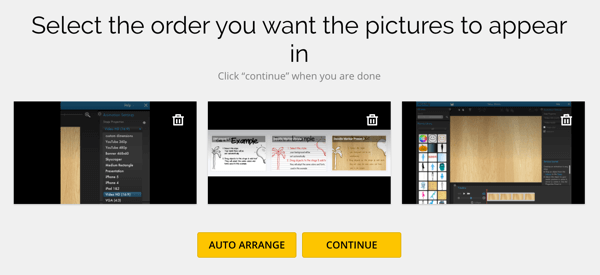
Then arrange the images in the order in which you want them to appear.
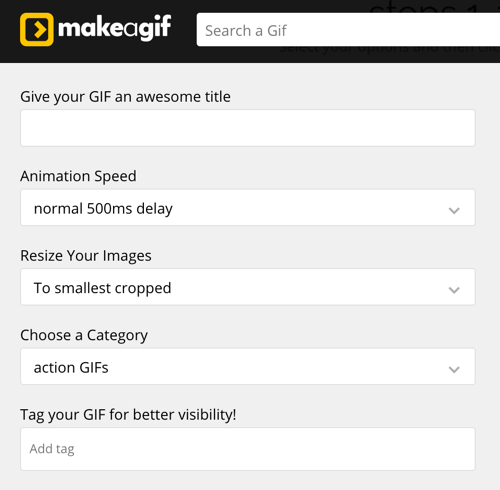
Now, just name your GIF, pick the speed and category, and click Create a GIF.
Keep in mind your GIFs don't have to be work-related. The best ones use humor, so get creative and brainstorm a GIF for TGIF, for example. Creating your own GIFs lets you add a more personal and unique face to your brand.
#5: Turn Visuals Into Movies
Magisto eliminates the time and hassle of video editing and will create beautiful videos for you automatically from your photos and videos. It's available on a variety of platforms, including desktop, Android, and iOS.
To get started, click Create Movie and choose the videos and images you want to include. The free version limits you to 10 videos or photos and a maximum length of 15 minutes.
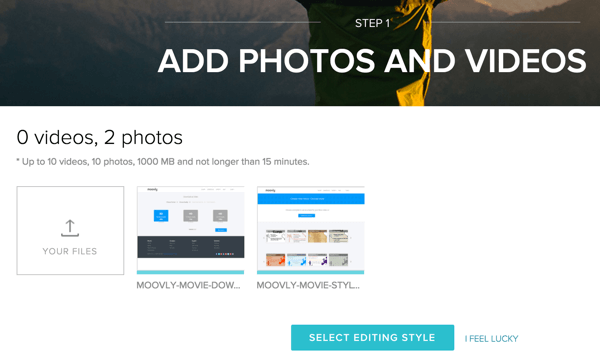
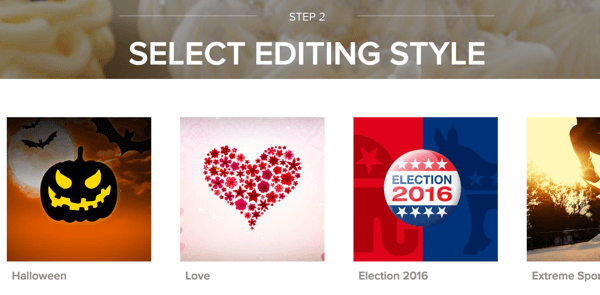
Next, choose from Magisto's collection of themes and editing styles to apply to your movie. Your choice will determine the effects within your movie and the editing speed and filters. There's also an option to let Magisto choose a style for you.
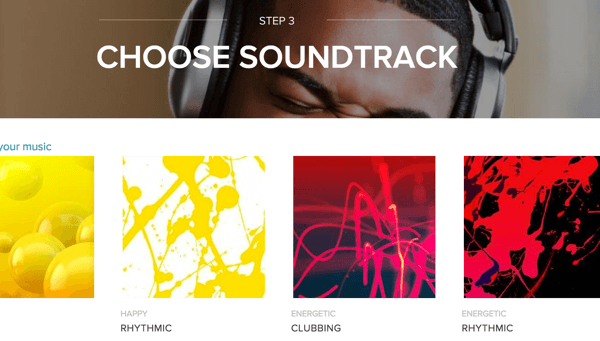
Next comes the music. Make a selection from Magisto's excellent music library or you can upload your own song. The song and video will sync perfectly with the cuts and effects following the speed of the song.
Finally, give your movie a title and the app will do the rest.
Magisto does a great job of creating professional-looking video based on your selections, but if you want further editing options, you'll need to upgrade to the Business plan for $9.99 a month.
#6: Design Custom Images
If you're on social media, chances are you're at least familiar with Buffer, one of the best free social media management tools around. But you might not know about Buffer's relatively new image creation service.
Pablo lets you create amazing images optimized for Facebook, Pinterest, or Twitter in just a few minutes. You can share them directly from Buffer's dashboard.

To begin, select an image from the library of 600,000+ free images from Unsplash. If you can't find something you like, upload your own. You can also add a filter to your image to create a cool effect.
Next, add overlay text on your image, place your headline, and choose the font and color you want. Pablo's Quotes tool will randomly generate inspiring and famous quotes that help attract engagement on your social channels.
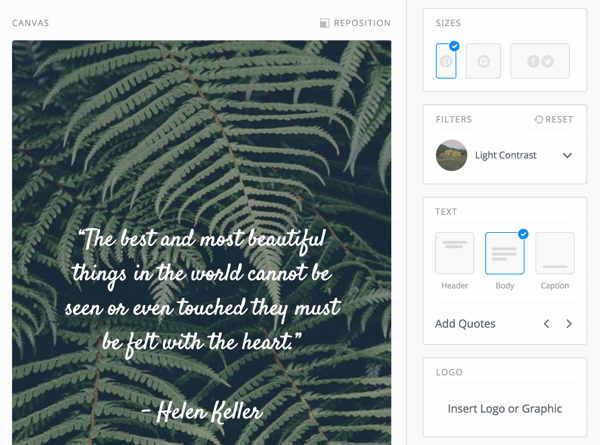
Pablo also lets you upload your logo or icon to brand your image.
Now all that's left is to share your image. You can publish it directly to your favorite social platform or schedule it with Buffer's dashboard for an optimal time.
Conclusion
You have tools at your fingertips that make designing awesome visual content ridiculously simple. And we know that good visual content increases the chances of high engagement.
So what are you waiting for? Try some of these tools and see what works for you.
What do you think? Do you have any must-try visual apps or tools to recommend? Please share your thoughts in the comments below.

Curious About How to Use AI?
Our newest show, AI Explored, might be just what you're looking for. It's for marketers, creators, and entrepreneurs who want to understand how to use AI in their business.
It's hosted by Michael Stelzner and explores this exciting new frontier in easy-to-understand terms.
Pull up your favorite podcast app and search for AI Explored. Or click the button below for more information.
