Want to make better Instagram reels? Looking for editing tips and app recommendations?
In this article, you’ll learn how to make and edit Instagram reels like a pro so you can fully leverage short-form video in your Instagram marketing.
#1: How to Make an Instagram Reel
To create Reels videos, open the Instagram mobile app and tap the plus icon in the upper-right corner to open the Reels camera. Select Reel, and then follow the steps below to record original footage or upload existing video clips.
As you create reels content, keep these best practices in mind:
- Produce content that's as high-quality as possible. You don't necessarily need a professional camera but you should use adequate lighting and avoid blurry reels footage.
- Aim to entertain and inform your audience with reels content that resonates. Storyboard your reels content in advance to keep it interesting and relevant.
- Capture your audience's attention within the first few seconds of your reels to retain viewers. Use movement, captions, and transitions at the beginning to hold viewers' interest.
- Add your brand's take on trends or create your own to inspire your audience with your new reels. Think of reels as an ongoing conversation with peers and customers.
#2: How to Record Original Content for Instagram Reels
Before you start recording, choose the timing for your reel. By default, reels are typically set to 15 seconds. To make yours as long as 90 seconds, tap the timing button in the left-hand menu and choose another option.
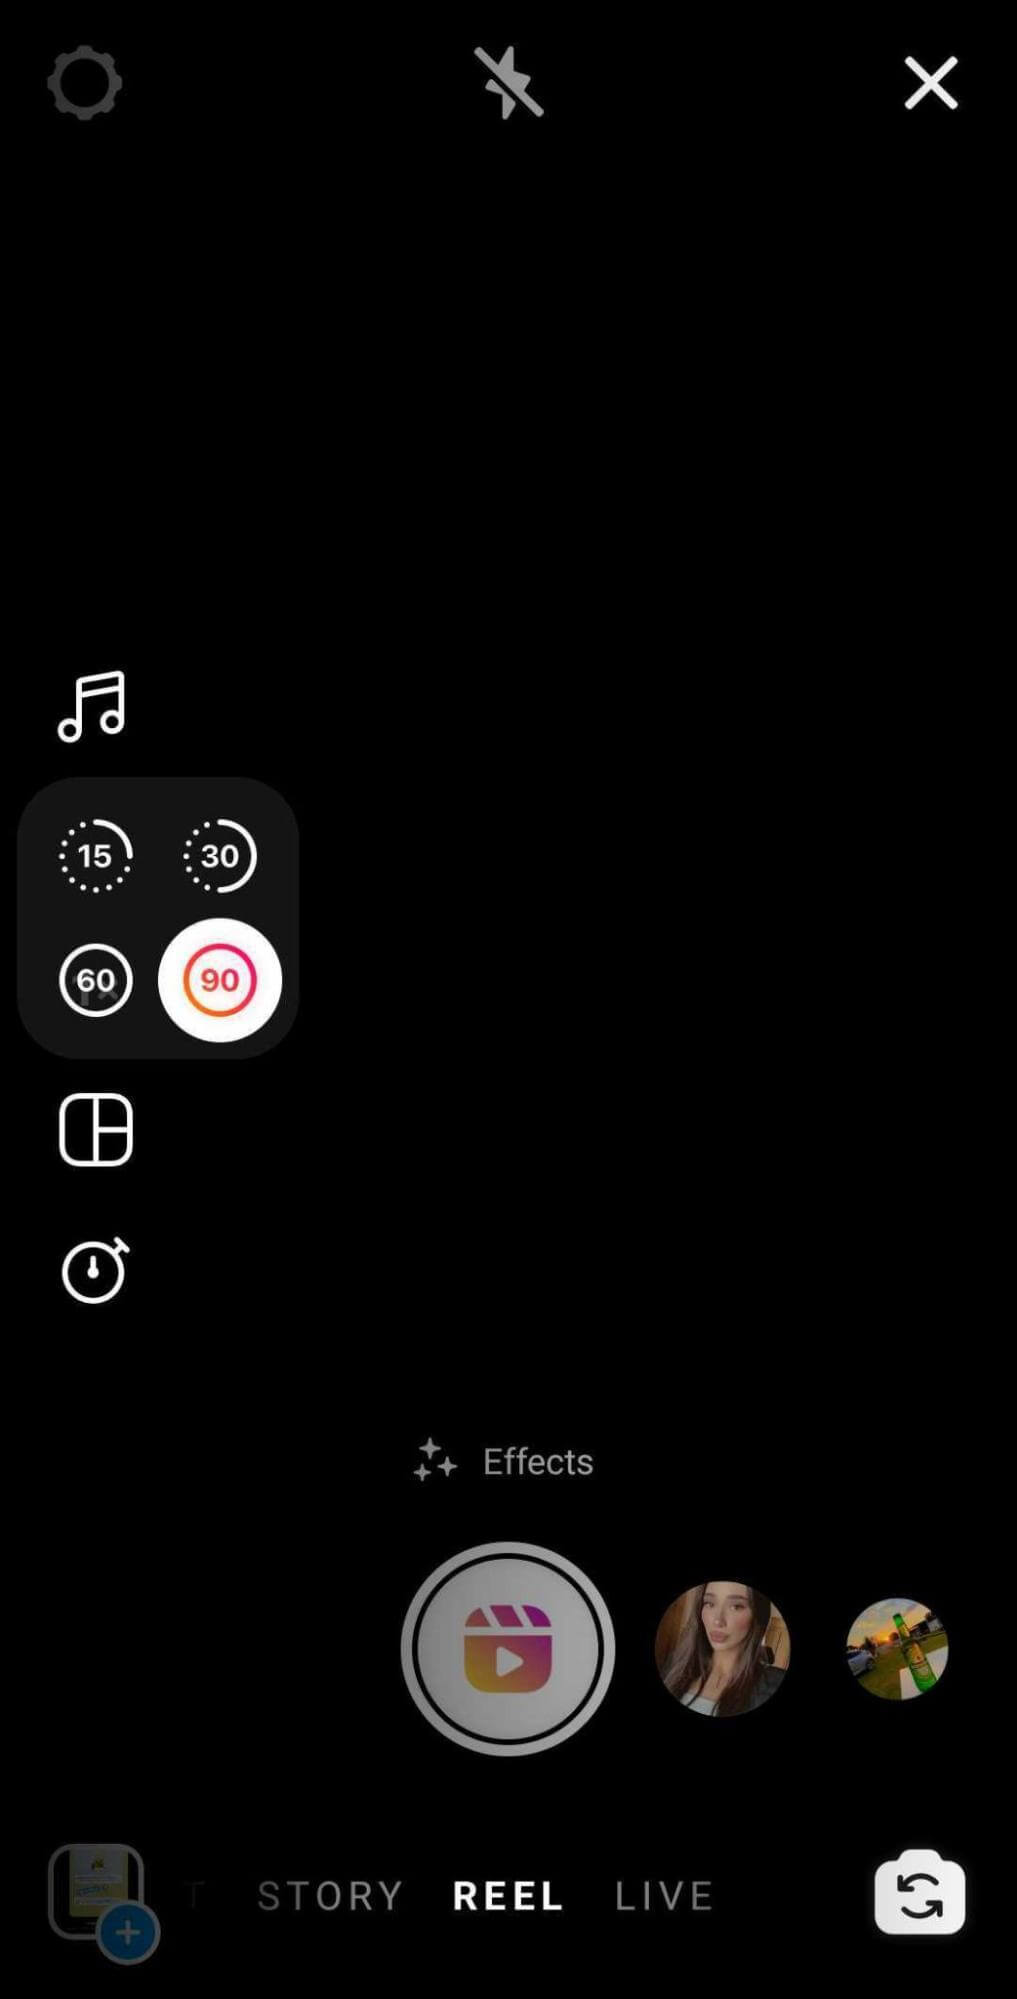
Next, set up your shot and tap the camera button in the lower-right corner to make sure it's facing the right direction. Then choose from a number of reels layouts, effects, and speeds:
- Stick with the default full-screen layout for reels or tap the layout button to choose from a handful of split-screen options.
- Record content at the default 1x speed or tap the speed button to make your footage display faster or slower.
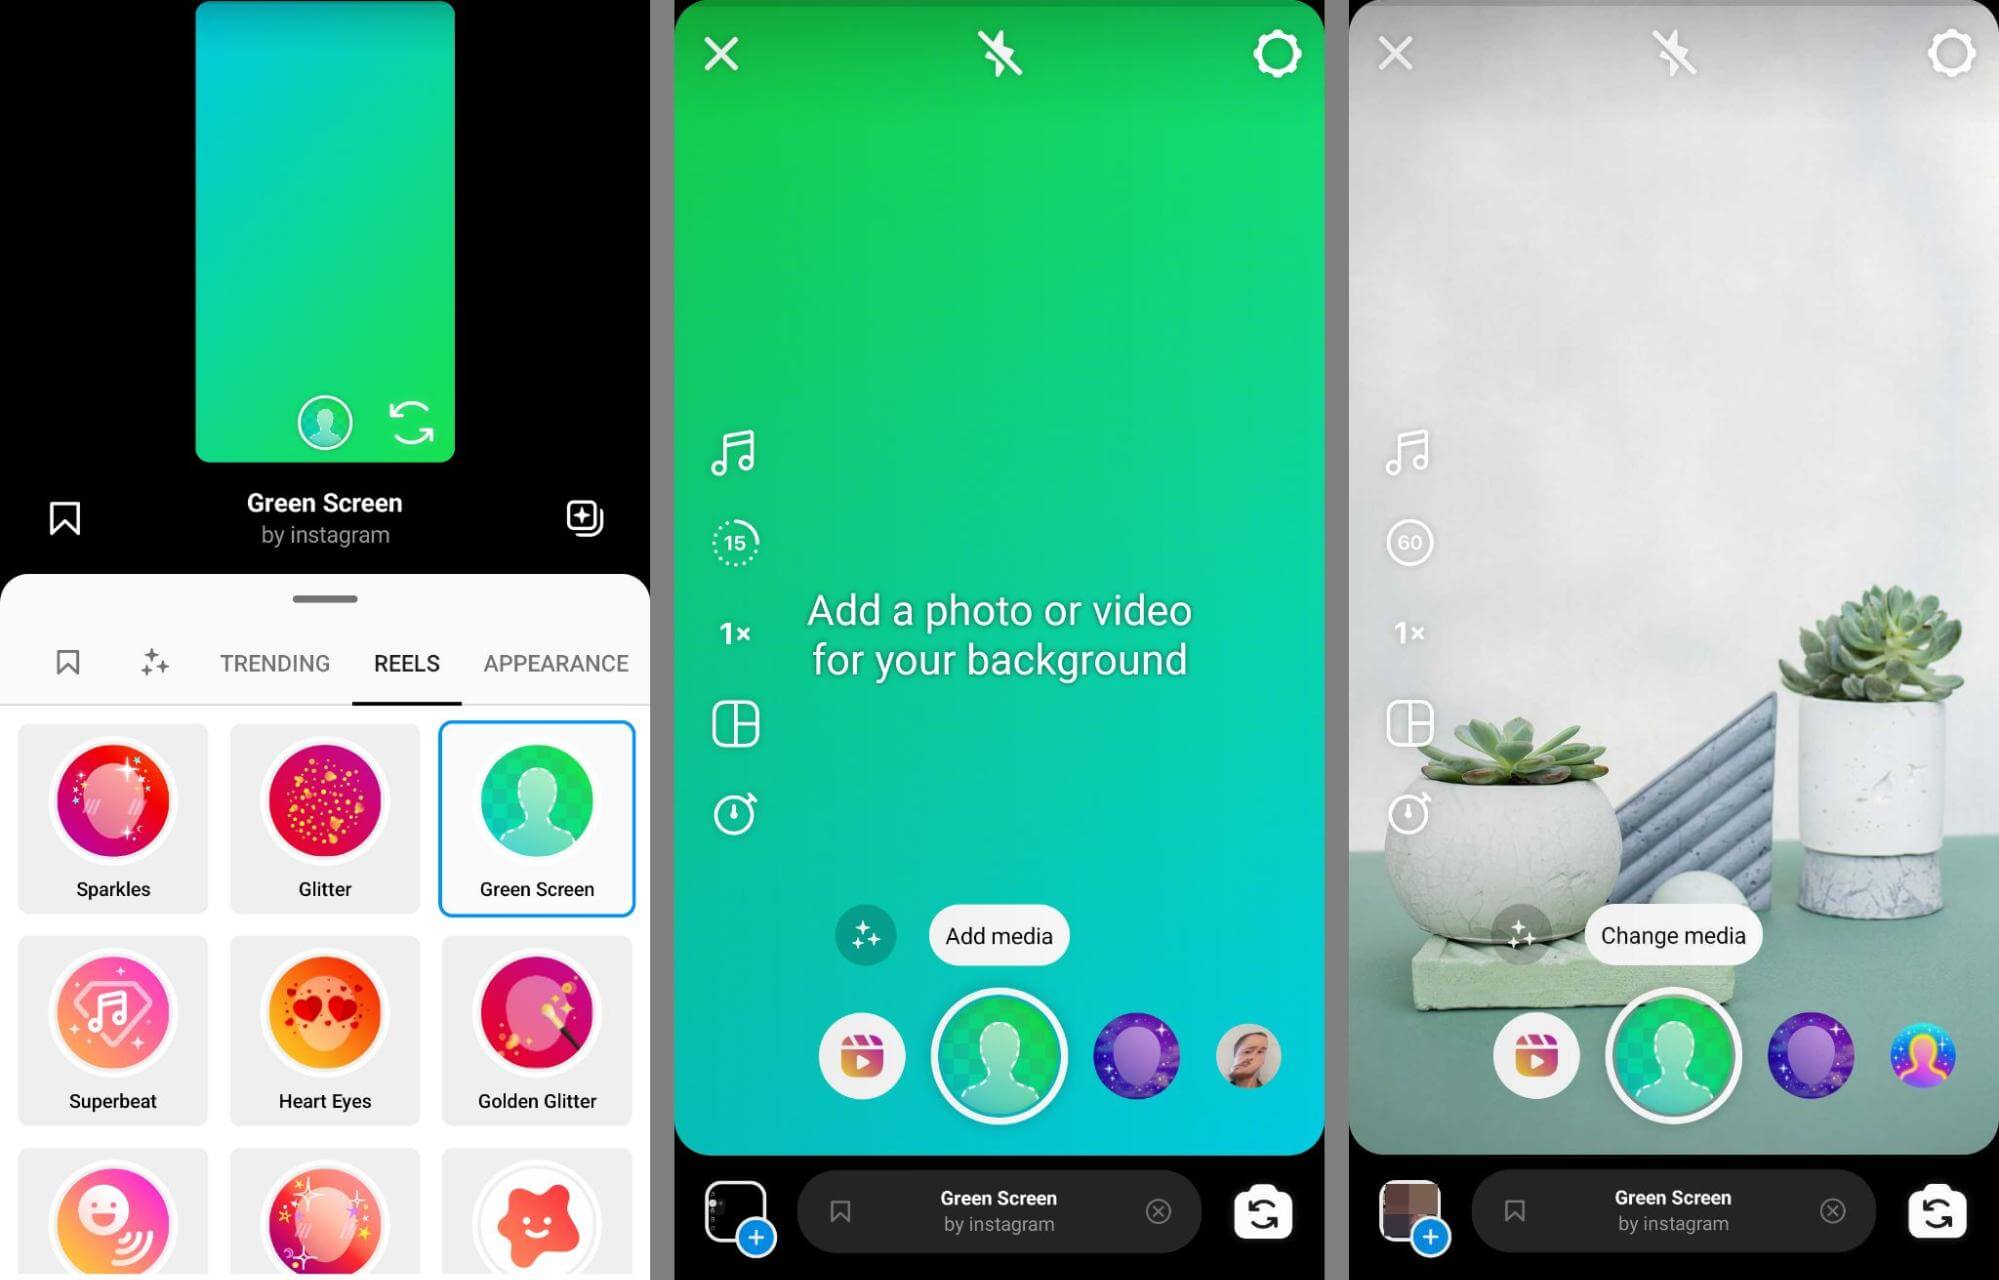
- Film without filters or tap the sparkle icon to choose from the many in-app special effects. If you want to film against a green screen, for example, you'll find it here.
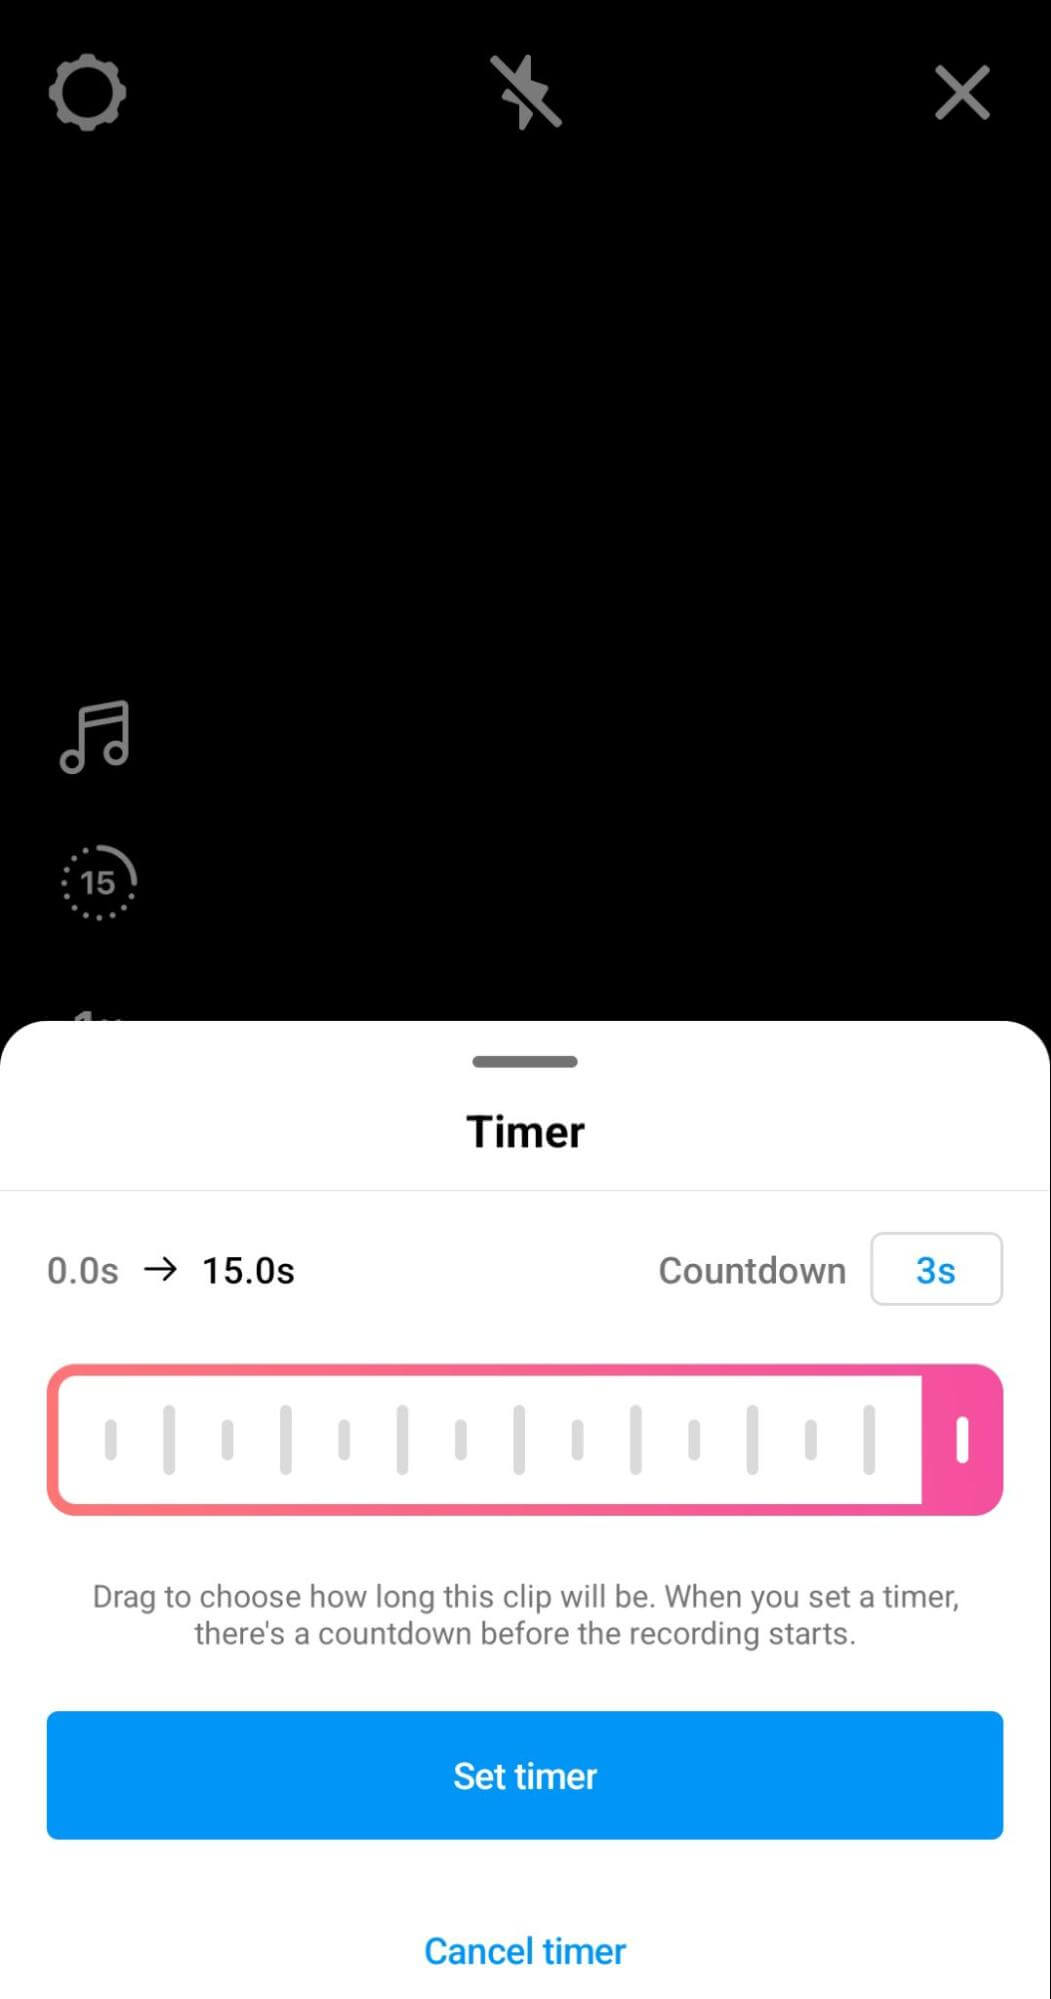
When you're ready to begin filming, tap the timer icon in the left-hand menu. Set the length for the clip you want to record and select a countdown timer. The countdown will start right away, and the app will automatically start and stop recording based on the time you chose.
If you plan to film multiple reels clips that show transitions like style changes or adding more people or objects to the frame, use Instagram's built-in transition effects. Before you film a clip that includes a transition, tap the sparkle icon above the Record button.
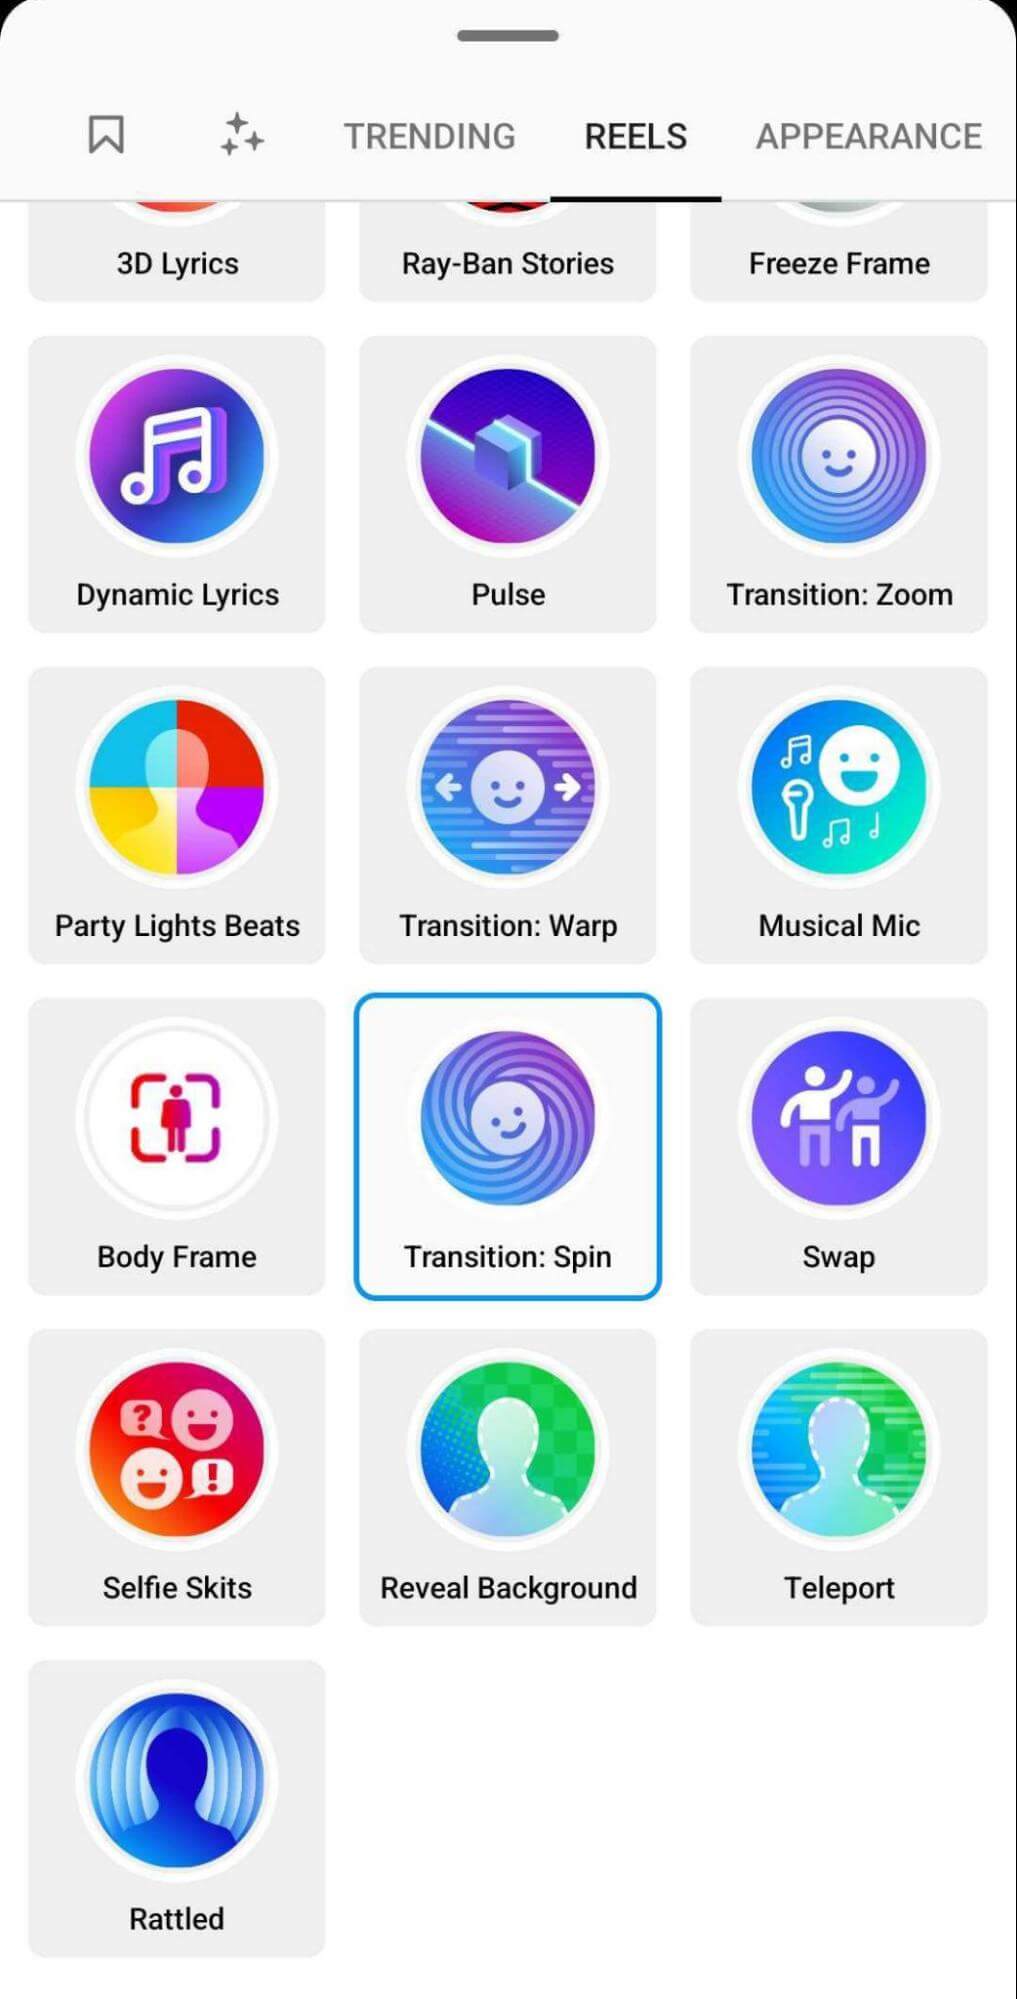
Then go to the Reels tab and choose one of the transition effects. Toward the end of the clip, do the gesture that triggers the effect and end the clip. When you set up the next clip, use Instagram's built-in alignment option to create seamless transitions and continuity with the previous clip. It's also helpful to use the timer to give yourself time to get to the right spot and set up the shots before you start recording.
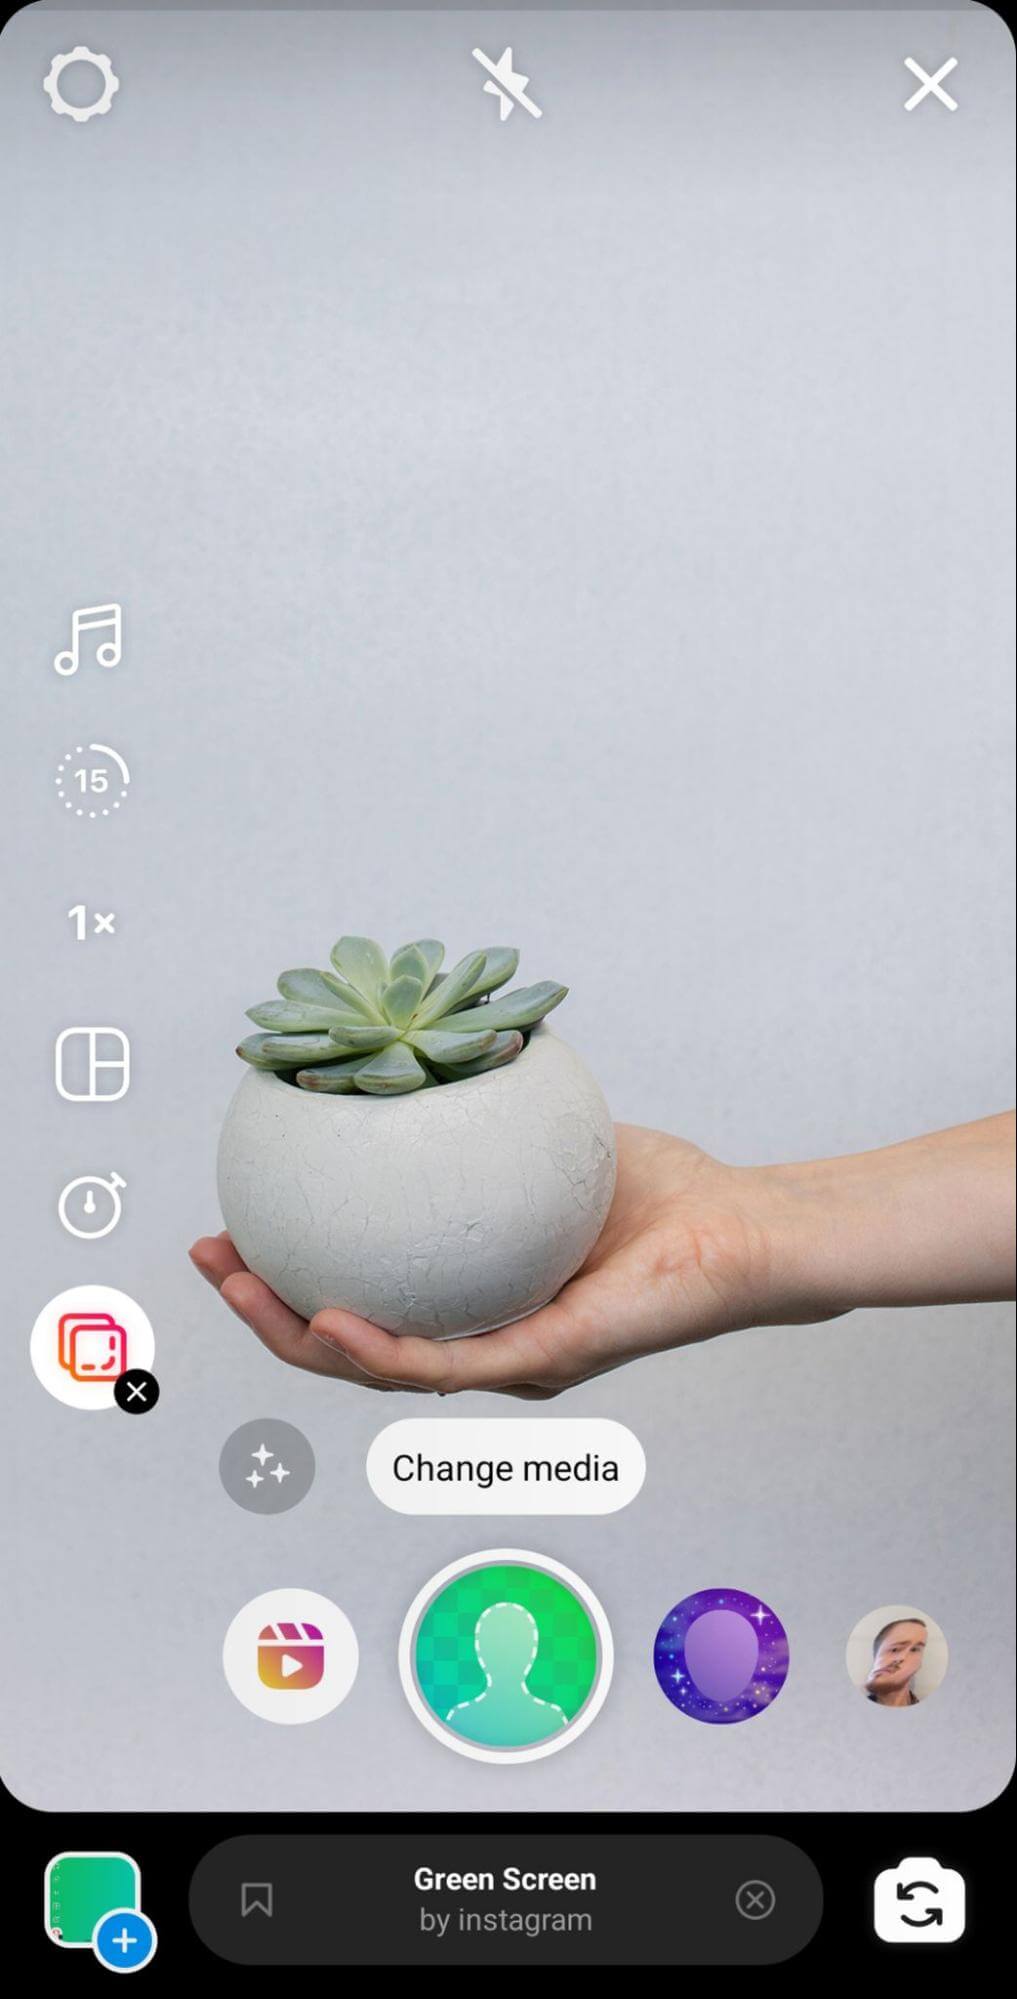
After filming the first clip, tap the Align button to turn on the feature, and then line up your shot before recording. You can continue to record or add clips until you've reached the time limit you set.
Bonus Tips for Creating Original Reels Content
If you're looking for creative inspiration, these ideas can help you get started.
Remix
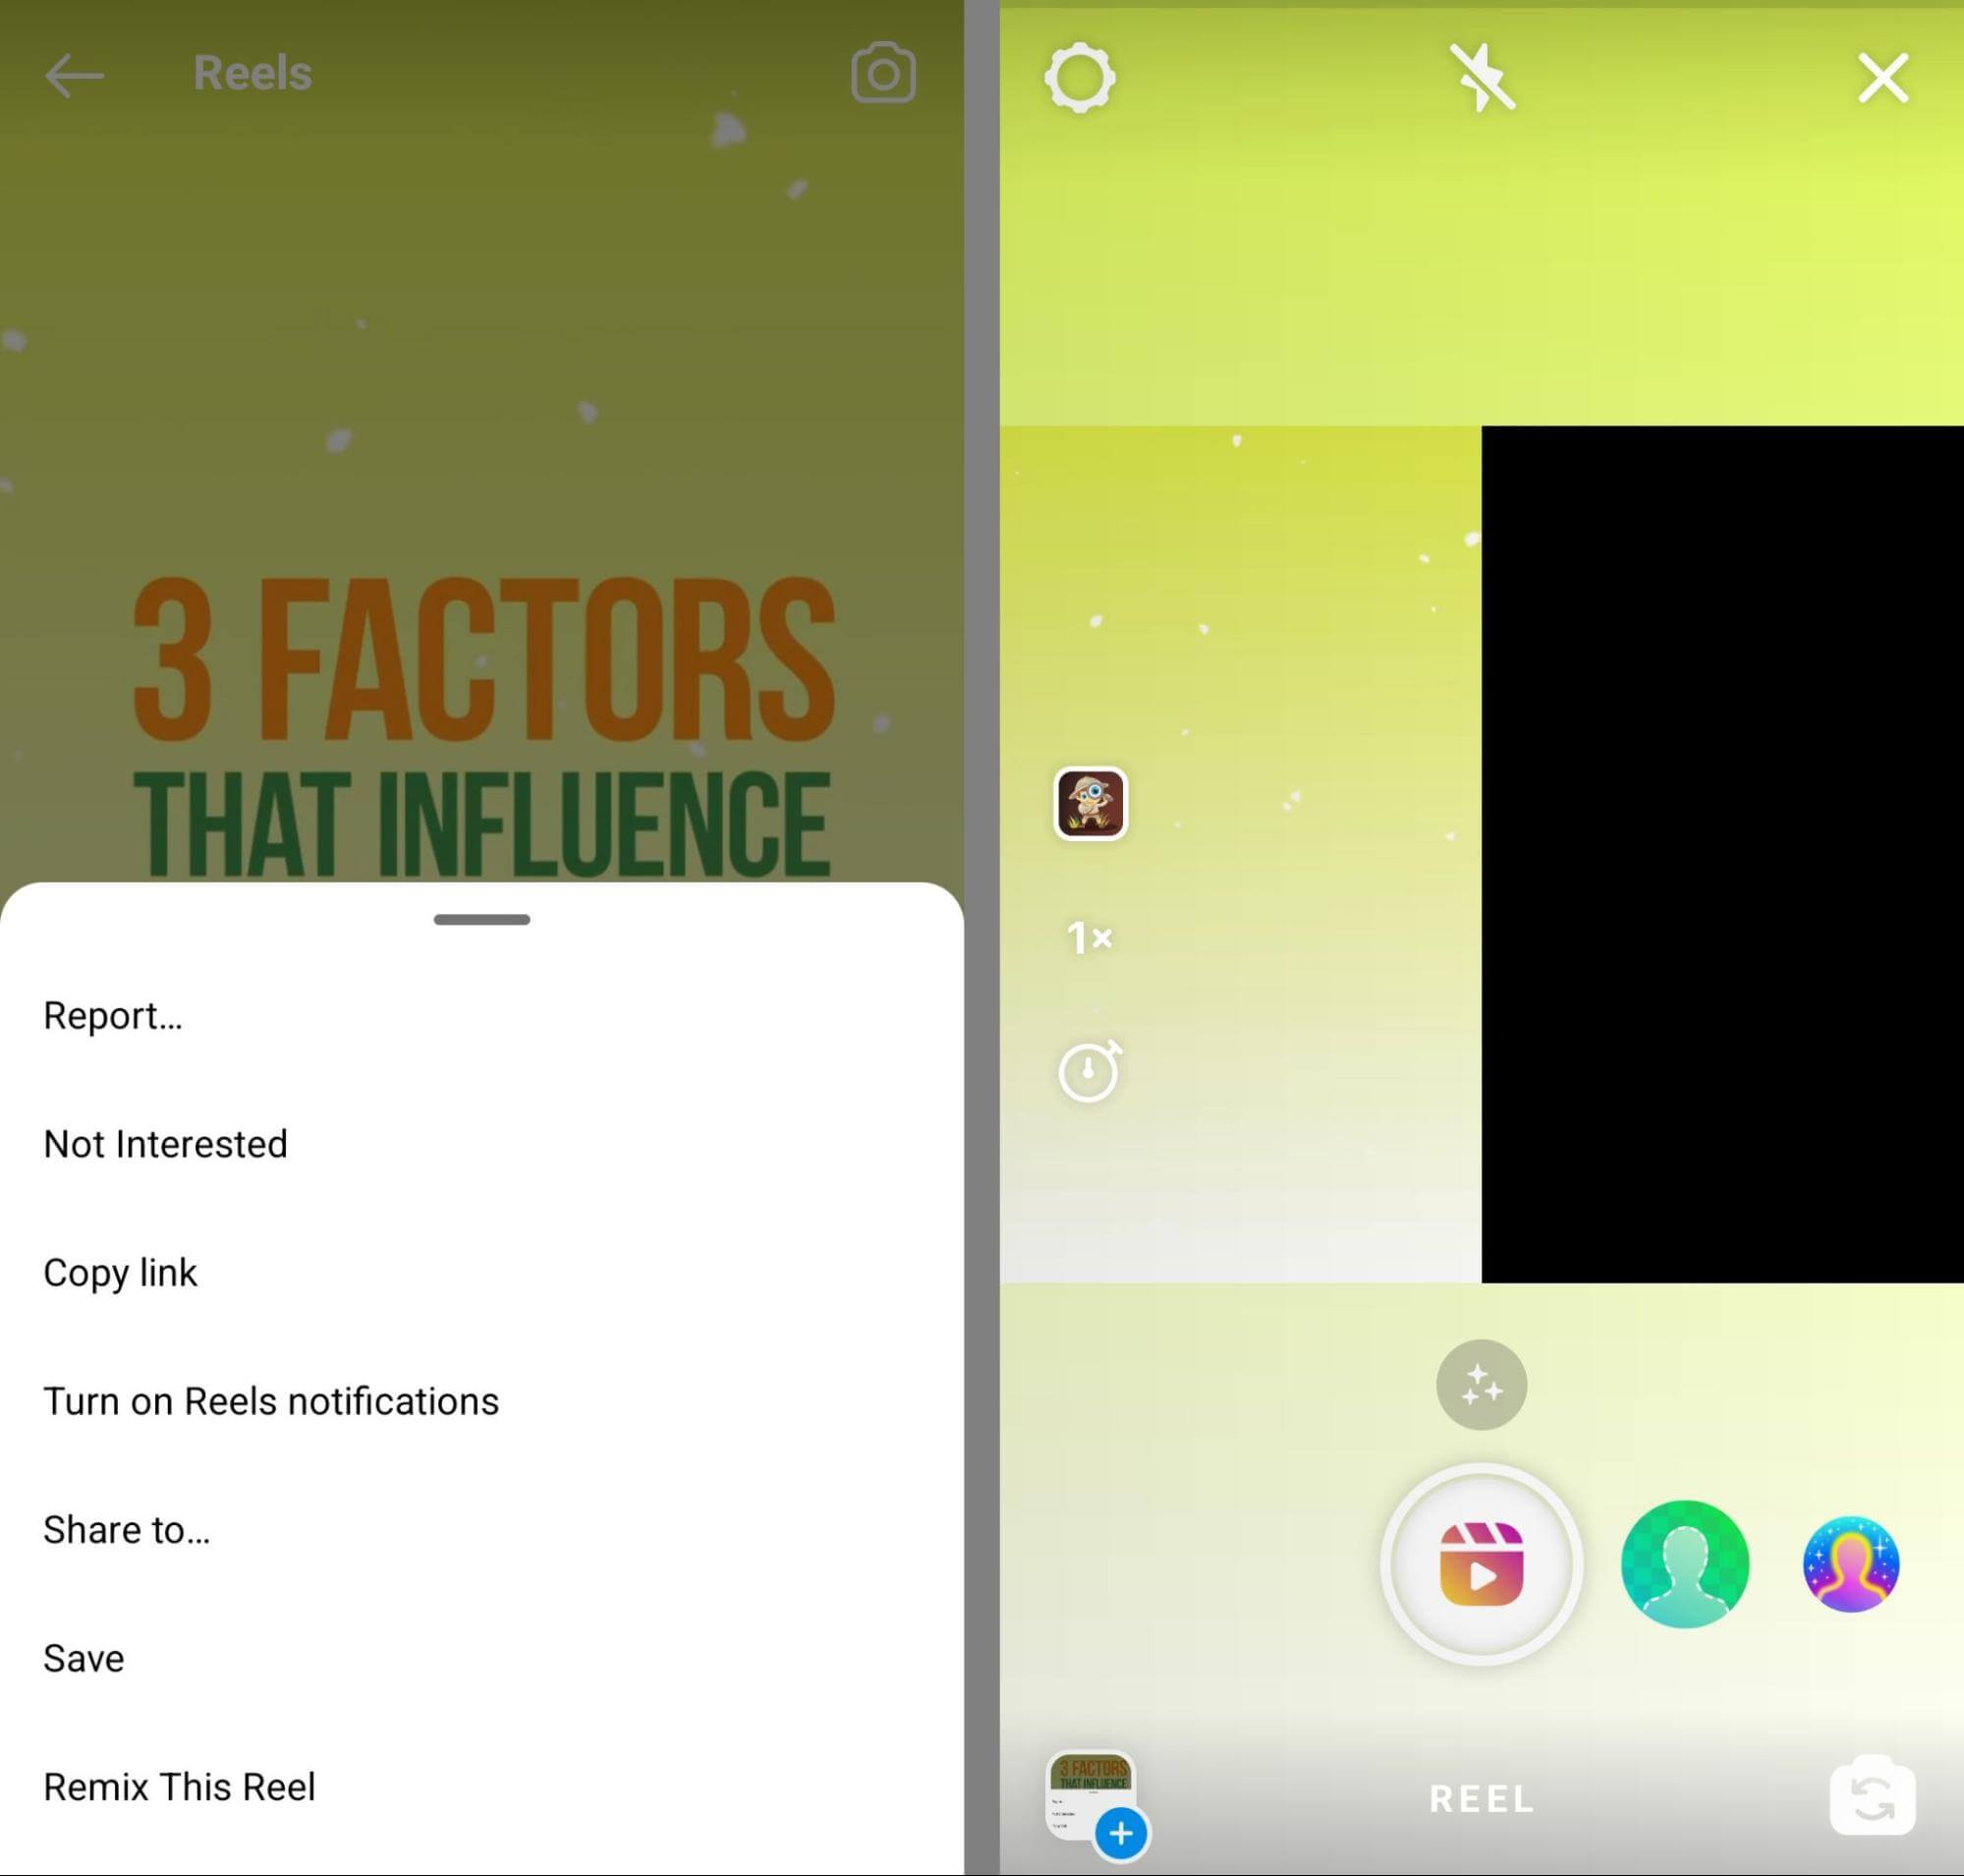
Did you spot an inspiring reel by another brand or creator? You can add your brand's insights or spin by remixing reels. While viewing a reel, tap the three dots in the lower-right corner. Then tap Remix This Reel and use the workflow above to add your own take. When you publish your remix, the original video automatically appears alongside your content.
Reels Templates
Remixing is great for adding to an existing conversation but it's not the only way you can get inspiration from another account's content. In some cases, you can replicate other creators' shots and pacing while replacing their clips with your own.
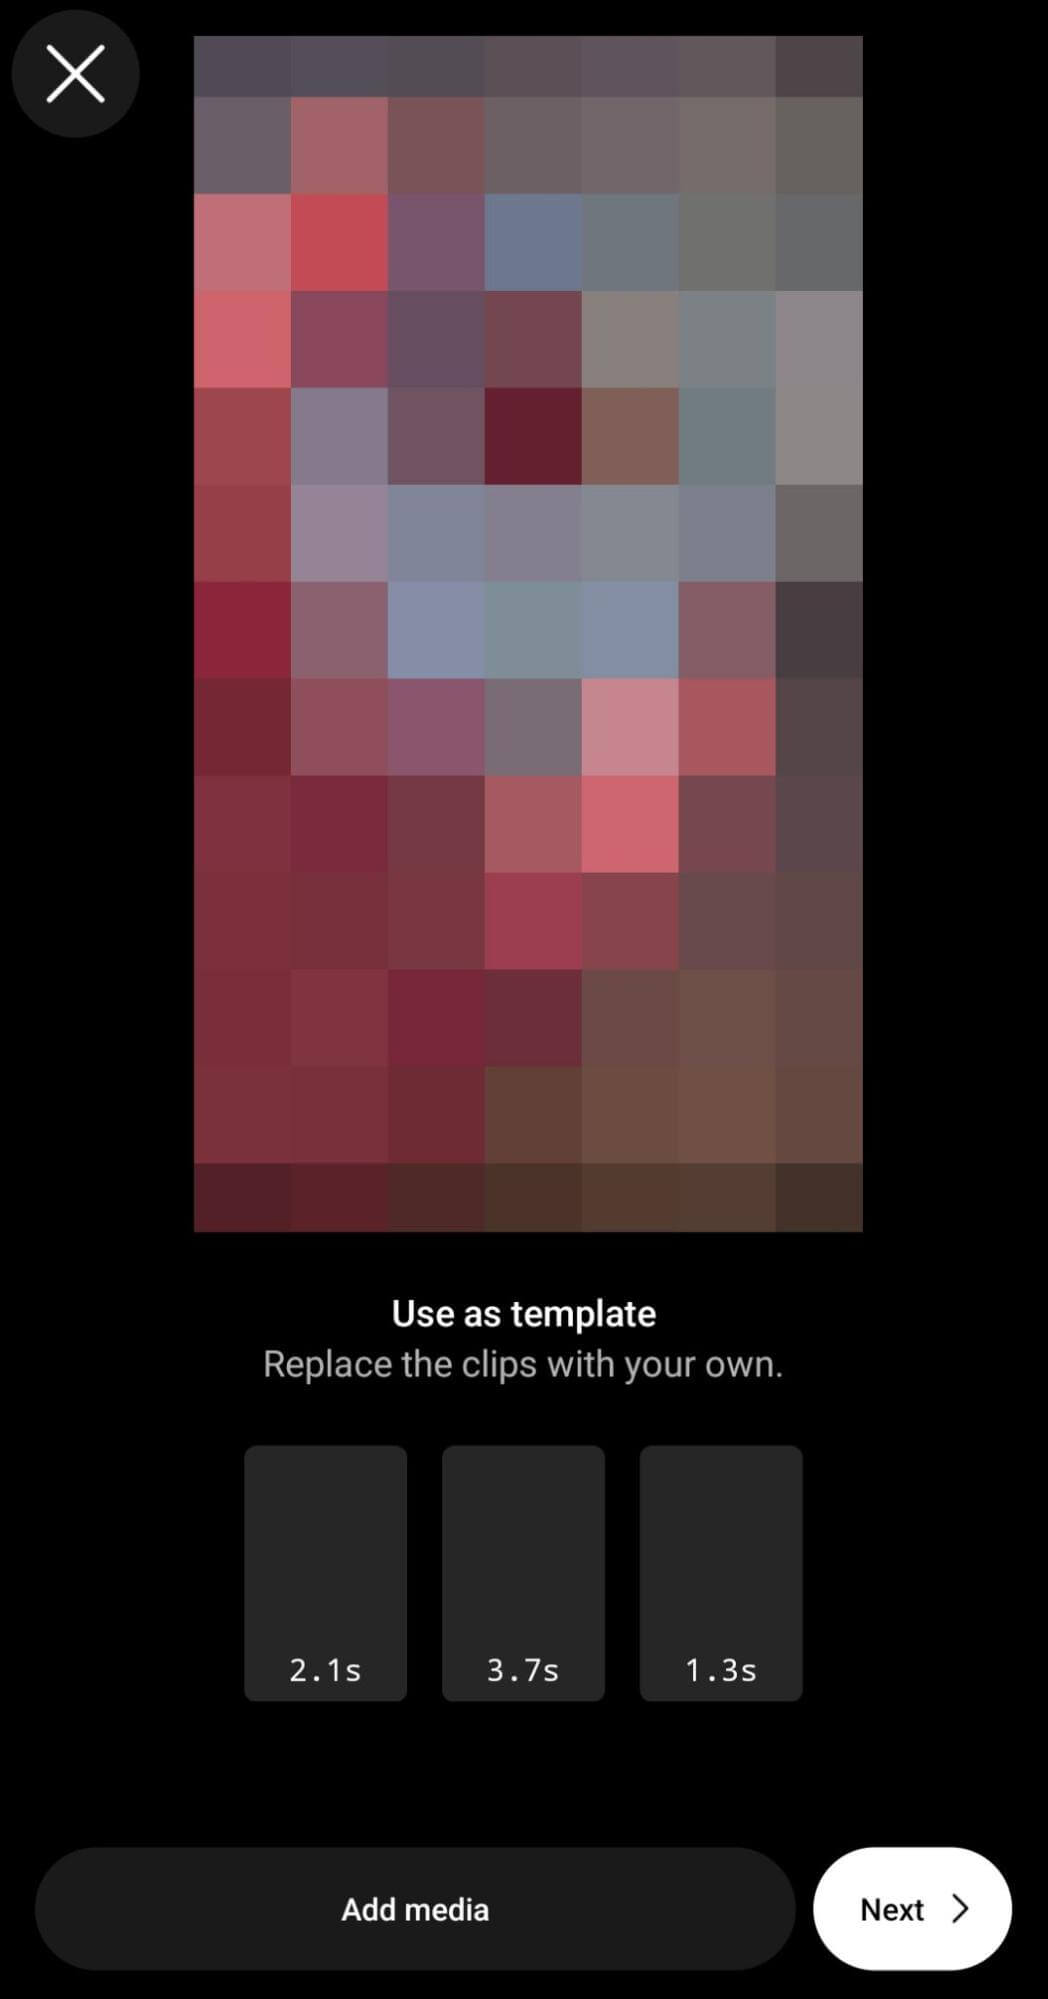
To reuse another account's Reels template, find one you like and tap the Use Template button above their handle. Then tap the Add Media button to upload your own clips. Note that you'll need to replicate any effects or captions using the editing tips below.
Get World-Class Marketing Training — All Year Long!
Are you facing doubt, uncertainty, or overwhelm? The Social Media Marketing Society can help.
Each month, you’ll receive training from trusted marketing experts, covering everything from AI to organic social marketing. When you join, you’ll also get immediate access to:
- A library of 100+ marketing trainings
- A community of like-minded marketers
- Monthly online community meetups
- Relevant news and trends updates
Story Highlights
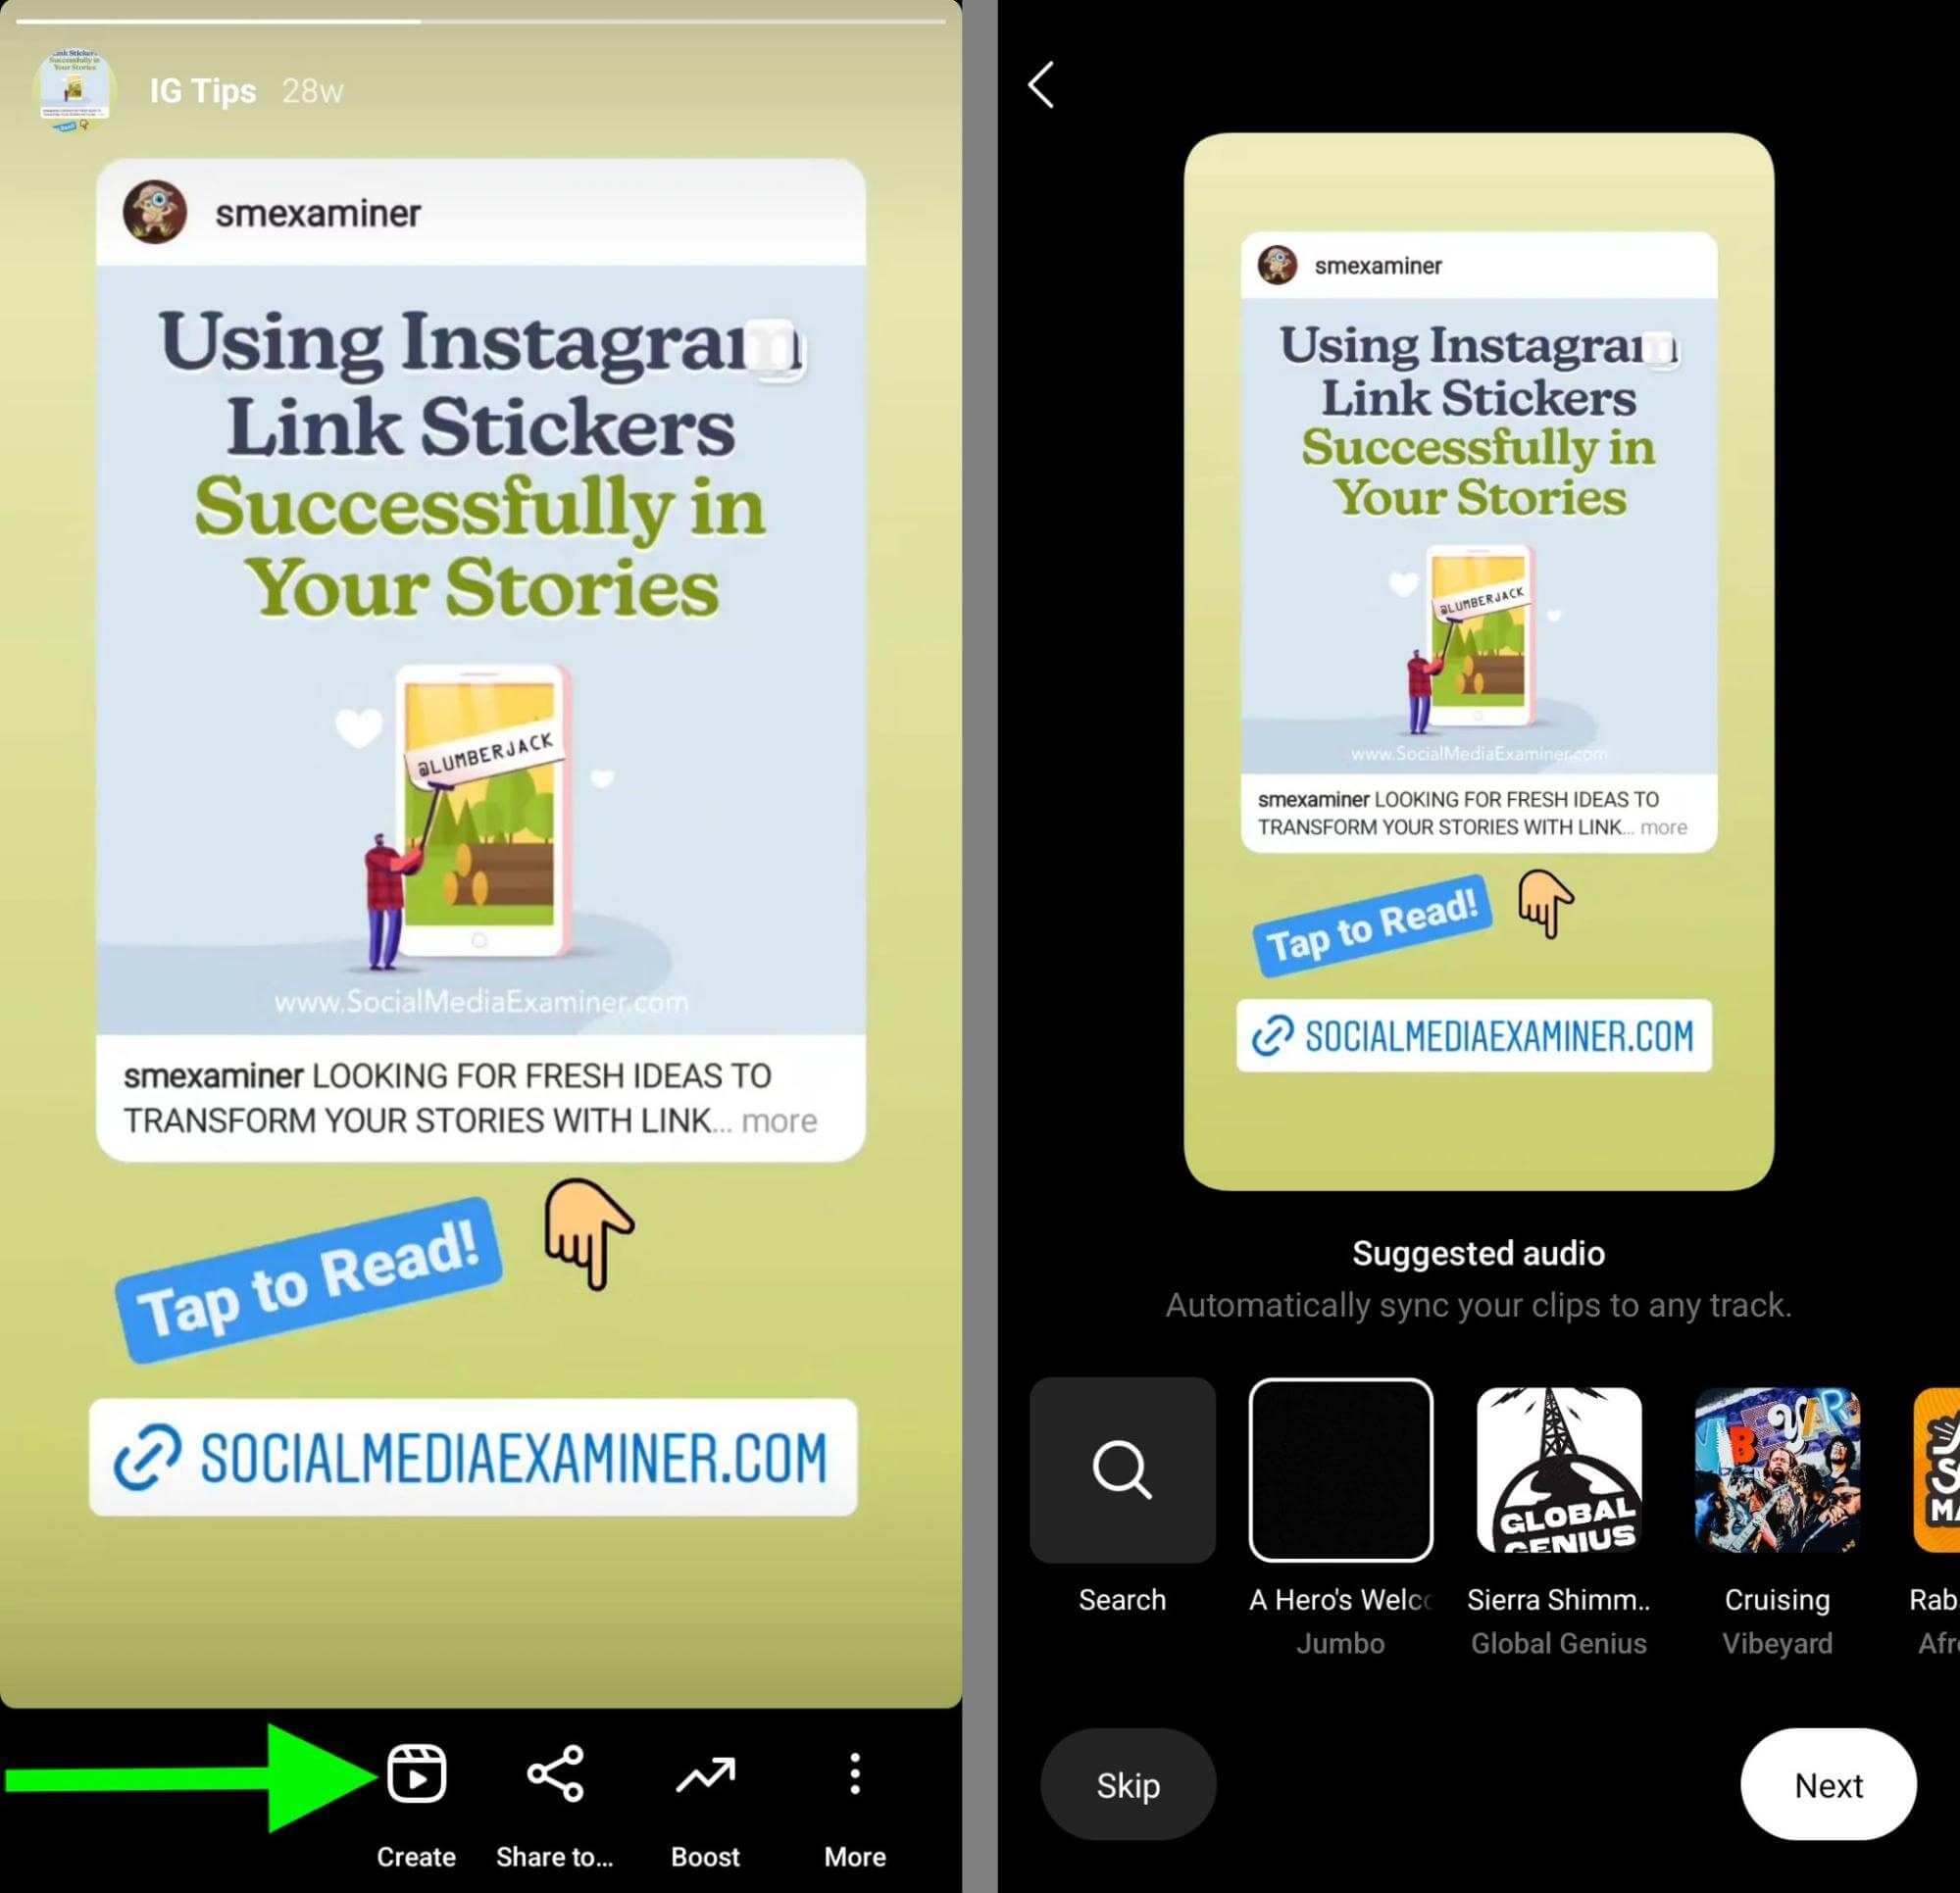
You can also give your business' own Instagram content more traction by repurposing story highlights in your reels. Choose any story you've highlighted on your Instagram profile and tap the Reels icon in the bottom menu. Then select music and use the editing tips below to make your new reel stand out in the feed.
#3: How to Upload Existing Clips to an Instagram Reel
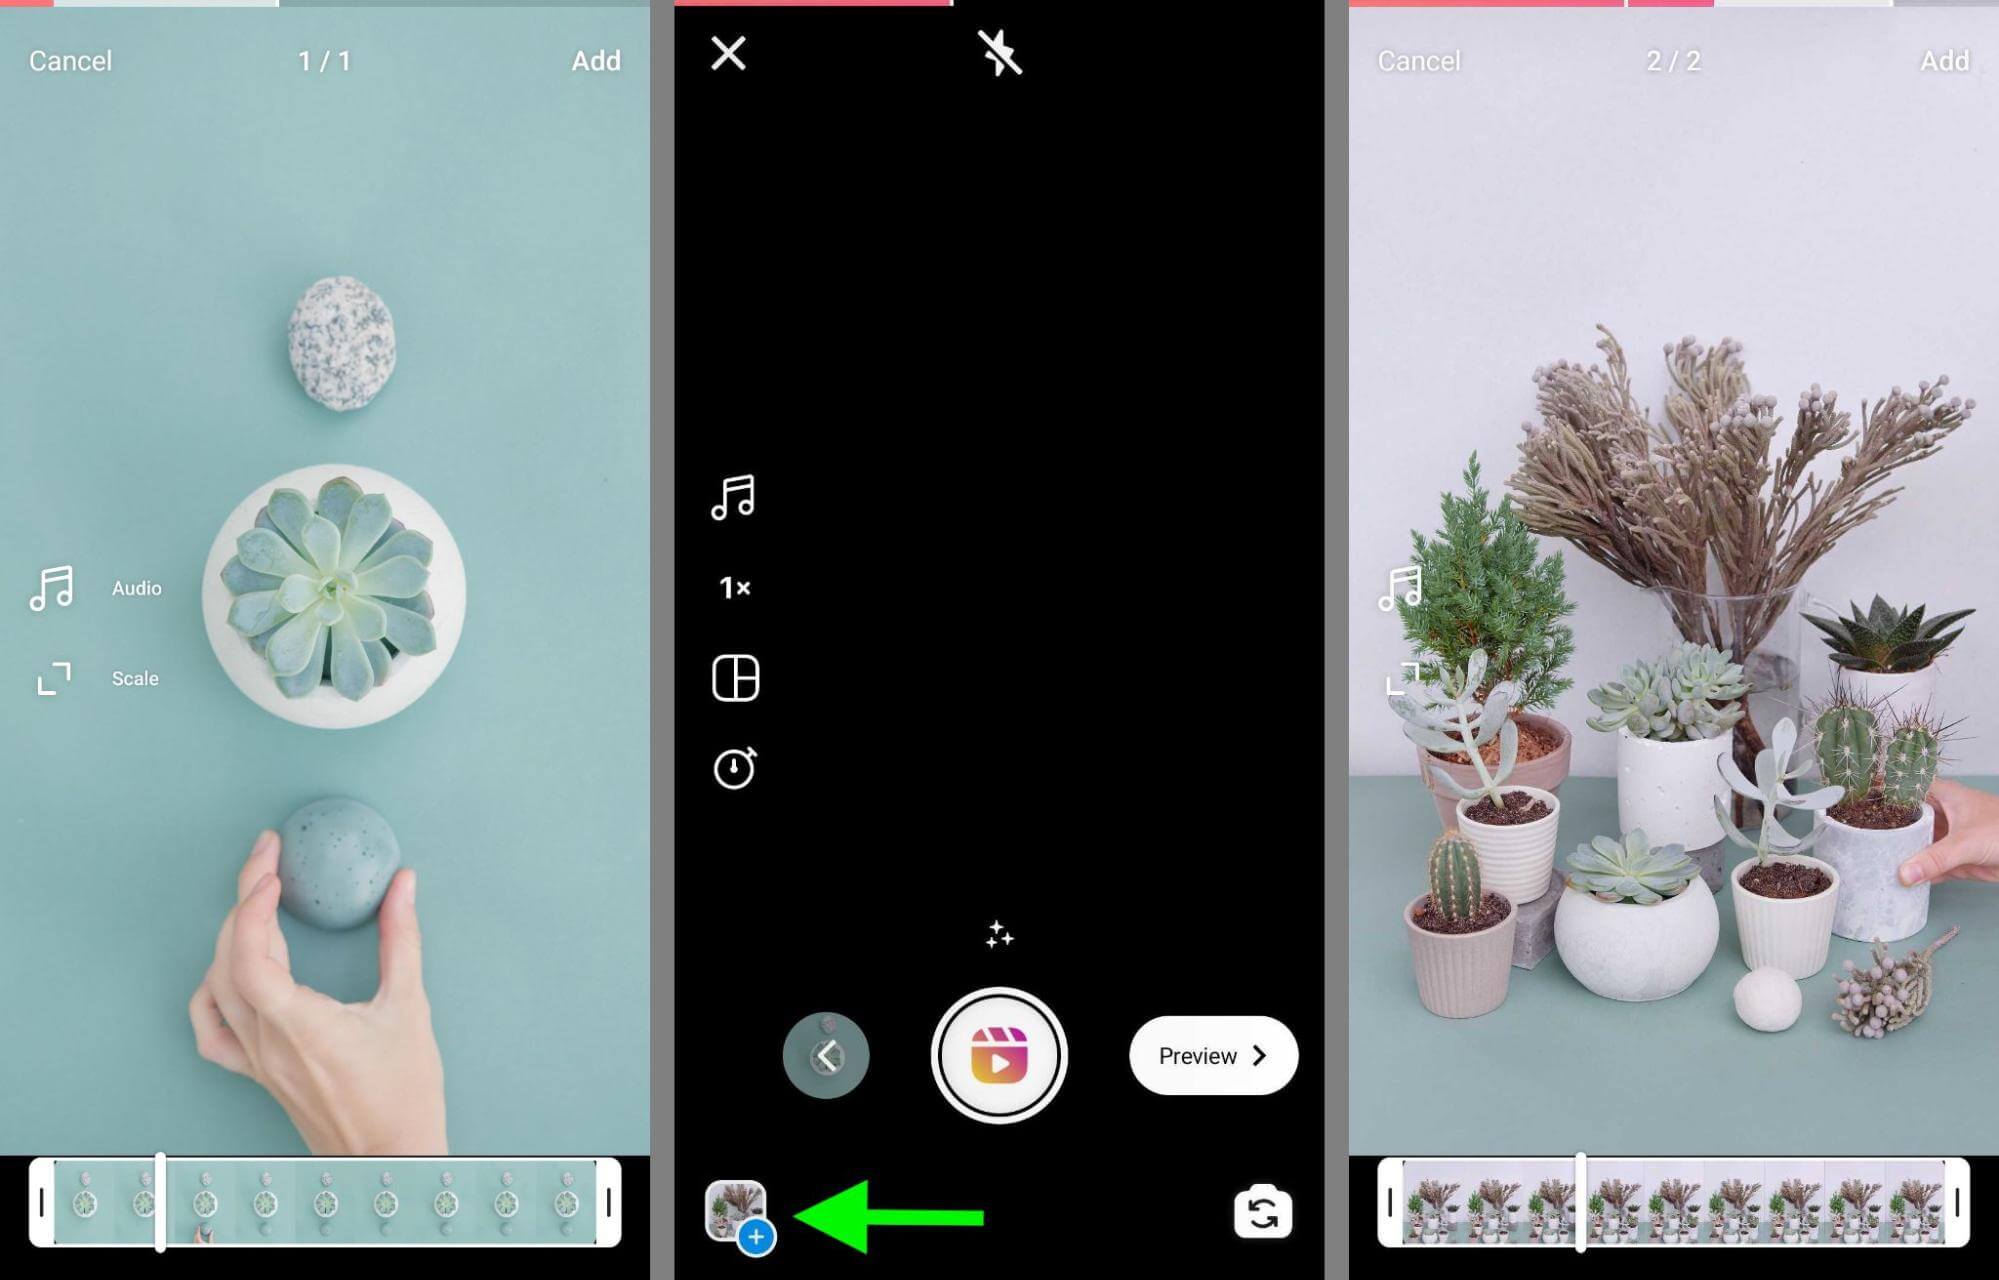
If you've already produced one or more clips for your reel, you can easily upload existing content instead of or in addition to newly recorded video. To access your existing video clips, tap the camera roll in the lower-left corner.
Then browse your device's folders and select the clips you want to feature. You can add as many clips as you like until you reach the time limit for reels, which is currently 90 seconds.
Keep in mind that published reels display in a full-screen format. Whether you plan to create reels using only pre-made video footage or combine it with newly recorded reels video, it's always a good idea to make sure any existing content has a 9:16 aspect ratio.
How to Add Photos to an Instagram Reel
In many cases, you may want to focus exclusively on video clips. But you also have the option to add photos to your reels. With one or more photos, you can design slideshows or create separation between video clips.
To add photos to your reels, repeat the same workflow you used to add existing video clips. Tap your camera roll in the lower-left corner and select the photo you want to include. Then tap Add in the upper-right corner. By default, reels display photos for 5 seconds each.
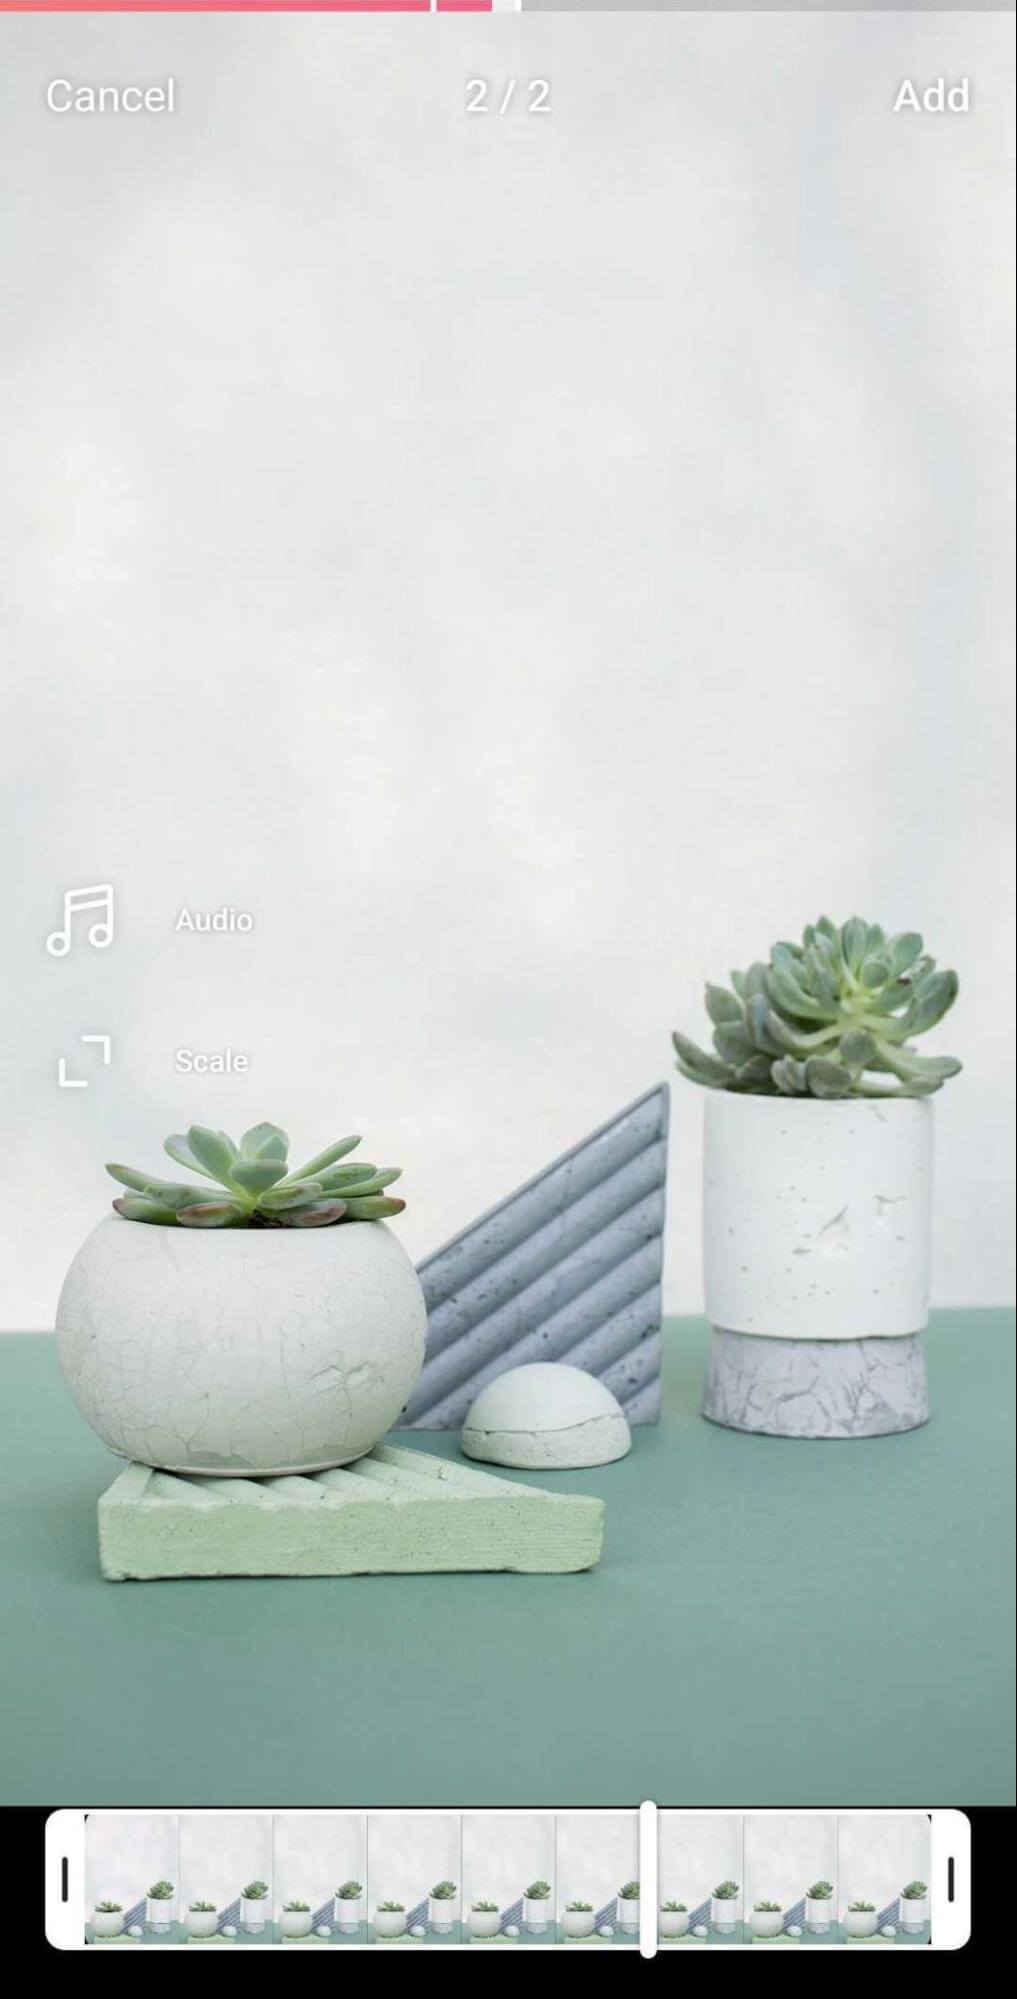
Note that any photos you upload will display as still images in your published reels. If you want to add animation or other effects, use the editing tips or third-party apps below.
#4: How to Edit Instagram Reels With Native Instagram Tools
After recording new content or uploading clips, you have tons of options for editing your reels using Instagram's native creative editing tools. Here are a few to try.
Trim or Reorder Clips
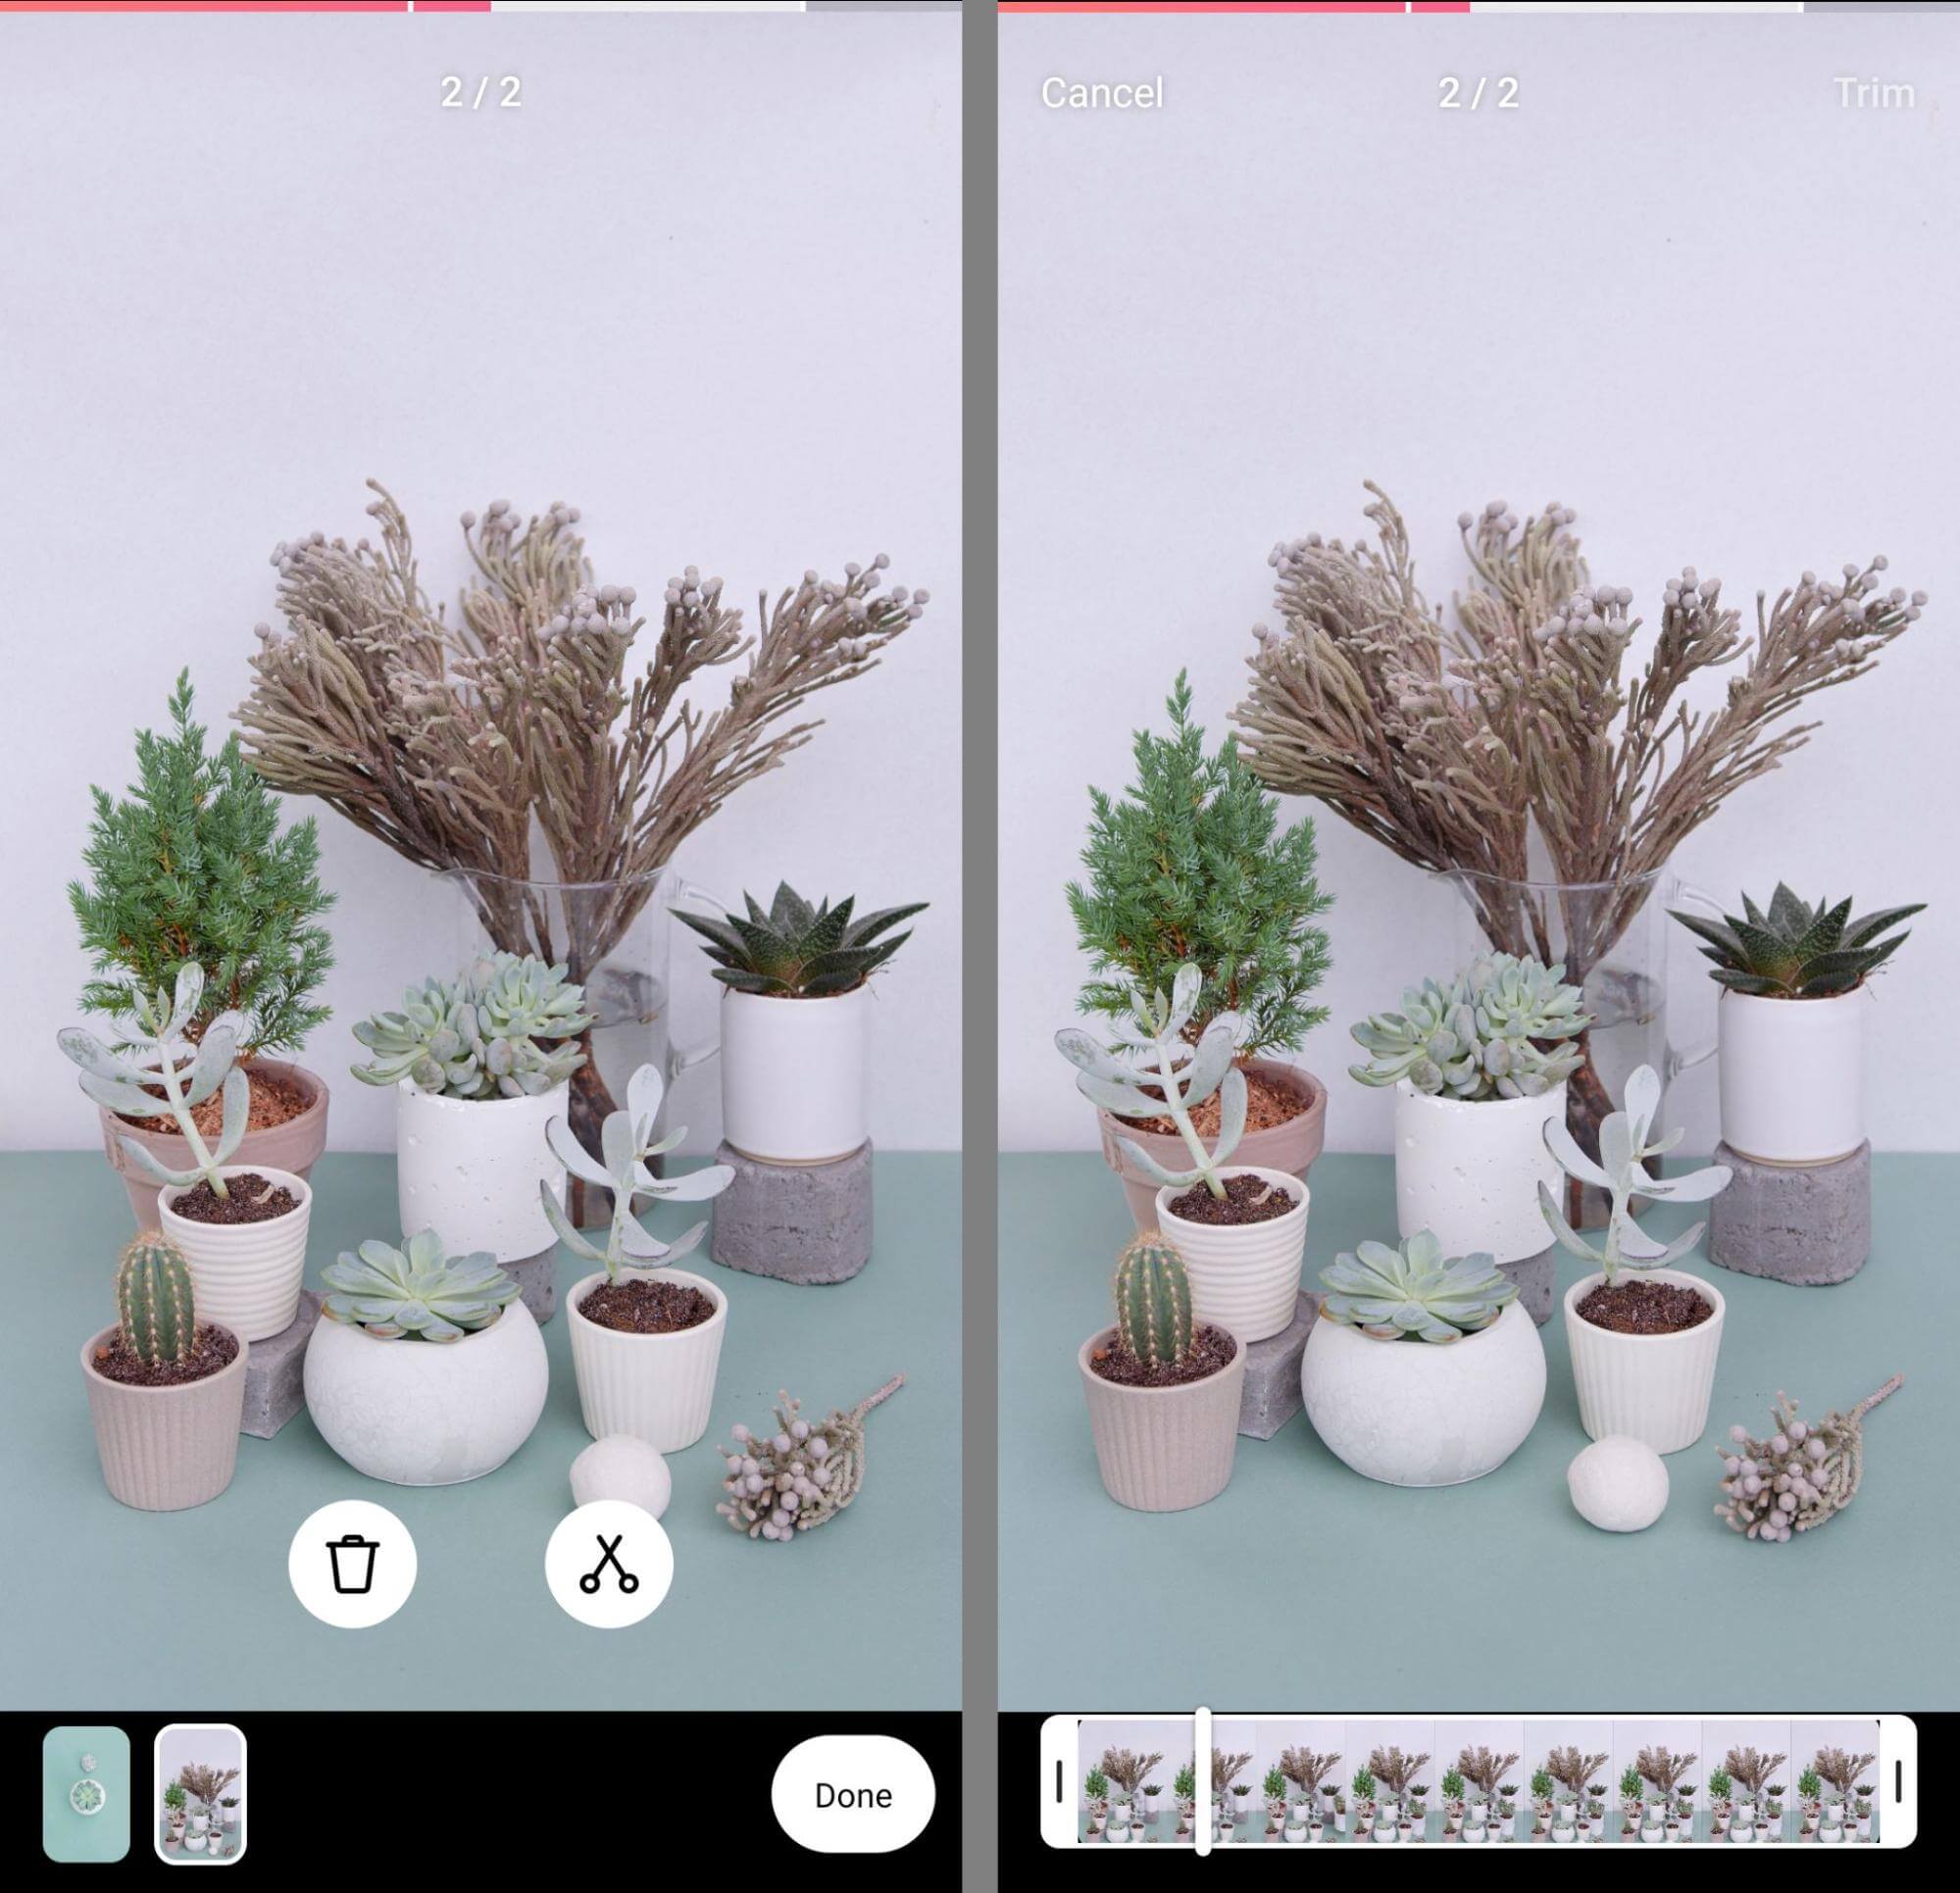
Whether you created new content or uploaded existing video for your reels, you can adjust the timing of the clips. Tap the left arrow to edit clips and then select a clip to adjust. You can tap the scissors icon to trim the beginning or end of a clip, or you can tap the trash can icon to delete a clip. In some versions of the app, you can also tap to reorder clips.
Select Music, Voiceovers, or Voice Effects
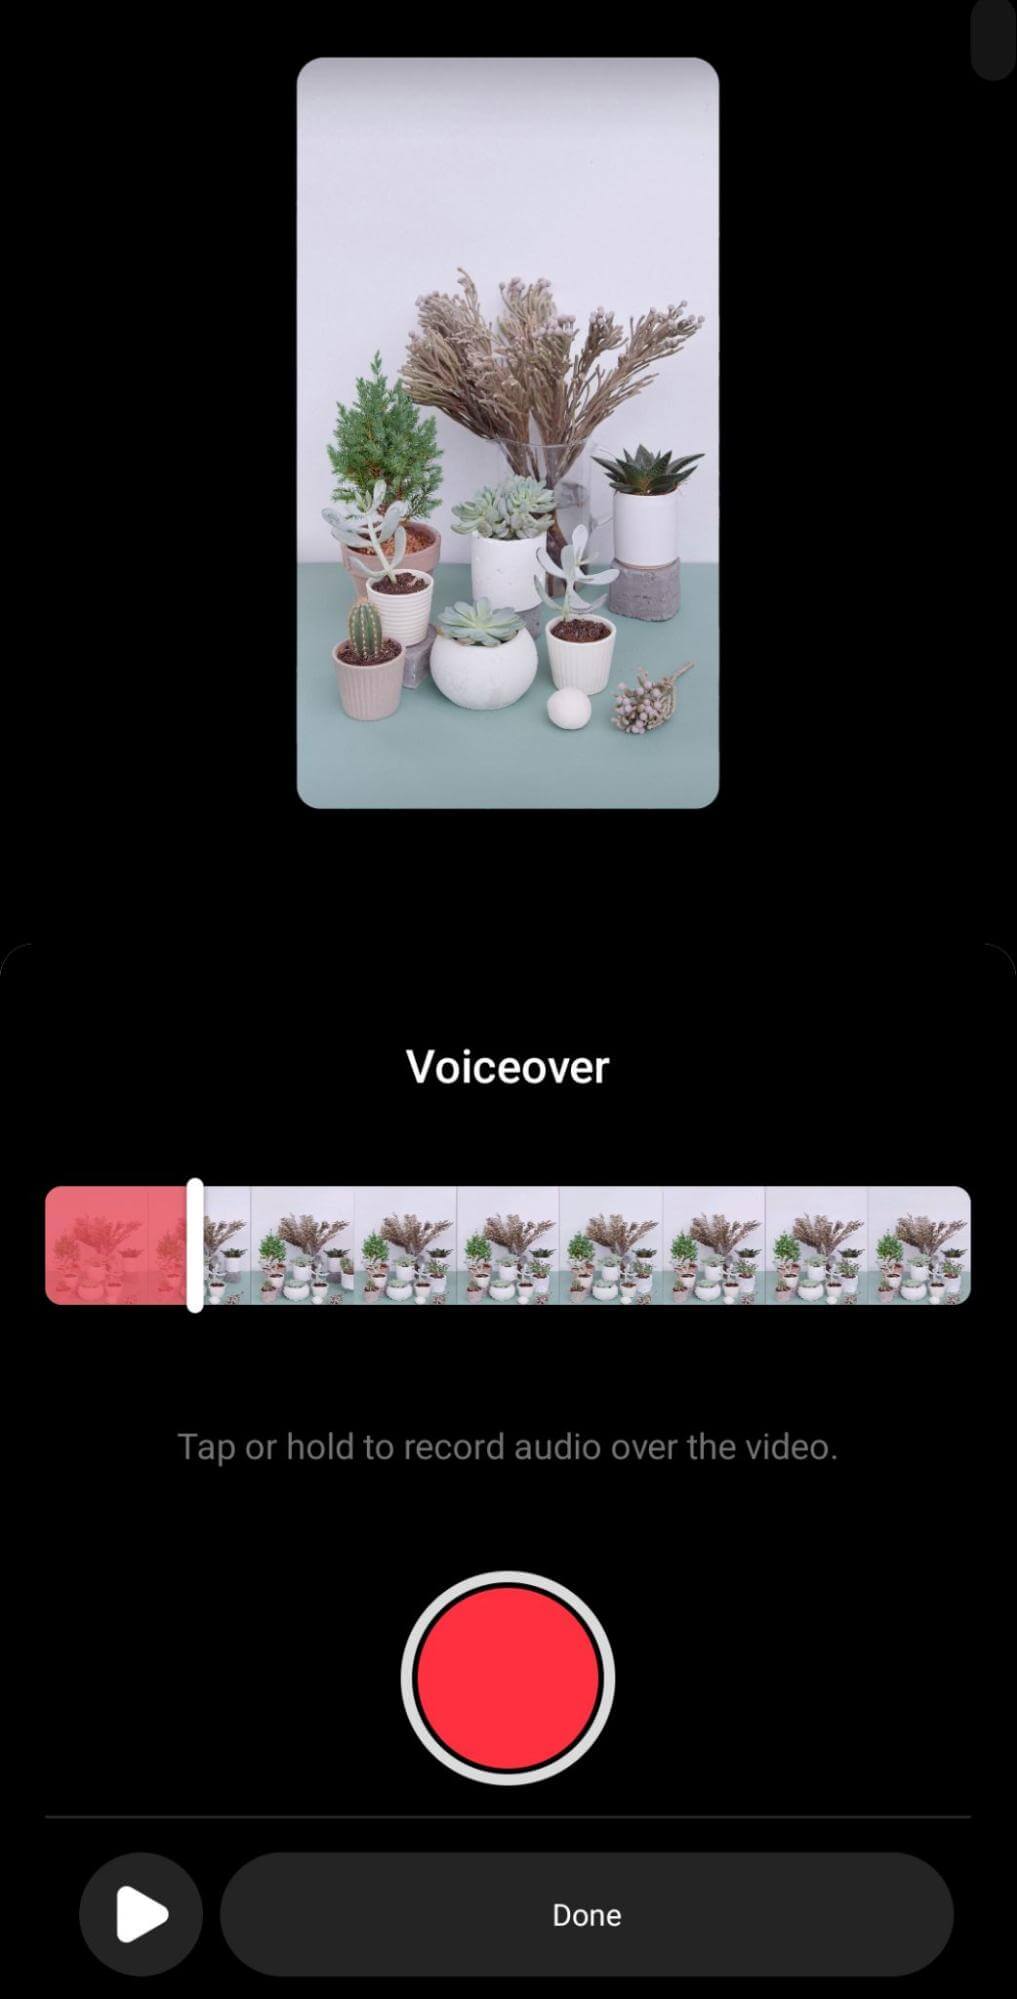
To change the audio settings for your reels, tap the Preview button. Then tap the microphone icon to add a voiceover, which allows you to narrate or add more information to a reel.
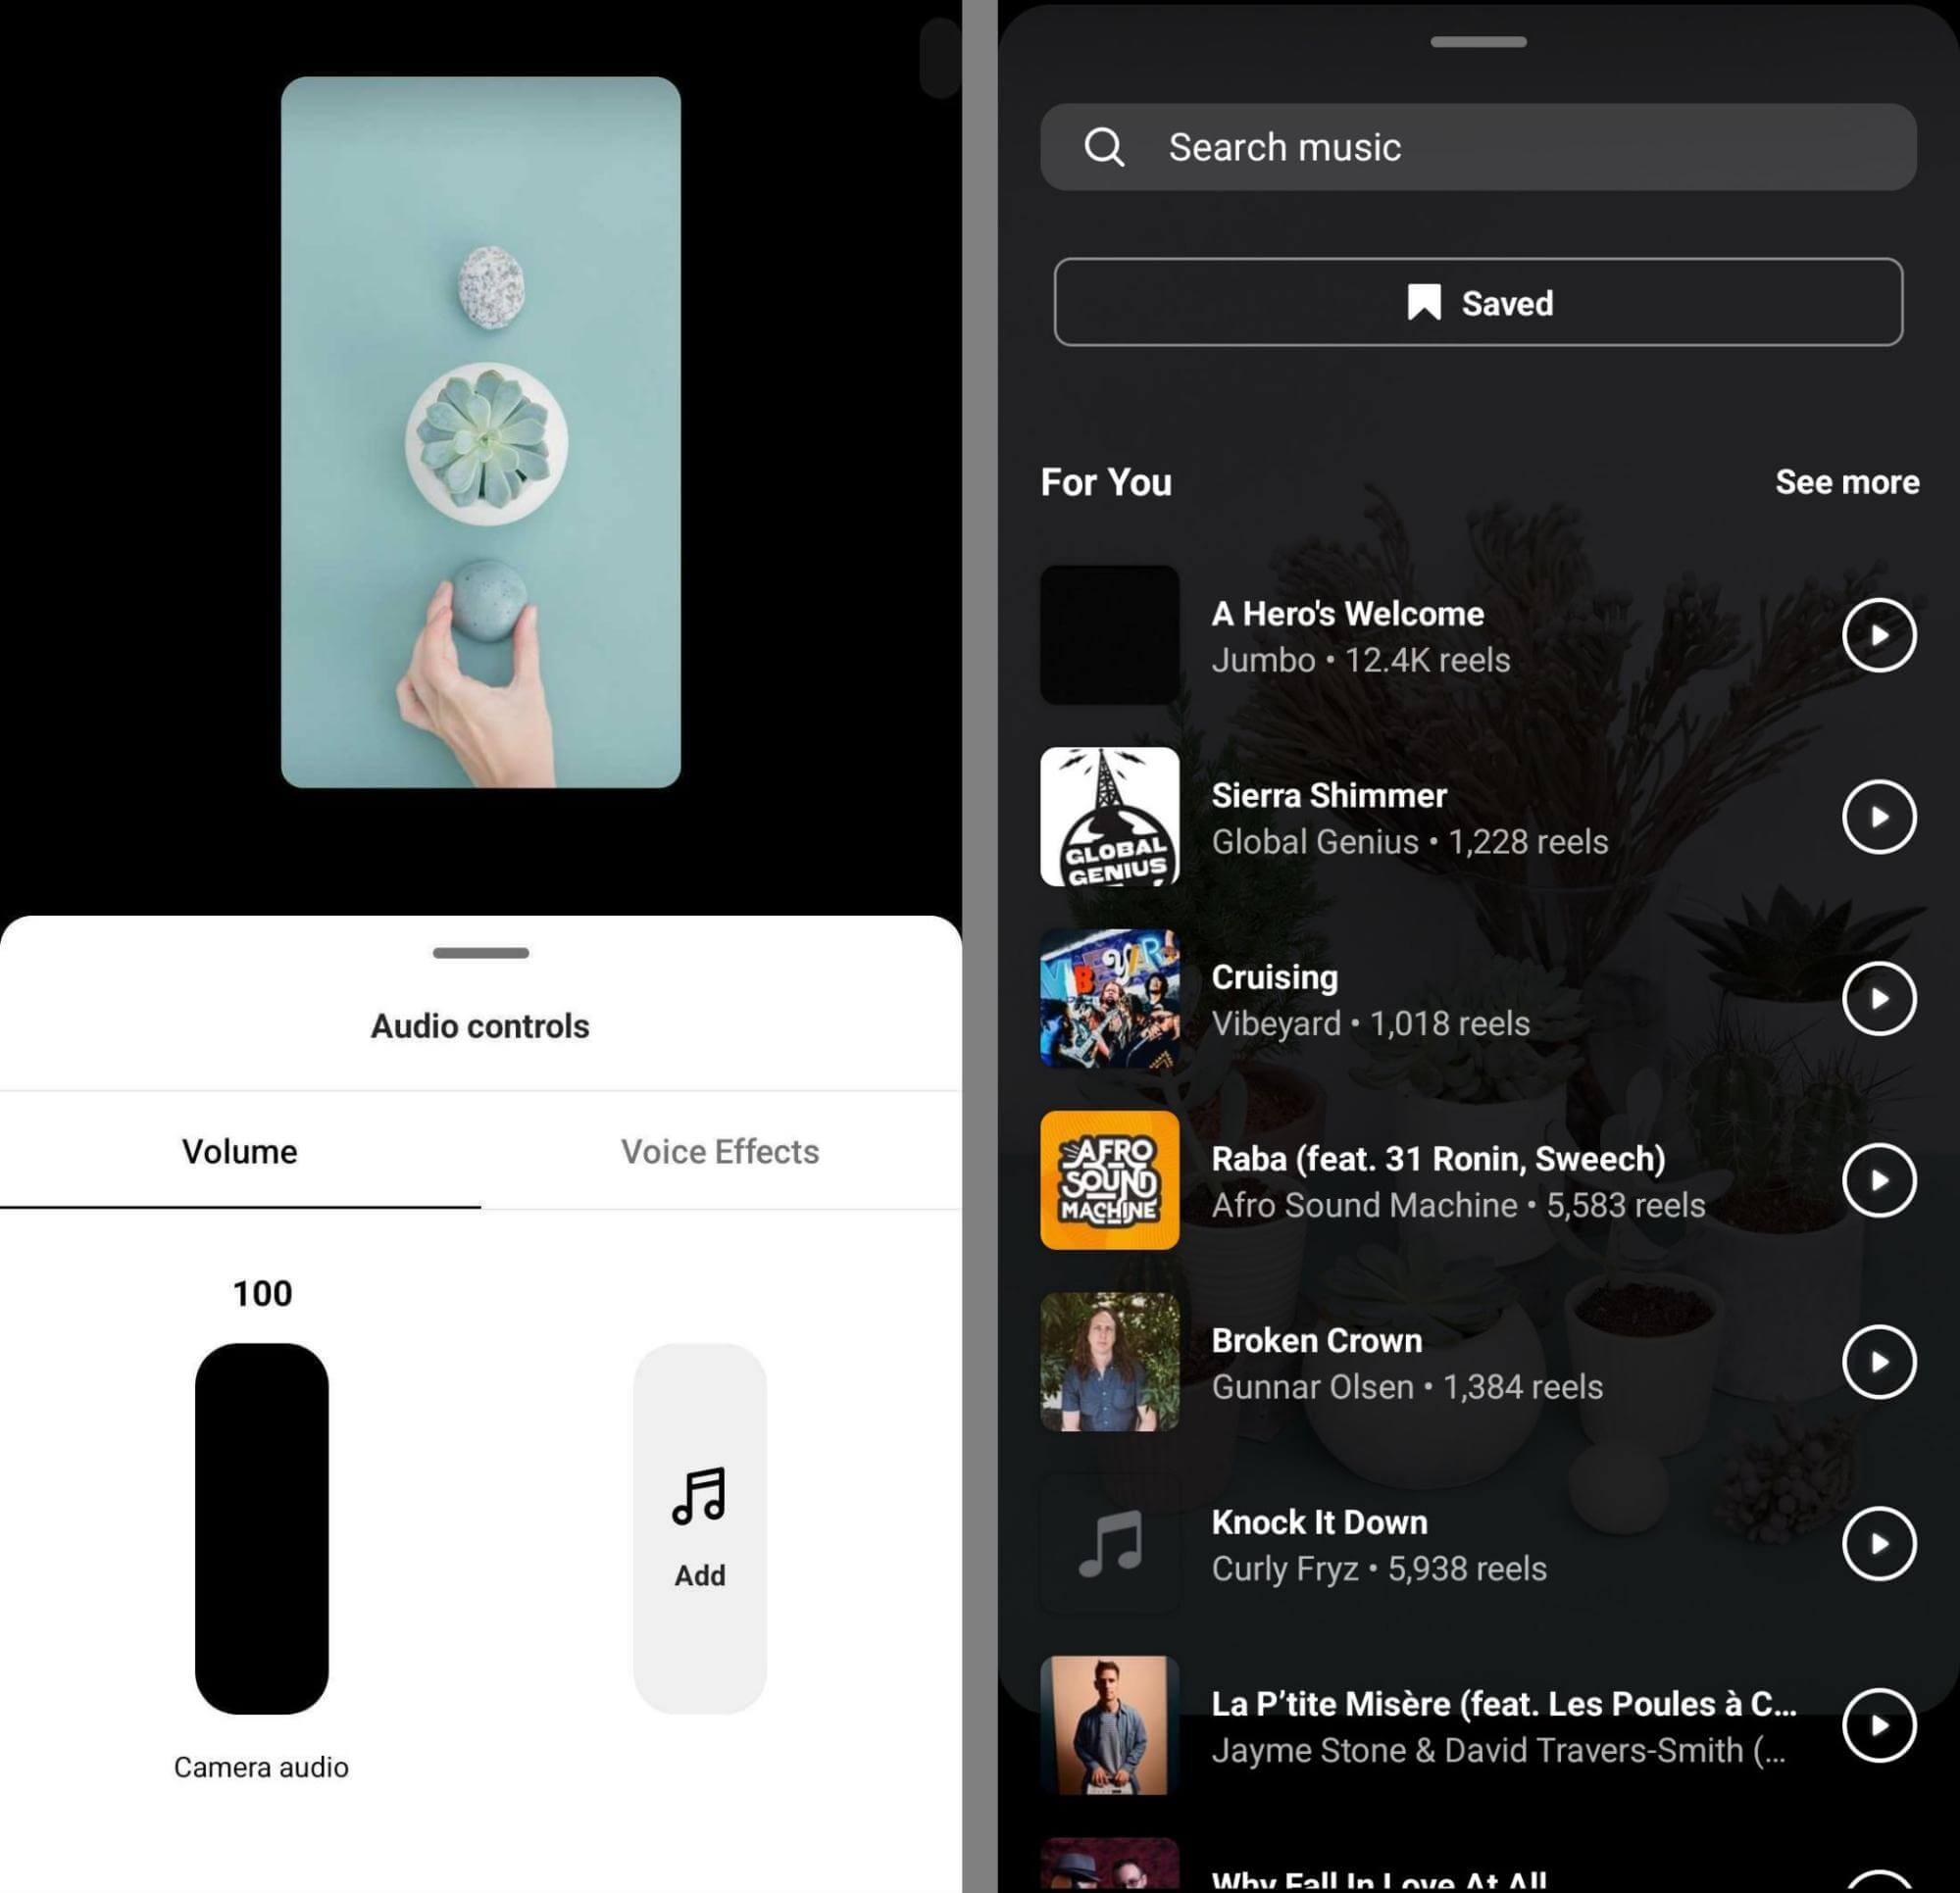
To add music to reels, tap the music note icon to view the Instagram music library. Here, you can adjust the volume of the original audio you recorded or uploaded and add music or sounds. You can also add voice effects to your own original audio and voiceover.

Discover Proven Marketing Strategies and Tips
Want to go even deeper with your marketing? Check out the Social Media Marketing Podcast! Publishing weekly since 2012, the Social Media Marketing Podcast helps you navigate the constantly changing marketing jungle, with expert interviews from marketing pros.
But don’t let the name fool you. This show is about a lot more than just social media marketing. With over 600 episodes and millions of downloads each year, this show has been a trusted source for marketers for well over a decade.
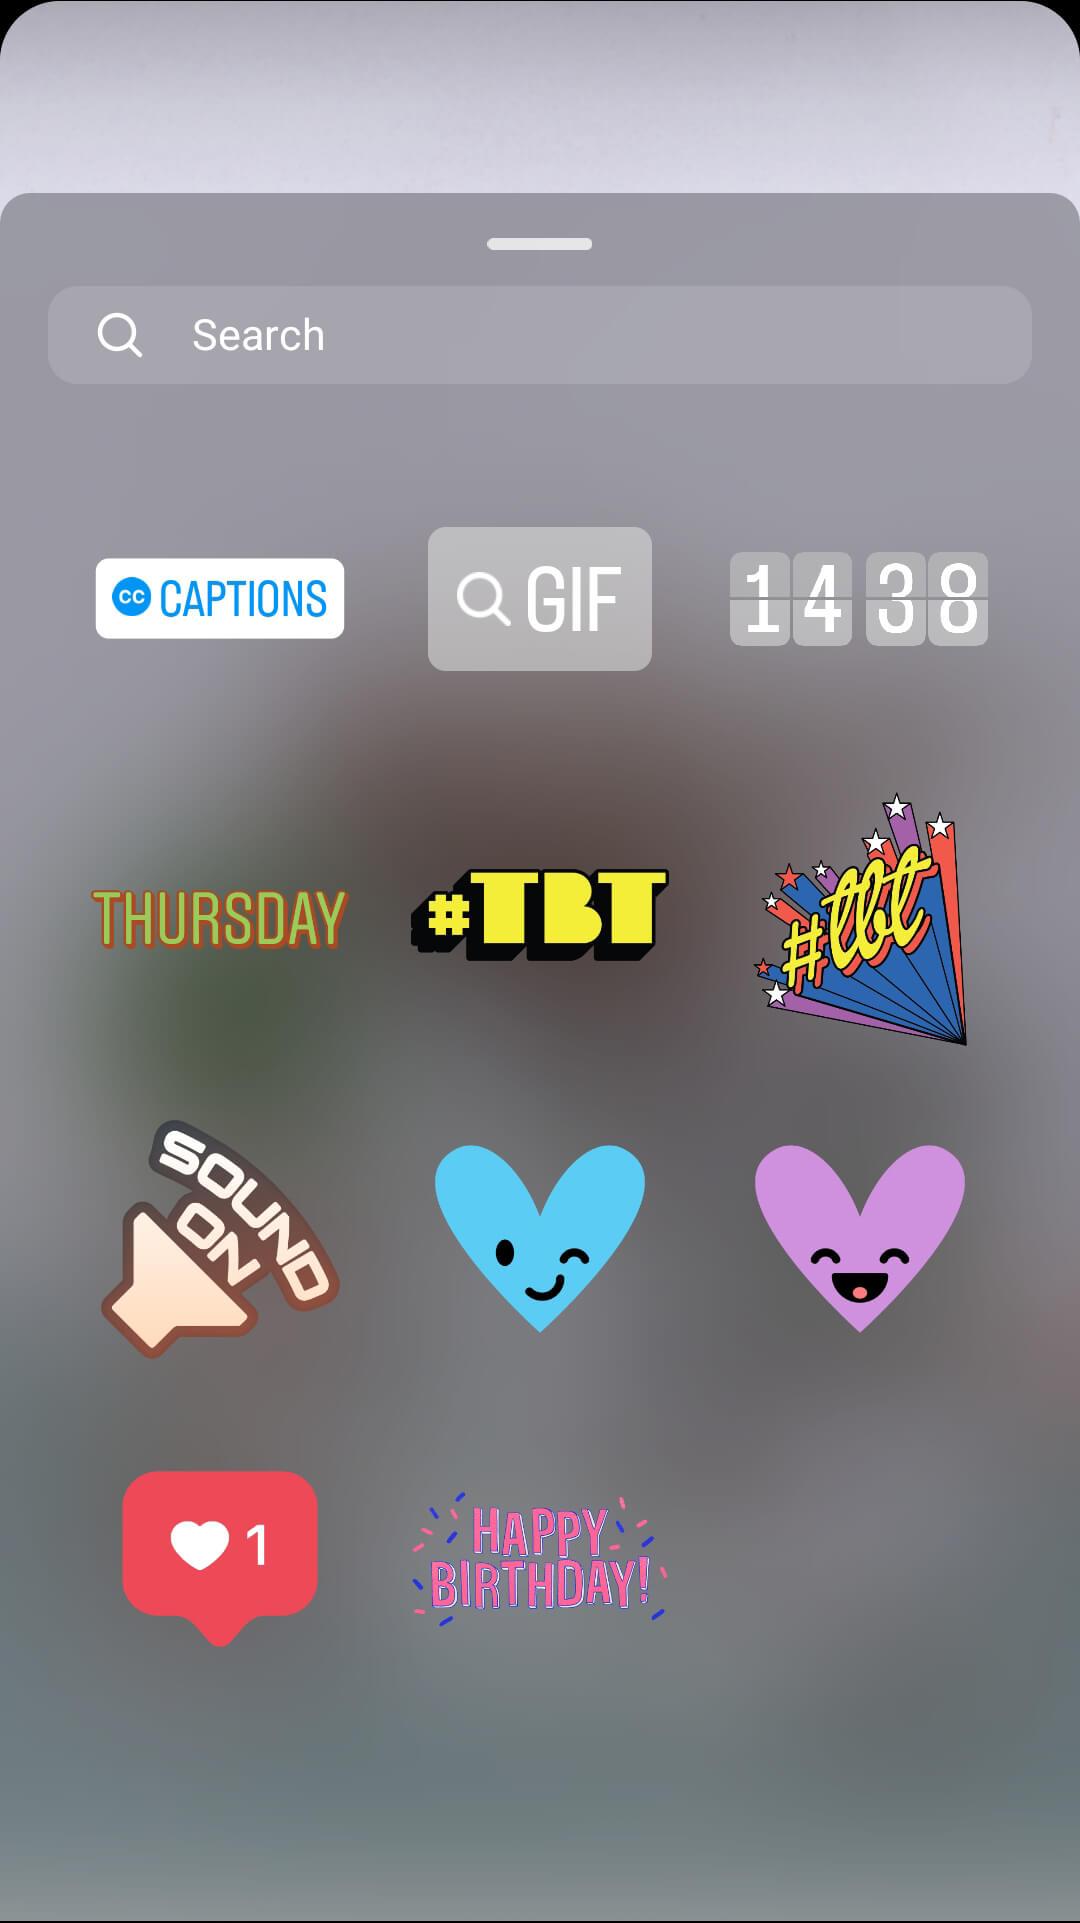
Choose Stickers
The Reels sticker tray isn't nearly as robust as the options available for Stories but it still has some useful additions—like captions. Tap the Captions sticker to transcribe your audio automatically and help viewers watch your reel without sound.
After the Instagram app transcribes your audio, you can tap to correct any mistakes and change the text color and animation style. Then you can tap to move the captions around on the screen.
Add Text Overlays
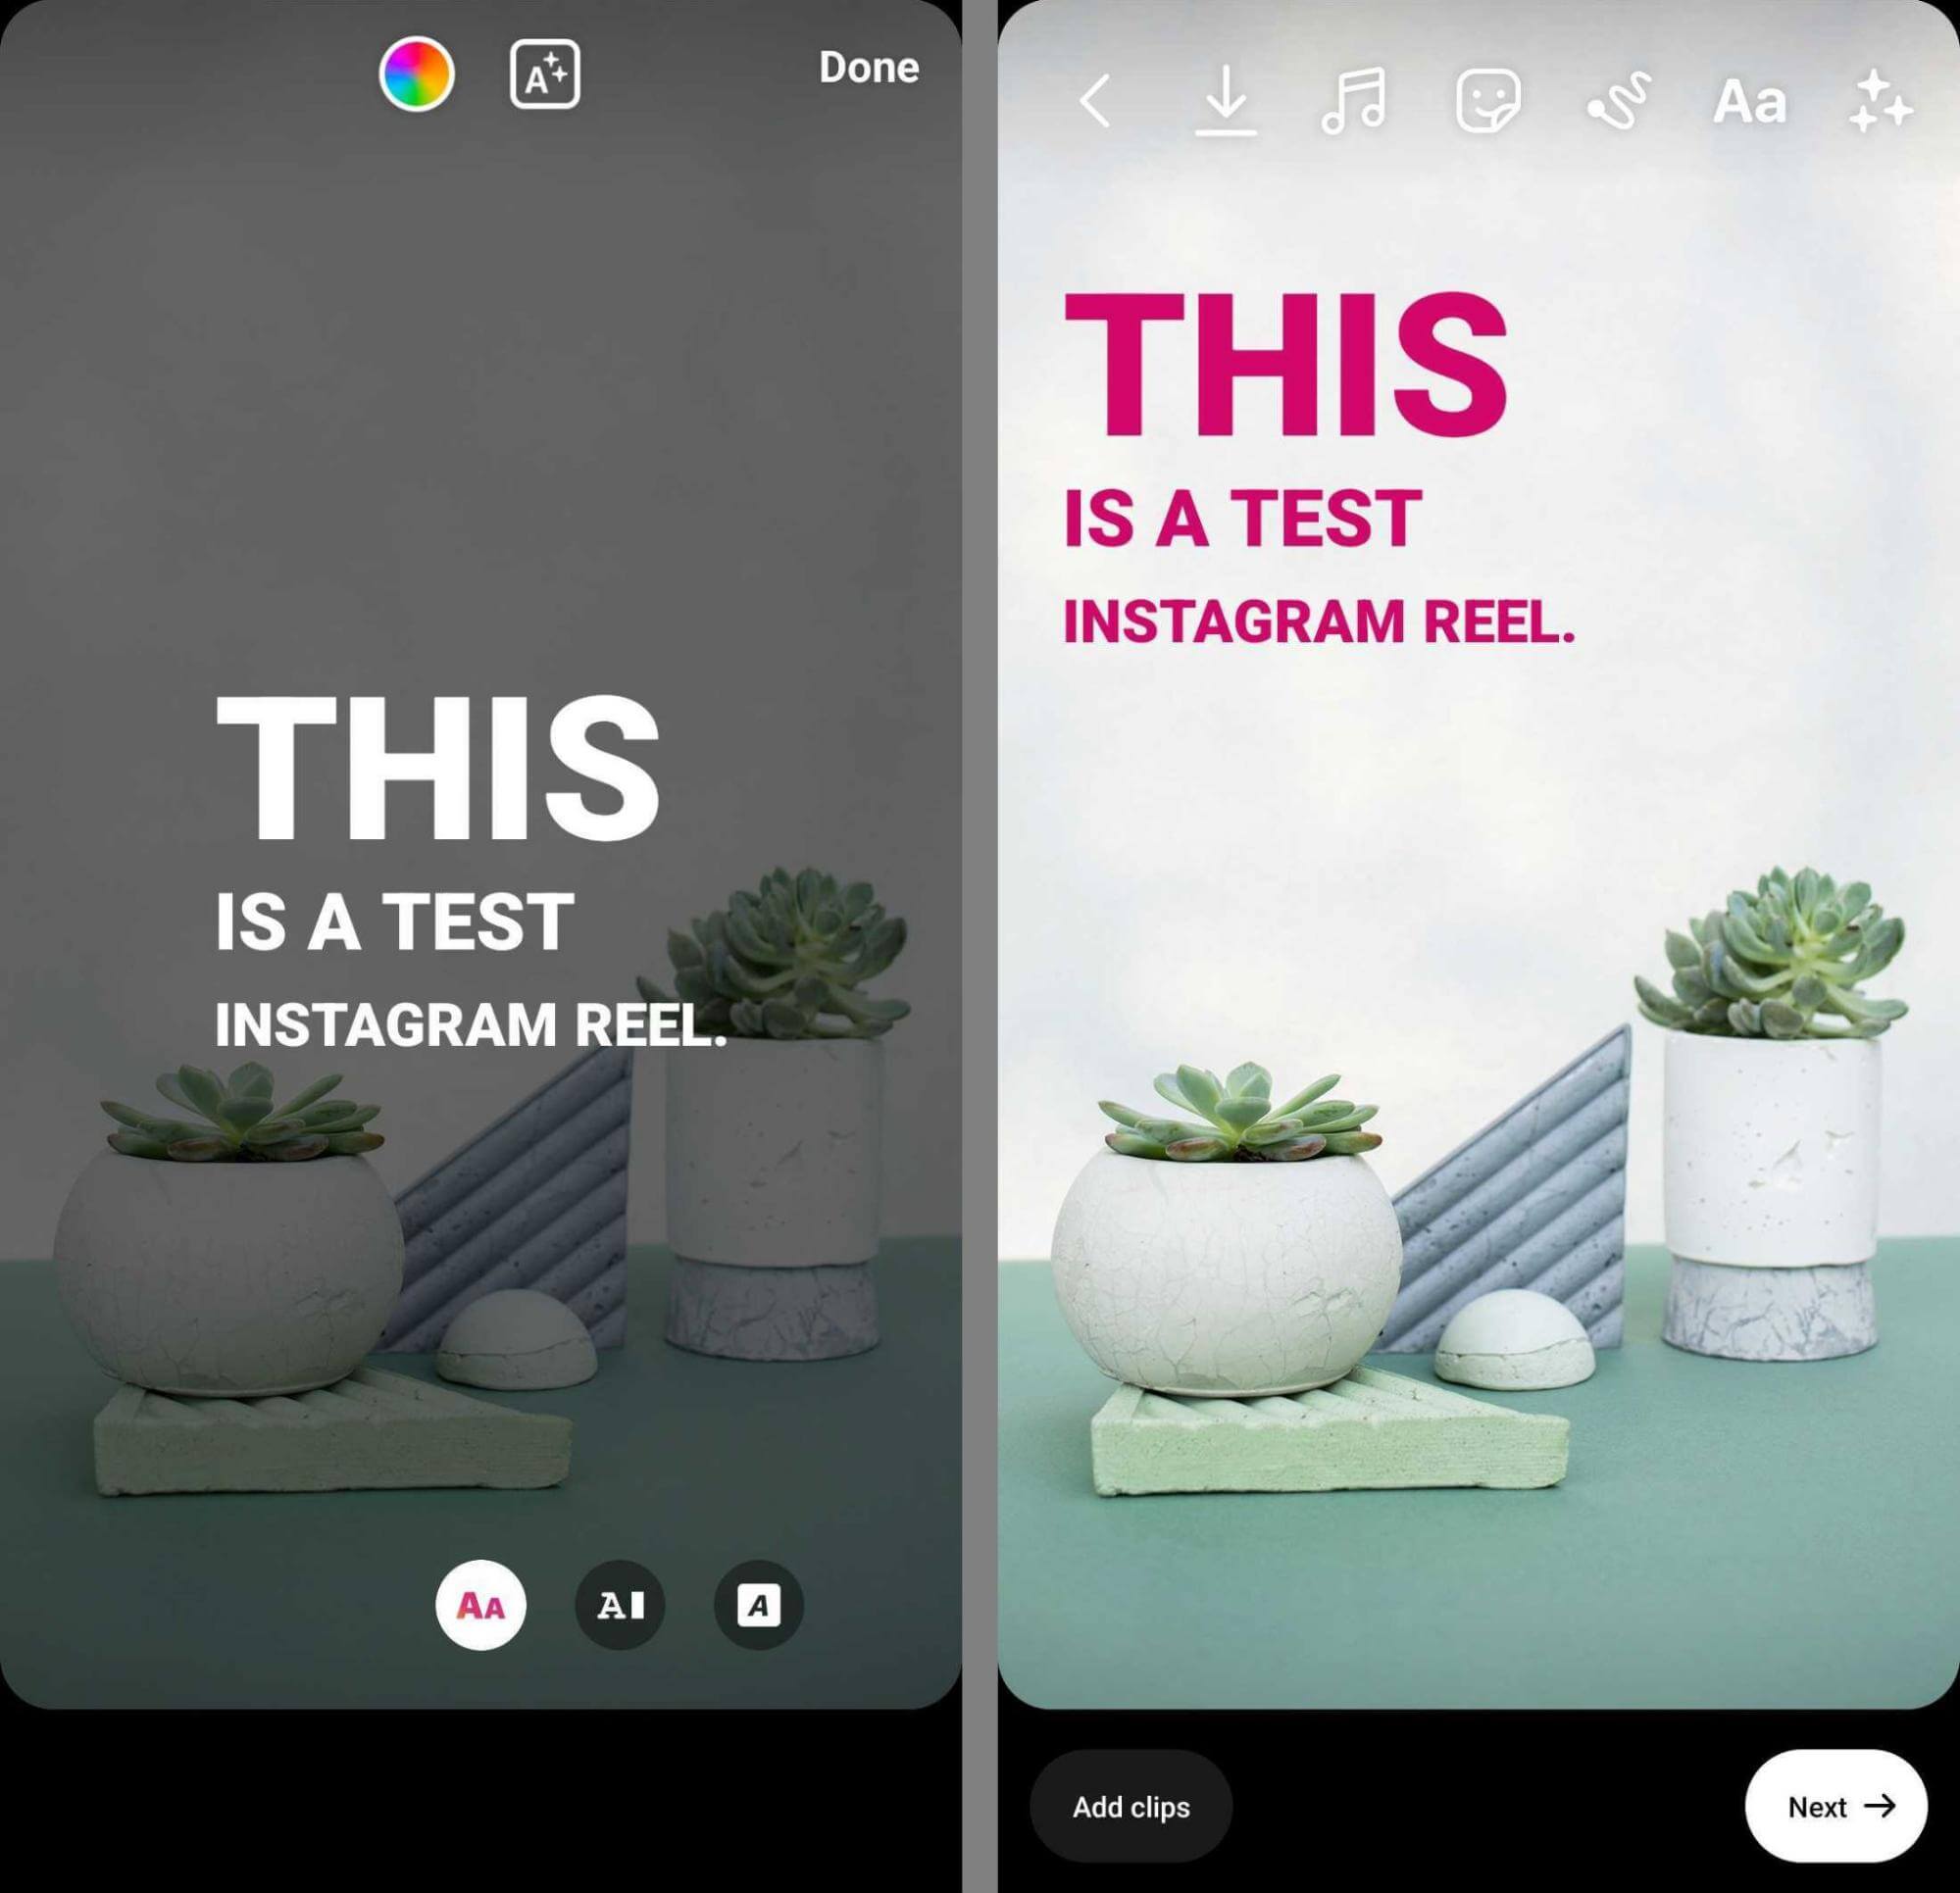
Captions are just one option for adding text to reels. You can also add overlays by tapping the Aa icon. Enter the text, choose a color, and tap the animation icons to add movement.
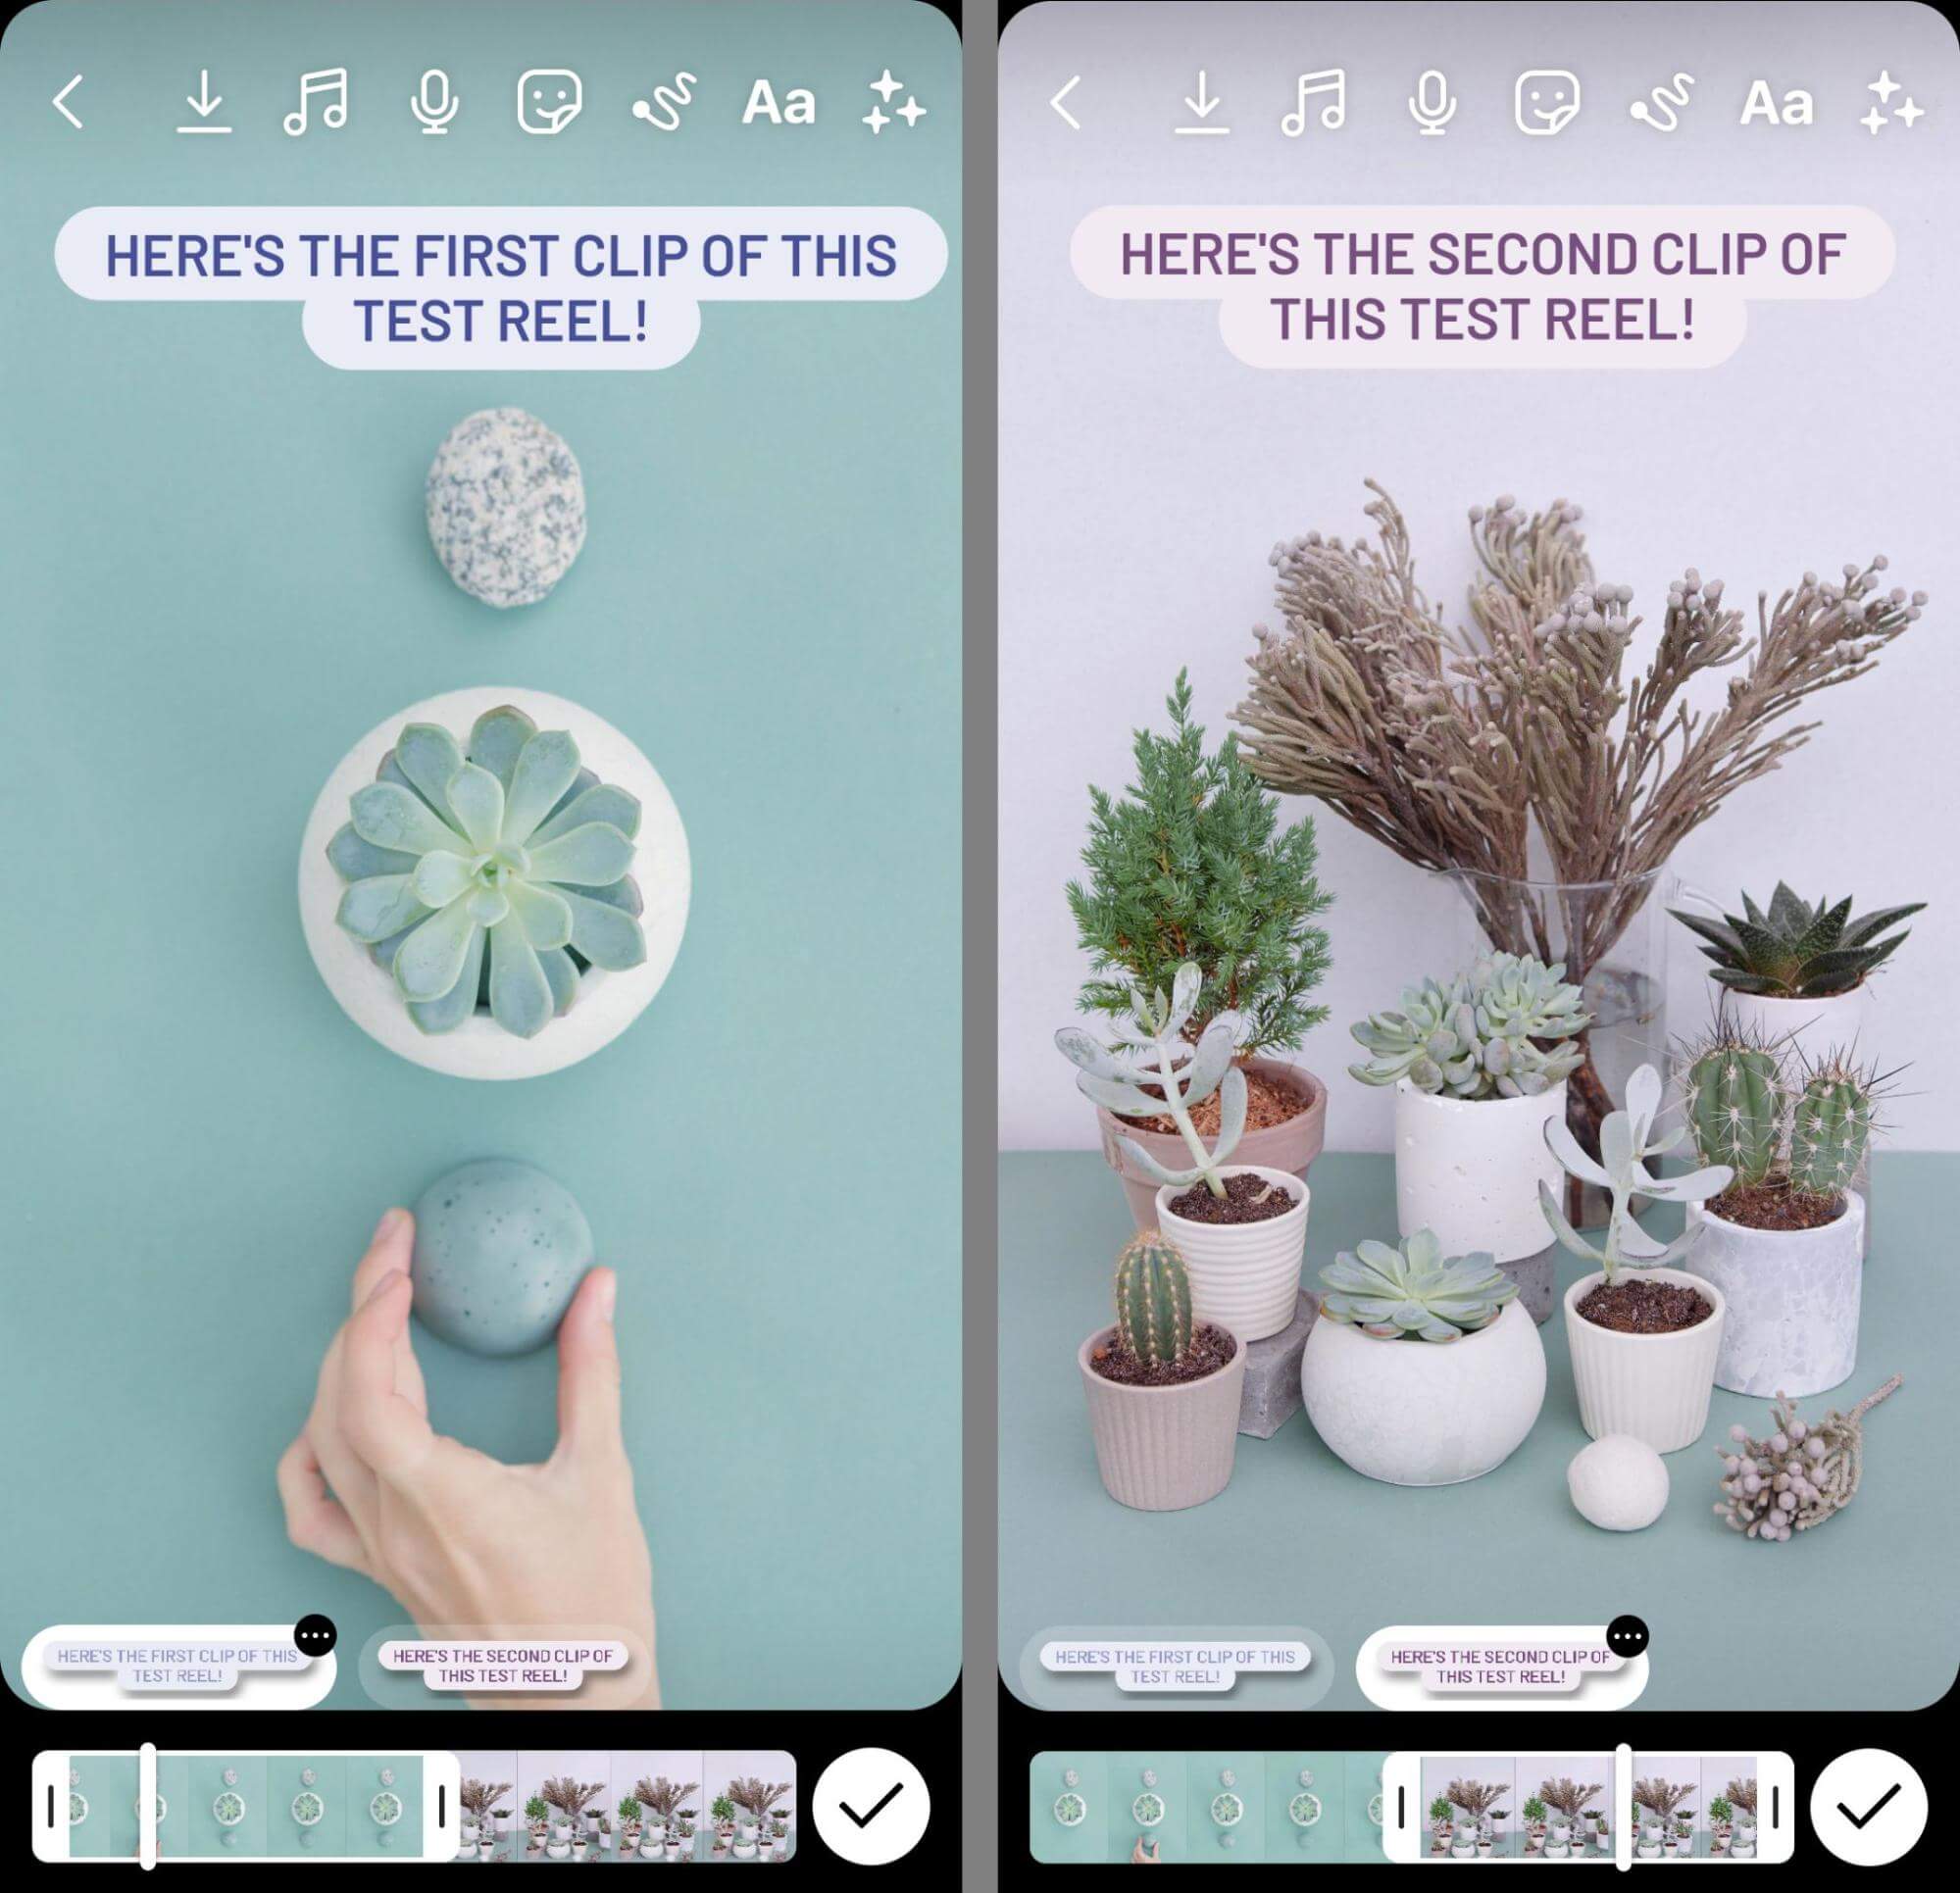
Tap Done when you're finished, and then place the overlay on the screen. To add more text blocks, tap the Aa icon again and repeat the workflow. Then use the timeline at the bottom of the screen to set when and for how long each text block should appear.
Include Special Effects
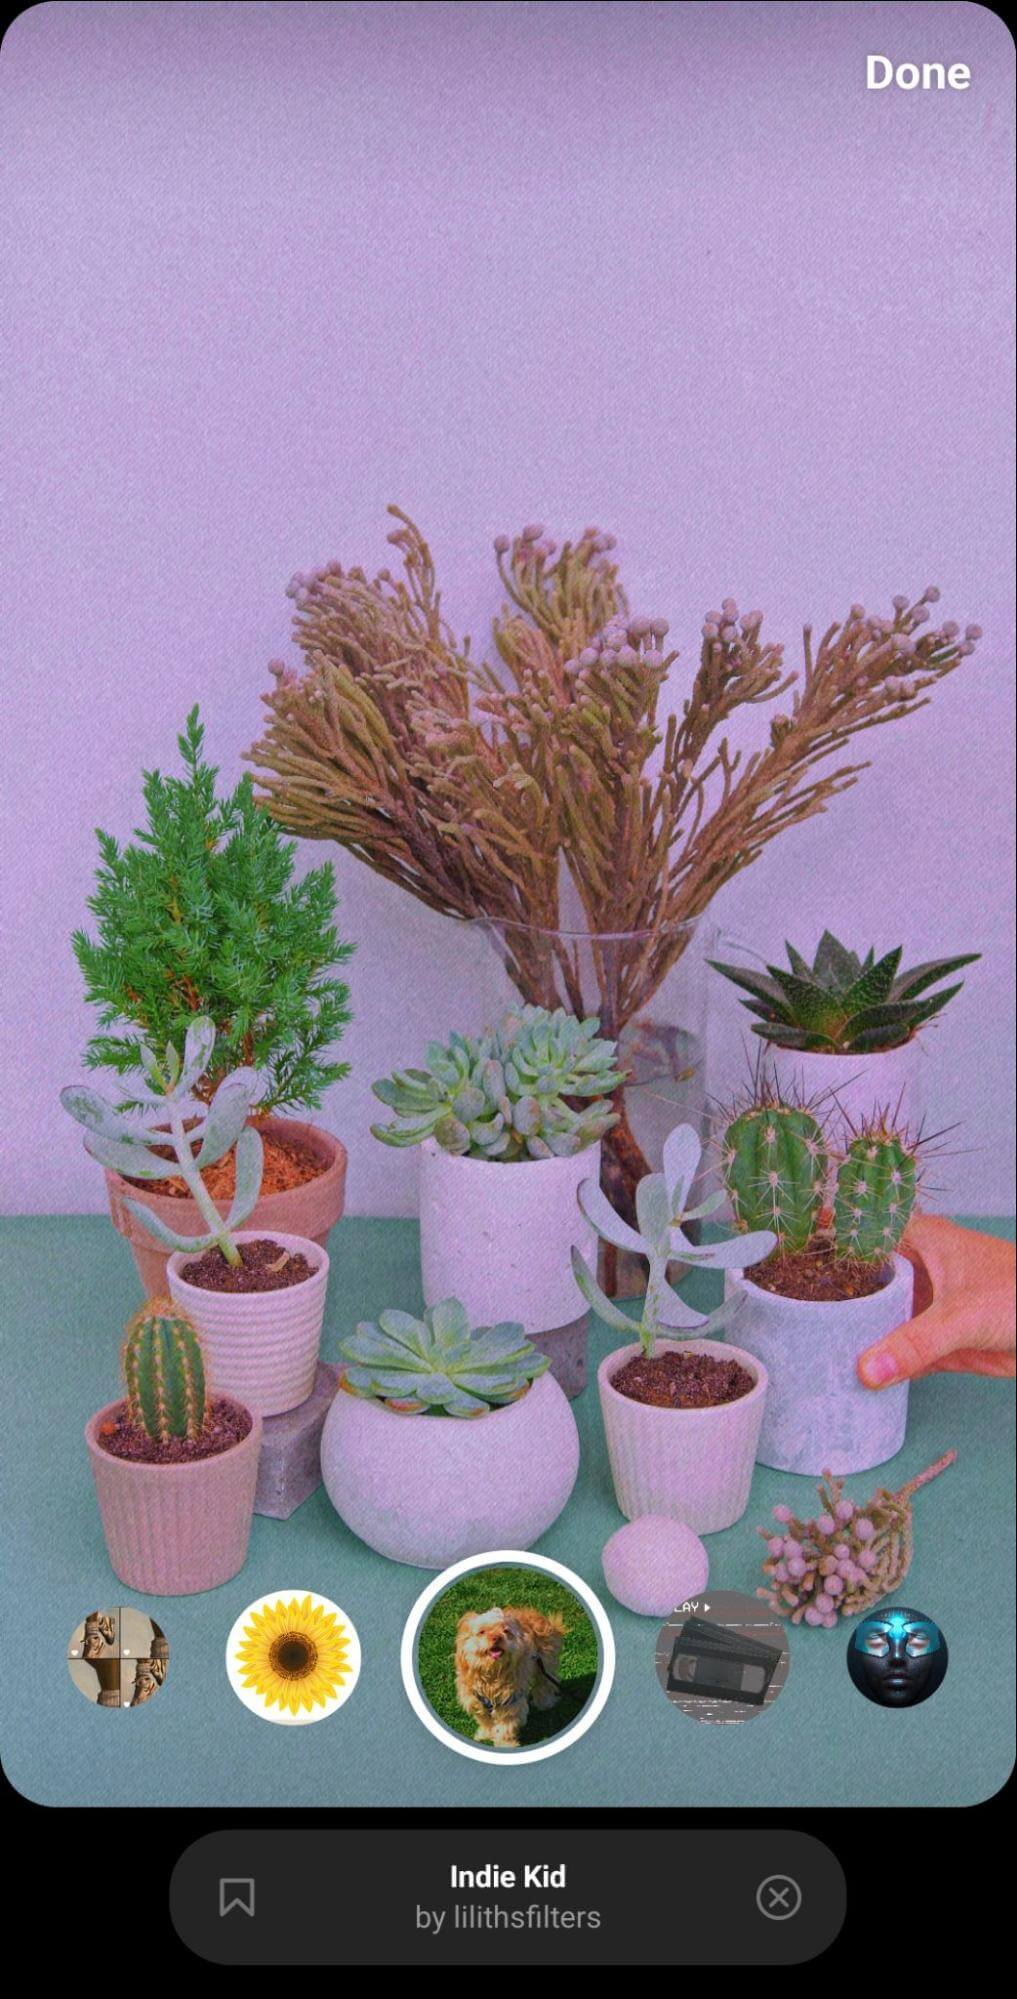
Reels gives you the option to add special effects as you record clips. But you can also add special effects during the editing process. Tap the sparkle icon to browse and add the available effects.
Filter Your Video
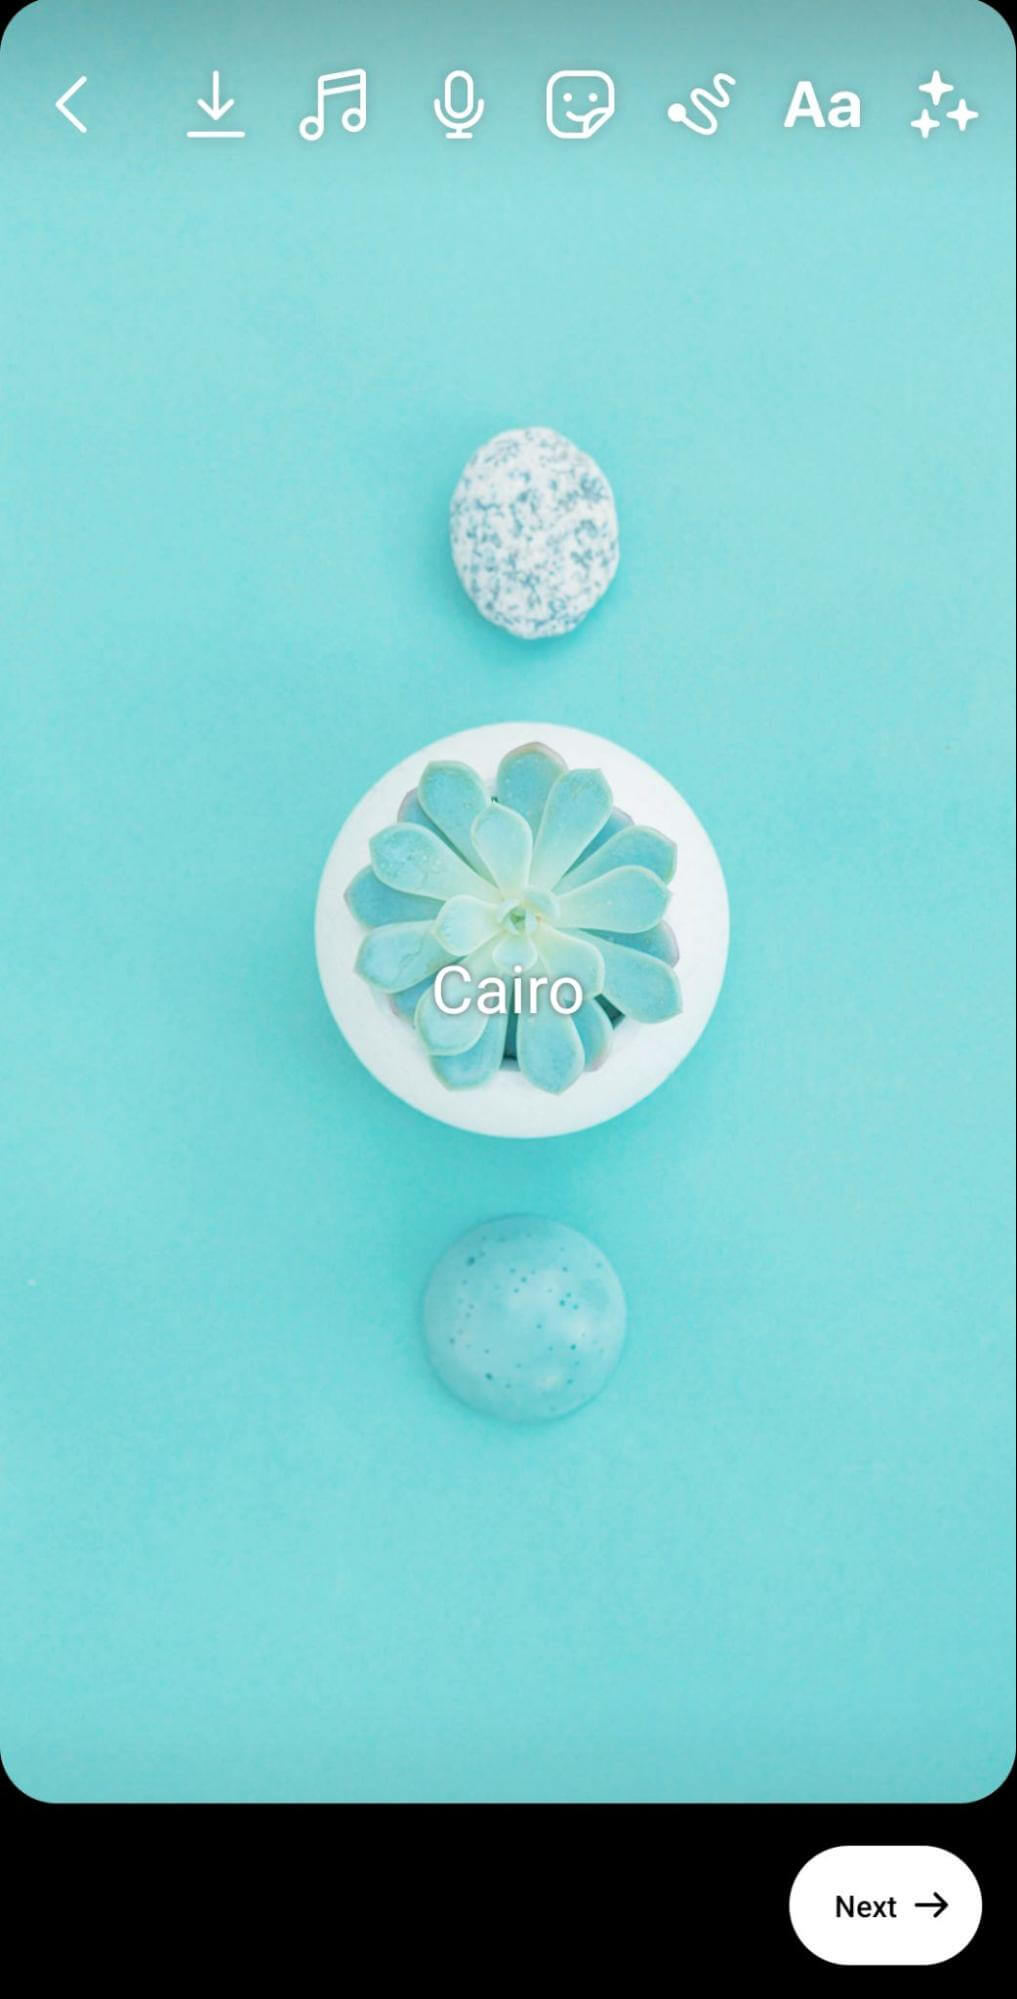
Alternatively, you can add simple filters to your reel. From the main editing interface, swipe left or right to see the available filters.
Draw on Your Reel
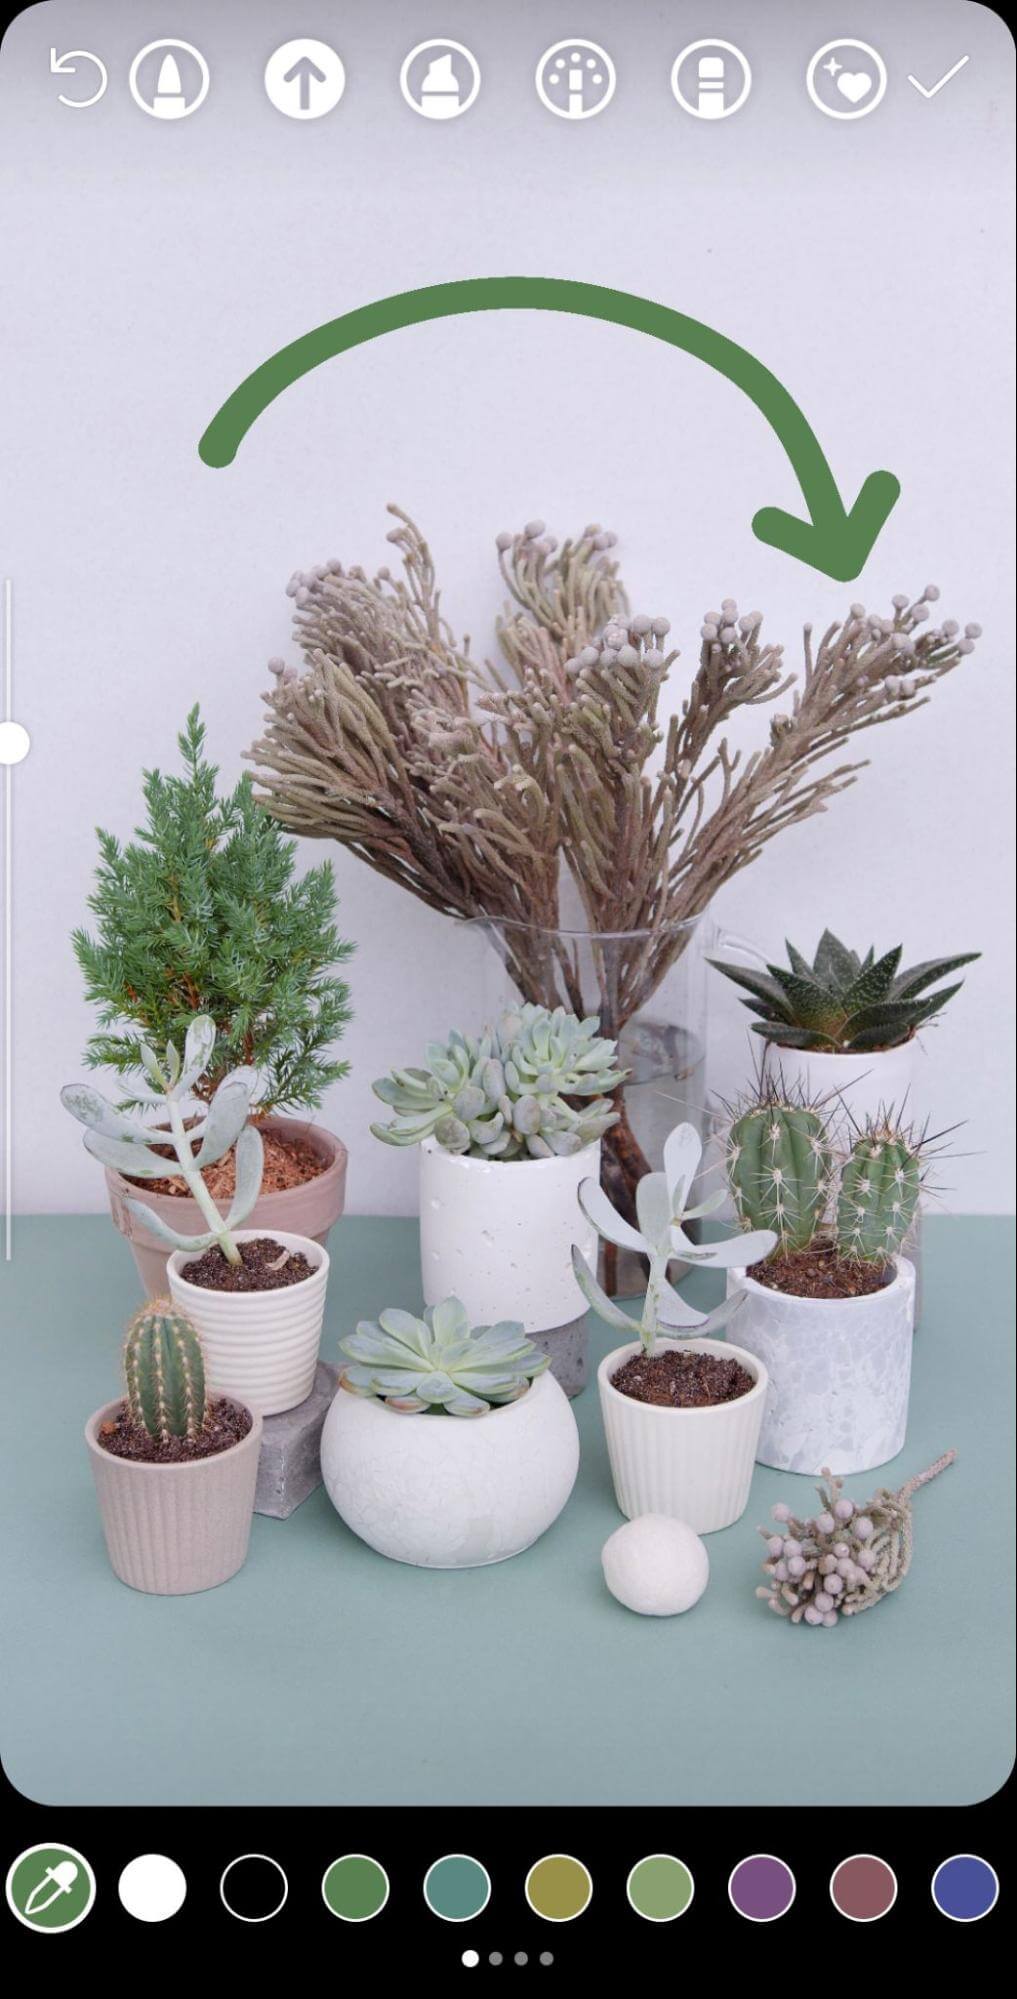
If you want to enhance aspects of your reel or call attention to a certain element, tap the line icon to access the drawing tools. You can choose from preset shapes like arrows or add free-form elements to your video.
#5: How to Enhance Instagram Reels With 3 Affordable Third-Party Creative Tools
If you take full advantage of the many built-in editing tools above, you may never need a third-party tool for creating reels. But if you want to add more complex edits or access more exclusive tools, try one of the third-party apps below.
Adobe Premiere Rush
Meta doesn't currently have any desktop apps for making or editing reels. But Adobe Premiere Rush is a good place to start if you'd rather edit with a desktop app and you have access to Adobe Creative Cloud.
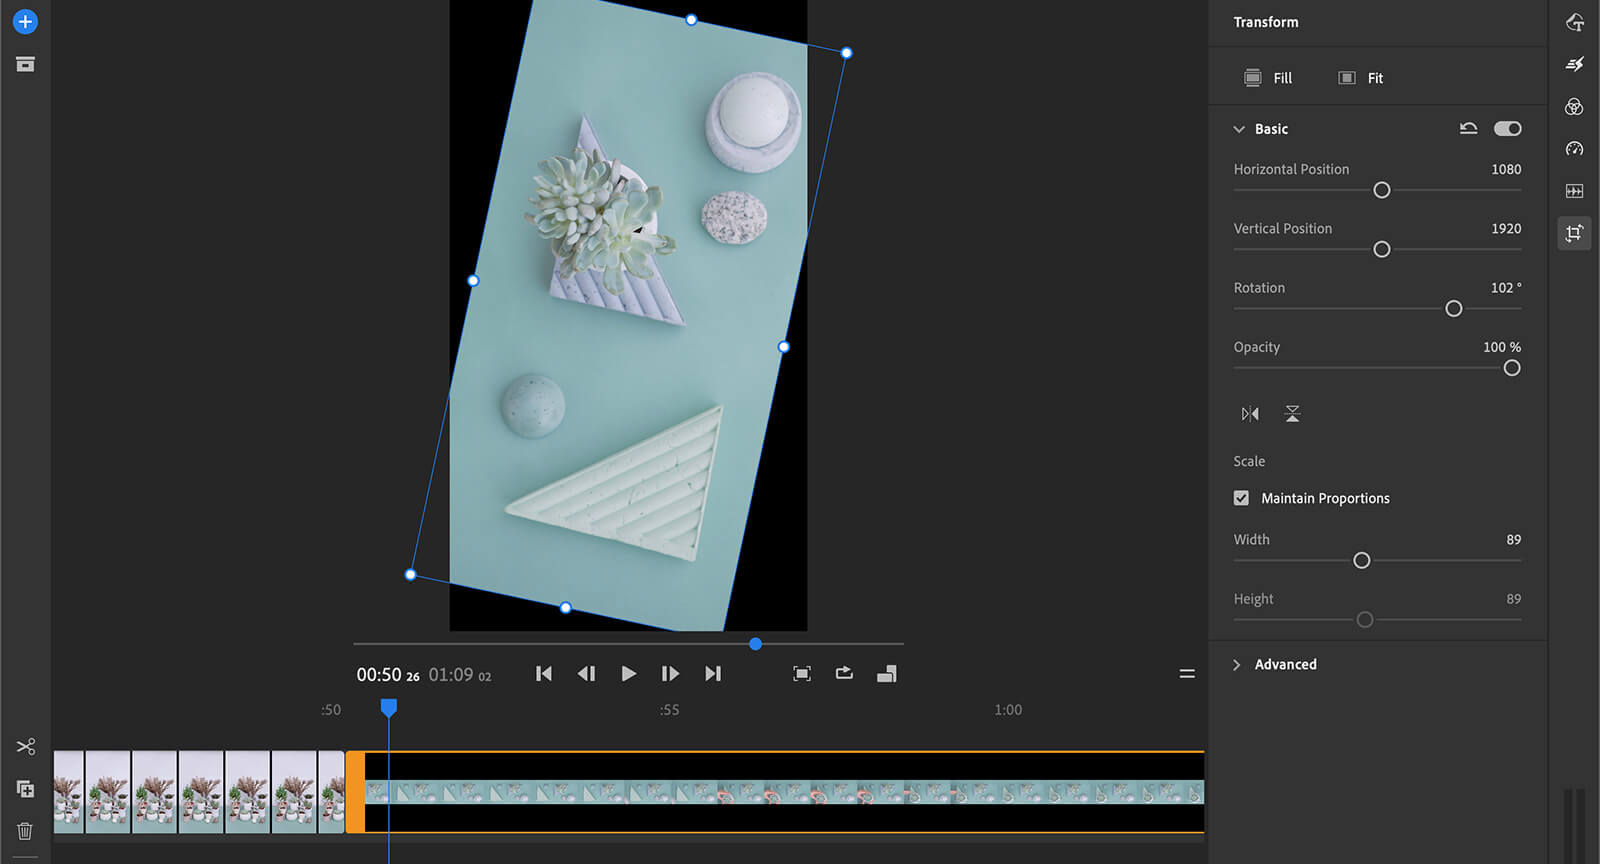
Start by uploading your clips to the app. If one or more of your clips doesn't fit the standard 9:16 full-screen aspect ratio, you can use the built-in cropping and scaling tools to adjust the display. For example, you can rotate vertical videos or scale smaller aspect ratios to fit the full-screen display.
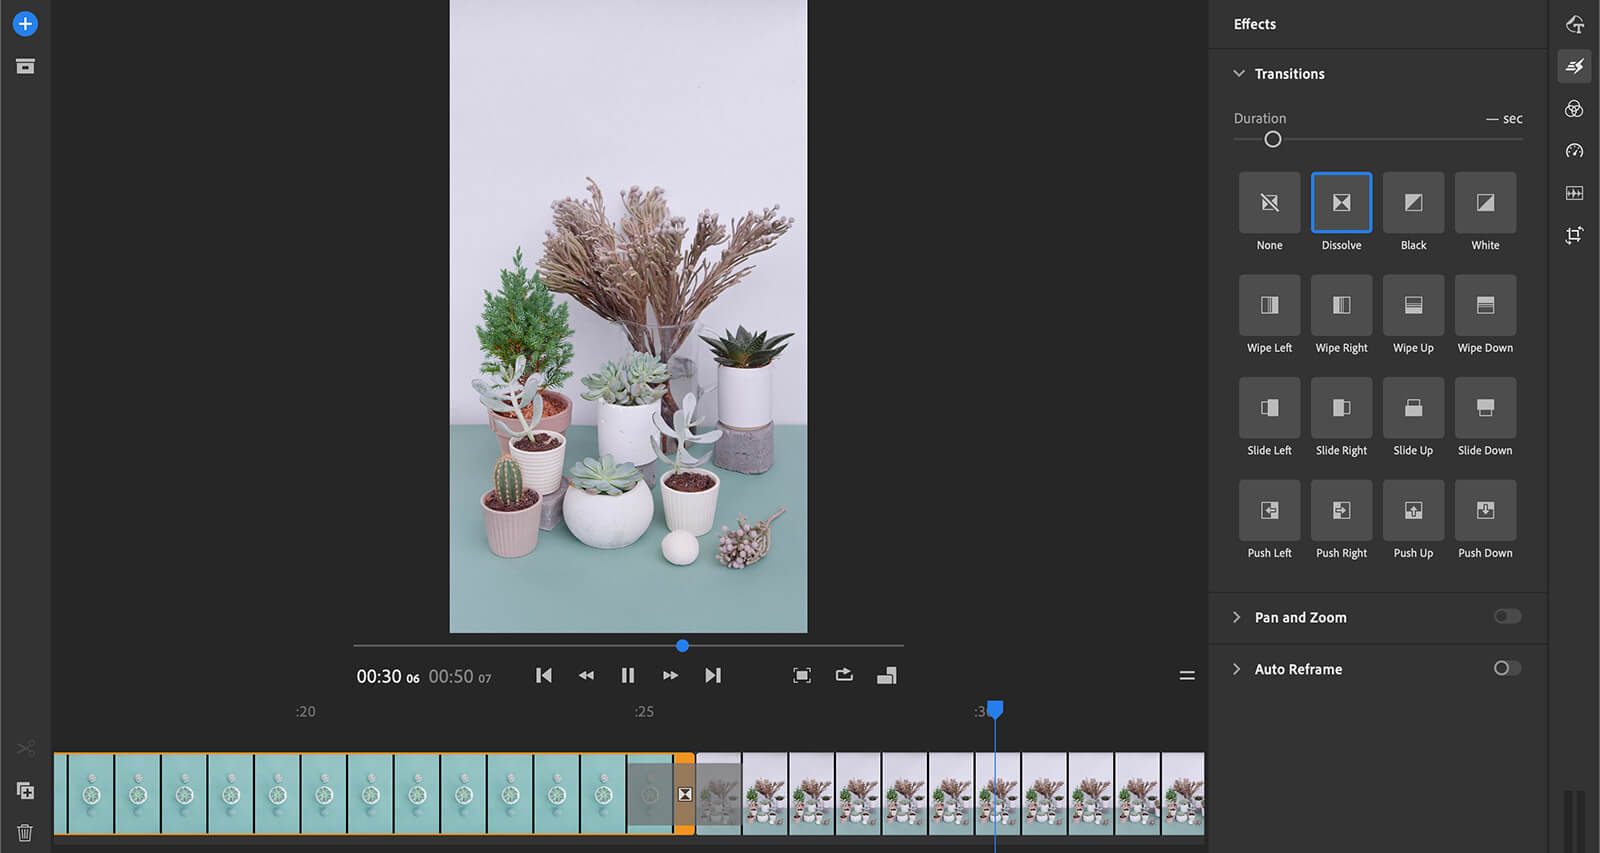
Then click the Effects icon to create a transition between clips. You can set the length of transitions between each clip and even choose transitions to begin and conclude the reel. You can also add transition graphics to create more of a separation between clips.
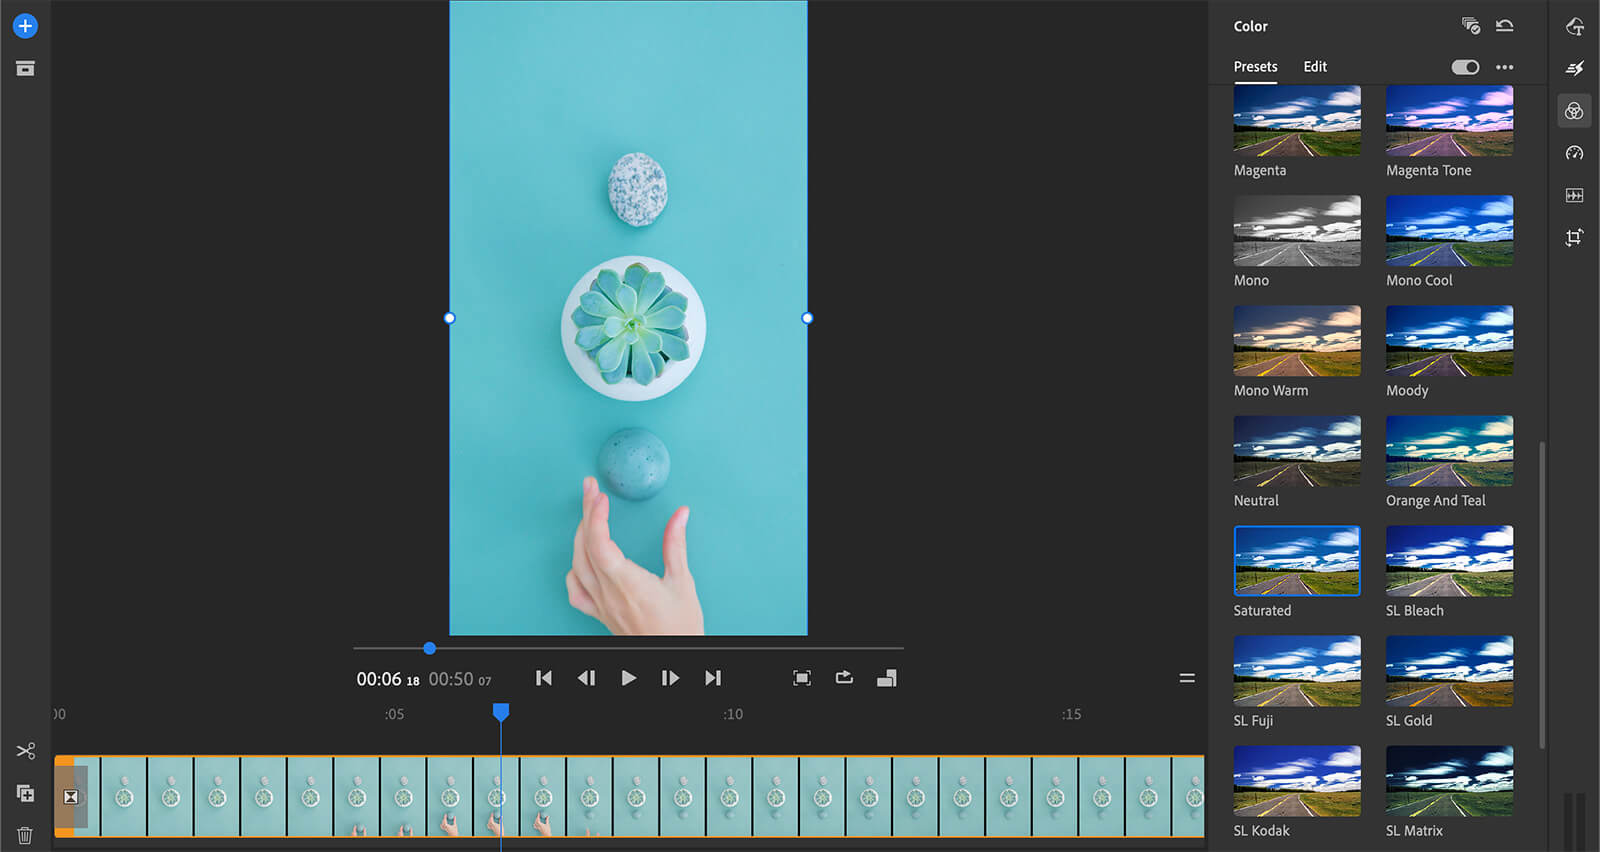
To adjust the tones and saturation of your clips, browse the filter menu. You can select different filters for each clip to optimize your reel and help it stand out in the feed. When you're finished, export the video, download it to a mobile device, and upload it to Instagram.
Canva
If you're seeking more creative direction from an editing app, Canva is a good choice. This desktop and mobile app has tons of templates for reels, many of which you can use to translate your storyboard into short-form video format.
Choose a template that fits your storyboard or your style, and replace the clips with your own. Then edit the text and graphics to fit the message you want to share. You can also add extra clips, adjust the timing, or choose audio tracks.
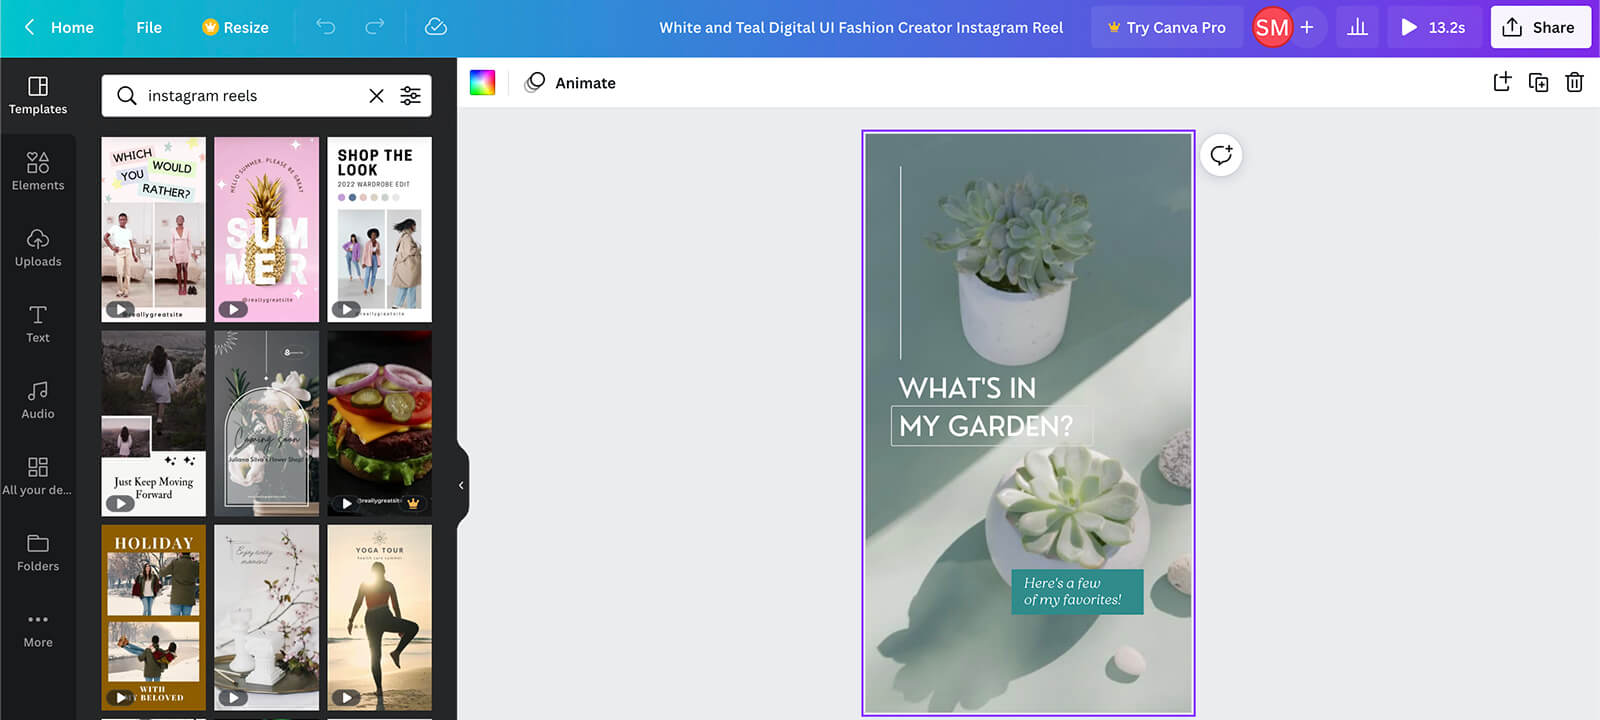
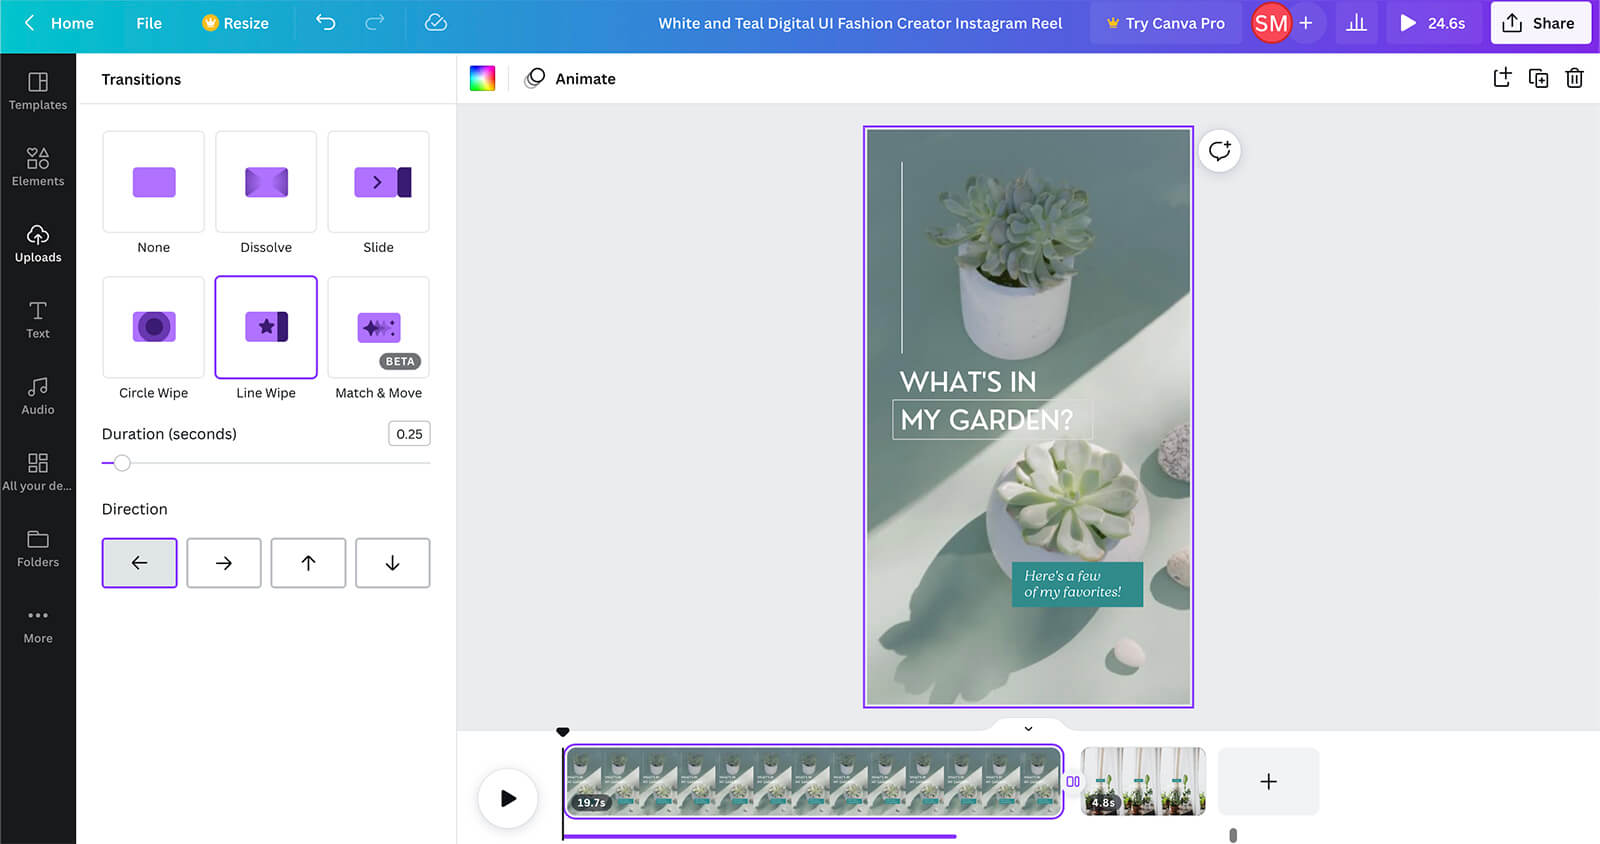
If you don't find a template that works for your needs, you can always create a blank reel in Canva. Upload your clips and then click to change the transitions between each clip. You can also adjust the timing of each transition so it lasts up to 2.5 seconds.
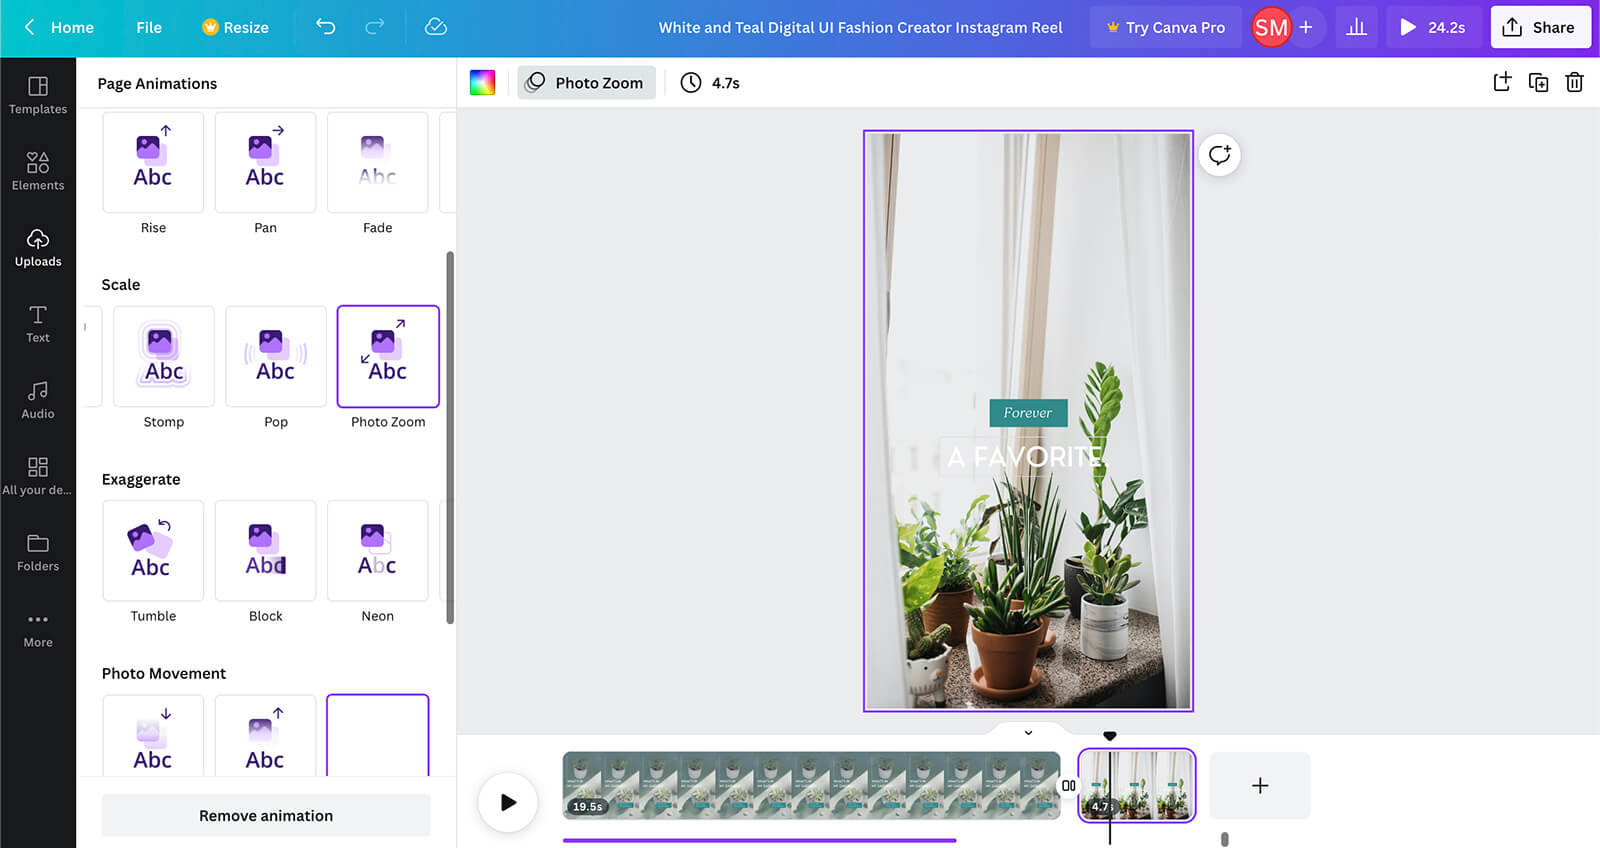
If you've opted to upload photos to your reel, Canva makes it easy to animate any still images. Click the Animate button in the top menu and choose an animation effect. You can also opt to shorten or lengthen the animation to fit your reel.
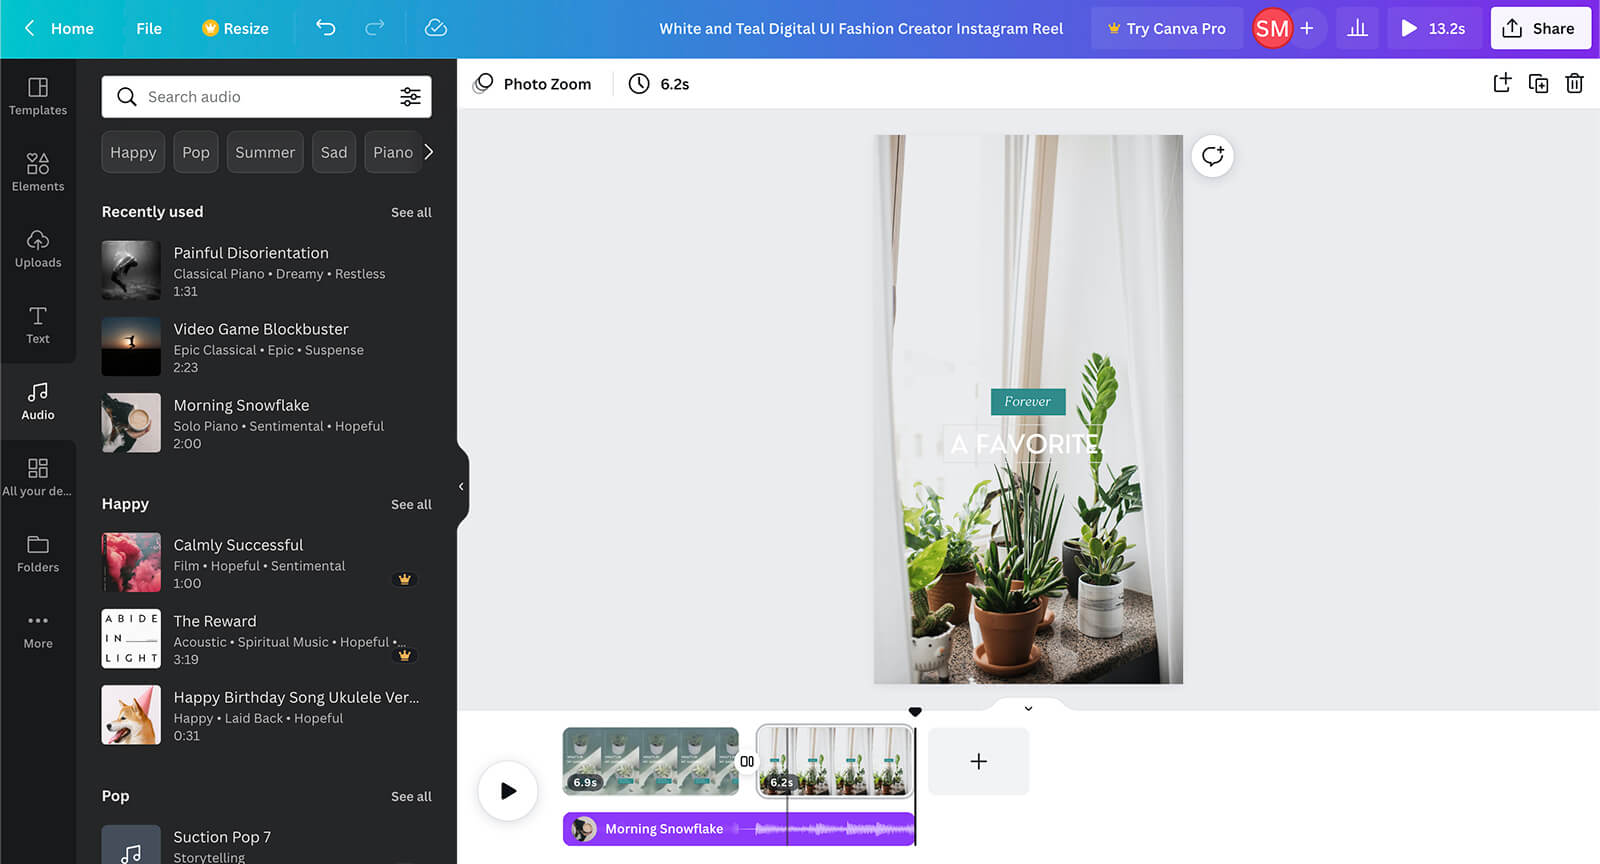
Then open the Audio tab to choose music for your reel. You can add separate audio tracks to each clip or keep the music consistent throughout. You can also add fade-in and fade-out effects for smoother audio transitions.
When you're finished editing your reel, you can export it directly from Canva's mobile app. Then you can seamlessly publish it to Instagram.
InShot
When you want more creative options in a mobile app, InShot is a good pick. Once you've uploaded a clip, you can configure everything from text and filters to music and voice effects.
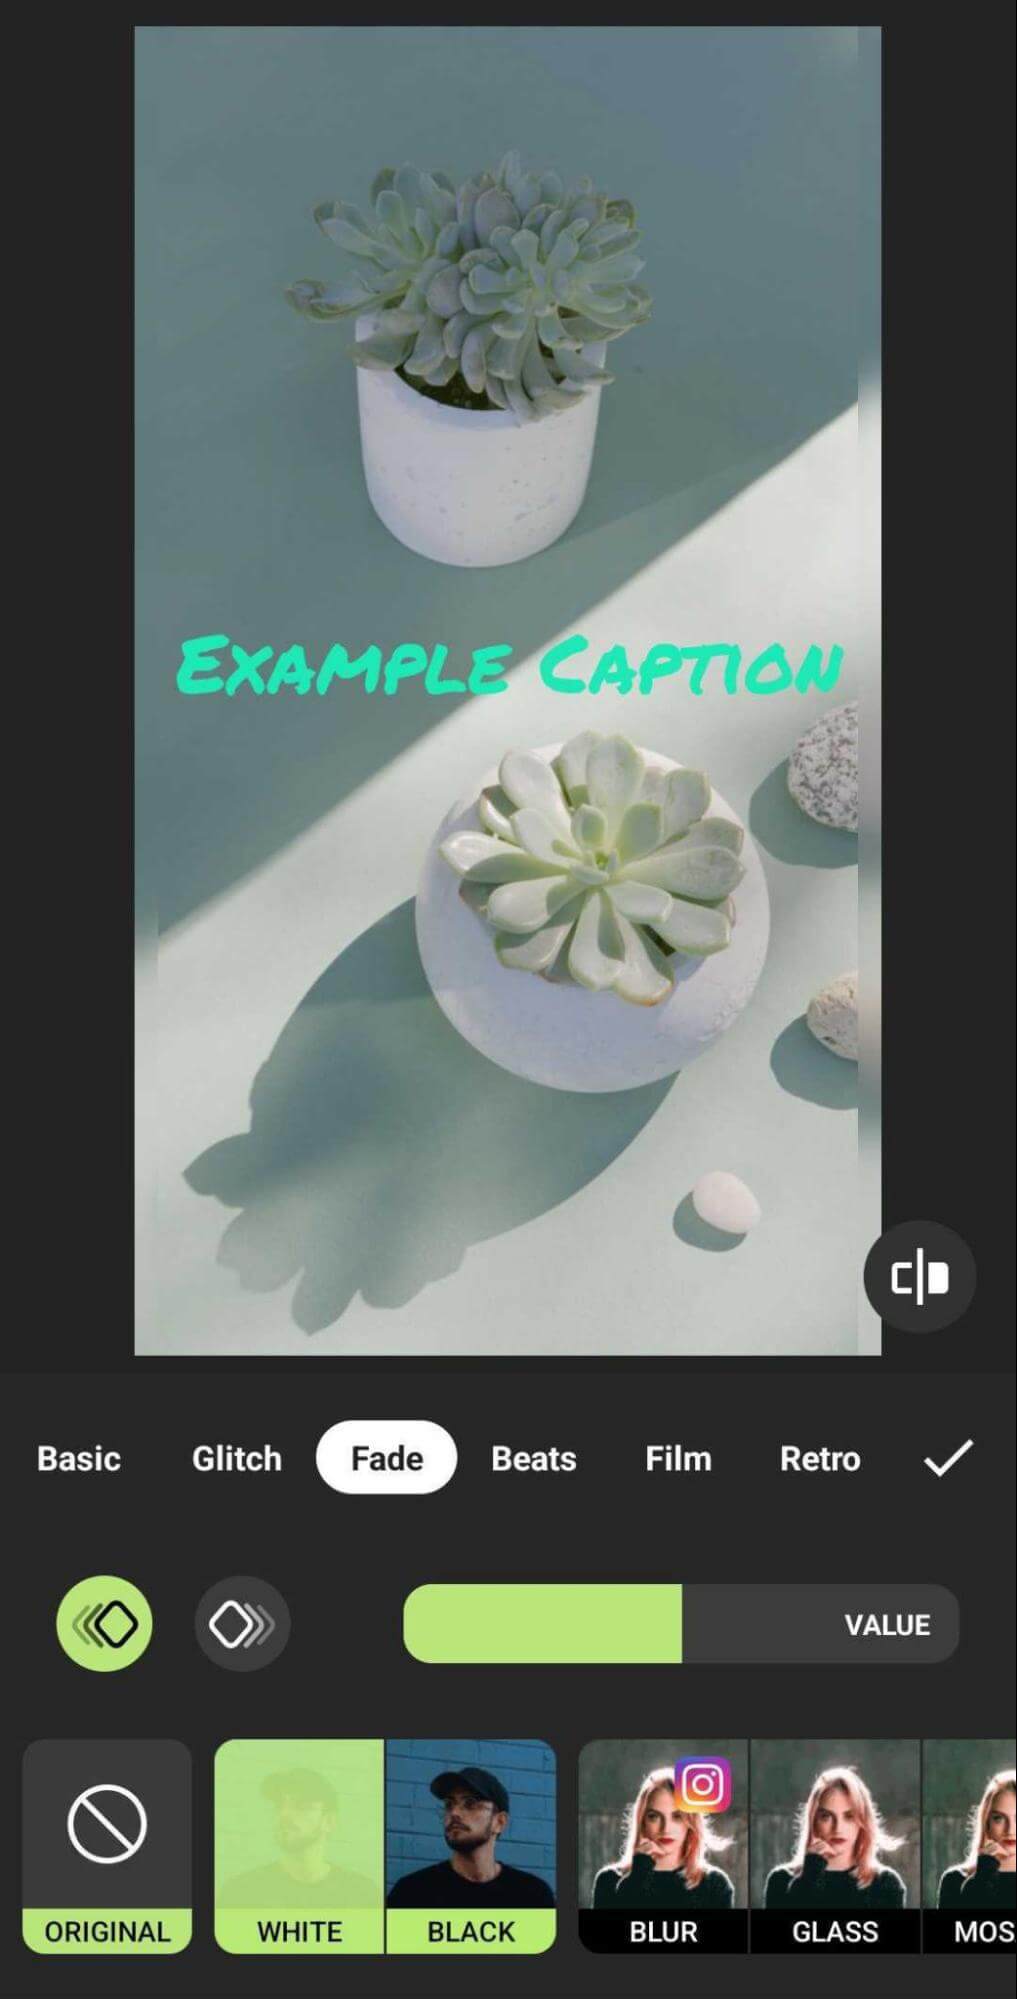
With InShot's text effects, you can choose from a wide range of fonts and colors and choose from over a dozen animation effects. These effects help add more movement to your reels, especially if you plan to align on-screen gestures with text overlays.
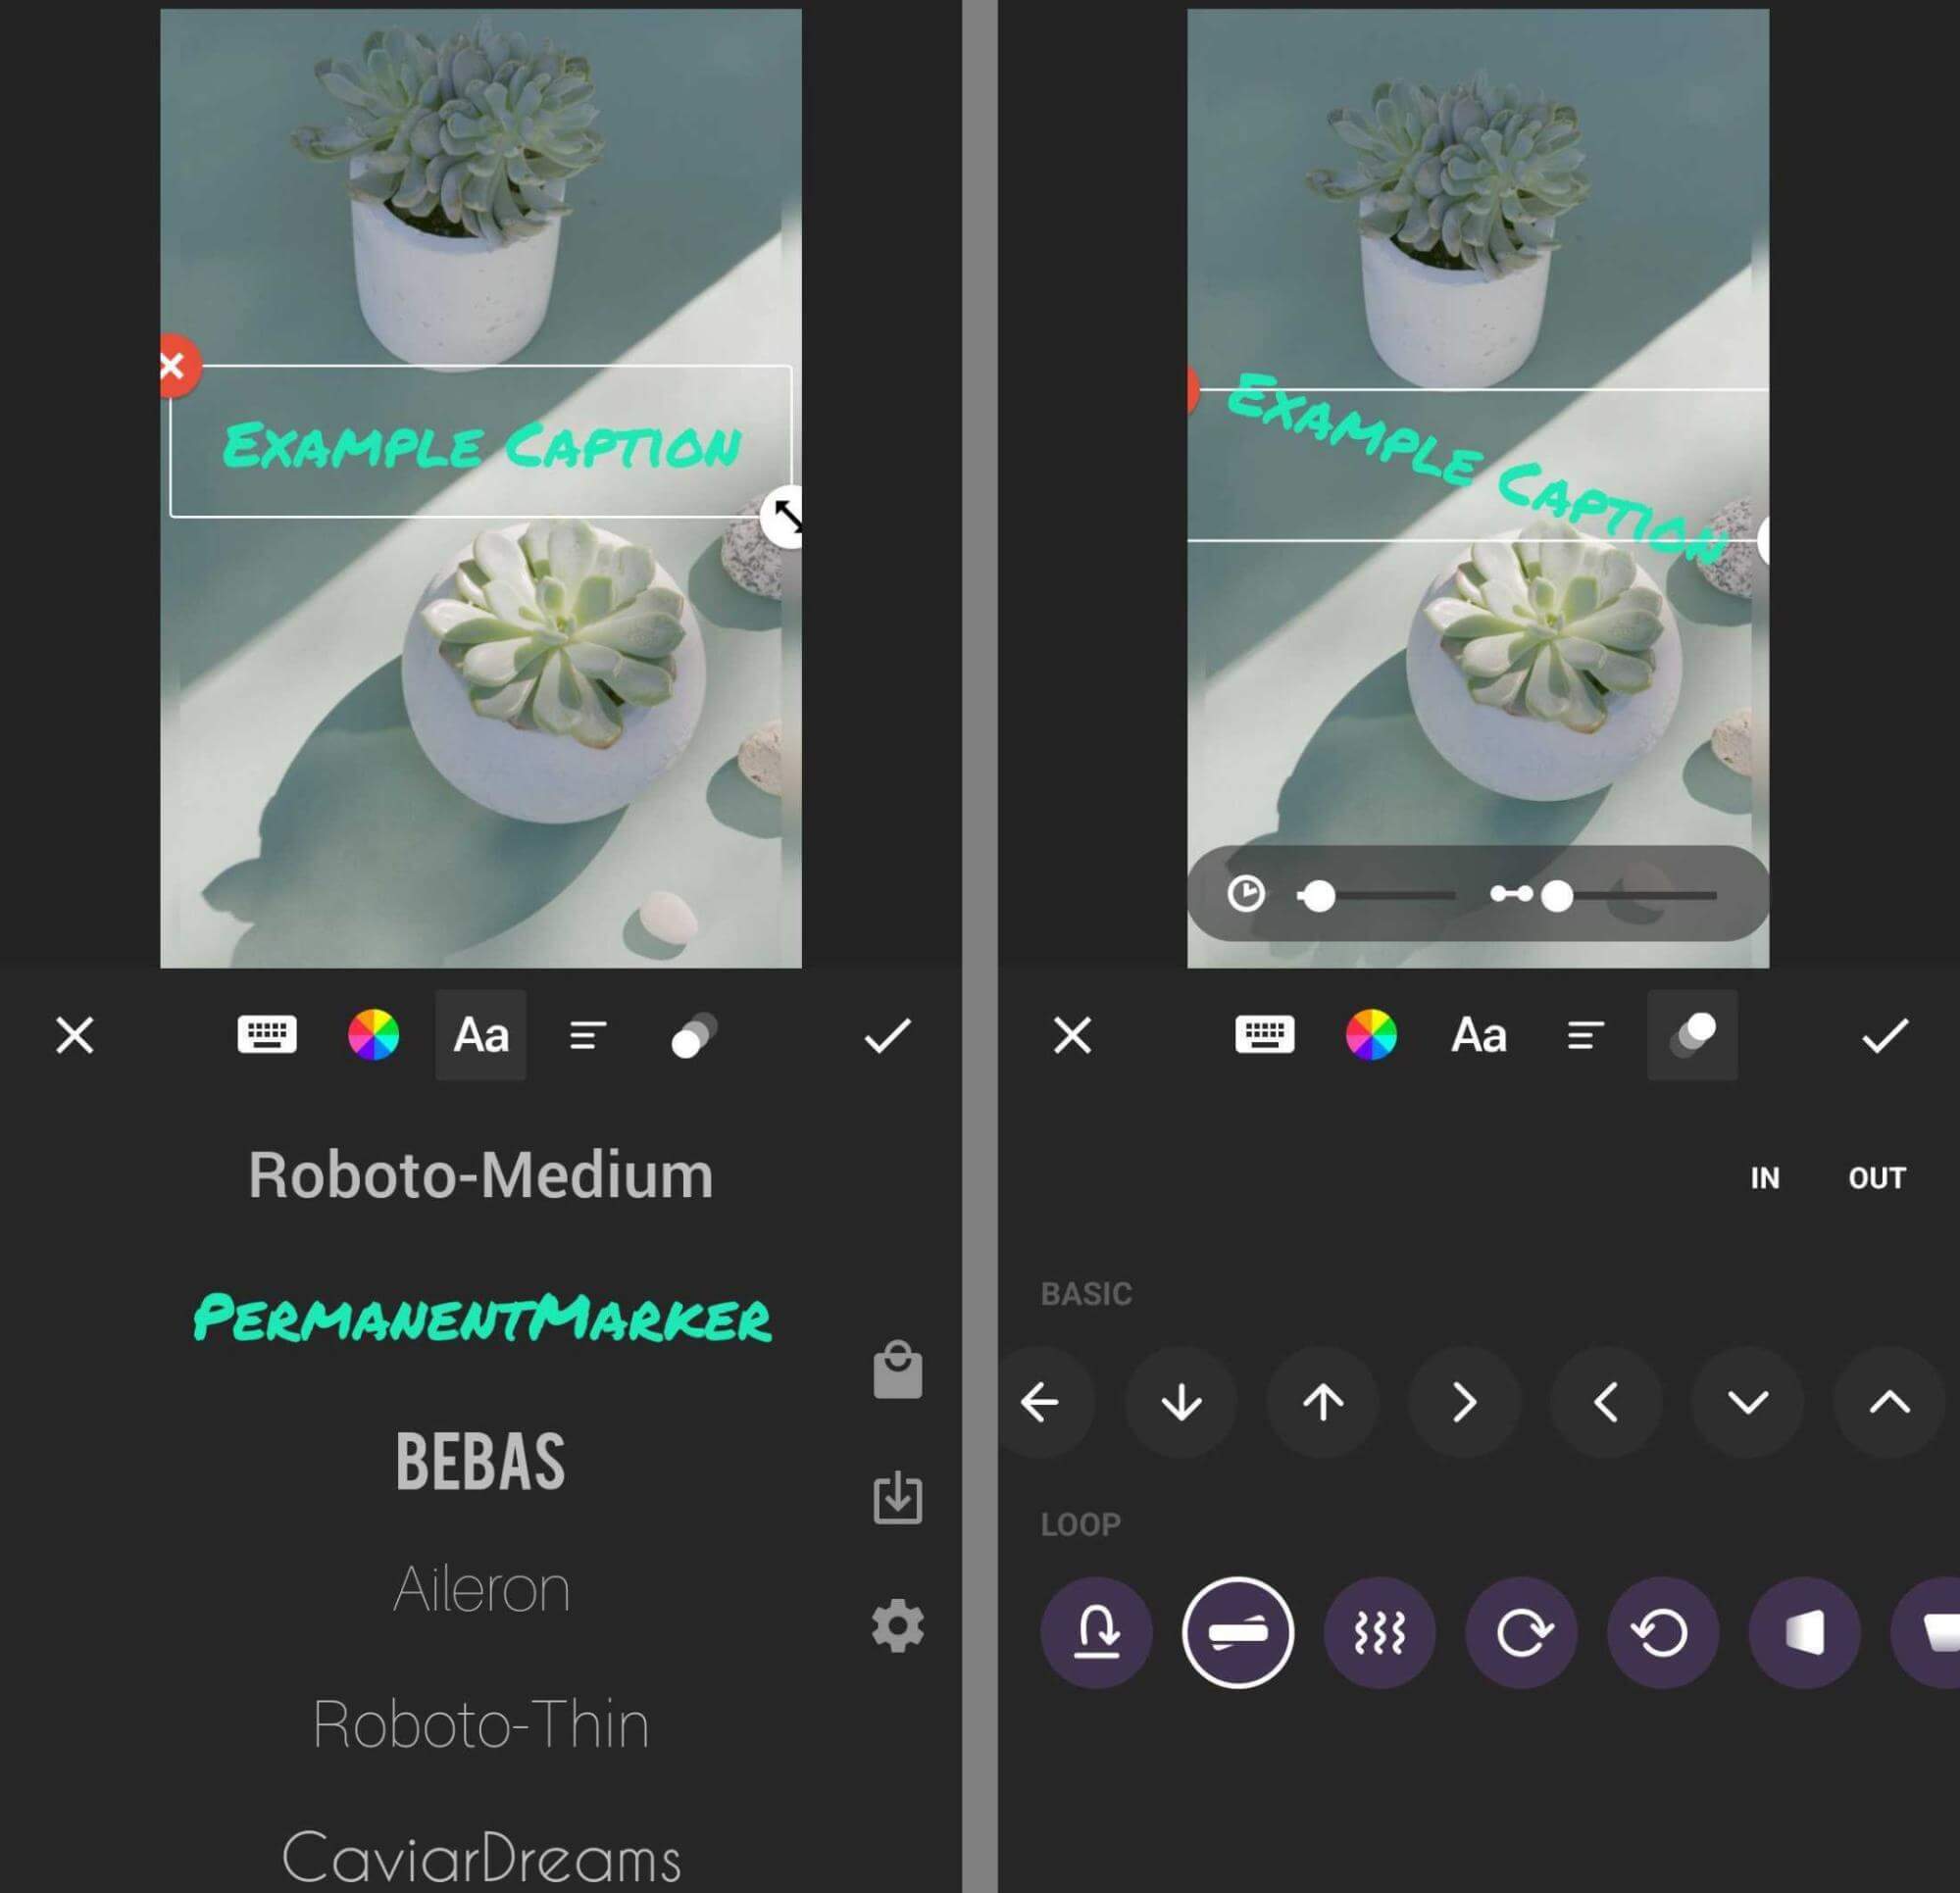
To add more visual interest to your reel, you can also choose from InShot's filters. Most include animations, which can make your video appear even more dynamic. Since the app allows you to add multiple filters—each at a specific timestamp—it gives you tons of options to make your reel stand out.
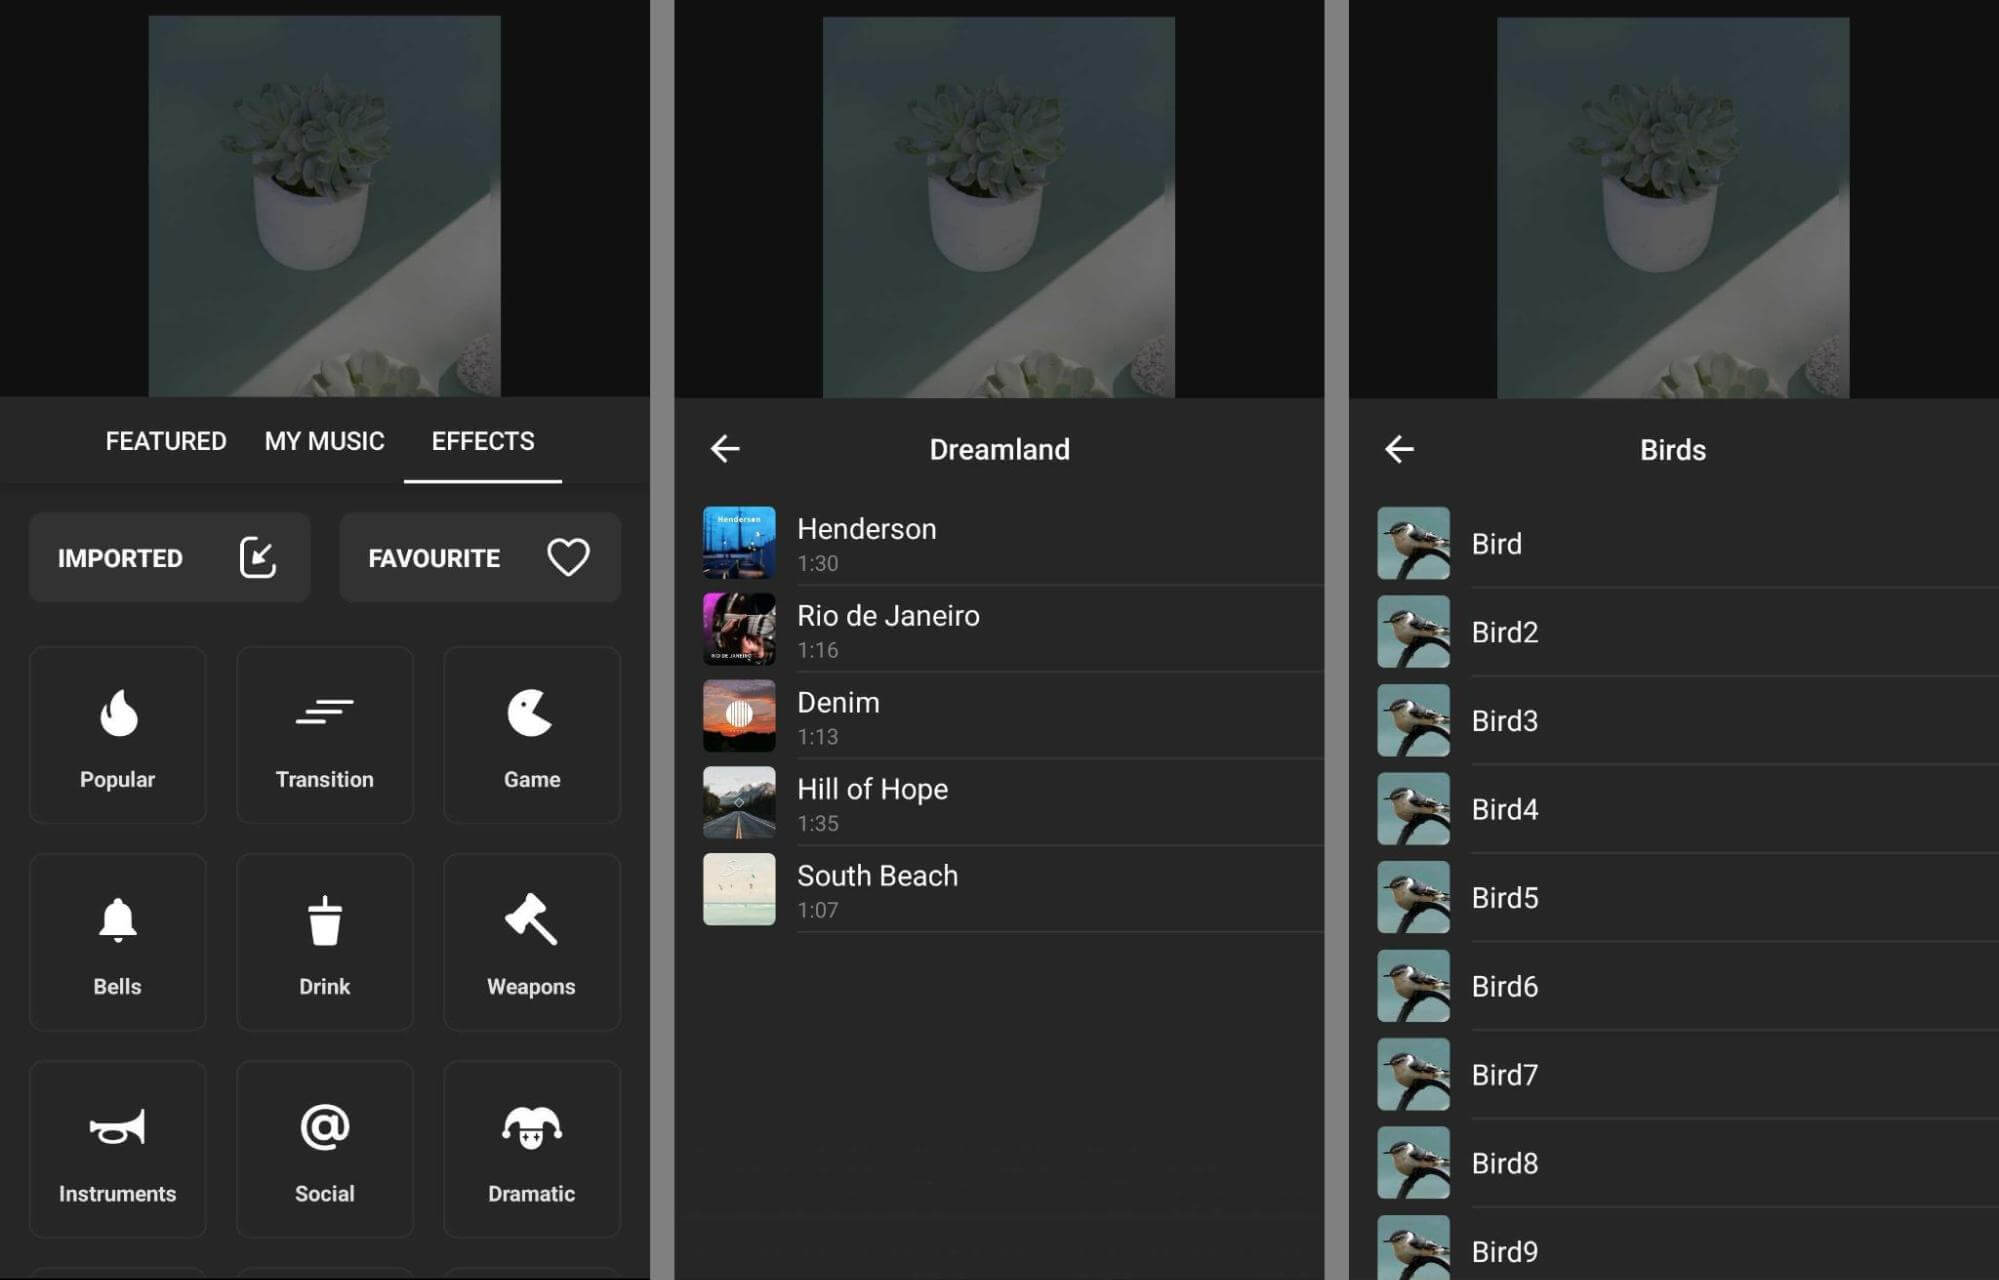
To add audio to your reel, select a track from the app's library. You can also choose from the app's sound effect library to add isolated noises at key parts of your video.
Once you're done editing, you can save the video to your device to publish later. You can also share to Instagram directly from InShot, making publishing your reel as seamless as possible. The only downside? The free version of InShot adds a watermark to videos, so if you plan to use the app extensively, it may be worth upgrading to the premium version.
Conclusion
As you start publishing reels regularly, use Instagram insights to monitor analytics closely. Identify the kinds of topics, styles, and effects that drive the most views and engagement so you can keep producing reels that get the results you want.
Get More Advice on Instagram Reels Content:
- Learn what Instagram Reels is, understand how to create a reel on Instagram, and discover how to use Instagram Reels for business.
- Discover a step-by-step guide to creating your own reels from scratch including how to interpret the trends.
- Finds a strategy to sell with Instagram Reels and Stories.
Stay Up-to-Date: Get New Marketing Articles Delivered to You!
Don't miss out on upcoming social media marketing insights and strategies! Sign up to receive notifications when we publish new articles on Social Media Examiner. Our expertly crafted content will help you stay ahead of the curve and drive results for your business. Click the link below to sign up now and receive our annual report!
Attention Agency Owners, Brand Marketers, and Consultants

Introducing the Marketing Agency Show–our newest podcast designed to explore the struggles of agency marketers.
Join show host and agency owner, Brooke Sellas, as she interviews agency marketers and digs deep into their biggest challenges. Explore topics like navigating rough economic times, leveraging AI, service diversification, client acquisition, and much more.
Just pull up your favorite podcast app, search for Marketing Agency Show and start listening. Or click the button below for more information.

