 Do you develop multiple pieces of content at one time?
Looking for a better way to organize and manage your content?
Whether you’re working solo or with a team that manages content for clients, it's essential to have a system in place to ensure that everything you publish is managed properly from ideation through promotion.
In this article, you'll discover how to manage your content with Trello.
Listen to this article:
Where to subscribe: Apple Podcasts | Spotify | YouTube Music | YouTube | Amazon Music | RSS
#1: Create a Trello Account
To get started, you need to create a free Trello account. Fortunately, the free account offers all of the features you’ll need for content management.
#2: Understand How to Structure Your Trello
Once you log in, you can create the following as a free account holder.
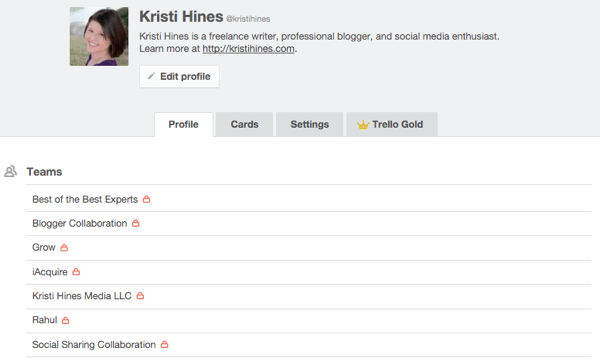
You can create an unlimited number of teams to keep specific groups of projects organized.
For example, in terms of content management, you may want the following:
- If you have a large company, create multiple teams so that each team has its own set of boards to manage its own blogs, such as the sales team blog, the marketing team blog, the development team blog, the support team blog, etc.
- If you have an agency, create multiple teams so that one team represents your agency’s blog, and the rest of the teams represent your clients’ blogs.
- If it’s just you as a small business owner, create one team for your own personal blog and one team for your business blog.
You can add an unlimited number of members to your account under the teams you’ve created.

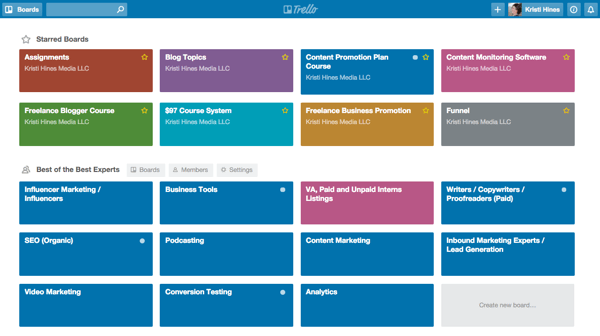
You can also create an unlimited number of boards. Boards can be visible to specific members, specific teams, or publicly to anyone with a link. Members with access to a board can subscribe to that board and get notified about any changes to the board.
Within each board, you can have an unlimited number of lists. Members with access to the board can subscribe to specific lists to get notified when anything in the list has been updated.
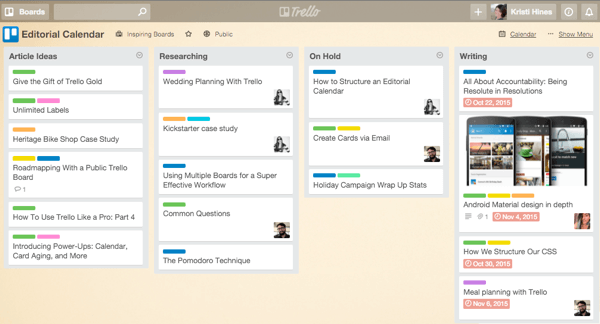
Within each list, you can have an unlimited number of cards and assign them to members. Cards can have due dates, multiple labels, and a main description.
They can also contain a discussion thread in which you can mention specific members, include multiple attachments and checklists with task items that can be dated, and be linked to specific members.
3 Days of World-Class Training—Zero Travel!

Couldn't make it to Social Media Marketing World and AI Business World this year? Get all of the great content at a fraction of the price with a Virtual ticket.
That’s full access to recordings of every keynote, workshop, and session—the ones people travel thousands of miles to see. Don't wait. Get your Virtual ticket and enjoy actionable content that you can watch anytime, anywhere.
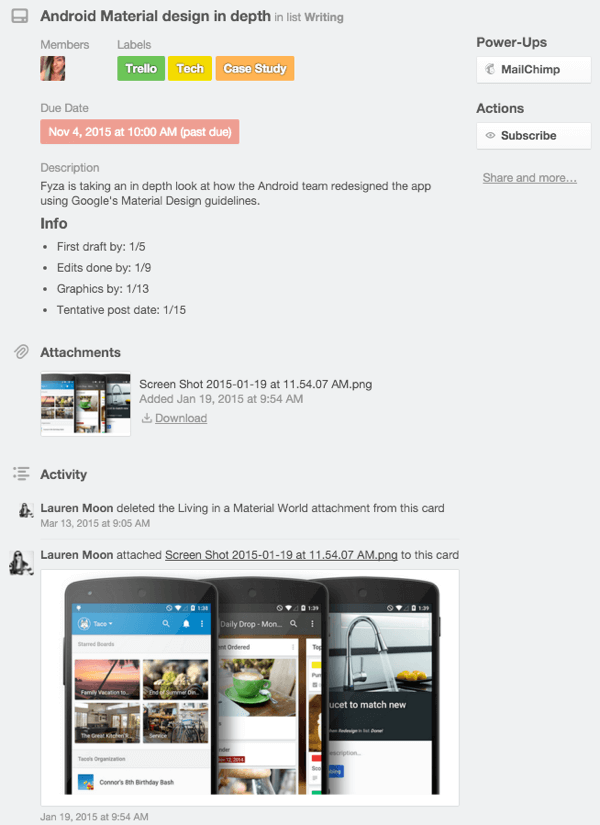
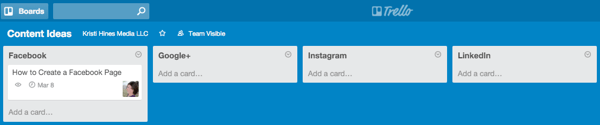
As you can see, Trello has a lot of options for organizing a content management system, from simple to highly complex. The last two screenshots come from example content management boards for Trello’s own Editorial Calendar.
You can also peruse public examples of ReadWrite’s Editorial Calendar, The Changelog Weekly Newsletter, WP Curve’s Guest Writer Management, and Buffer’s Blog Post Ideas.
Now, here are some ways to use Trello for your own content management.
#3: Create a Simple Idea and Process Board
If it’s just you or a team of people who need to manage ideas, use Trello to create an idea management board. To do this, click on the + icon next to your profile photo to add a new board.
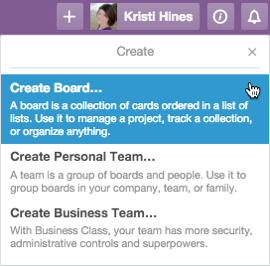
Then name your board and (optionally) link it to a team.

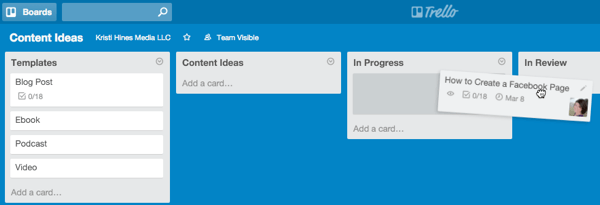
Inside your board, you can add as many lists as you want based on how you plan to organize your content. For example, if you have content ideas for blog posts, ebooks, videos, and podcasts, create a list for each type of content. Then have one list for In Progress, one list for In Review, and one list for Published.

You can use your lists to represent where content is in the process and use color labels. For example, use green for blog posts, yellow for ebooks, orange for videos, and red for podcasts.
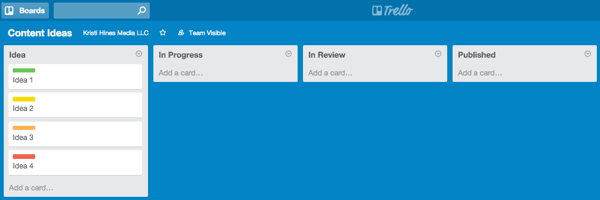
Or you can use your lists as topic categories and your cards as specific ideas. Then have one list for In Progress, one list for In Review, and one list for Published.

The point is there are no rules. It’s just a matter of what setup is easiest for you and your team to understand and manage.
Want to Unlock AI Marketing Breakthroughs?
If you’re like most of us, you are trying to figure out how to use AI in your marketing. Here's the solution: The AI Business Society—from your friends at Social Media Examiner.The AI Business Society is the place to discover how to apply AI in your work. When you join, you'll boost your productivity, unlock your creativity, and make connections with other marketers on a similar journey.
I'M READY TO BECOME AN AI-POWERED MARKETERRemember that as your cards and lists grow, they’ll eventually run off of the screen. Hence, you could easily forget the cards at the bottom of the list and the lists at the end of the board if they’re not carefully managed. So keep this in mind when organizing.
#4: Invite Authors to Claim Topics
If you have in-house writers, freelance writers, guest bloggers, or some other combination of writers, it’s important to assign topics to writers or allow writers to claim the topics they’re most interested in, depending on your preference. Otherwise, those topics will never get developed.
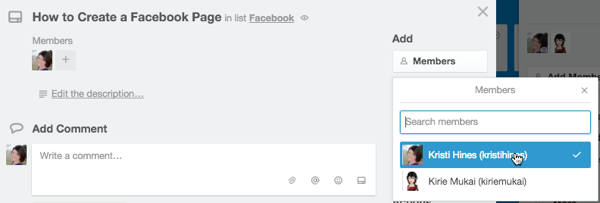
To assign topics to writers or have writers claim topics, the writers need to be members of the board with normal settings so they can view and edit cards. To add members to your board, click on the Show Menu link under your profile photo on the board and click the Add Members button. Then invite members by typing in their name or email address.
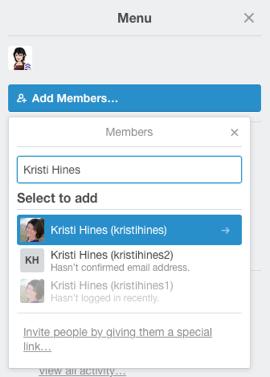
If they have a Trello account already, they’ll automatically pop up. If not, Trello will invite them to create a free account. Once they’re members of the board, you can add them as members of the card for assignment to a content topic.
You can see all of the activity within the board among members and admins when you click on the Show Menu link under your profile photo. This activity log can’t be edited and shows you anything that happens within the cards, including the archiving of cards by other admins.

If you allow writers to claim topics, be sure that you create rules, such as writers can’t claim more than a specified number of topics and that topics must be turned in within a specific time frame. You may even want to specify that when a writer claims a topic, he or she has to set the due date for a certain number of days out.
Otherwise, a writer may claim a hot topic, but never turn it in. Then another writer misses out on the topic and your blog misses out on the coverage.
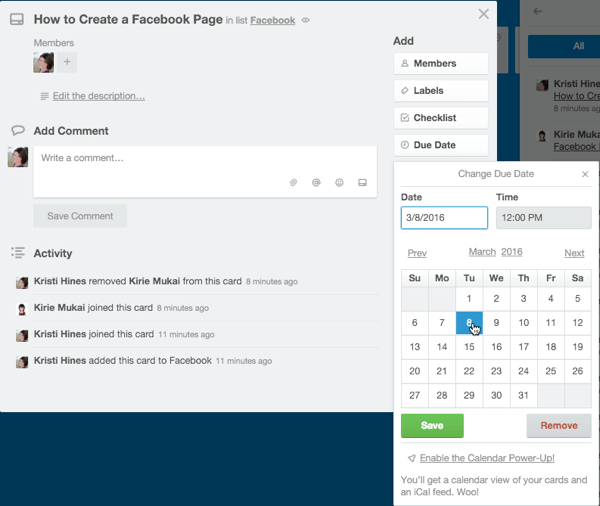
If you assign topics to writers, be sure to use the due date feature. This makes it clear when a topic is due in your list.
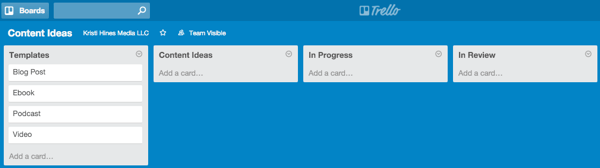
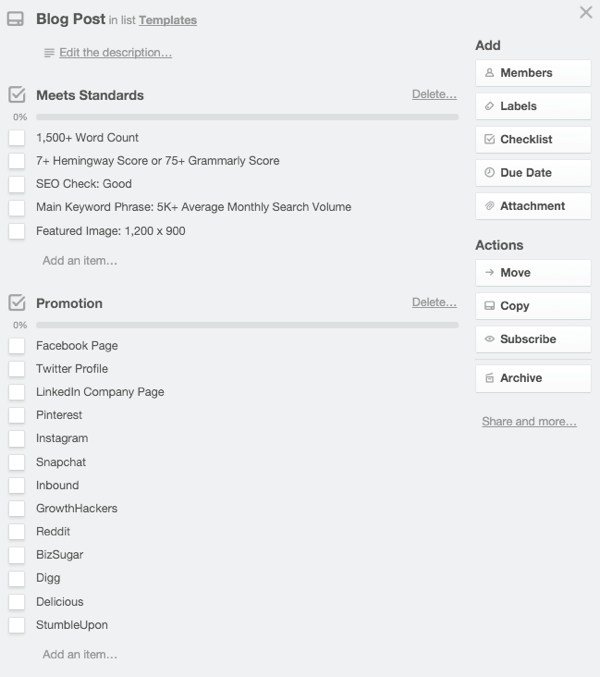
#5: Use Template Cards
Want to go a step beyond just having topic ideas added to cards? Why not create a card template that’s used for each piece of content that goes into production? This ensures that you follow a specific process for each piece of content that is created for you or your clients.
You could start with lists for your Templates, Content Ideas, In Progress, In Review, Published, and Promoted.
Your blog post template, for example, would include checklists to ensure that the blog post meets standards and that proper promotion procedures are implemented once the post is published.
After writers choose a content idea, content editors can use the Copy button on the blog post template card to create a copy of this template to add to the In Progress list.
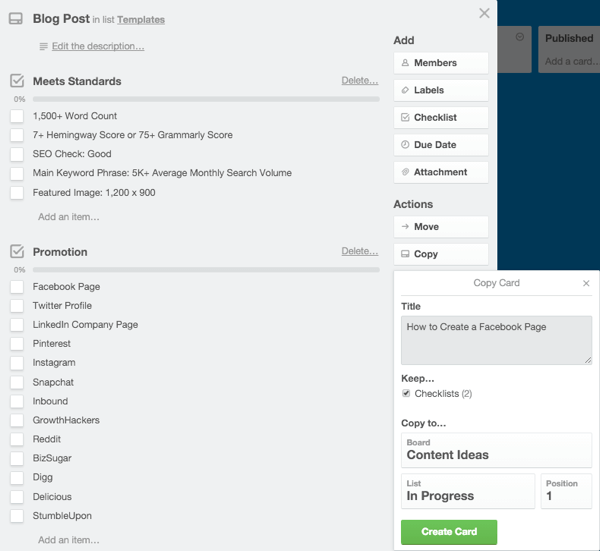
From there, they can add the member and due date assignment and have a card devoted to that particular blog post. Each member can then update the due date according to the process.
For example, once writers have submitted a draft, they know to change the due date to five days ahead and assign it to a specific editor for review when they move it to the In Review list.
Once editors have it, they can assign it to a specific date to be published, and then assign it to a specific member for promotion.
You can create similar templates for additional types of content so that every piece of content goes through a strict process to ensure quality and exposure once published.
#6: Use Comments and Attachments as Needed
Trello allows you to have up to 10MB file attachments with free accounts. I know personally that some of my posts go over that limit based on the number of images.
Depending on the type of content you create, you may be able to keep content attachments within the Trello cards themselves, or you may need to use outside services such as Google Drive to stay within the free Trello account limits.
If you use Google Drive, it allows you to share document links within your Trello card’s comments to ensure that all discussion for each piece of content is contained within the card.
This might be useful if you’re looking for contact information for a specific reference or quote, reasons why you decided to make a particular edit on the post, or other details that might come in handy for future content.
In Conclusion
As you can see, Trello offers a powerful system for content management, whether you’re looking for a simple place to store ideas or a system to ensure that every piece of content you produce meets specific standards.
What do you think? Do you use Trello for content management? What has your experience been so far? Let us know in the comments!

Curious About How to Use AI?
Our newest show, AI Explored, might be just what you're looking for. It's for marketers, creators, and entrepreneurs who want to understand how to use AI in their business.
It's hosted by Michael Stelzner and explores this exciting new frontier in easy-to-understand terms.
Pull up your favorite podcast app and search for AI Explored. Or click the button below for more information.
