 Are you using video to promote your brand?
Do you want to create videos without having costly equipment?
If you have a smartphone, you already have all of the tools you need to create fun and engaging social videos.
In this article you’ll find out how to shoot and edit videos to share on social media with your smartphone.
#1: Choose Your Channel
Before you start creating a video, you should choose a primary channel for sharing that video. This article focuses on the three most popular channels for hosting and sharing social video: Instagram, Vine and YouTube.
Instagram allows you to post videos 3 to 15 seconds in length. You can upload and combine videos from your phone or record a video using the app's camera function. Videos are cropped in a square shape to match the popular aesthetic of their photos. Instagram posts show up as native photos or videos in Facebook, but as links in Twitter.

Instagram is a great place for your brand if your team is creative enough to produce visually appealing content. Users look for images that impress them, not generic screenshots or boring video clips.
Vine lets you publish videos up to 6 seconds long. These videos automatically play and loop when they're viewed, and they show up inside the Twitter feed. Like Instagram, videos published on Vine are cropped to a square frame.
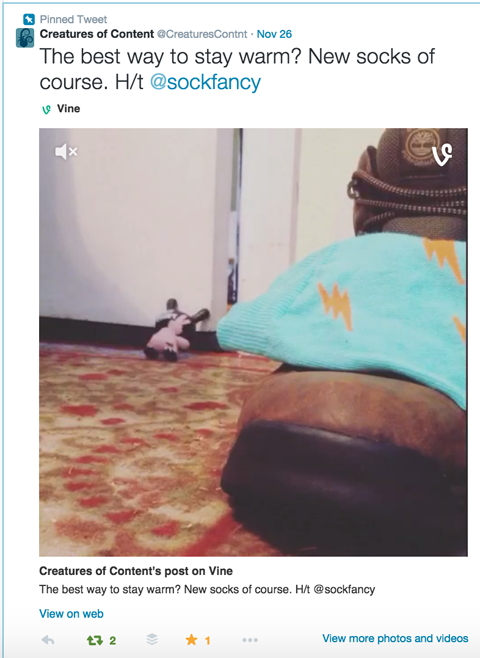
While Vine is technically a channel, most of the user engagement happens within Twitter, so you're better off building and engaging your audience on Twitter than building it exclusively within Vine.
Vine has proven to increase engagement via Twitter and across the web. The short length of the content encourages viewers to watch clips multiple times, which is great from a branding and engagement perspective.
YouTube offers the ability to upload almost any video regardless of length or quality. All videos are published in a widescreen format. YouTube videos can be played within Facebook and Twitter feeds and most other social networks.
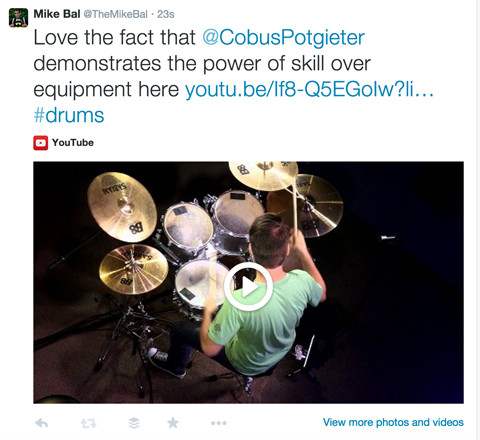
Keep in mind, many YouTube users don't use the social features like subscribing, thumbs up (or down) or commenting. But those users who are active and engaged spend a lot of time within the channel, which makes them incredibly valuable.
If you have the time and resources to create quality content consistently, YouTube is a great place to start. If you're just dipping your toes in, you might want to start with Instagram or Vine.
Get World-Class Marketing Training — All Year Long!
Are you facing doubt, uncertainty, or overwhelm? The Social Media Marketing Society can help.
Each month, you’ll receive training from trusted marketing experts, covering everything from AI to organic social marketing. When you join, you’ll also get immediate access to:
- A library of 100+ marketing trainings
- A community of like-minded marketers
- Monthly online community meetups
- Relevant news and trends updates
#2: Choose a Video Style
Next, you need to choose what style of video you want to create. The three main styles proven effective for brands and businesses are stop motion, time-lapse and standard video.
Stop motion is a great option if you're working with physical products or objects that can be brought to life. You can use this style to create videos ranging from simple image collages to full-length films like The Boxtrolls. This video style requires you to think through the project and take individual photos and shots, so creating a short video can take considerable time, as explained here.
Time-lapse videos are basically normal videos played at a faster speed. Many popular time-lapse videos involve leaving the camera focused on a changing scene over a long period of time, like this video of the Aurora Borealis. Other videos focus on a specific event like a volcanic eruption or a bicycle ride through New York City.
Brands like Taco Bell, Mountain Dew and Foot Locker have found creative ways to tell product stories using this video style.
Time-lapse videos work for brands a lot like product placement does in the movies. The piece itself needs to be entertaining enough to engage the viewer. The brand or product element can be present, but should never take away from the viewer's experience or enjoyment of the content.
If you prefer to share and record standard video clips, make sure the content itself is engaging. The beauty of a standard video is it's fast and easy to create and publish, and you can enhance it by combining multiple clips or adding music.
Regular video clips can be used in most scenarios, but are really handy if you offer a product or service that doesn't lend itself to the more creative video styles. You can create a number of interesting standard videos including a behind-the-scenes look, an introduction to your team, a workspace or office tour, interviews, product demonstrations, reviews, tutorials and new product previews.
Although you should choose a style before you start a video project, remember you can change styles with each piece of content you create or even within a single piece of content. Here's a simple example of a Hyperlapse video combined with a stop motion animation clip.
View this post on InstagramJazz gets his #vinyl on. #transformers #spindoctor h/t @theloyalsubjects

Discover Proven Marketing Strategies and Tips
Want to go even deeper with your marketing? Check out the Social Media Marketing Podcast! Publishing weekly since 2012, the Social Media Marketing Podcast helps you navigate the constantly changing marketing jungle, with expert interviews from marketing pros.
CHECK OUT THE SOCIAL MEDIA MARKETING PODCAST NOW
But don’t let the name fool you. This show is about a lot more than just social media marketing. With over 600 episodes and millions of downloads each year, this show has been a trusted source for marketers for well over a decade.
#3: Shoot a Stop Motion Video With Vine
If you've decided you want to create a basic stop motion video, you can shoot the video using the Vine app. After you install the Vine app and log in, you should see your feed. From here, tap on the camera icon in the bottom center of the screen. Then (if needed) tap on the wrench icon to open the advanced recording tools, which appear at the bottom of the screen.
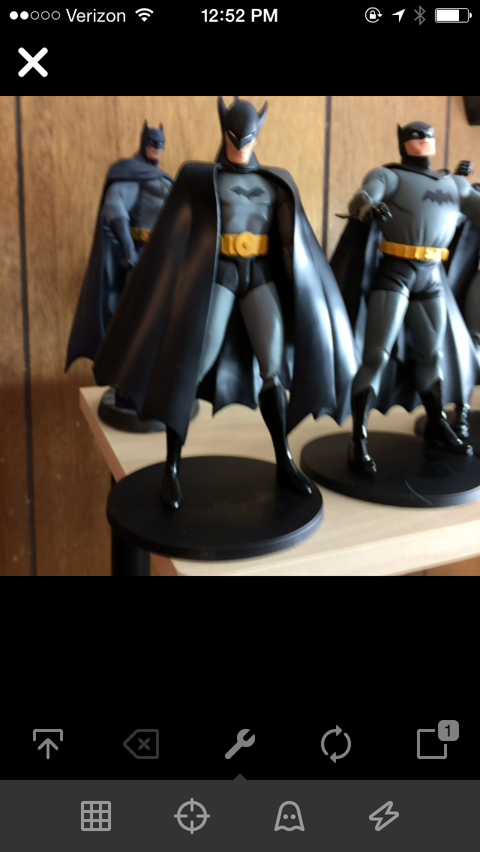
Before capturing any images or videos, you need to turn on a few helpful recording tools. Tap the ghost icon to turn on a tool that shows a transparent layer of the last image you captured.
This feature helps you remember where you're at in your story and helps you line up the background and props consistently from frame to frame. After you tap the icon, it turns green.
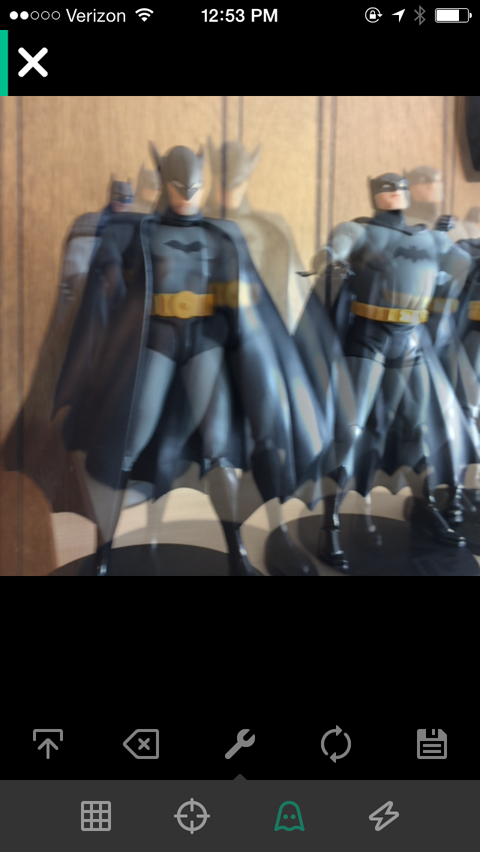
Next, tap the grid icon to turn on the grid tool. This tool overlays a grid of squares on your camera screen, helping you line up and balance elements in your video.
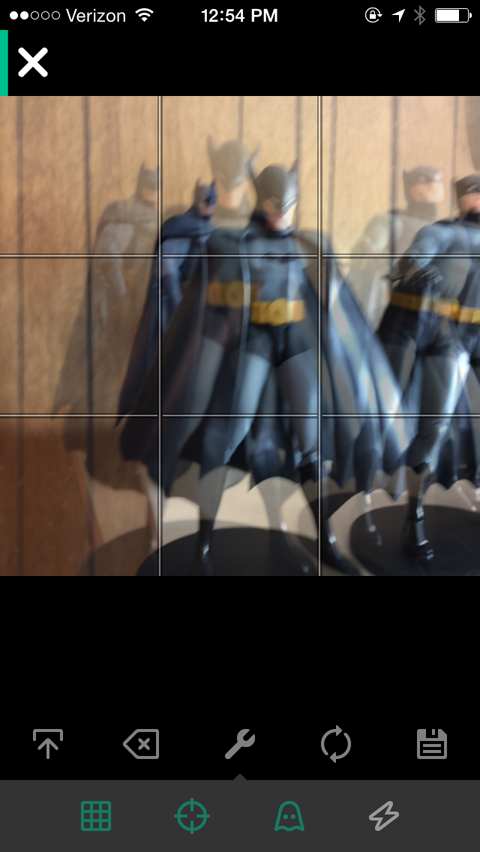
When you have both of these tools turned on, you're ready to shoot the video. While shooting a 6-second video doesn't seem like much work, you'll actually be taking between 40 and 60 images and usually adjusting something between each shot. The Vine camera captures the image or video every time you touch the screen.
The length of the clip depends on how long your finger stays in contact with the screen. For stop motion, you want to tap the screen quickly. Remember, one of the most important elements of a good stop motion video is consistency.
Pay close attention to how long your clips are and how many clips you're using for different movements. If you start out doing quick motions and then move to slower and longer clips, your video will look sloppy.
You can track the rough length of your clips by looking at the progress bar at the top of the screen.

To keep your motions consistent, set a specific number of frames for a particular movement or distance. For example, if you have a ball spinning, maintain a speed of four frames for every full 360° rotation.
If any of your shots are too long or not in focus, you can remove individual clips with the editing tool. To open it, tap on the arrow in the top-right corner of your screen. You'll see a preview of your video, as well as an Edit button with a pair of scissors. Tap that Edit button to go to the Edit screen.
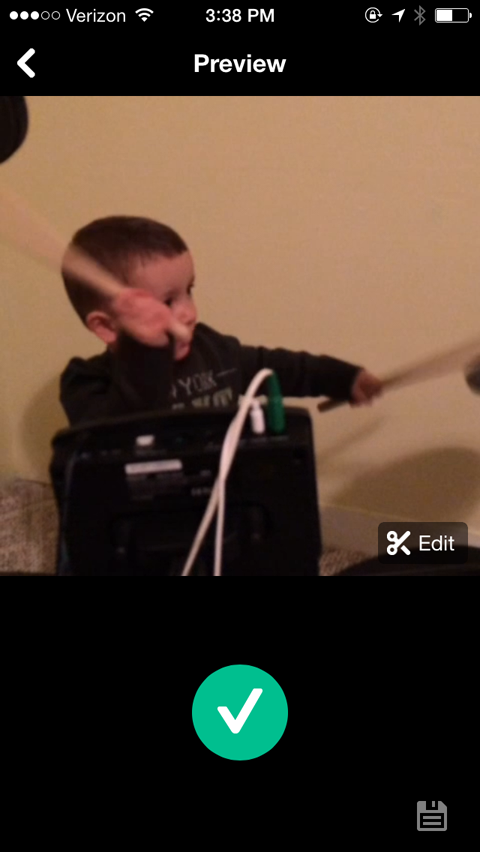
On the Edit screen shown below, swipe through the frames and then tap on the one you want to remove. The selected clip is highlighted, and you see a preview on the main screen shown above. Tap the trashcan icon to remove the selected clip.
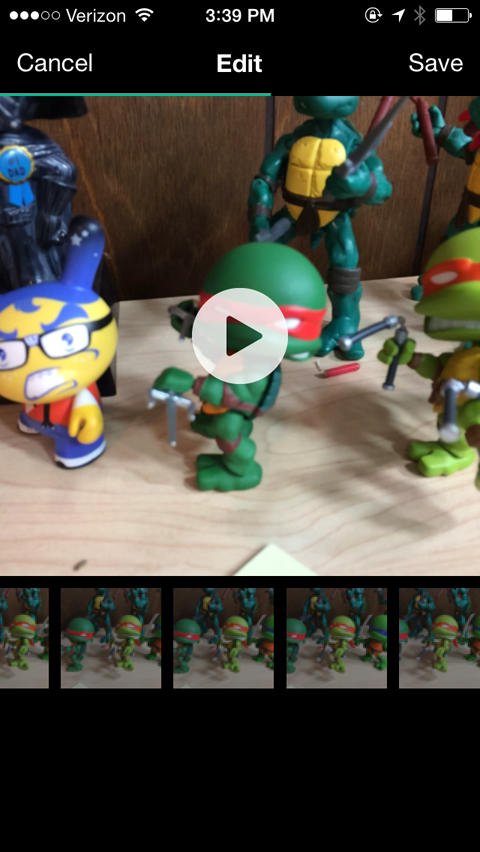
There will also be times when a specific frame or scene is too short. To duplicate a frame, follow the same process to open the Edit screen, tap the clip you want to duplicate and then tap the icon with the two squares and a plus sign.
Another editing option is to rearrange all of the frames or create an effect that would be easier to shoot backwards. For example, this clip was shot by pushing the figure into the sand and then rearranging the frames to make it look like it was emerging from the sand instead.
Once you're done with your video, you can either save it or publish and share it. If you want to save it, tap the disk icon in the lower-right corner of the preview page.

If you're ready to publish your video, tap on the big green checkmark. This takes you to the Publish screen where you can write your copy, add your video to a Vine channel and share it on Twitter or Facebook. After you publish your video, it's saved to your camera roll so you can use it in other channels or for other video projects later on.
#4: Shoot a Time-Lapse Video With Hyperlapse
To shoot a time-lapse video, you can use Instagram's Hyperlapse app. It's easy to use and takes advantage of Instagram's video stabilizing feature, which helps you shoot smooth video while you're moving.
You don't have to log into Hyperlapse or connect an account until you share your final video. When you open the app the first time, you need to allow access to your camera and microphone. Next, you're taken straight to the camera. Your two options are to start recording or switch to the front-facing camera, which is called Selfielapse mode.
When you're ready to start recording, tap the large record button.
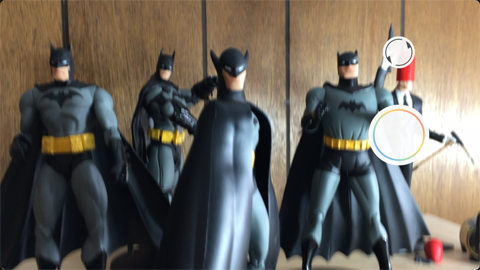
You'll notice the timer on the bottom of the screen shows you two different times. The time on the left is how much time has elapsed, and the time on the right is how long your video is. This information is relative because you can adjust the speed after you're done recording.
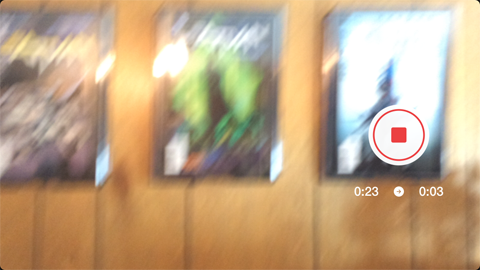
When you're finished, tap the stop button. You then see an Edit screen that looks like this.
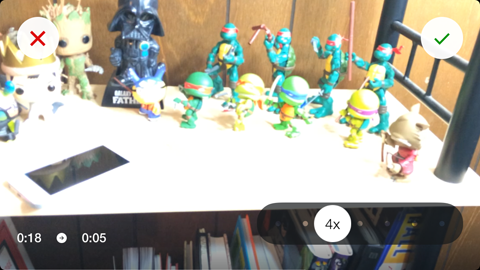
The speed of the video is the only thing you can edit in Hyperlapse. To do edit your video's speed, simply move the slider to the left or right. The speed readout on the icon adjusts, and the time of the video and the video preview also adjust in real time with it.
Once you're happy with your video, tap the green checkmark in the top-right corner to save the video to your camera roll. The Share screen then appears, where you can share your video on your social channels.
#5: Shoot a Regular Video
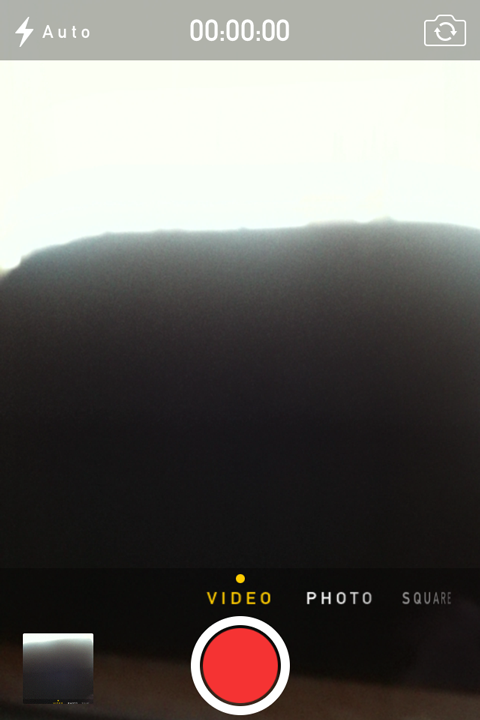
Many apps focus on adding advanced features for your smartphone's camera, but the default camera on your phone does a great job on its own.
For standard video, it's more important to focus on the video content than the filming method. To improve your results, here are a few tips to consider before you start recording:
Always record a 5- to 10-second test and play it back on your computer before you record the entire project. This helps you identify any lighting, background or audio issues ahead of time.
Choose a setting that doesn't distract from the main focus of the video. For example, if you're filming a product review or demonstration, don't shoot in a coffee shop with lots of people moving around in the background.
Consider any editing or production you may or may not be able to do ahead of time. If you don't have the ability to add music or cut the clips later, you need to get the shots pretty close to perfect.
You can find lots of pro tips and tricks online for shooting video with your phone, but not all of them will apply to what you want to do. Instead, look for specific tips or tutorials based on the content you want to create.
#6: Edit Your Video
After shooting your video, you can give it a more polished and professional look with a video editing app.
Here's how to edit your iPhone video.
To make simple video edits on an iPhone, the iMovie app is a great option. You can add audio, text and effects; cut clips or splice them together; and a whole lot more.
When you're done recording your video, open the iMovie app and tap Projects. From here, you can choose to work on recent projects or start a new project.
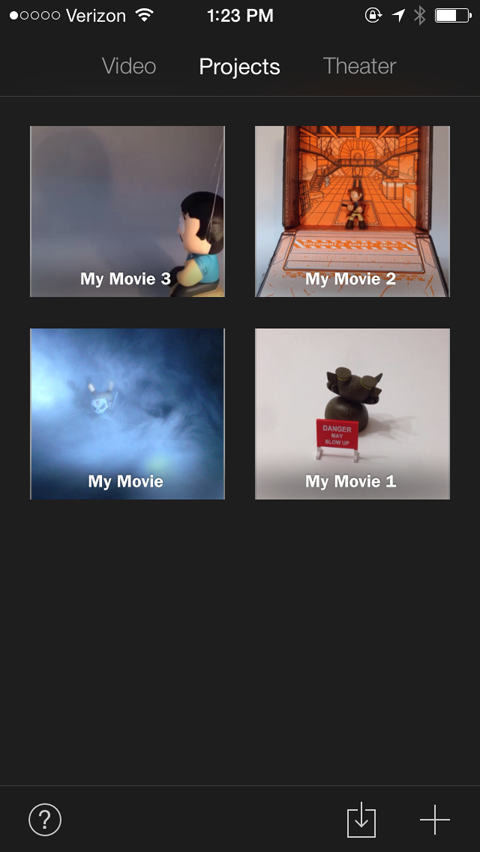
Tap the + icon in the bottom-right corner to start a new project. At this point, you can create a movie or choose a premade template to create a video similar to a movie trailer.
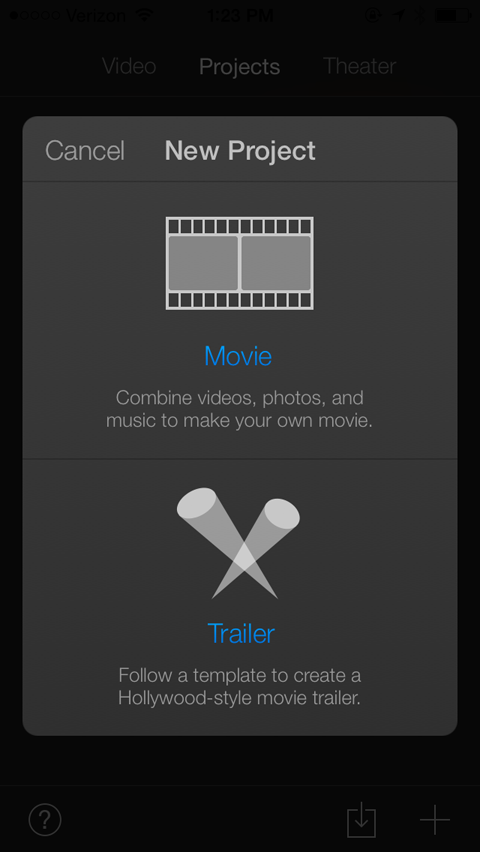
Tap the filmstrip where it says Movie. This takes you to a screen with several theme options for your movie.
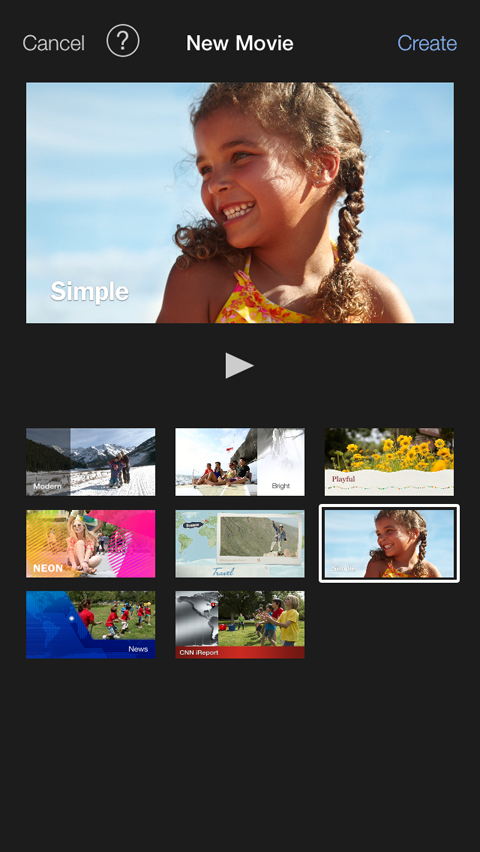
The Simple theme is the default setting, but feel free to try out the other options. After you select a theme, tap Create in the top-right corner of your screen to open the editor, shown here.
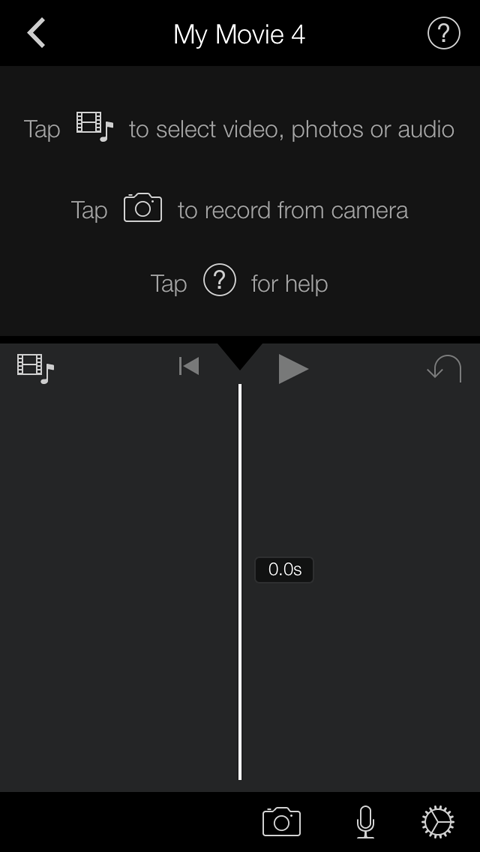
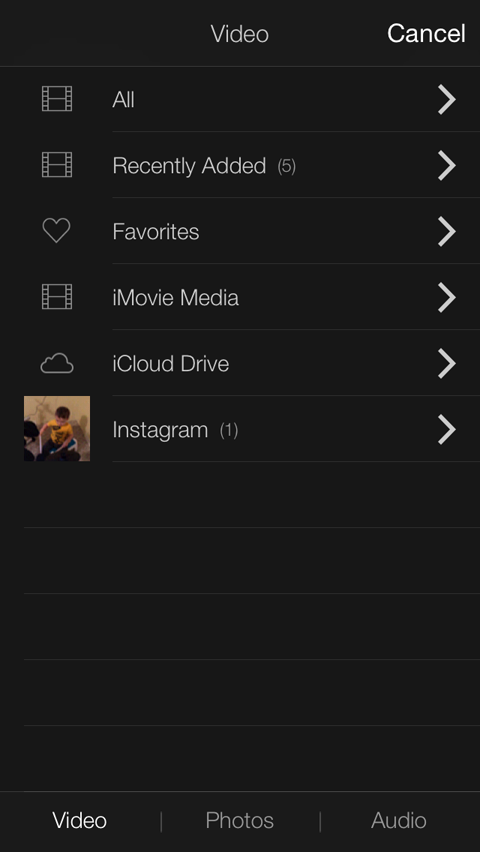
The top half of this screen is simply a cheat sheet to help you get started. Next, tap on the icon with a filmstrip and a music note on it (it's located in the middle left of the screen).
Tapping this icon reveals options for all of the places you can pull media from. Your video should be saved to your camera roll, so you can tap on All or Recently Added to see your video files.
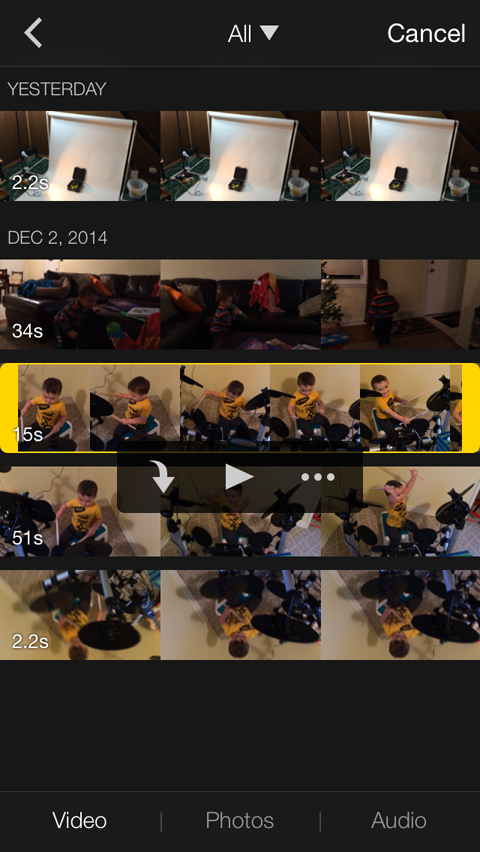
When you tap the file you want to use, it's outlined in yellow and an action box pops up. You can tap the Play button to make sure it's the right file or tap the down-arrow button to import it into your project.
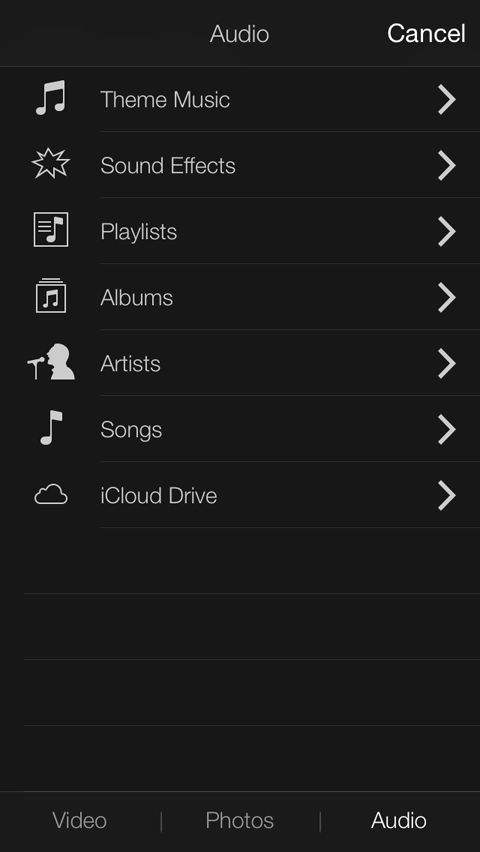
If you want to import an audio file into your project, follow the same steps you did to import the video, but this time choose the Audio option at the bottom of the screen.
This takes you to a screen where you can sort your music by playlist, album, artist or song name. You can also choose from the theme music or sound effects preloaded with the app.
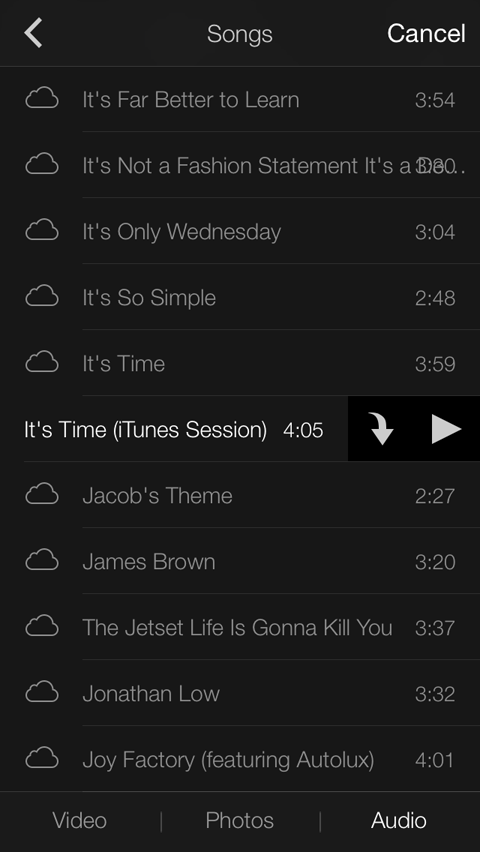
The songs you can use are highlighted in white, while the other songs from your library are in grey. Tap the song you want to use and then tap the down-arrow button to import the audio into your project. The song is automatically added as background music to your video.
After you've imported your video (and possibly your audio), you should be back in the editor.
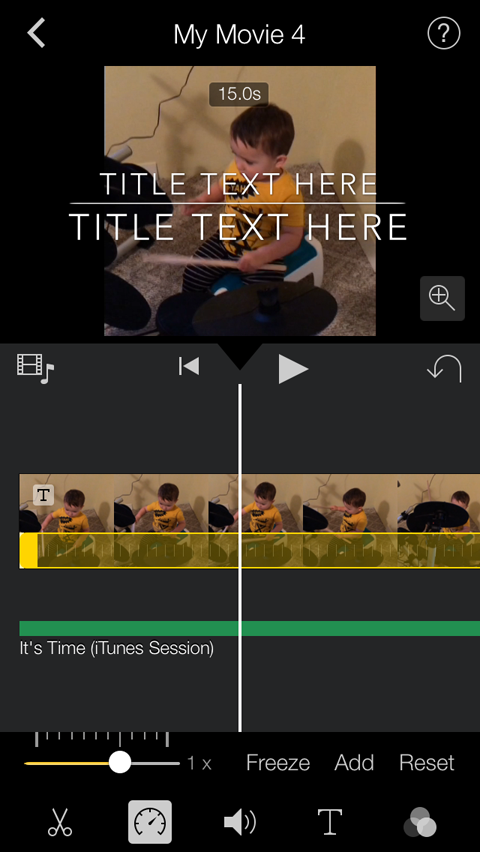
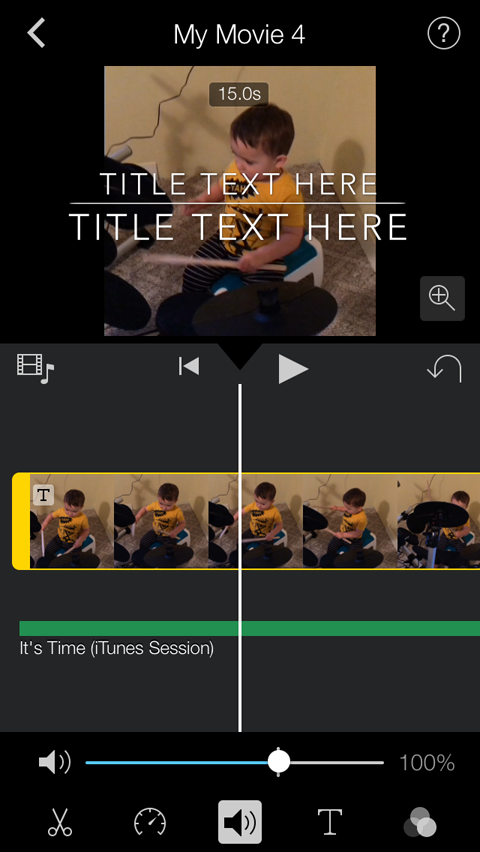
Next, tap your video clip. The clip is outlined in yellow to show it's selected, and a new toolbar opens on the bottom of the screen. This toolbar offers a variety of editing tools.
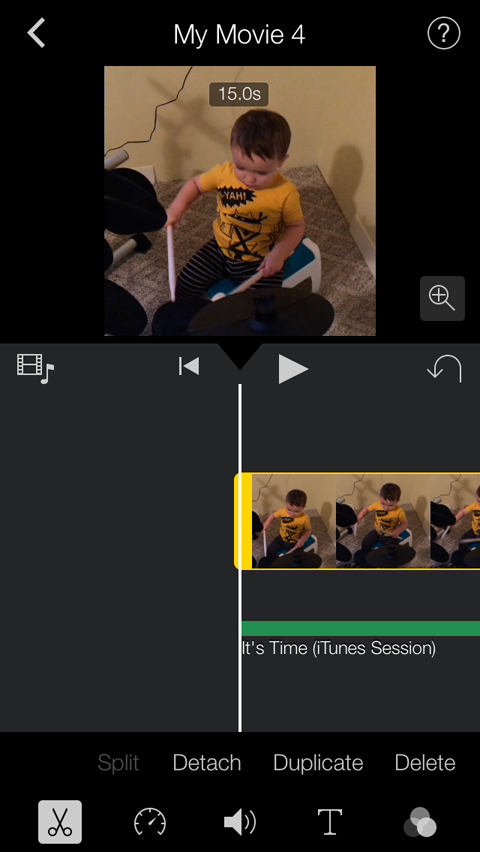
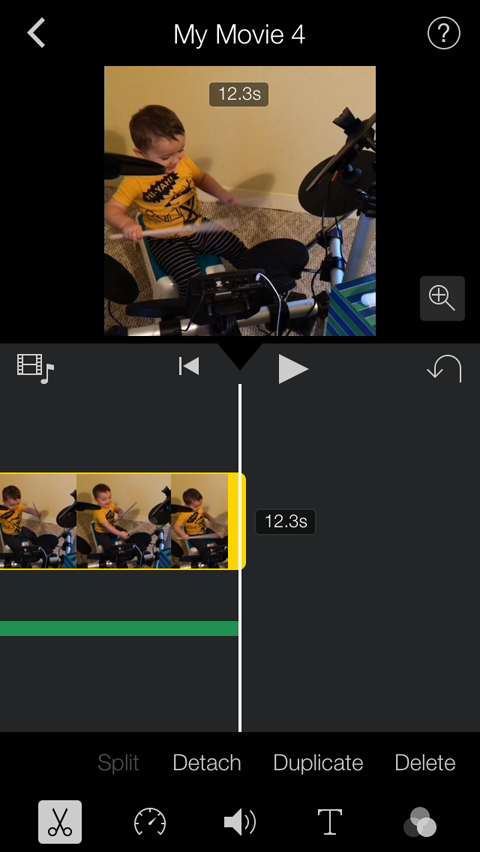
The scissors icon allows you to adjust the length, starting point and stopping point of the clip. Simply place your finger on the yellow trim handle and slide it.
Use the speedometer icon to increase or decrease the playback speed of the video. Slide the little white circle left or right.
The volume icon is self-explanatory: Increase or decrease the volume by sliding the little white circle left or right.
The T icon allows you to add title text to your video or transitions. When you toggle on that T icon, tiles with different fonts and animations pop up. Scroll through the tiles until you find the title style you want.
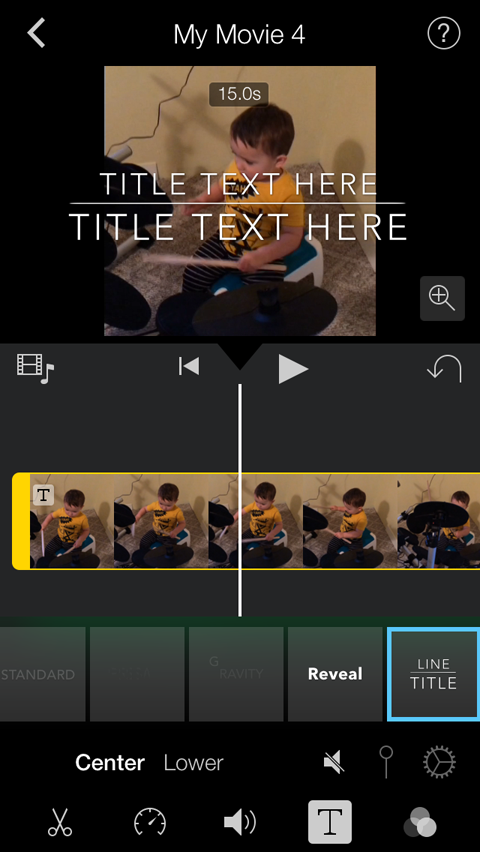
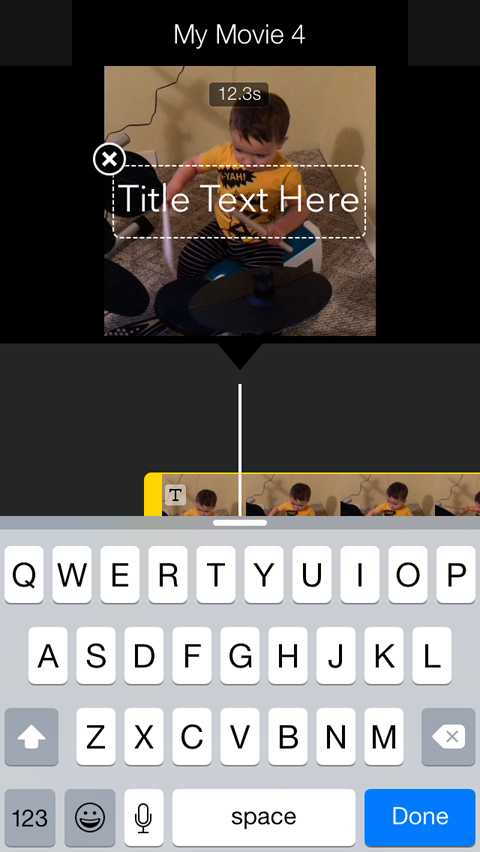
Once you choose a title style, a preview pops up over your video. Tap that preview and then type in the title text you want to use for this movie.
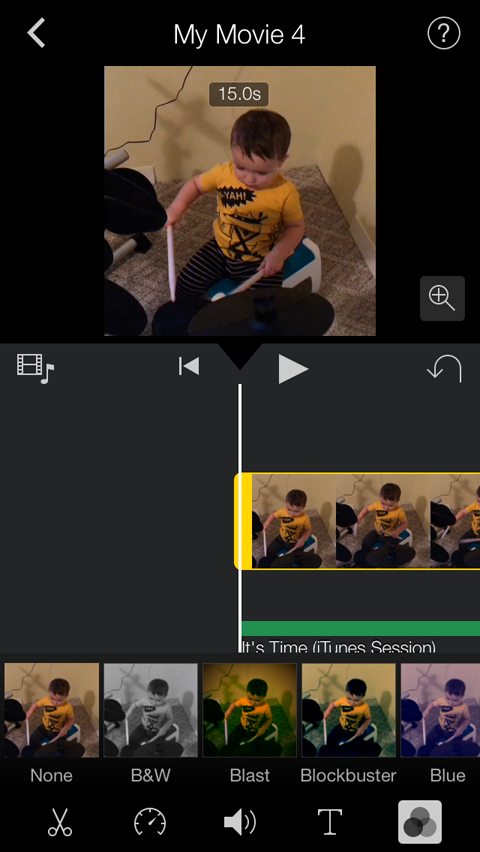
The last icon on the toolbar shows three circles overlapping. When you tap it, some tiles pop up with previews of the filters you can add to your video.
Depending on what you're trying to create, you may use some or none of these editing tools. For example, you may just want to add an audio file to the background of your video and then export it.
When you're done editing your video, tap the left-facing arrow in the top-left corner of the screen. This takes you to the project summary, shown below, where you can watch, export or delete the video.
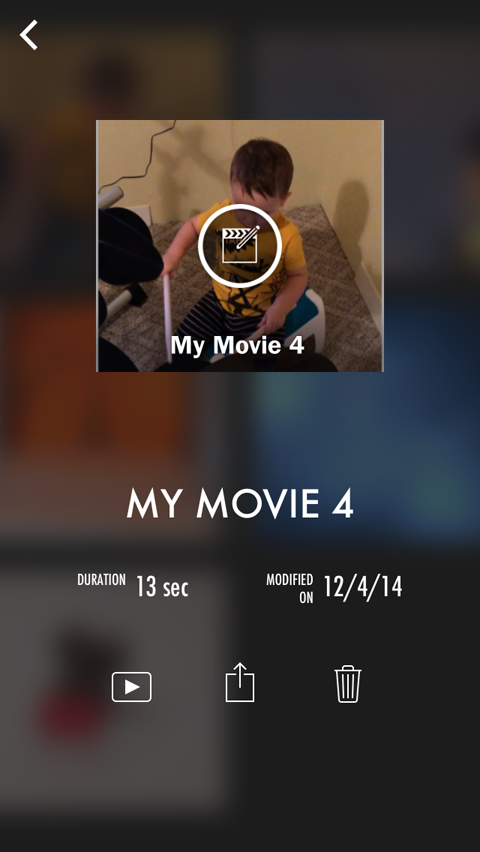
Tap on the middle icon (with a box and upward-pointing arrow on it) to see your options for sharing or saving the video.
If you're planning to share your video on multiple channels, tap the Save Video button to save it to your camera roll. You can then upload it to other channels from your phone.
Before you start shooting, you'll want to have a few things in place:
- Your setting/workspace—Make sure you have a nice space with good lighting and there's nothing embarrassing in the background like dirty dishes.
- Your props—Make sure you have whatever you're animating handy, as well as any other items you want to include or feature in your video.
- A storyline—You don't need to plan every single frame, but you should have the basics of a story: the beginning, the middle, the end and what happens in between.
- Your phone and/or stand—Make sure your phone is charged and you have your tripod or stand handy if you're using one.
Conclusion
Getting comfortable shooting and editing video can take some time, but I guarantee these tools and processes will get easier every time. At this point it's just a matter of getting your social video content out there and figuring out what really works with your fans. Good luck and feel free to hit me up on Twitter if you have any questions or want to bounce an idea off of me.
What do you think? Have you created any social videos yet? How did you use the information you found? Leave your experiences and questions in the comments section below.
Attention Agency Owners, Brand Marketers, and Consultants

Introducing the Marketing Agency Show–our newest podcast designed to explore the struggles of agency marketers.
Join show host and agency owner, Brooke Sellas, as she interviews agency marketers and digs deep into their biggest challenges. Explore topics like navigating rough economic times, leveraging AI, service diversification, client acquisition, and much more.
Just pull up your favorite podcast app, search for Marketing Agency Show and start listening. Or click the button below for more information.

