 Do you want to improve the quality of your live videos?
Wondering how to integrate visuals and work with multiple camera angles?
In this article, you’ll discover how to broadcast professional-quality live video to Facebook and YouTube.
Why Brand Live Videos?
Switcher Studio is a mobile production tool that lets you create professionally branded Facebook Live or YouTube Live videos. You can set up your iOS devices as cameras to offer multiple views of your live broadcast.
To brand your live videos, showcase your logo and share images, links, or video clips with viewers. The app also lets you include lower-third graphics, add transitions, and choose from various layouts and angles to make your live videos more visually appealing. During the broadcast, view comments in real time to engage with your audience.
Switcher Studios lets you go live to your Facebook timeline, page, group, or event, or to YouTube. In addition, custom RTMP lets you share to other live-streaming applications including Periscope, Livestream.tv, Twitch, and others.
You can stream live, record, or both. By recording the stream, you can repurpose your content for other social media platforms.
Wicked Sheets uses Switcher Studios to do their Facebook Live broadcasts. In the video below, the countdown at the beginning lets people know they'll be going live shortly. The title card at the end shares tips about what was discussed during the broadcast.
CEO Alli's Tips for Night Sweats
Need some wicked cool tips to manage your night sweats? Check out CEO Alli's reccomendations for managing them and sleeping cool and dry, all night long. #wickedcool
Posted by Wicked Sheets on Thursday, July 27, 2017
Here's how to start branding your live videos for your business.
#1: Connect Your iOS Devices to Switcher Studio
To get started with Switcher Studio, sign up for a 14-day free trial. When the trial ends, you'll need to upgrade to one of the paid plans, which start at $29/month.
Get World-Class Marketing Training — All Year Long!
Are you facing doubt, uncertainty, or overwhelm? The Social Media Marketing Society can help.
Each month, you’ll receive training from trusted marketing experts, covering everything from AI to organic social marketing. When you join, you’ll also get immediate access to:
- A library of 100+ marketing trainings
- A community of like-minded marketers
- Monthly online community meetups
- Relevant news and trends updates
Next, install the Switcher Studio app on all of the iOS devices you plan to use as cameras during your live broadcast. Each camera lets you show viewers a different angle.
You'll need to decide which device you want to use to control your video production. An iPad is a good choice because it has a larger screen for easier control. Sign into the selected control device and tap the Use as Switcher button.
For all of the other camera devices, sign in and tap Remote Camera Mode to control your other devices for capturing various angles. Make sure all of the iOS devices are connected to the same Wi-Fi network.
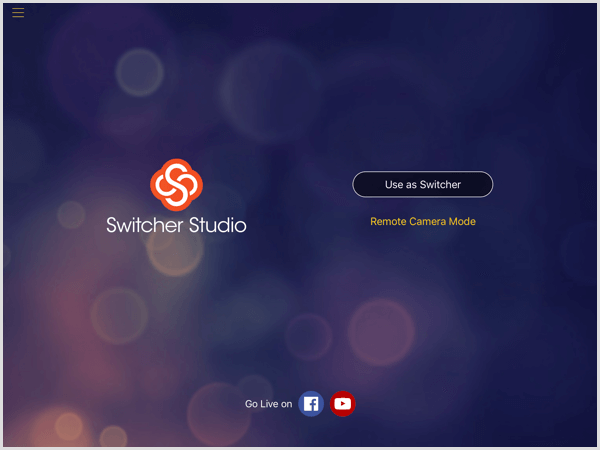
Once you've logged in on your control device, you'll see the control panel. At first glance, the interface may look daunting, but the more you use it, the easier it is to manage.
#2: Connect Your Facebook or YouTube Account
The next step is to connect your Facebook or YouTube account to Switcher Studio. On the control device, tap the second icon in the lower-right corner to access the Outputs screen. Then tap the + icon to the right of Outputs.
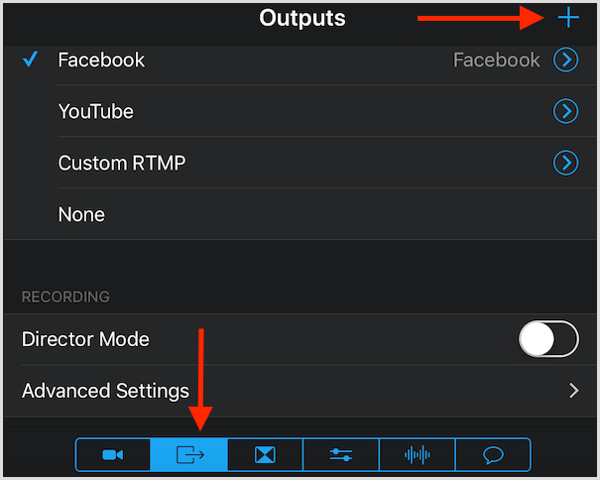
Next, sign into your Facebook or YouTube account.
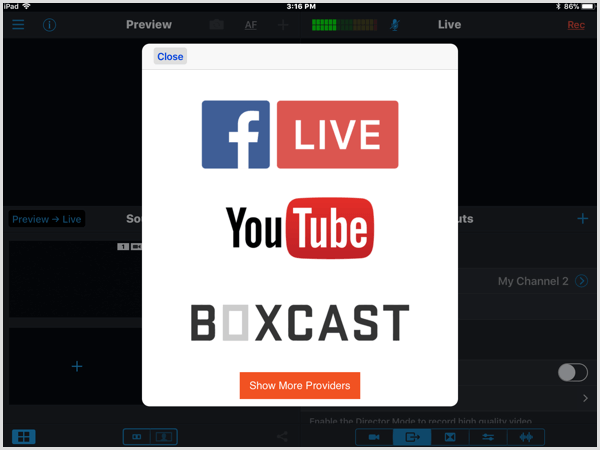
This is also where you can use a custom RTMP for your production.
If you aren't using the control device as a camera, you can select Director Mode. In this mode, each camera will capture its own independent video that will be composited when the session ends. Make sure you have enough storage to save the video on each device.
Choose Advanced Selecting to access additional recording options.
#3: Add Media Assets to Use in Your Broadcast
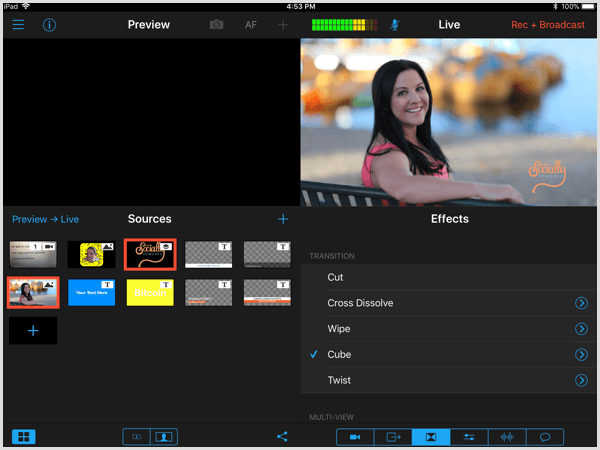
The Sources section on the left is where you direct your broadcast. Here you line up all of the content you plan to share during the broadcast such as your logo, images, video clips, lower-thirds, title images, and so on.
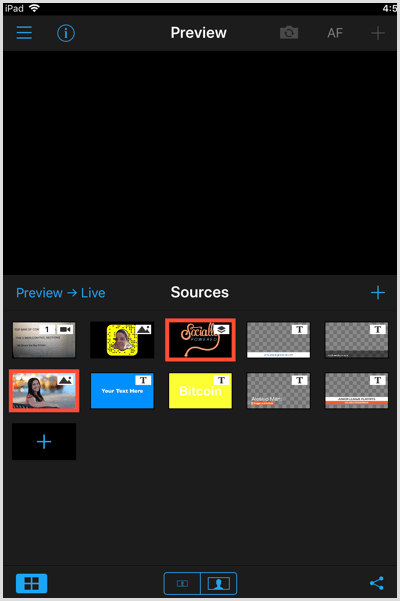
At the bottom of the Sources control panel, you'll find four icons. Tap the leftmost icon to toggle display of the preview window. If you plan to make changes to what you show on-screen during your broadcast, keep the preview window displayed so you can preview content before sending it to your live broadcast.
The two icons in the middle let you enlarge or reduce the sizes of the images in the Sources section. Tap the far-right icon to get a link to share your live broadcast on Facebook. Be sure you do this so people are notified you're live.
Upload or Create Assets
To upload assets for your live broadcast, tap the + sign. You can add photos and videos from your photo library, Switcher Studio-recorded/imported media, or create your own content using the app's dynamic templates and sample images.
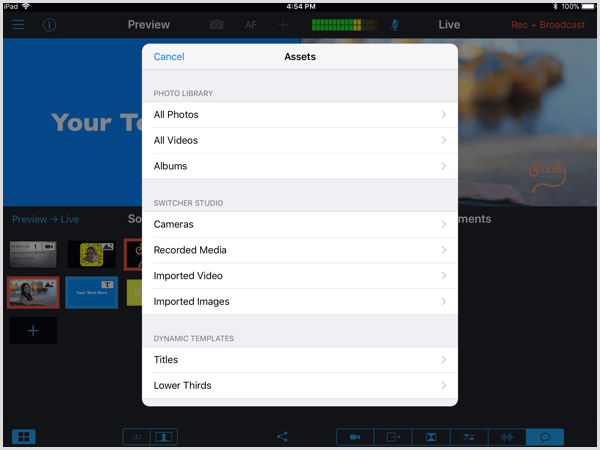
If you want to create your own media directly in Switcher, select Titles or Lower Thirds, which are editable templates. You can adjust font, size, alignment, and text and background color as needed.

Discover Proven Marketing Strategies and Tips
Want to go even deeper with your marketing? Check out the Social Media Marketing Podcast! Publishing weekly since 2012, the Social Media Marketing Podcast helps you navigate the constantly changing marketing jungle, with expert interviews from marketing pros.
But don’t let the name fool you. This show is about a lot more than just social media marketing. With over 600 episodes and millions of downloads each year, this show has been a trusted source for marketers for well over a decade.
Tip: When you create dynamic lower-thirds, select the Apply on Preview option so you'll have the opportunity to preview it before it's live on-screen. If you don't select that option, the image will automatically show up live to your viewers when you tap on it during the broadcast.
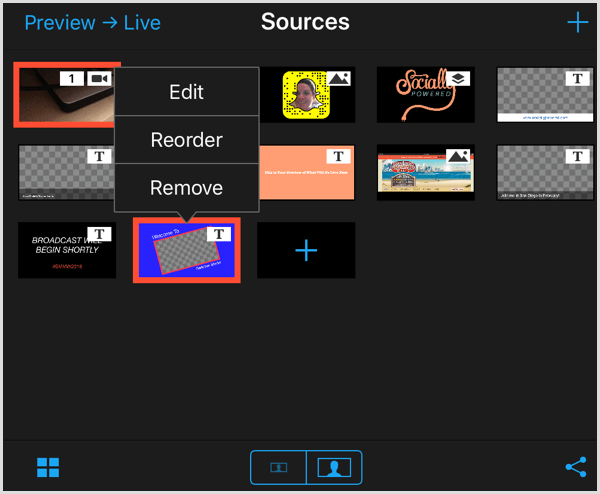
To edit, reorder, or remove assets, long-press on the image to open a pop-up menu with those options. If possible, arrange assets in the order in which you plan to display them during your live broadcast.
Share Assets During the Broadcast
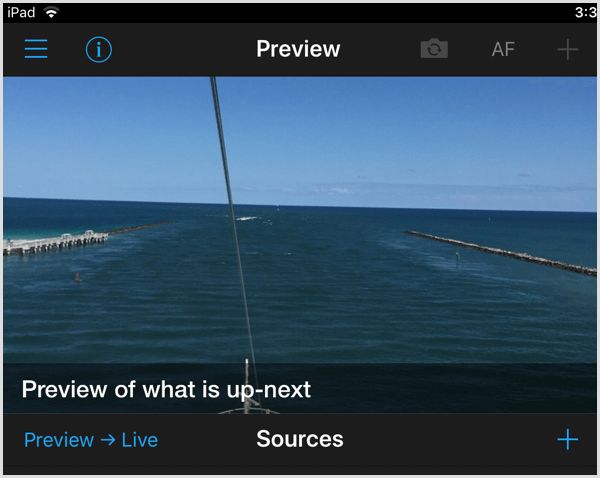
During your live broadcast, tap the asset you want to show to your audience. You'll then see a preview of it in the preview window at the top of the Sources section. When you're ready to display it live, tap the Preview–>Live icon.
#4: Control Cameras and Angles
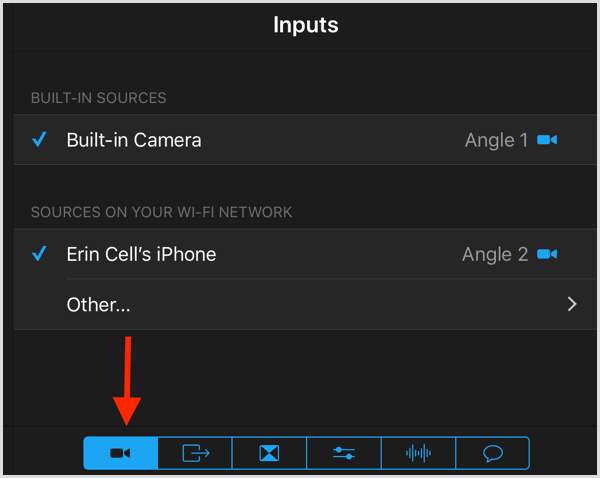
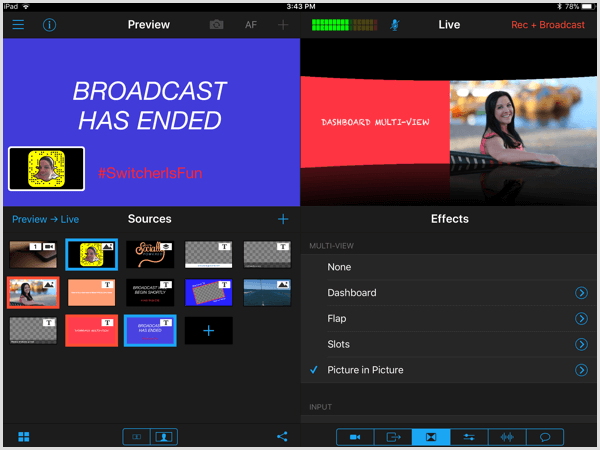
Tap the first icon in the lower-right corner to access the Inputs section. This is where you control the cameras and angles. You can see the current camera views in the Sources section on the left.
#5: Choose Transition and Multi-View Effects
Switcher Studio has a library of effects for your transitions when you switch cameras, display images, or videos during your broadcast. In the lower-right corner of the screen, tap the third icon from the left to access transition effects. Your options include cut, cross dissolve, wipe, cube, and twist.
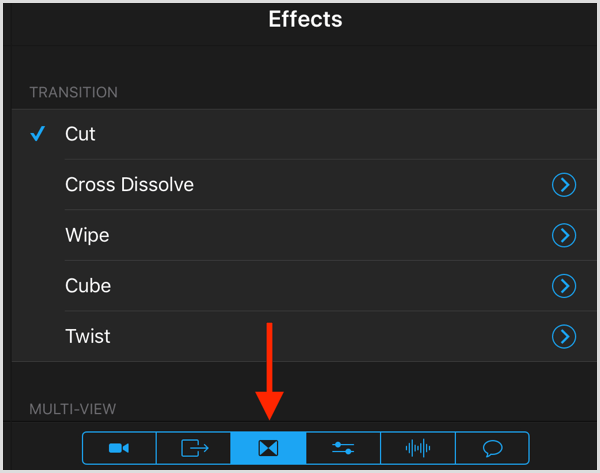
It's a good idea to pick one effect and use it for the entire broadcast, especially if you're new to using Switcher Studios.
Next, scroll down to access the multi-view layout options:
- None (a single image)
- Dashboard (two images side by side)
- Flap (one larger image)
- Slots (two side-by-side images)
- Picture-in-picture (one large, one smaller image)
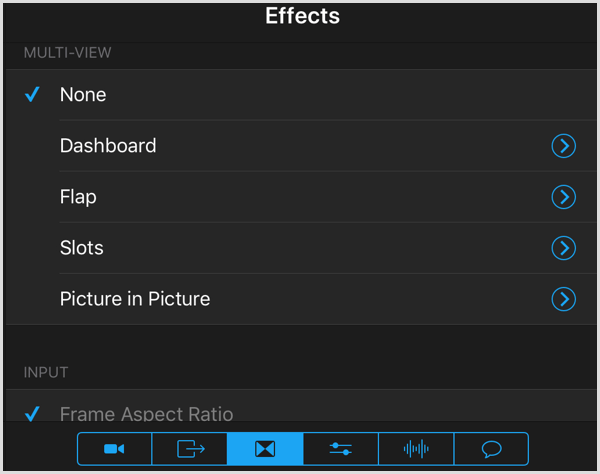
If you choose the picture-in-picture layout, the first image you select will be the main image, and the second image will be the smaller picture-in-picture image. Drag and drop the smaller image to position it in the preview window.
#6: Adjust Camera Settings
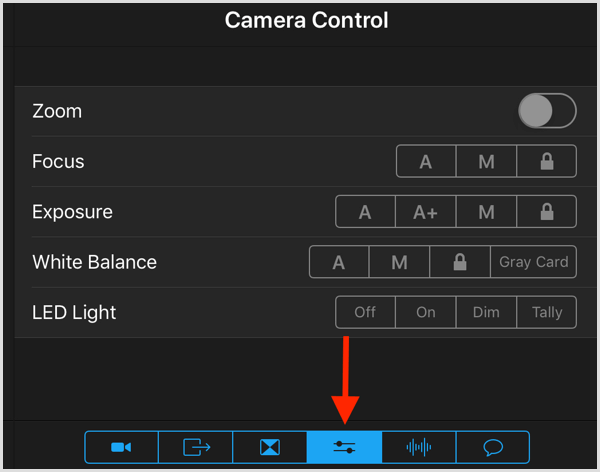
Tap the fourth icon to get more advanced camera control options including zoom, focus, exposure, white balance, and LED light.
#7: Choose Which Device Will Broadcast Audio
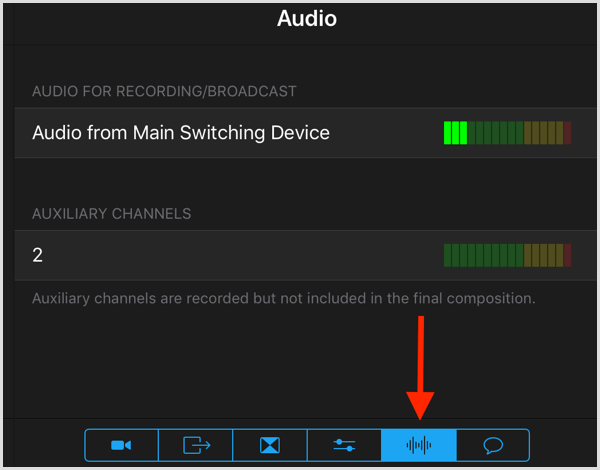
Tap the fifth icon to view audio controls. Decide which device you'll be using for the main audio and select it here. Be sure to check your audio before you go live to make sure you're picking it up.
#8: Go Live
Before you go live, connect and check your cameras and microphone. You don't want to be caught with no sound or trying to adjust technology after you've gone live. Also, check the positioning of your cameras for the angles and zoom options you want to capture. You do all of these adjustments in the Outputs section.
Tip: Use tripods or mounts for your cameras and ensure they're stabilized. You don't want a camera to fall over during the live broadcast.
The top-right part of the screen will show you what viewers are seeing during your live broadcast. It's a good idea to go on a few minutes before you're scheduled to go live to get everything set up. You can share a “Broadcast Will Begin Shortly” title image to let viewers know you'll be going live soon.
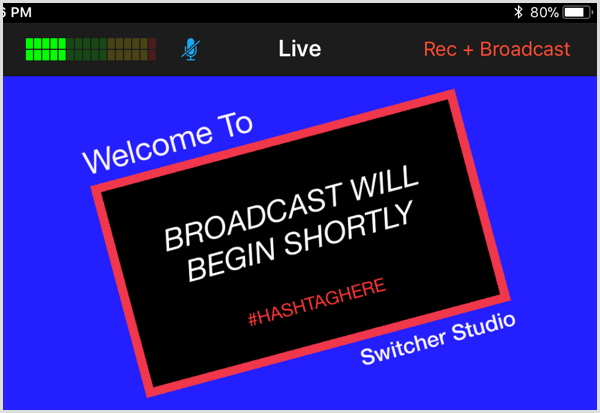
When you're ready to go live, tap Rec + Broadcast to start sharing your live stream with your audience.
When you're live, tap the far-right icon in the lower-right corner of the screen to see live comments. Here you can engage with your audience, welcome them to your broadcast, and answer questions.
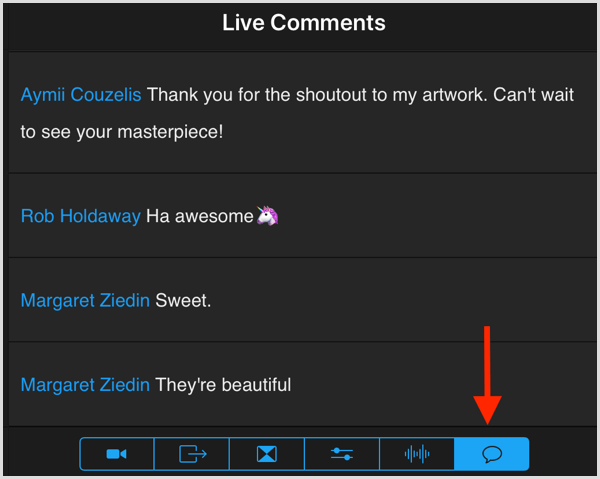
Keep in mind that if you're directing the production and you're not on video, you can only respond verbally to these comments. If you want to respond in the comments, you'll need another device with the live feed pulled up.
Get to Know the Control Panel Menu Bar
Here's a rundown of the options on the top bar of the control panel, from left to right:
- Tap the three bars icon to access the main menu, where you'll find all of your recorded media.
- Check the information icon to see the camera angle, battery life, and storage.
- Tap the camera icon to switch between the front and back cameras.
- AF lets you turn autofocus on or off, depending on your preference.
- View the audio levels and turn audio on or off.
- Tap Rec + Broadcast to go live.
![]()
Conclusion
Switcher Studio lets you move beyond arm's reach of your iPhone or iPad for your live videos. Showing different angles of your product, location, or event will add interest to your live broadcasts.
In addition to setting up your live broadcast ahead of time, you'll also want to have an outline or schedule of your show prior to going live. Check out this resource if you need guidance for creating a live show format.
What do you think? Are you ready to take your live videos to the next level and start branding? What features are you interested in trying? Please share your thoughts in the comments below.
Attention Agency Owners, Brand Marketers, and Consultants

Introducing the Marketing Agency Show–our newest podcast designed to explore the struggles of agency marketers.
Join show host and agency owner, Brooke Sellas, as she interviews agency marketers and digs deep into their biggest challenges. Explore topics like navigating rough economic times, leveraging AI, service diversification, client acquisition, and much more.
Just pull up your favorite podcast app, search for Marketing Agency Show and start listening. Or click the button below for more information.

