Do you create custom images for social media?
Looking for tools to streamline the design process?
There are some new desktop design tools that make it easy to quickly create multiple graphics for social media.
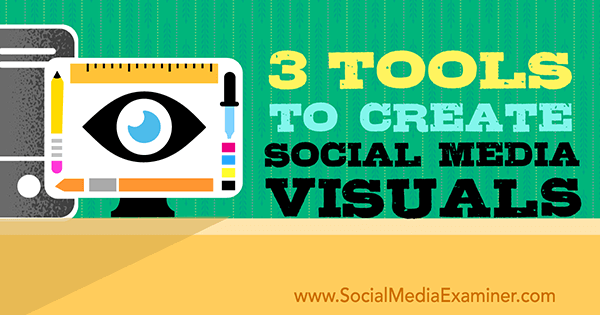
In this article, you'll discover three user-friendly desktop tools to create visuals for social media.
Listen to this article:
Where to subscribe: Apple Podcasts | Spotify | YouTube Music | YouTube | Amazon Music | RSS
Why Create Images via Desktop?
If you want to batch your visual content, desktop tools are the way to go. While mobile apps are convenient, they aren't as efficient or easy to use when you want to create more than a few images.
Canva and PicMonkey, two of the main tools people use on their computers, have evolved over the years. Canva is now even available in multiple languages, making it the ideal solution for users around the world.
However, some of the visual content creation tools launched in the past year (some in recent months) offer even more options. While you can't start an image from scratch with complete customization, their automation functionality is perfect for batching social media graphics.
Here are three new desktop visual content tools and how to use them.
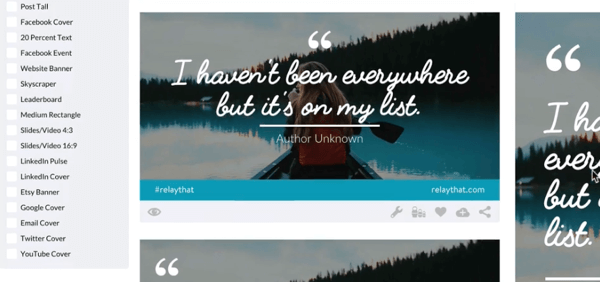
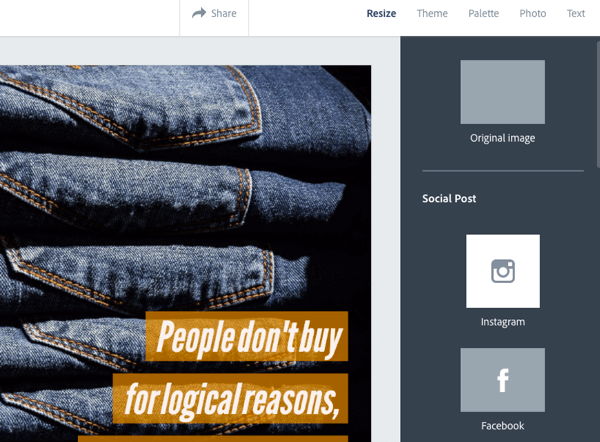
#1: Relay
Relay is template-driven. It was the first tool that allowed people to create images without having to do much design.
To start, choose a style of image based on image shape, platform, or type and the related template.
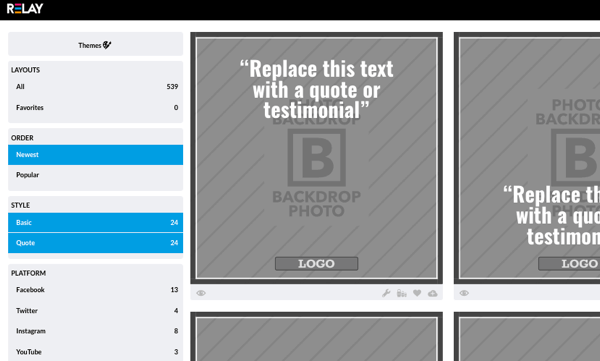
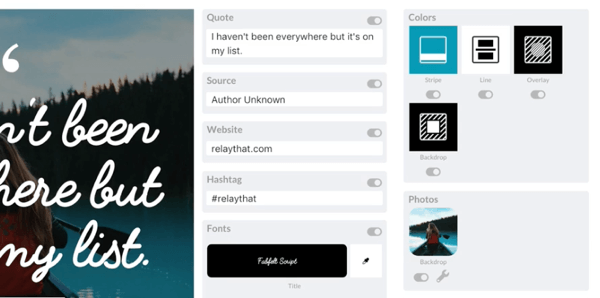
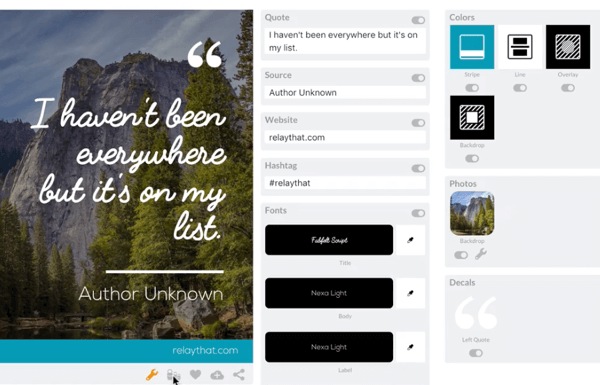
Then add in the basic text. For a quote image, add the text and source, as well as the website and hashtag.

Also, enter assets such as photos and logos into the system to create your image. Unlike other tools, Relay doesn't automatically pull in images.
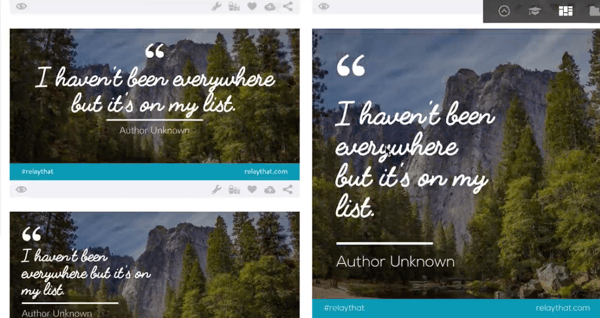
With one click, you can now preview how your design looks for a variety of social formats.
Get World-Class Marketing Training — All Year Long!
Are you facing doubt, uncertainty, or overwhelm? The Social Media Marketing Society can help.
Each month, you’ll receive training from trusted marketing experts, covering everything from AI to organic social marketing. When you join, you’ll also get immediate access to:
- A library of 100+ marketing trainings
- A community of like-minded marketers
- Monthly online community meetups
- Relevant news and trends updates
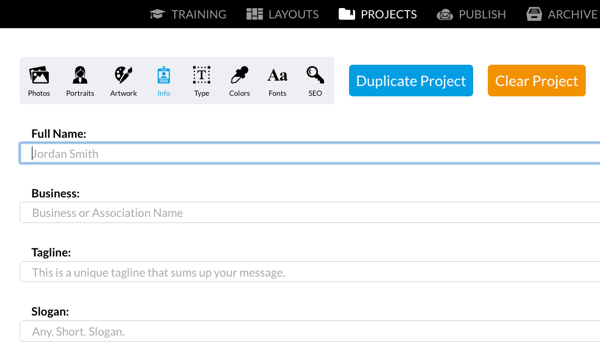
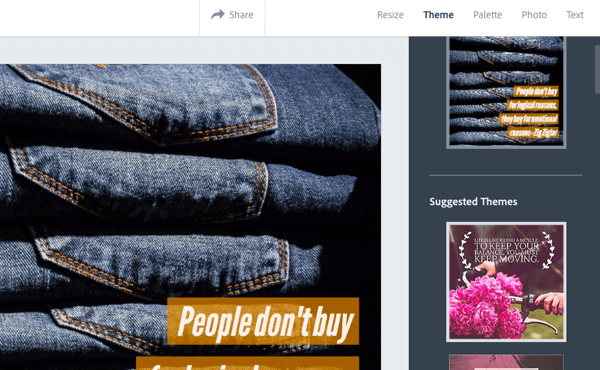
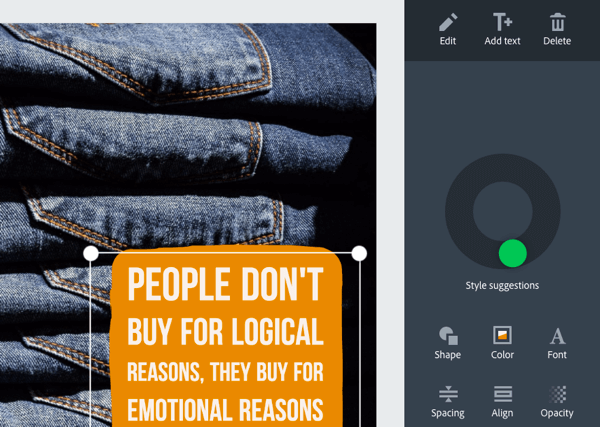
The assets are shared among dozens of image layouts, so if you edit one element of a design, each layout automatically adapts to each asset update. You can edit assets like title, subtitle, text, font, taglines, logos, layers, and images. However, you can't edit the overall structure of the template, like where the title, subtitle, or photo is positioned on the image.
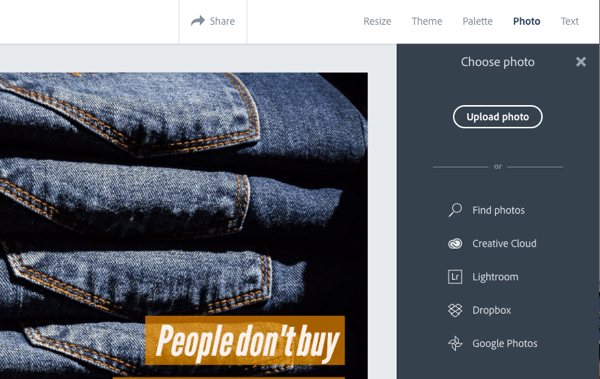
You may also click off to remove certain elements. For example, if you want to change the photo, simply upload a new one.
Now click the Russian doll icon on the bottom to resize and remix everything.
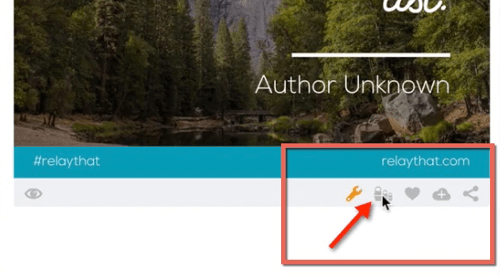
The change is now reflected in dozens of different graphics.
When you're done, simply download the graphics and schedule or post them to your favorite social media sites.
Relay allows for a little more customization than other tools. There are more functions, layers to the images, and so forth. It's ideal if you want to create bulk sets of images, do a series of images featuring guests on your podcast, or create ad sets.
Ads are easy to create because the 20% text rule is included in the templates. You can also add keywords into the metadata of the images for SEO purposes.
Advanced Tip: Relay Projects
If you need to design a lot of assets for something, create them as a project. This allows you to add lots of text and graphic content. With a single click, Relay mixes and matches everything you put in and gives you hundreds of design alternatives.
Save multiple projects and resume work on any of them at any time.
Cost: There's a free version of Relay available that includes the Relay watermark. Jump to the paid version to remove the watermark and get extra features. The cost is $12/month or $8/month if paid annually.
#2: Designfeed
The new tool on the block, Designfeed, is all about automated graphics and an excellent user experience. The templates are beautifully designed and showcase the images well. Plus the font combinations are outstanding.
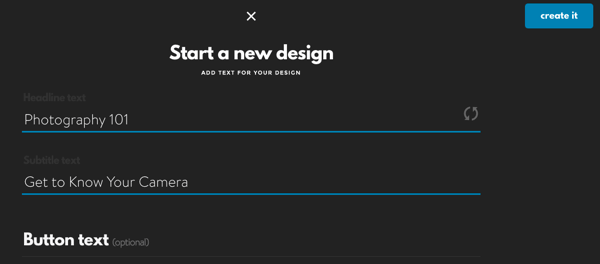
Designfeed is easy to use. Simply enter a little data and Designfeed will create an endless number of designs from which to choose.
Type in a title and subtitle and then click Create It.
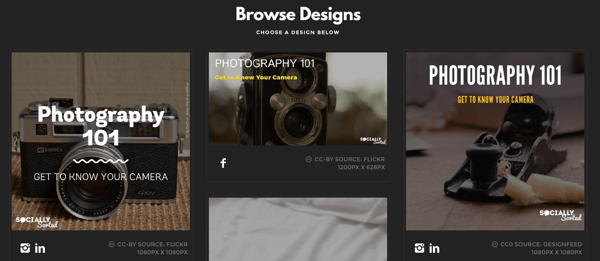
Designfeed chooses images from reputable stock libraries, like Unsplash, based on the keywords you entered in the title and description. Designfeed is different from Relay in that it brings in the images.
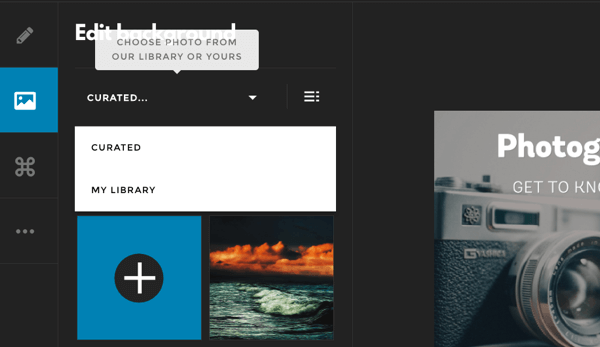
Choose an image curated by Designfeed from their stock photo library, or upload one of your own.
Note: Most of the images from Designfeed are Creative Commons or otherwise without restriction. Just check the license and accept it if you decide to use one.
Once you select an image you like, Designfeed generates a whole series of design sizes.
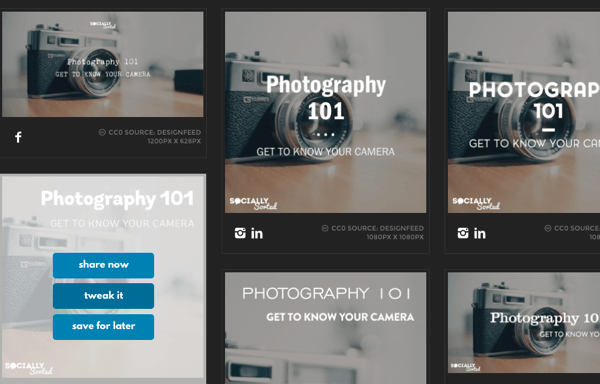
Next, tweak the text (change the size, color, or words), add a button or footer, or change the background.
In this example, the title was edited to add the word “Workshop,” a button was added, and a footnote attached to the image.
Discover Proven Marketing Strategies and Tips
Want to go even deeper with your marketing? Check out the Social Media Marketing Podcast! Publishing weekly since 2012, the Social Media Marketing Podcast helps you navigate the constantly changing marketing jungle, with expert interviews from marketing pros.
But don’t let the name fool you. This show is about a lot more than just social media marketing. With over 600 episodes and millions of downloads each year, this show has been a trusted source for marketers for well over a decade.

While you can alter certain elements, you can't get picky with the design, like moving text around. However, there are enough options to customize your own style and branding. For example, you can choose whether you want to have your logo on the image.
After you've set your design, Designfeed creates perfectly sized versions of it. Click to save and share to all of your social platforms, or schedule with Hootsuite or Buffer.
Advanced Tip: Designfeed Import
A fun beta feature of Designfeed is the ability to create visuals at scale by connecting your feeds from sites like Twitter, Medium, and Shopify. Designfeed transforms content from your feeds into graphics that you can easily modify and share.
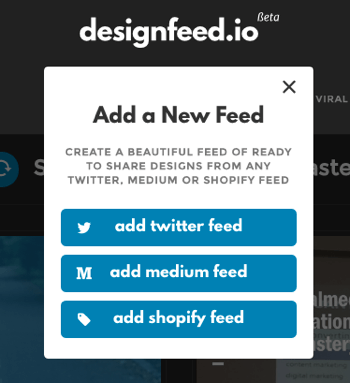
Then Designfeed generates graphics from the content. This is an especially efficient tool to create graphics from events, since you can also create a feed from a Twitter hashtag. For example, the graphic below was generated by pulling in the #ContentMastery Summit in Dublin.

Choose an image and edit it as you would any other Designfeed graphic. For more information on Designfeed, check out these video tutorials.
Cost: The Designfeed essentials plan is $9/month. The advanced feeds are still in beta. As such, costs will be determined later.
While you need to request an invite to use it, Social Media Examiner readers can get immediate access here. Sign up with Facebook, Twitter, or your email account.
In any graphic situation, be respectful of the copyright of any images provided by the tool. While not all suggestions will be relevant, Designfeed is intuitive. The more you design, Designfeed learns what you love and creates more designs for you just like it.
#3: Adobe Spark
Adobe Spark, which launched in May 2016, allows you to create different types of visuals: posts, pages, and videos. Note: Adobe Voice (previously only on iPad), Adobe Slate (an app that creates beautiful web pages from your phone), and Adobe Post (a popular image creation app) are now part of Adobe Spark.

Like the other tools, Adobe Spark Post is template-driven and you can edit different features. Unlike Relay and Designfeed, however, Spark lets you alter anything you create via desktop on your mobile iOS device. This makes it a one-stop shop for Apple users.
To get started, type in text and choose a theme, also known as a social media template.
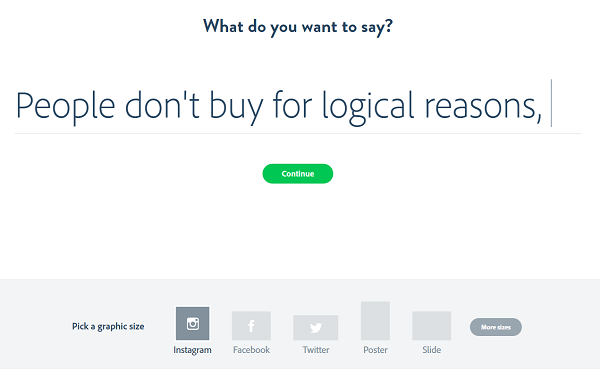
You can do any of the following steps in any order. If you'd like, resize the image for a different social media template.
Another option is to choose a different theme. Adobe gives suggestions for different placement and styles of text.
If you want to select a different photo, you have numerous options. Choose one from your own library, the cloud (Google Photos or Dropbox), Creative Cloud, or Lightroom. You can also search from Adobe's stock photos.
There are many options for the Color Palette, as well.

Also, edit the text in more detail. Change the shape, color, font, opacity, spacing, and alignment of text.
When you're satisfied with your post, click Share. You can download your post or share it with the Spark Community or to your favorite social platforms.
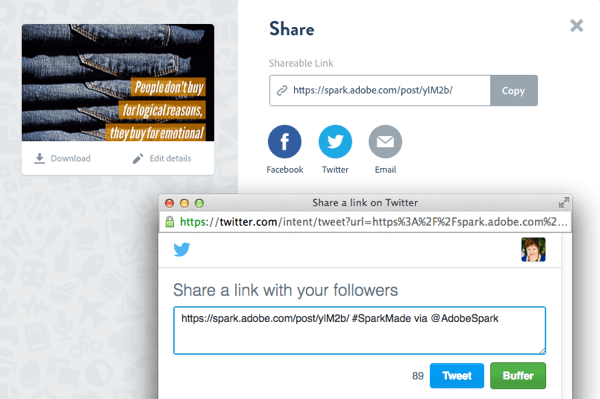
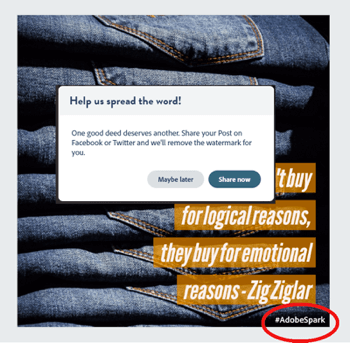
Note: To remove the #AdobeSpark hashtag from your post, you need to share it to Facebook or Twitter. Click the hashtag to share. The branding can't be removed for Adobe Spark Pages and Videos.
Advanced Tip: Adobe Spark Pages
Adobe Spark Pages are fully responsive and ideal for newsletters, book reviews, travel stories, and even promotions.
Create eye-catching photo layouts by dragging in photos from a variety of places. You can add photos as single images or grids of photos, or use the Glideshow feature, which creates fluid, beautiful, gliding full-screen photos. Add text and captions to every section and choose from themes to make your page pop.
Advanced Tip: Adobe Spark Video
Create animated videos like a professional with Adobe Spark Video.
Enter your idea or title and then choose a story template. Options include Promote an Idea, Tell What Happened, A Hero's Journey, Show and Tell, Personal Growth, Teach a Lesson, An Invitation, or Make Up My Own.
Add icons, photos, and text with voice overlay to create the story. You also have the option to choose music from the library. The tool guides you at each stage to add the elements.
Cost: Adobe Spark is free.
In Conclusion
While Canva and PicMonkey still offer the most customization, Relay, Designfeed, and Adobe Spark make it easy for marketers to create professional-looking images with ease.
Everyone has favorite tools for visual content. Explore them all to see what works best for you.
What do you think? What tools do you use for creating images on desktop? Which are the easiest to work with? How do you customize? Please share your thoughts in the comments below!
Attention Agency Owners, Brand Marketers, and Consultants

Introducing the Marketing Agency Show–our newest podcast designed to explore the struggles of agency marketers.
Join show host and agency owner, Brooke Sellas, as she interviews agency marketers and digs deep into their biggest challenges. Explore topics like navigating rough economic times, leveraging AI, service diversification, client acquisition, and much more.
Just pull up your favorite podcast app, search for Marketing Agency Show and start listening. Or click the button below for more information.