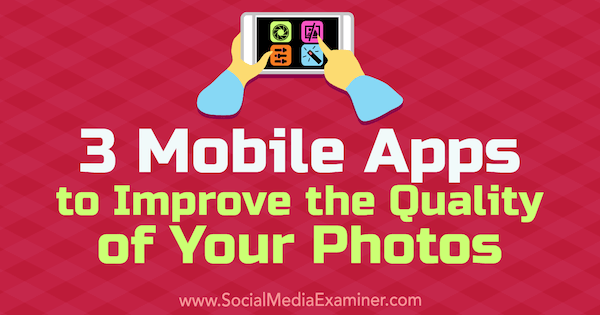
 Do you post photos from your mobile phone? Looking for expert-level mobile photo editing solutions?
In this article, you'll discover three mobile apps that help you edit and deliver professional-looking photographs.
#1: Make Complex Edits Using Mendr
Even if you're a pro at using DIY photo editing apps, getting the perfect image can be a time-consuming task. Thankfully, with Mendr (available for iOS and Android), you only need one simple app.
Whether you want to remove a photobomber, swap backgrounds, remove unwanted objects, or make cosmetic enhancements, Mendr has a network of certified professionals who will make the edits for you. Just upload your photo to the app, designate the edits you want, and voilà! You'll have an Instagram-worthy photo in minutes.
While the app itself is free, the cost for each fix varies, depending on the complexity of the edit you're requesting. Here's how to submit a request to remove an object from your photo:
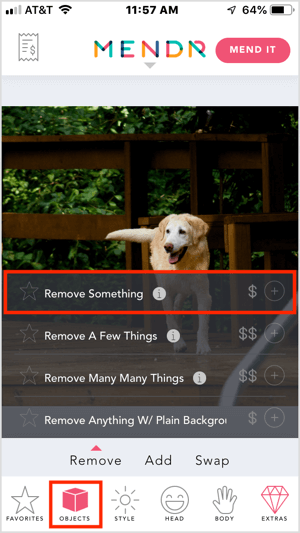
From the home screen of the Mendr app, select the photo you want to edit and then tap Tailor.
On the next screen, tap Objects and in the pop-up menu, select Remove Something.
Next, draw a circle around the object you want to remove from the photo, such as the metal pole in the example below.
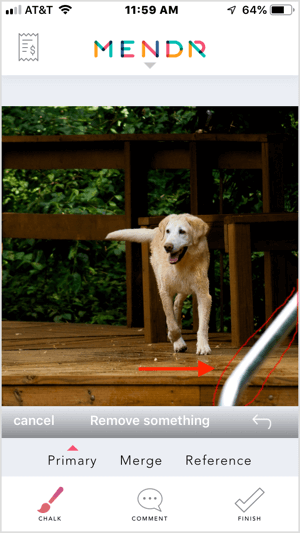
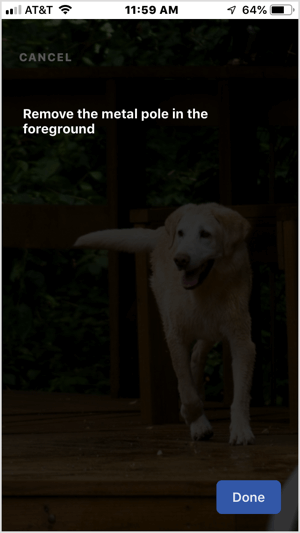
Then tap on the Comment icon and explain in detail the edit you're requesting. Finally, tap Done.
The next step is to tap Mend It in the upper-right corner of the screen. In the pop-up window, tap Yes to submit your request. You see a fee for your edit. Submit your payment to send the order to an editor.
Which AI Moves Actually Matter?
That's what every marketer is wrestling with now. New AI strategies, new tools, new takes every week — but no clarity. Most marketers and business owners are trying to figure out AI alone.The AI Business Society is your trusted guide. Get expert-led training you can put to work immediately. Plus a community of marketers sharing what's actually working.
I'M READY FOR REAL AI RESULTS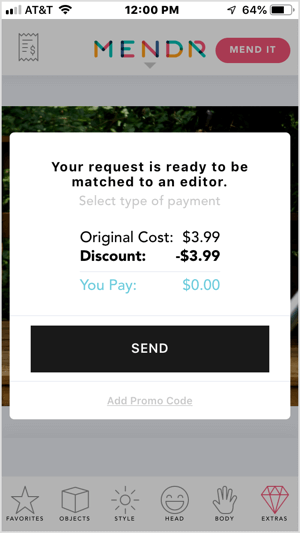
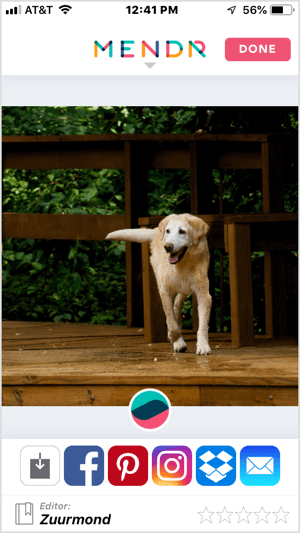
Mendr sends you a notification as soon as an editor starts working on your photo and also when the edited photo is available for review.
Once the edits are done, you'll get a notification that your photo is ready for download. You can review your edited photo and download it. Mendr also lets you share it directly to Instagram from the app.
You'll be surprised to see how easy it is to remove almost anything from your photo.
Mendr allows you to do a lot more with your photos as well. Want to change someone's hair color? Tap on Head and then tap Hair to see a variety of hair fixes to change the hair color, fix flyaways/reduce frizz, adjust length, and more. Similarly, to make edits to the body, tap on Body.

There's also an option to leave all of the decisions to the editor, so you can still get a perfect image even if you're not sure what edits you need for your perfect shot.
#2: Add Intricate Effects Using PicsArt
The PicsArt mobile app (available for iOS and Android) allows for extensive post-processing to give your images a professional look. You can create tiny planet photos, add overlays, change backgrounds, add text, design memes, and even slice your photos.
While most of the features are available for free, upgrading to the paid version gives you access to more advanced features.
To edit your photos, tap the + button at the bottom of the screen.
At the top of the next screen, you see the photos and videos from your camera roll. Scroll down to see options to create a collage, make a drawing, select a background, search for free images, or take a photo.
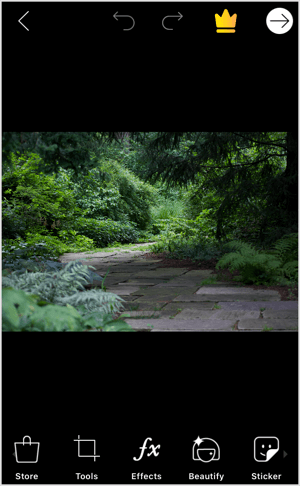
To edit your image to enhance its quality, tap your image in the camera roll.
When the editing window opens, you'll see a number of options in the toolbar at the bottom of the screen.
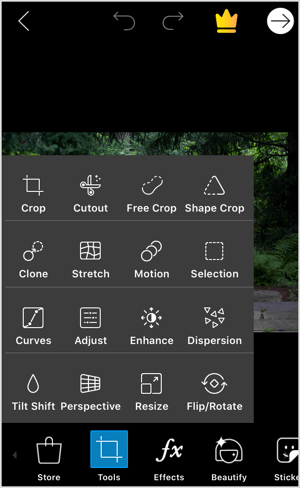
Tap on Tools to access features that let you crop, stretch, enhance, adjust, resize, rotate, or change the perspective of the photo. You can even clone the image, use curves, and apply tilt shift or motion effects.
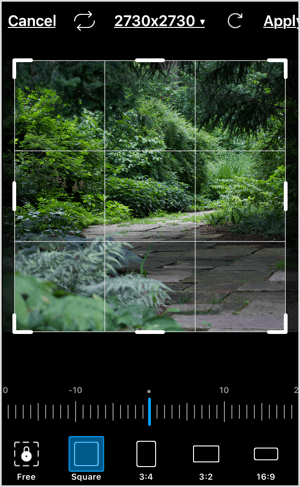
Tap Crop to access the Crop tool. Adjust the crop frame by dragging the sizing handles. To straighten the image, drag the slider below the image. If you want to adjust the aspect ratio, tap one of the presets at the bottom of the screen. Once you've got the perfect frame, tap Apply in the top-right corner.
If you want to add effects to your photos, tap on Effects in the toolbar. Swipe through the options at the bottom of the screen (FX, Magic, Blur, Artistic, etc.) to select the type of effect you want to apply to your photo. After you select a category, you see a variety of presets to choose from.
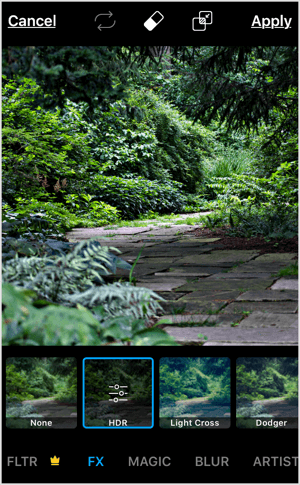
Simply tap on an effect to see a preview of how it looks when applied to your photo. If you tap on the effect again, a pop-up menu opens that lets you adjust the intensity.

If you want to apply the effect to only part of the image, tap the Eraser tool at the top of the screen and select the areas to exclude.
When you're finished making changes, tap Apply to save your changes.
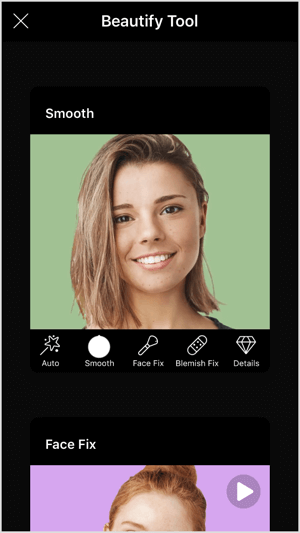
If you have people in your image, use the Beautify tool to fix blemishes or spots on faces, change hair color, and more. You can even whiten the teeth or simply select auto-fix. All you need to do is tap on the particular option and then tap Apply to save the changes.
3 Days of World-Class Training—Zero Travel!

Couldn't make it to Social Media Marketing World and AI Business World this year? Get all of the great content at a fraction of the price with a Virtual ticket.
That’s full access to recordings of every keynote, workshop, and session—the ones people travel thousands of miles to see. Don't wait. Get your Virtual ticket and enjoy actionable content that you can watch anytime, anywhere.
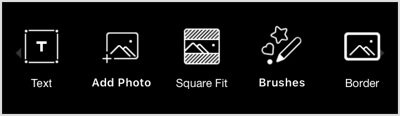
PicsArt also has options that let you cut out a certain part of the photo, add text overlay, incorporate a second image, apply borders, and more.
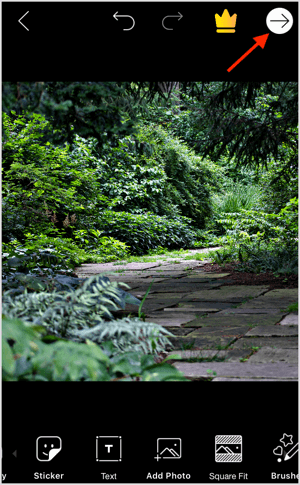
When you're done editing, tap the white arrow at the top right of the screen.
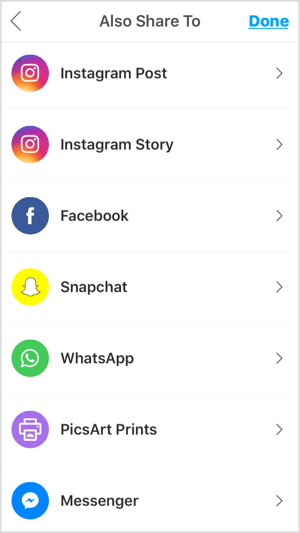
On the next page, you can save the edited photo to your camera roll or share it. Tap Post to save it to your PicsArt profile and reveal sharing options.
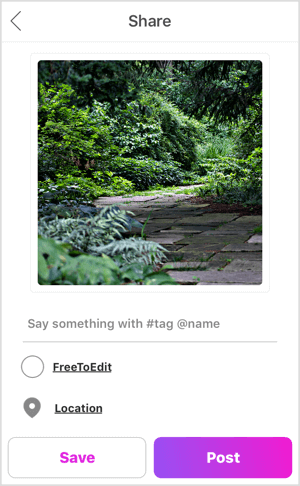
PicsArt lets you share your photo on Instagram, Facebook, and other platforms.
#3: Apply Professional-Level Effects Using Snapseed
Snapseed (available for iOS and Android) is a free mobile app from Google that lets you edit your images with ease. You'll find both simple and sophisticated tools to fine-tune your photos in minutes.
When you first open the app, tap anywhere on the screen to import your image into the app.
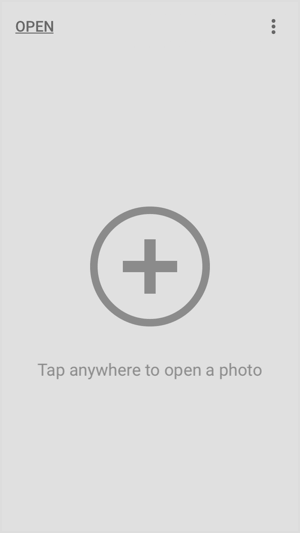
In the pop-up menu, tap Open From Device and select a photo from your camera roll.
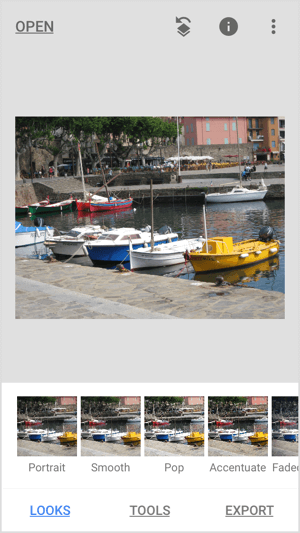
When your image opens in the editor, you have several options. If you want to make quick, simple edits, tap on Looks at the bottom of the screen and swipe through the style presets (Portrait, Smooth, Pop, Accentuate, etc.). Tap a style to preview the effect on your photo. If you find one you like, tap the checkmark to save your changes.
If you want to make more precise edits, tap Tools at the bottom of the screen to access Snapseed's extensive collection of image editing tools. Scroll down to view additional tools.
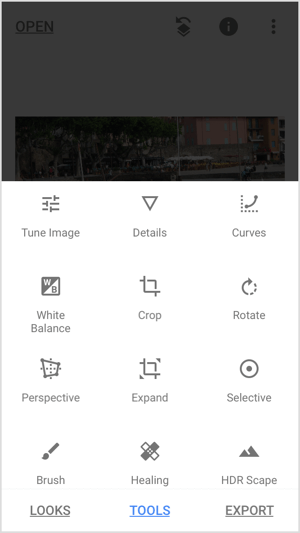
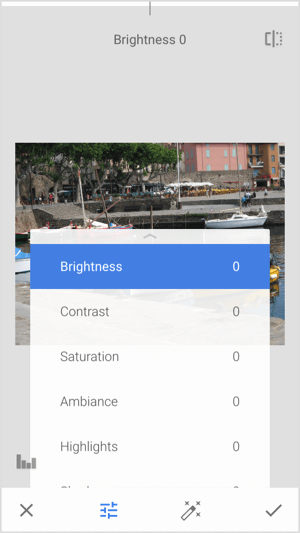
Tap the Tune Image tool to adjust image brightness, contrast, saturation, and more. Then tap the second icon at the bottom of the screen to open a pop-up menu with the controls.
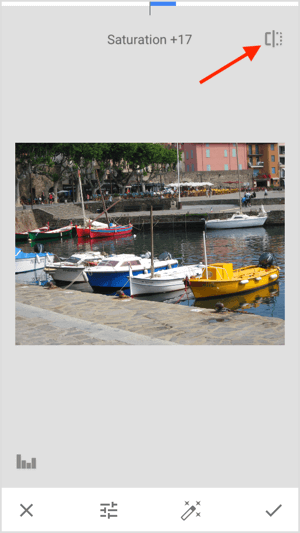
If you want to adjust saturation, for instance, tap Saturation and then drag your finger across the screen to adjust the intensity. Drag to the right to add more saturation or to the left to decrease saturation. You can see the effect on your image as you move your finger.
Tip: Hold and then release the icon in the upper-right corner of the screen to toggle between the before and after versions of your edits.
When you're satisfied with your changes, tap the checkmark at the bottom right of the screen.
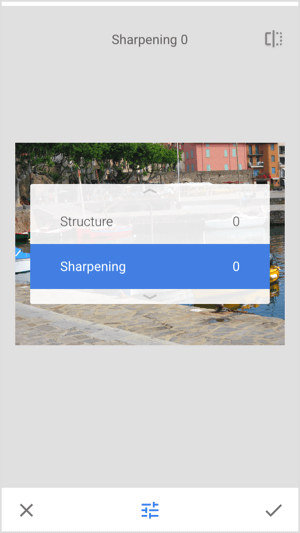
If you want to adjust the sharpness and structure of your image, go back to the Tools menu and tap Details. Then tap the middle icon at the bottom of the screen to open the controls. After you select a control, drag your finger on the screen to make adjustments.
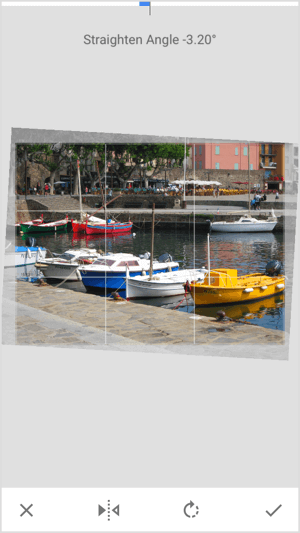
On the Tools menu, you'll also find tools to change white balance, crop your image, or change the perspective. Tap the Rotate tool to straighten your image.
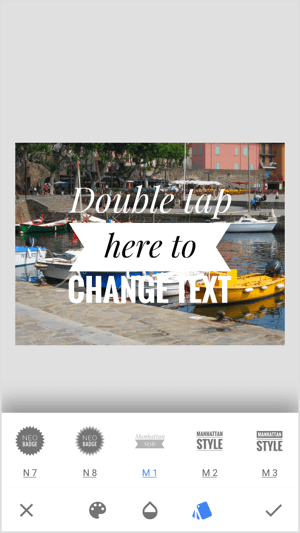
If you want to add a text overlay, tap the Text tool on the Tools menu. On the next screen, placeholder text appears on your image. Swipe through the text styles below the image and select the style you want to use. The left and middle icons at the bottom of the screen let you change the color and opacity of the text.
To change the placeholder text on your image, double-tap on it and start typing. Pinch to adjust the text size.
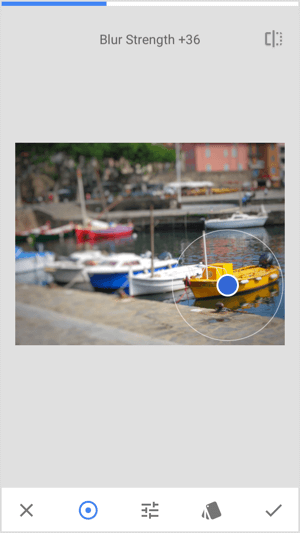
If you want to blur part of your image, open the Lens Blur tool. Then adjust the size and location of the circle to select the area to blur. Drag to the left or right on the screen to change the intensity of the effect.
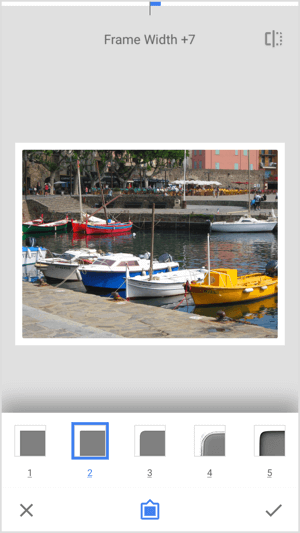
Want to add a frame around your image? Tap the Frame tool and select a frame style. Drag your finger across the image to adjust the size of the frame.
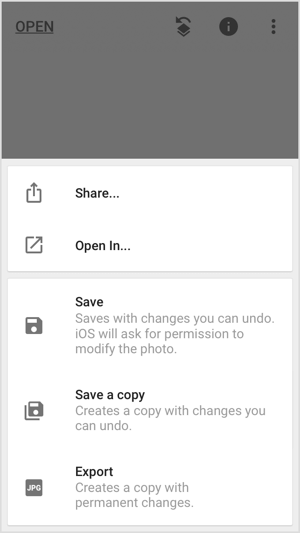
When you're finished editing, tap Export at the bottom of the screen. A pop-up menu opens with options to share, save, or export your image, or even export it as a copy. Simply tap an option and your image will be ready to post on your social media accounts.
Conclusion
Taking a good photo is easier said than done, and capturing the perfect shot is only the first step in creating a social media–worthy post. To make your photos look professional and grab attention in social feeds, it's important to put some time into post-processing them.
While there's powerful software out there such as Adobe Photoshop, it can be expensive, not to mention difficult to learn. The good news is that you don't need to be a Photoshop pro to edit your photos and make them stand out on social media. The mobile apps above are all pretty simple to use and can help you fine-tune your images effortlessly on the go.
What do you think? Have you tried some of these mobile apps? Do you use any other user-friendly apps to edit your photos for social media? Let us know in the comments below.
More articles about image and design tools for social media marketers:
- Discover 14 mobile apps to brand your social media images and video on the go.
- Learn how to use images correctly (and legally) on social media.
- Find 7 mobile apps to create quality visual content for your social media channels.

Curious About How to Use AI?
Our newest show, AI Explored, might be just what you're looking for. It's for marketers, creators, and entrepreneurs who want to understand how to use AI in their business.
It's hosted by Michael Stelzner and explores this exciting new frontier in easy-to-understand terms.
Pull up your favorite podcast app and search for AI Explored. Or click the button below for more information.
