 Need to do more marketing with video? Looking for video tools that are easy to use?
In this article, you'll discover three tools to quickly and easily create polished, eye-catching videos for social media.
#1: Produce Video Quickly With Biteable
Biteable lets you quickly create video ads, animations, and presentations. It offers more than 60 unique, cool templates to choose from.
The free version lets you publish your finished video to Facebook and Twitter, and embed it on your website or blog. If you upgrade to the Pro version ($29/month), you can remove the Biteable watermark, download your video, use your own video clips, and more.
To create your first video, click Get Started.

On the next page, select what type of video you're creating (Promote, Share, Explain, Present) and specify for what purpose (Course, Event, Product, Sale, Service, Business). Then click Find a Template.
Biteable uses the information you provided to recommend templates. Hover over a template to see a preview of it.
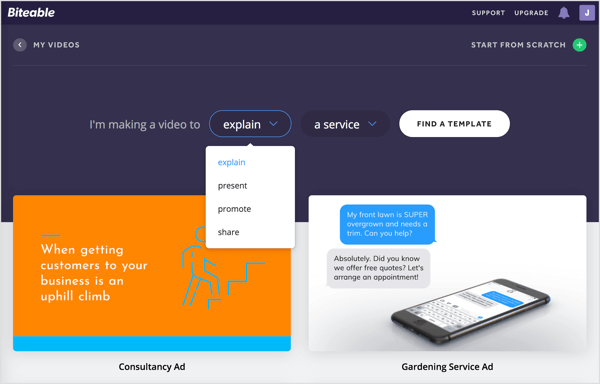
You can use one of the suggested templates for your project or start from scratch. For this example, select a template.
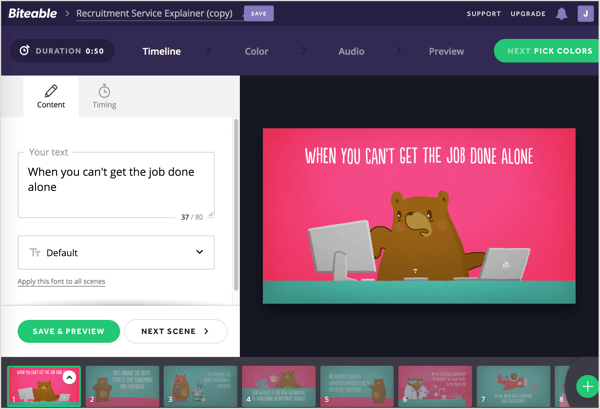
After you make your selection, the template opens in the editor. At the top of the screen, you'll see four tabs, which represent the steps for creating your video: Timeline, Color, Audio, and Preview.
Customize the Video Timeline
Which AI Moves Actually Matter?
That's what every marketer is wrestling with now. New AI strategies, new tools, new takes every week — but no clarity. Most marketers and business owners are trying to figure out AI alone.The AI Business Society is your trusted guide. Get expert-led training you can put to work immediately. Plus a community of marketers sharing what's actually working.
I'M READY FOR REAL AI RESULTSThe Timeline tab is where you put your video together.
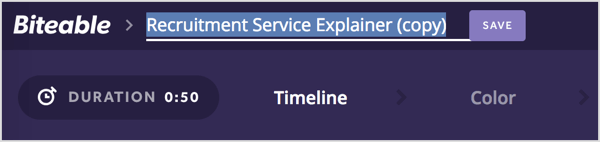
In the top-left corner of the page, select the provisional title and type in a name for your video.
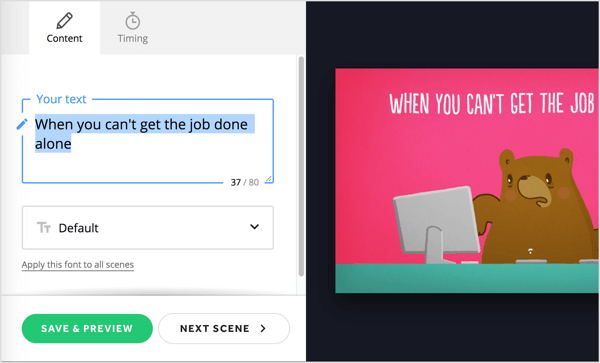
Next, you'll customize the first scene of your video. Select the placeholder text in the Your Text box and replace it with your own copy. If you don't like the default font, select a different font from the drop-down list.
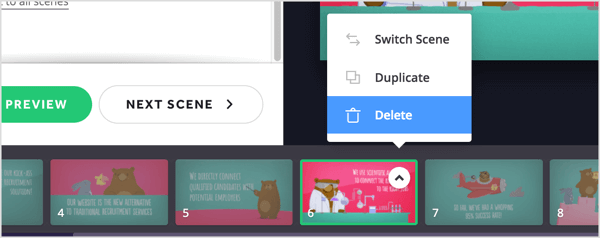
When you're done, click Next Scene. Now repeat this process to customize the other scenes from the template. You can drag scenes in the timeline at the bottom of the page to reorder them.
If you don't want to use some of the scenes, you can delete them. In the timeline, click the arrow button for the scene you want to eliminate and choose Delete from the pop-up menu.
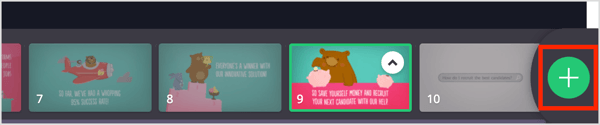
To add a scene that's not included in the template, click the + button at the far right of the timeline.
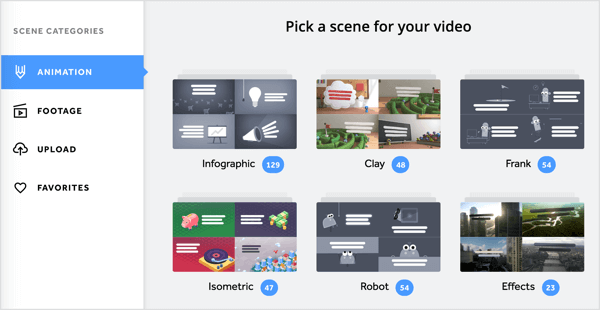
On the next page, you'll see a variety of animations and video footage you can add to your video. You can also upload your own images. With the Pro plan, you can upload your own video clips as well.
Hover over a selection to see a preview of it. When you find something you want to use, click the scene to add it to your project.
When you're finished customizing all of the scenes in your video, click the green Next Pick Colors button at the top right of the page.
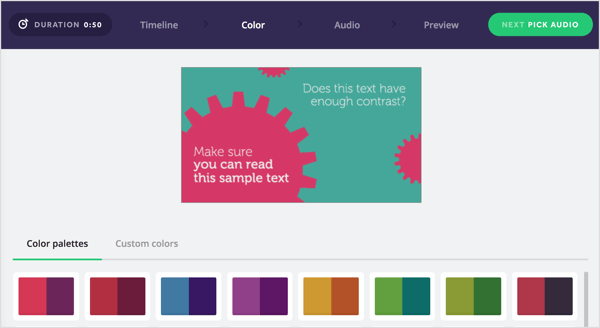
Choose a Color Scheme
On the Color tab, you can choose a color palette for your video or create your own. When you're done, click Next Pick Audio to proceed to the next step.
Add Audio
The Audio tab includes a list of royalty-free audio clips you can add to your video as background music. Click the play button to hear a preview. If you find something you like, select the option button to the left of the audio to add it to your video. Or if you prefer, you can upload your own song.

When you're done making your selection, click Next Preview Video.
View a Preview and Share Your Video
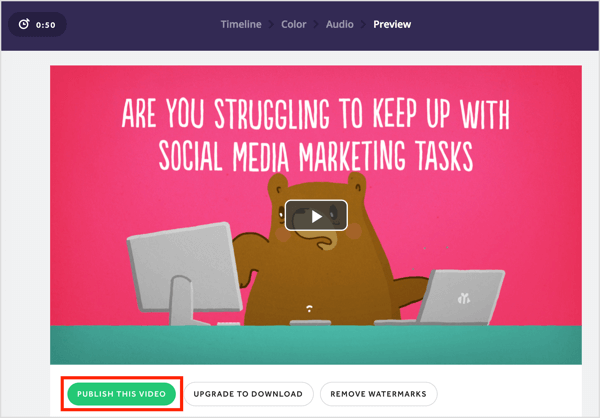
Now that you're finished designing your video, you're ready to preview it. Click Build Your Preview to render the video. Biteable shows an estimated build time.
When the video is ready, click the play button to preview it. If you're happy with it, click Publish This Video.
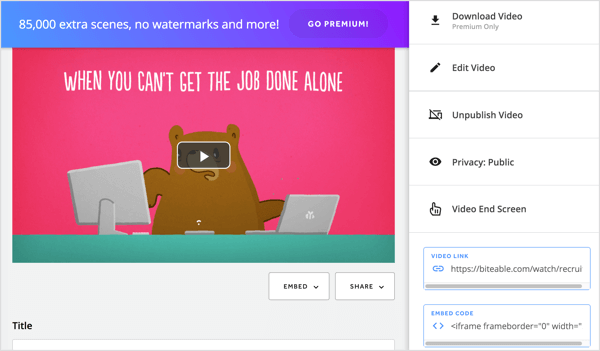
On the right side of the next page, you see options to change the video's privacy setting and add an end screen. If you want to share the video to social media, click Share and select Facebook or Twitter from the drop-down menu. Click Embed if you want to embed the video on your website or blog.
#2: Test Drive AI-Assisted Video Creation With Magisto
Magisto is a professional video editor that helps you create videos using Emotional Sense Technology. It analyzes raw footage and edits it into polished videos you can share on your social media channels.
Magisto is available in both free and paid plans, which start at $4.99/month. To get the most out of this tool, consider upgrading. With a premium plan, you can download your finished video, fine-tune it with the smart storyboard editor, add your own branding, get access to analytics and insights about your audience's viewing behavior, and more.
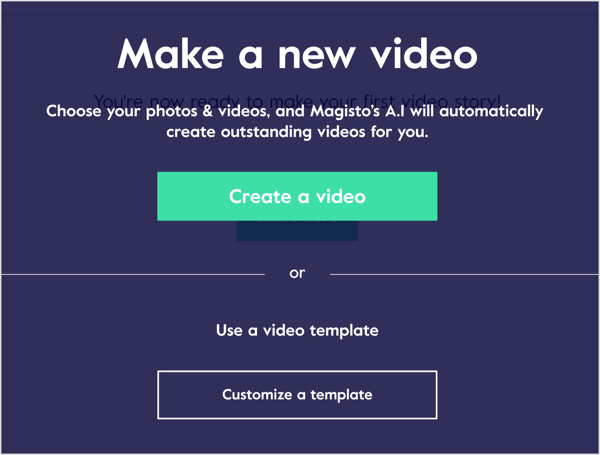
To get started, click the option to make a video. From here, you can either have Magisto create a video using your photos and video clips, or work from a video template. For this example, click Create a Video.
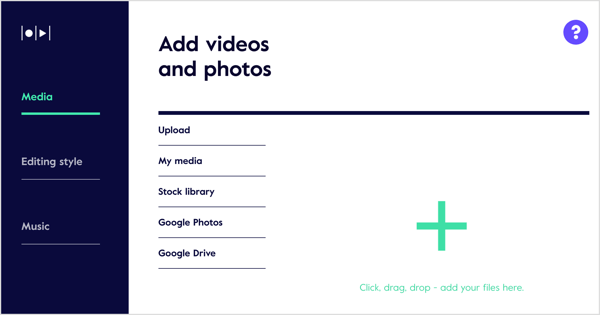
Upload Your Videos and Photos
The next step is to upload your media. Click the + button and navigate to the media assets you want to upload. Or drag and drop the files you want to use.
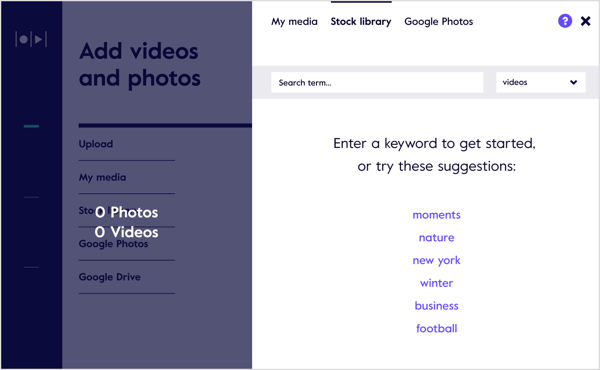
If you have a paid plan, you can choose from stock photos and videos in the Stock Library.
When you're finished uploading your imagery, click the Photo and Video Settings link. In the pop-up box that appears, you can edit two settings.
3 Days of World-Class Training—Zero Travel!

Couldn't make it to Social Media Marketing World and AI Business World this year? Get all of the great content at a fraction of the price with a Virtual ticket.
That’s full access to recordings of every keynote, workshop, and session—the ones people travel thousands of miles to see. Don't wait. Get your Virtual ticket and enjoy actionable content that you can watch anytime, anywhere.

The Result Length is the maximum length of your video. Magisto sets the video length based on the media assets you've added. To manually adjust the length, deselect the Automatic checkbox and drag the slider.
You can also choose from three options to set the pace of video: Fast, Medium, and Slow.
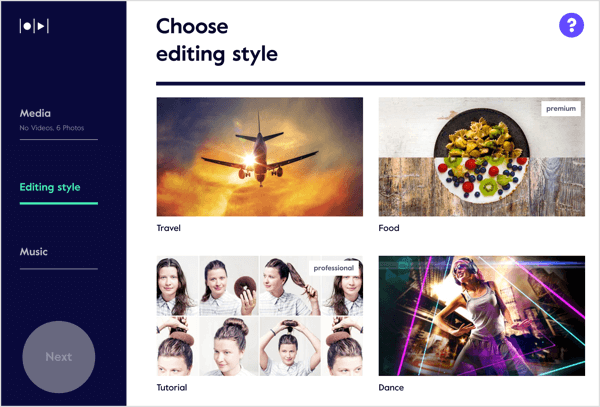
Editing Style
On the Editing Style tab, you can choose from 56 templates and styles for your video. Hover over a style to see a video preview of it. Styles marked with Premium or Professional are available only for those plans.
Choose an editing style that fits your video and audience.
After you make your selection, click Editing Style Settings at the top of the page. In the pop-up box that appears, Magisto lets you change two settings for your video style.
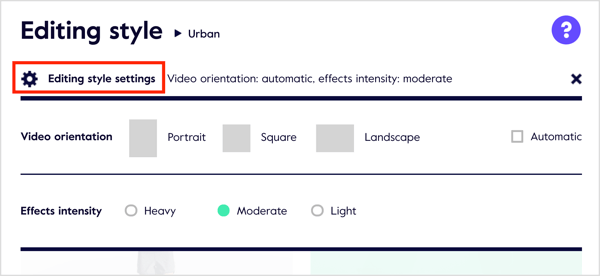
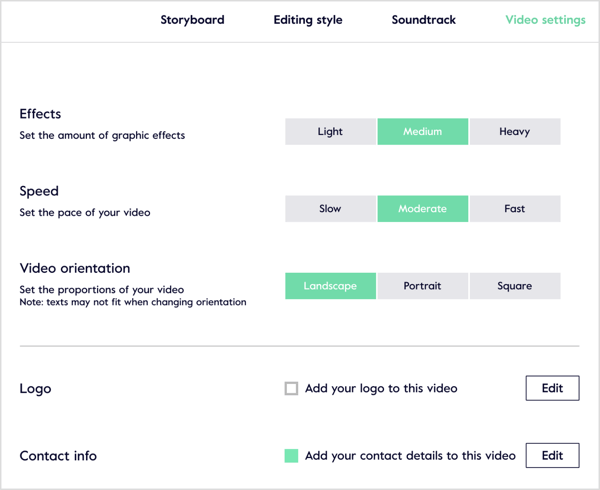
If you deselect the Automatic checkbox, you can choose from three video orientation options: Portrait, Square, and Landscape. If you prefer to have Magisto make this selection for you, keep the Automatic checkbox selected.
The other setting you can tweak is Effects Intensity. Your options are Heavy, Moderate, or Light.
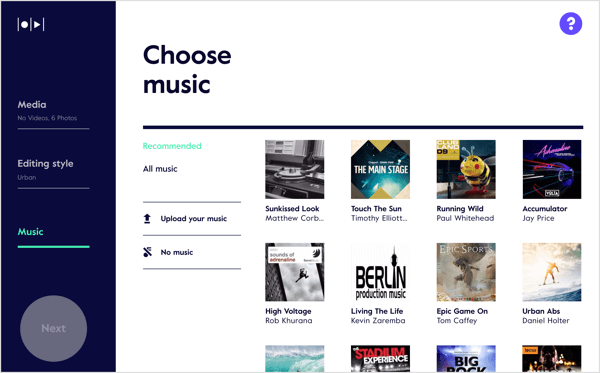
Music
The final step is to add music to your video. Magisto will recommend some music tracks based on the editing style you chose. Click All Music to see additional selections.
Click an audio clip to hear a preview. If you find an audio selection you want to use, click Choose.
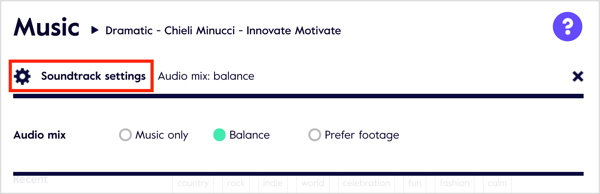
After you select a clip, click Soundtrack Settings. In the pop-up box, you have three options for the Audio Mix setting:
- Music Only: Use only the music you selected in your video.
- Balance: Strike a balance between the music you chose and the audio in the original footage.
- Prefer Footage: Give priority to any audio in your footage.
When you're done selecting your music settings, click the green Finish button on the left.
Create and Share Your Video
Now add a name for your video (optional) and click Create Preview.
After the first rendering, you'll see a preview of your video. On this page, you have two options: Go to Storyboard, and Save & Share.
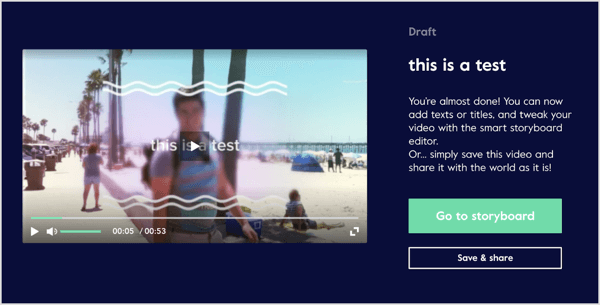
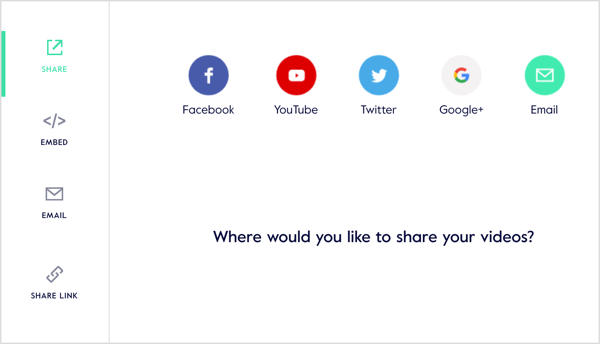
If you're using the free plan, click Save & Share, decide whether to make your movie public or private, and click Done.
Next, you see your sharing options. You can share your video on social media, generate a shareable link, email it, or embed it on your website.
If you have the Professional or Business plan, you can make further refinements to your video by clicking Go to Storyboard on the video preview page.
The Magisto storyboard editor opens, where you can edit, trim, and rearrange clips and preview your video. Like other professional desktop video editors, you can add new videos to the storyboard and browse for clips you've previously used.
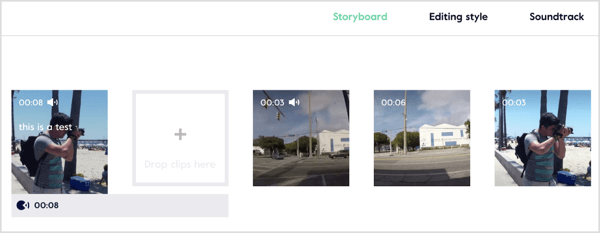
Magisto also lets premium users create a B-roll effect. Instead of simply showing a subject speaking into the camera, you show supplementary footage that enriches the storyline.
Click the Video Settings tab to fine-tune settings, and add your business logo and contact info to the video.
#3: Generate a Companion Video for Your Blog Posts With Lumen5
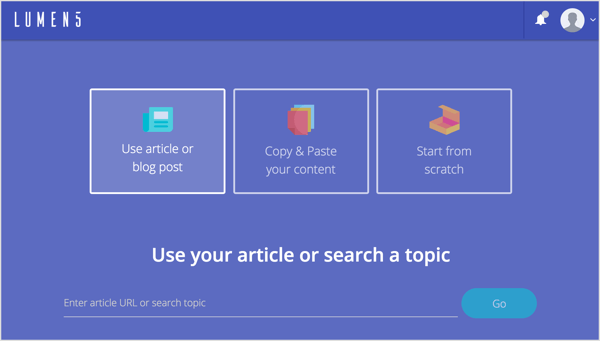
Lumen5 lets you create a video three ways: by starting from scratch, using a blog post, or copying and pasting text.
This tool is available in both free and paid plans. With the Pro plan ($49/month), you get the ability to export square videos, remove the Lumen5 branding, remove the credit scene at the end of the video, export in 720p video quality, and upload your watermark and an outro.
To start from a blog post to create your video, type in the URL and click Go.
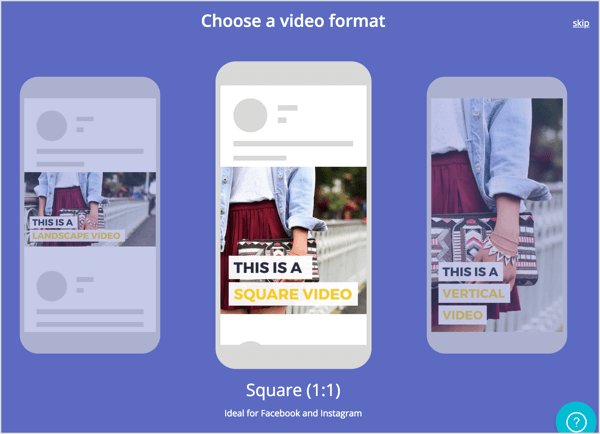
Next, you see several optional steps. First, you can choose a video format.
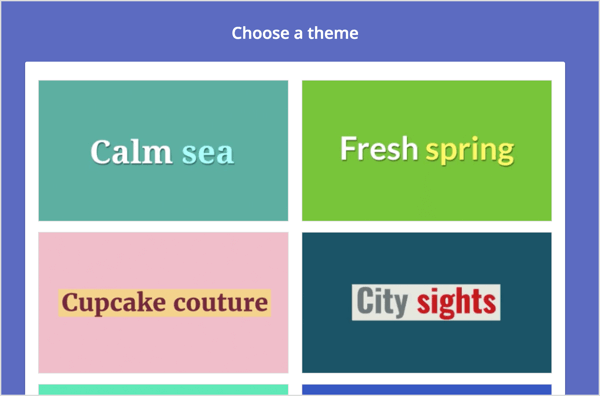
Next, you have the option to select a theme.
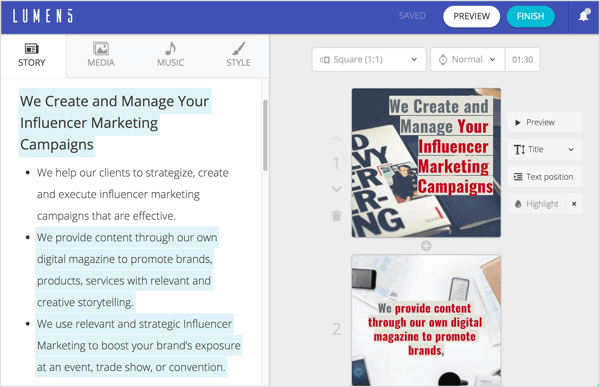
Lumen5 automatically extracts the text and images from your post and displays the content in a storyboard on the Story tab. In the text pane on the left, click to select (or deselect) the sentences you want to use in individual slides on the right.
It's easy to swap slides and order them as you like on the storyboard. For each slide, you can perform five actions:
- Preview: See a quick preview of the slide.
- Text: Choose from four different text styles.
- Text Position: Choose from nine different placements on the slide.
- Highlight: Highlight the most important text on the slide.
- Advanced: Turn the dimmer on or off.
To edit the text on a slide, double-click the existing text and type your changes.
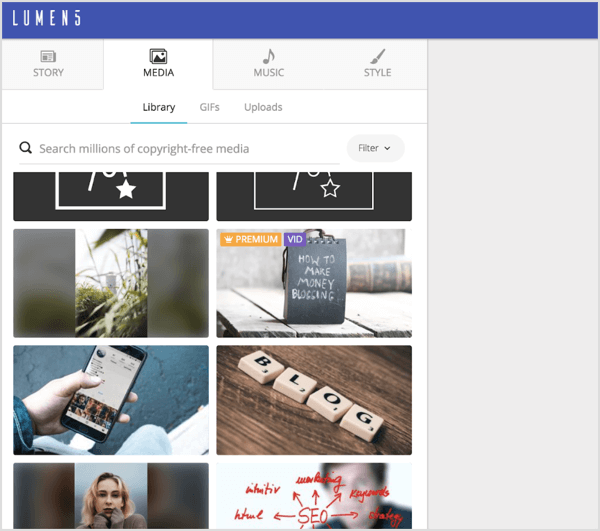
On the Media tab, you can search for free stock photos, GIFs, and videos, and drag and drop them onto individual slides.
On the Music tab, you can choose a royalty-free track from an extensive library organized by genre (Angry, Bright, Calm, Dark, Dramatic, Funky, Happy, Inspirational, Romantic, Sad) or upload your own song.
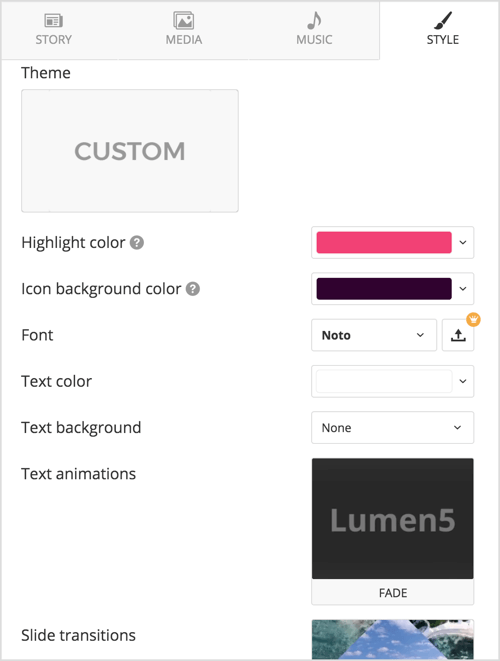
The Style tab gives you a variety of options for customizing the style of your slide. Choose highlight and icon background colors, a font, and text color, background, and animations. You can even add slide transitions.
When you're finished designing your slides, click the Finish button at the top of the screen and Lumen5 will start rendering the video. You'll receive an email notification when the video is ready to be downloaded in .mp4 format.
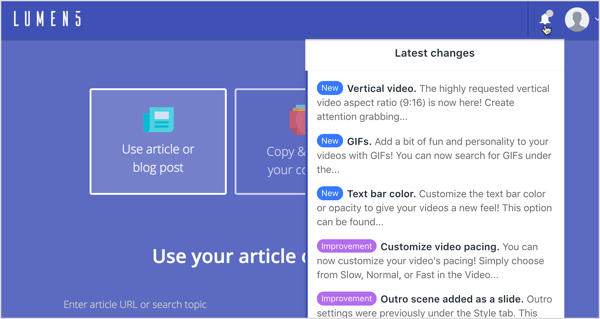
One nice thing about Lumen5 is that it takes user feedback into account and will incorporate customer suggestions and requests. Click the notification menu to read about the latest changes and improvements.
Click here to learn how to use video content to sell your products and services.
What do you think? Have you ever used any of these tools? What are your favorite features? Let me know in the comments!

Curious About How to Use AI?
Our newest show, AI Explored, might be just what you're looking for. It's for marketers, creators, and entrepreneurs who want to understand how to use AI in their business.
It's hosted by Michael Stelzner and explores this exciting new frontier in easy-to-understand terms.
Pull up your favorite podcast app and search for AI Explored. Or click the button below for more information.
