 Want to use more animated visuals in your marketing?
Looking for affordable tools to create your own animated graphics?
In this article, you'll find three tools that create animated motion graphics for social media ads and posts.
#1: Turn Images Into Animated GIFs With GIFMaker.me
GIFMaker.me is an excellent free tool that lets you turn your social media images into animated GIFs. Here's how.
Create Your Images
First, you'll need to create four to five images with a design tool like Canva. After you sign into Canva, click the More option on the far-right side of the screen.

In the Social Media Posts section, select the template you want to use to create the images. The template should correspond to the social media network on which you plan to post your animated GIF.

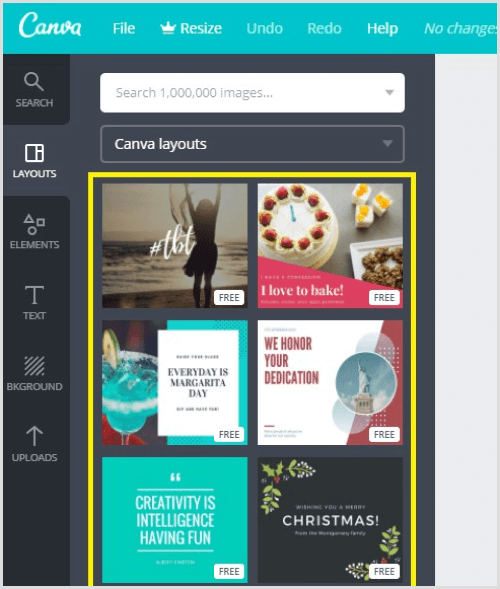
On the Layouts tab, you'll find a list of style layouts for that template. Layouts that have a “free” label are free to use, and templates with a $ label are stock photos or icons that cost $1 to use.
After you select the template you want to use, it appears in your design workspace. Now you can start customizing the text, colors, font, and images in the design.
To edit the text, simply click on the text in the design workspace and then start making your changes.
Get World-Class Marketing Training — All Year Long!
Are you facing doubt, uncertainty, or overwhelm? The Social Media Marketing Society can help.
Each month, you’ll receive training from trusted marketing experts, covering everything from AI to organic social marketing. When you join, you’ll also get immediate access to:
- A library of 100+ marketing trainings
- A community of like-minded marketers
- Monthly online community meetups
- Relevant news and trends updates
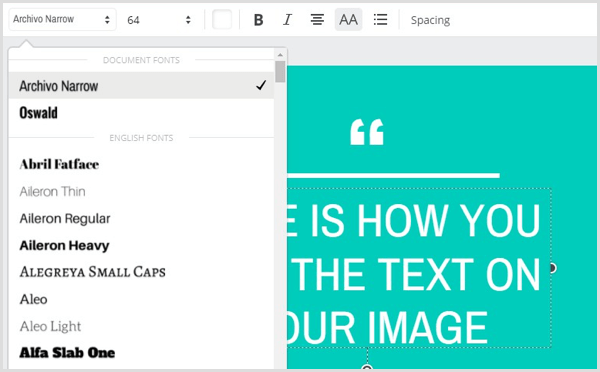
If you want to change the font, click the Font drop-down menu on the design toolbar and select a new font. You can also adjust the point size of the font.
To change the background color of your image, click on the background to select it. Then click the Pick a Color button and choose your desired color from the palette.
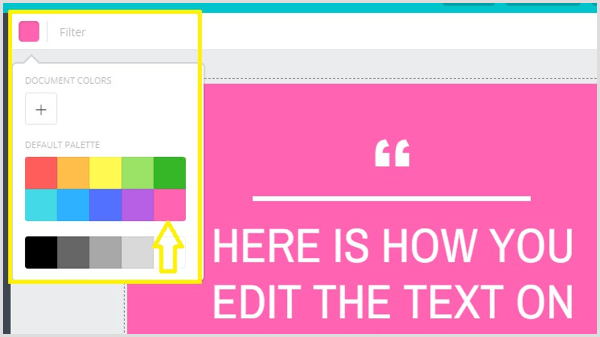
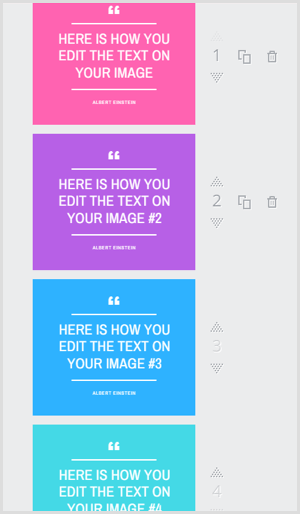
Next, add three additional images to your design to introduce visual interest to your animated GIF. To add new pages, click the Copy This Page icon to the right of your image (as shown below). Canva then adds a new page to your design.
![]()
For each new image, add different text to make your animated GIF fun and interesting.
Tip: You can repurpose content from a blog post to create your images. Add the post's title to the first image of your animated GIF and then incorporate three key points in your other images.
When you're finished designing your images, click the Download button at the top of the screen and make sure All Pages is selected.
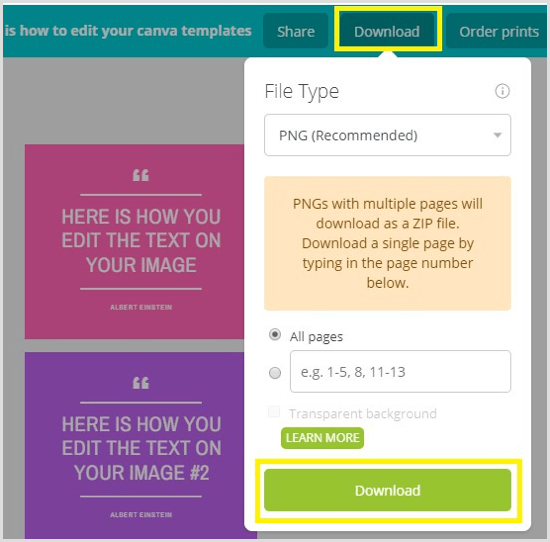
Then click Download at the bottom of the pop-up box to download the images to your computer as a ZIP file. Make sure you unzip the images and save them to a folder on your desktop.
Convert Your Images to a GIF With GIFMaker.me
To create an animated GIF from the images you just created, upload the images to GIFMaker.me. Hold down the Ctrl (Windows) or Command (Mac) key to select multiple images to upload.
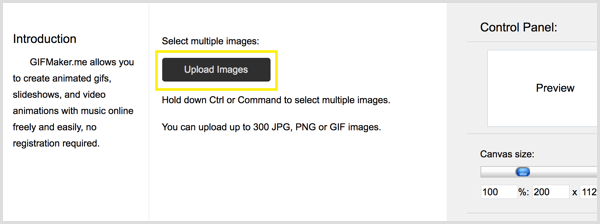
After you upload your images, you can sort the images by dragging them into the desired order.
On the right side of the screen, drag the Canvas Size slider to increase or reduce the size of your GIF. Below that, drag the Animation Speed slider to the left or the right to modify the speed of the GIF animation.
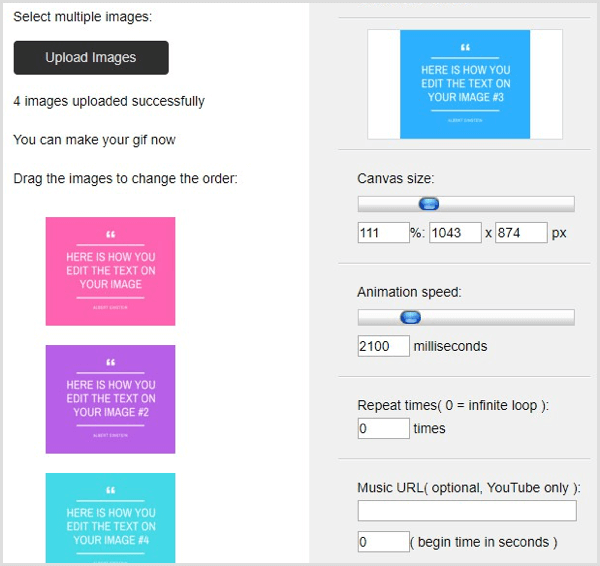
In the next two sections, Repeat Times and Music URL, you can change the number of times you want the GIF to repeat and add a link to music you want to use from YouTube. When you're finished, click Create Now.
Now click View the GIF Animation to check out what you just created. You can then publish your animated GIF to your desired social media channel.
#2: Create Photo Stories Using Flipagram
Flipagram (free for iOS and Android) is an animation tool that lets you convert a series of photos or graphics into short video stories and add your favorite background music.
Create Your Images
The first step is to create the images you want to use in your GIF. If you're using Canva, select the 800 x 800 Social Graphic template.

Then choose a layout and customize it to create four images. When you're finished, download your images as PNG files and save them in a folder on your desktop.
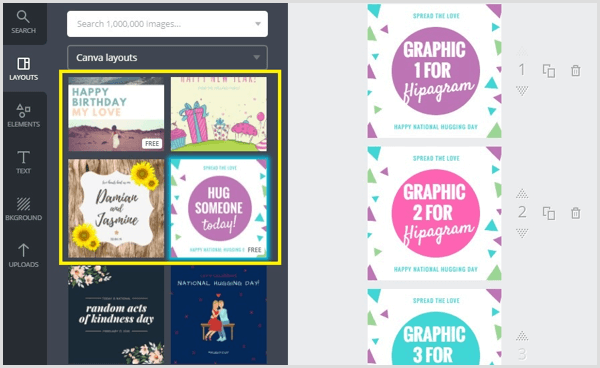
Finally, save the images to your mobile photo library so you can use them in your flipagram. An easy way to do this is to simply email them to yourself.
Create a Flipagram From Your Images
Now you're ready to create your flipagram. Open the Flipagram app on your mobile device and tap the + sign at the bottom of the screen.

Next, navigate to your photo library and tap to select the four images to use in your GIF. When you're done, tap Next.
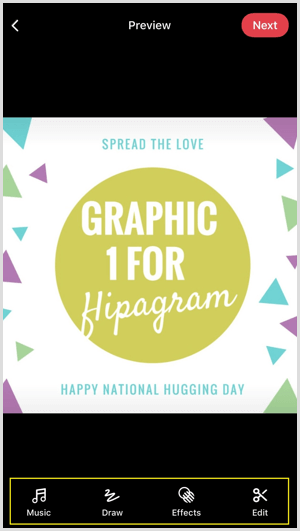
You can now customize your flipagram with music, effects, and more to bring it to life. Simply tap one of the options at the bottom of the screen to access these tools.

Discover Proven Marketing Strategies and Tips
Want to go even deeper with your marketing? Check out the Social Media Marketing Podcast! Publishing weekly since 2012, the Social Media Marketing Podcast helps you navigate the constantly changing marketing jungle, with expert interviews from marketing pros.
But don’t let the name fool you. This show is about a lot more than just social media marketing. With over 600 episodes and millions of downloads each year, this show has been a trusted source for marketers for well over a decade.
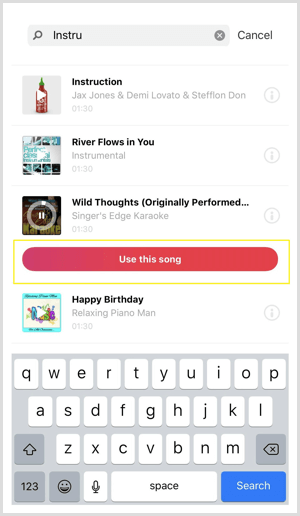
In the Flipagram music library, you'll find more than 65 million 30-second song clips you can use to bring your photo story to life. By default, Flipagram displays a list of popular songs. Use the search box at the top to find a specific song.
When you find a music clip you like, tap Use This Song to apply it to your flipagram. If your video exceeds 30 seconds, you'll have to buy the song from iTunes.
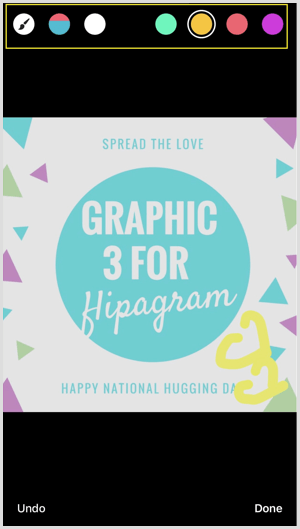
The draw tools allow you to add drawings to your photo story in different colors. To view and access more color choices, scroll to the right. When you're finished adding a drawing to your photo story, tap Done to move to the next section.
In the Effects section, you can apply three different types of effects to your photo story: Vibes, Filters, and Speed.
The Vibes effect has six settings (Boombox, Electro, Rave, Strobe, Heartbeat, Twerk) that will move to the beat of any song that you use.
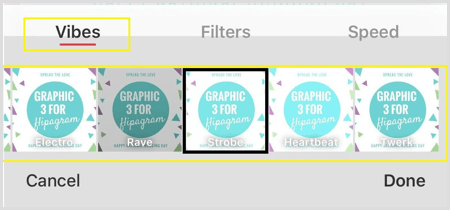
Scroll through the list of Vibes effects to see which one looks best. After you select an effect, click Done to apply it. If you don't want to use this feature, just skip it to move to the next screen.
The Filters feature lets you choose from 11 filters to enrich the colors of your images. Like the Vibes effect, scroll through the list of filters to see what they look like and then apply the one that you like to your photo story. Click Done to confirm your choice or skip this section if you don't want to use a filter.
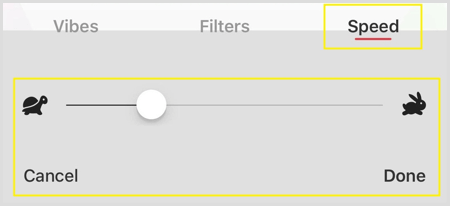
To change the speed of your photo story, tap Speed in the effects section. Drag the slider left or right to slow down or speed up your flipagram.
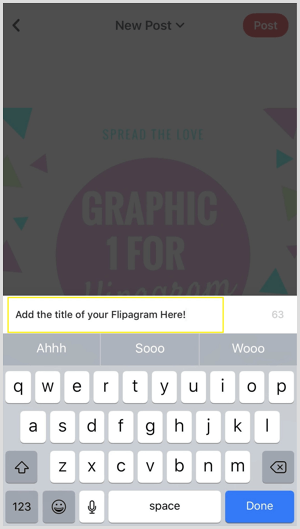
When you've finished adding effects to your flipagram, scroll to the next screen to add a compelling title. When you're happy with your flipagram's design, title, music, and effects, tap Next.
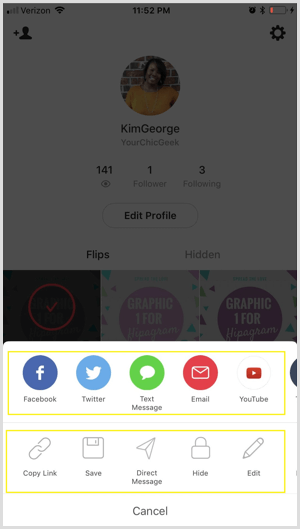
Finally, tap Post and select the social media networks to which you want to post your flipagram. You can also copy the link to your flipagram, save it, or send it as a direct message.
#3: Build Time Lapse (Fast Motion) Video Clips With Filmora
Time-lapse videos have become popular on social media. These videos add dramatic elements to video clips and allow you to turn long videos into shorter ones in just a few seconds.
Creating time-lapse videos is easy to do with a video editing tool like Filmora. It offers an assortment of professional-level features and is available for both Windows and Mac. The great thing about Filmora is that you can import videos created with a mobile device or camera, edit them, and then publish them in different formats (Audio, MP4, MOV).
Filmora is available as a 1-month free trial. After the trial expires, you'll need to upgrade to one of the paid plans, which start at $44.99 per year.
Create a Video Clip
First, you need to create the video you want to convert to a time lapse. Let your creative juices flow and have fun. For example, create a short promo video for a product launch, film a product demo video, or showcase testimonials from happy customers.
Import the Video Clip to Your Timeline
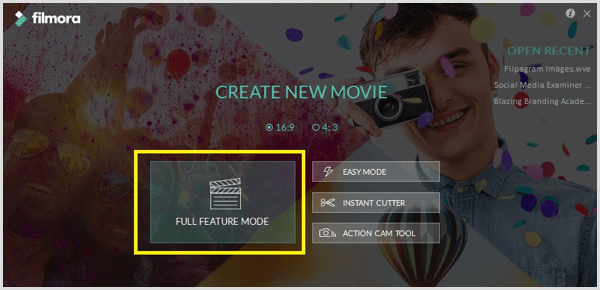
Next, open Filmora on your computer. On the first screen that opens, make sure the 16:9 option is selected and then click Full Feature Mode.
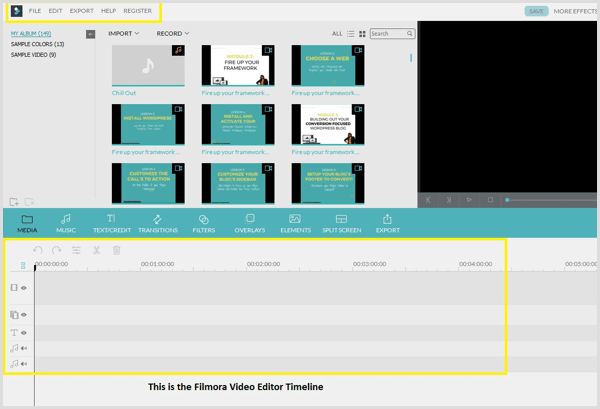
You then see the Filmora video editor, which has several menus at the top of the screen and a timeline at the bottom.
To import your video clip to your Filmora media library, choose File > Import Media > Import Media Files. Then navigate to the video clip on your computer and click Open to add it to your media library.
Now hover over the video clip you just added to your media library and click the red + sign to add the clip to your timeline.
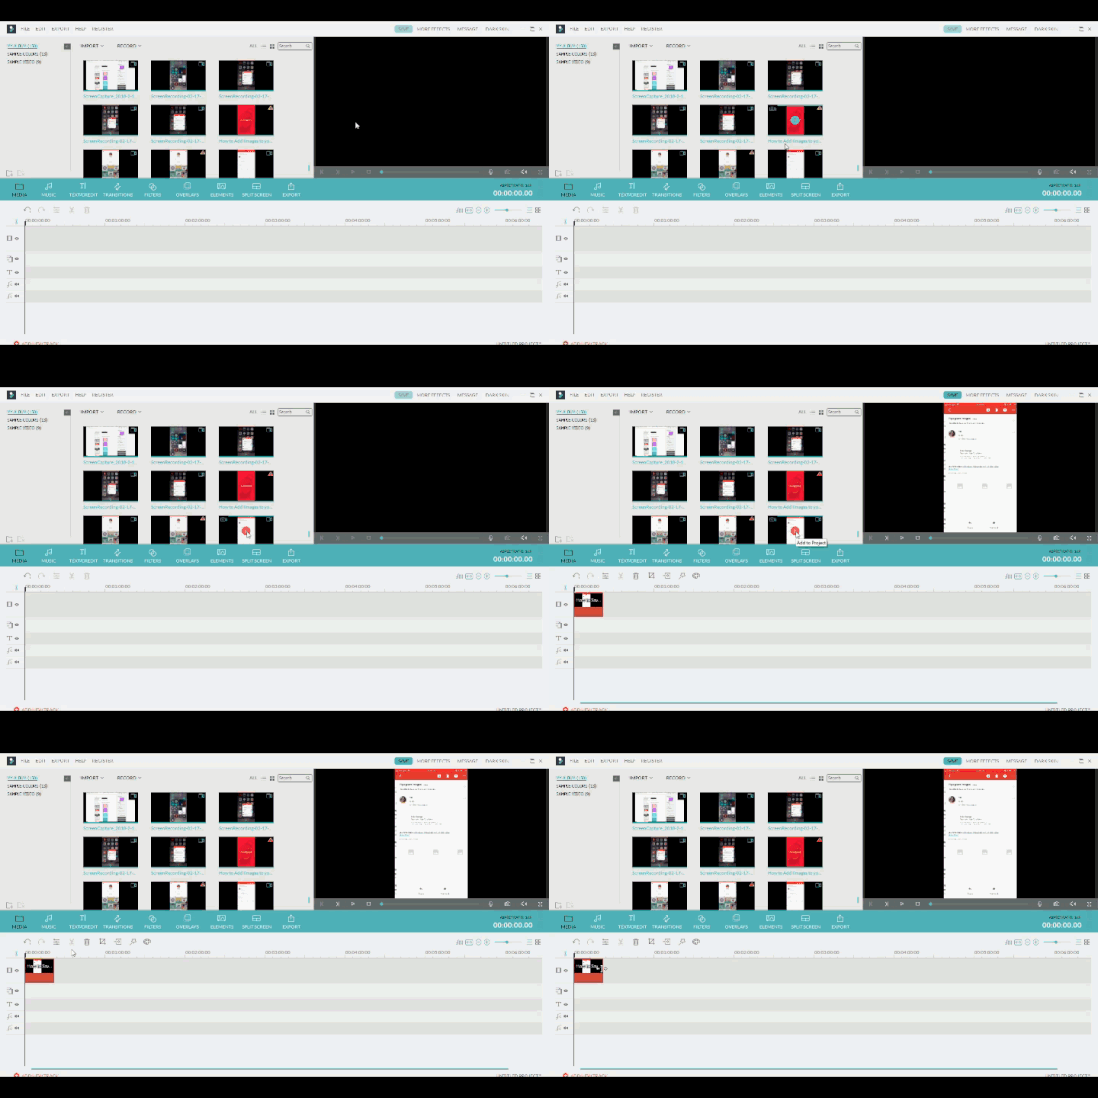
Double-click the video in your timeline to open the video editing panel. Here, you can speed up your video clip by dragging the Speed slider to the right. The available speeds are 2 times, 3 times, 5 times, 10 times, and so on. Click OK to save your changes.
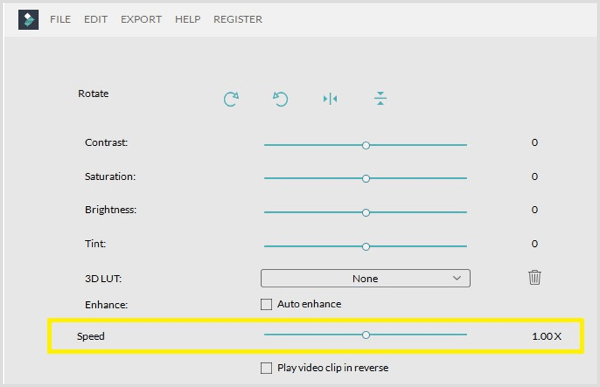
After you adjust the speed, click the Play button to preview your video clip on the right side of the screen. If you want to make further changes to the speed, double-click the video in the timeline again and adjust the speed.

When you're happy with your video, click the Export button.
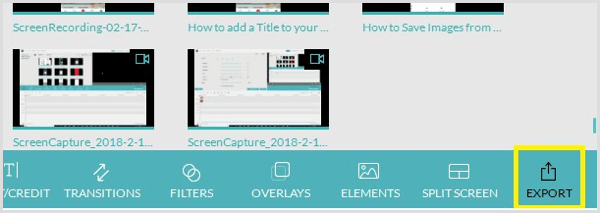
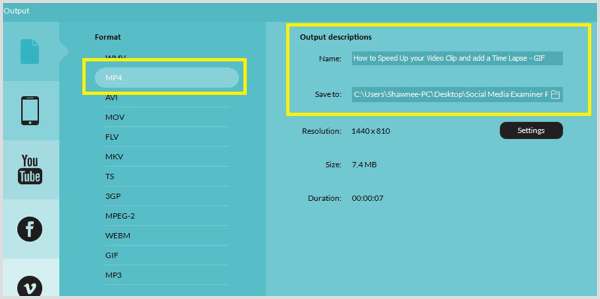
In the window that pops up, you see a list of export options. Make sure you export your video as an MP4 file, which is a universal file format that anyone can view on any type of device.
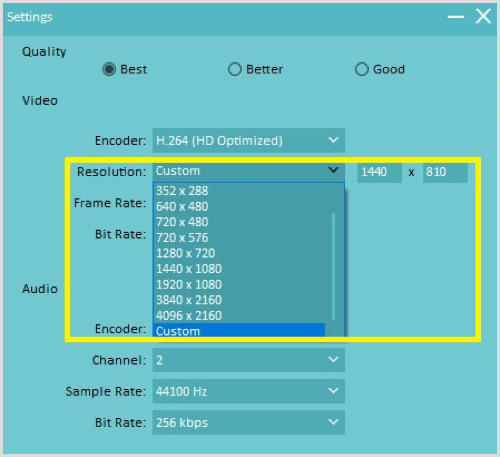
Tip: Click the Settings button to optimize the video quality and screen resolution. Pay close attention to these settings, especially the screen resolution, to ensure you don't have any excess space around your video clip when you export it. For instance, if your screen resolution is 1080 x 720, select this option from the Resolution output settings. Click OK to save your changes.
Finally, add a title to your video clip and navigate to where you want to save it on your computer. Then click Export at the bottom right of the screen to export it. A new box appears that shows the progress as your video clip is created.
After you've exported your video clip as an MP4 file, open it to view the clip to make sure it's good to go.
Conclusion
As visuals continue to play an essential role in social media marketing, you'll want to consider adding different types of visual content to your marketing mix. The tools above will help you convert images into beautiful GIFs and animated graphics you can post on social media to stand out and get noticed.
What do you think? Have you used any of these tools to create animated visuals to share on social media? What visual tools would you add to this list? Please share your thoughts in the comments below!
Attention Agency Owners, Brand Marketers, and Consultants

Introducing the Marketing Agency Show–our newest podcast designed to explore the struggles of agency marketers.
Join show host and agency owner, Brooke Sellas, as she interviews agency marketers and digs deep into their biggest challenges. Explore topics like navigating rough economic times, leveraging AI, service diversification, client acquisition, and much more.
Just pull up your favorite podcast app, search for Marketing Agency Show and start listening. Or click the button below for more information.
