Do you wish you had a blue checkmark next to your Facebook and Instagram accounts? Wondering about the benefits and drawbacks?
In this article, you’ll get a step-by-step guide to signing up for Meta Verified status.
What Is Meta Verified?
In a video post shared to Instagram, Instagram’s CEO Adam Mosseri stated the two comments he receives the most are:
- Requests for account verification
- Requests for customer support
It’s true that Meta is plagued by fake accounts and bots impersonating real accounts and the advent of AI is likely to exacerbate these issues in the near future. And the lack of customer service across Instagram and Facebook is almost legendary.
Meta Verified is positioned as a way to provide its Instagram and Facebook users with three key benefits:
- Account verification: After undergoing a verification process via submission of a government-issued ID to confirm your identity, you’ll receive a verified badge on Facebook and Instagram.
- Proactive account protection: Proactive account monitoring and mandatory two-factor authentication (2FA) to secure your account will help protect you from impersonation.
- Direct account support: Assistance is always available when you need it for common account-related issues, thanks to direct account support from a real person.
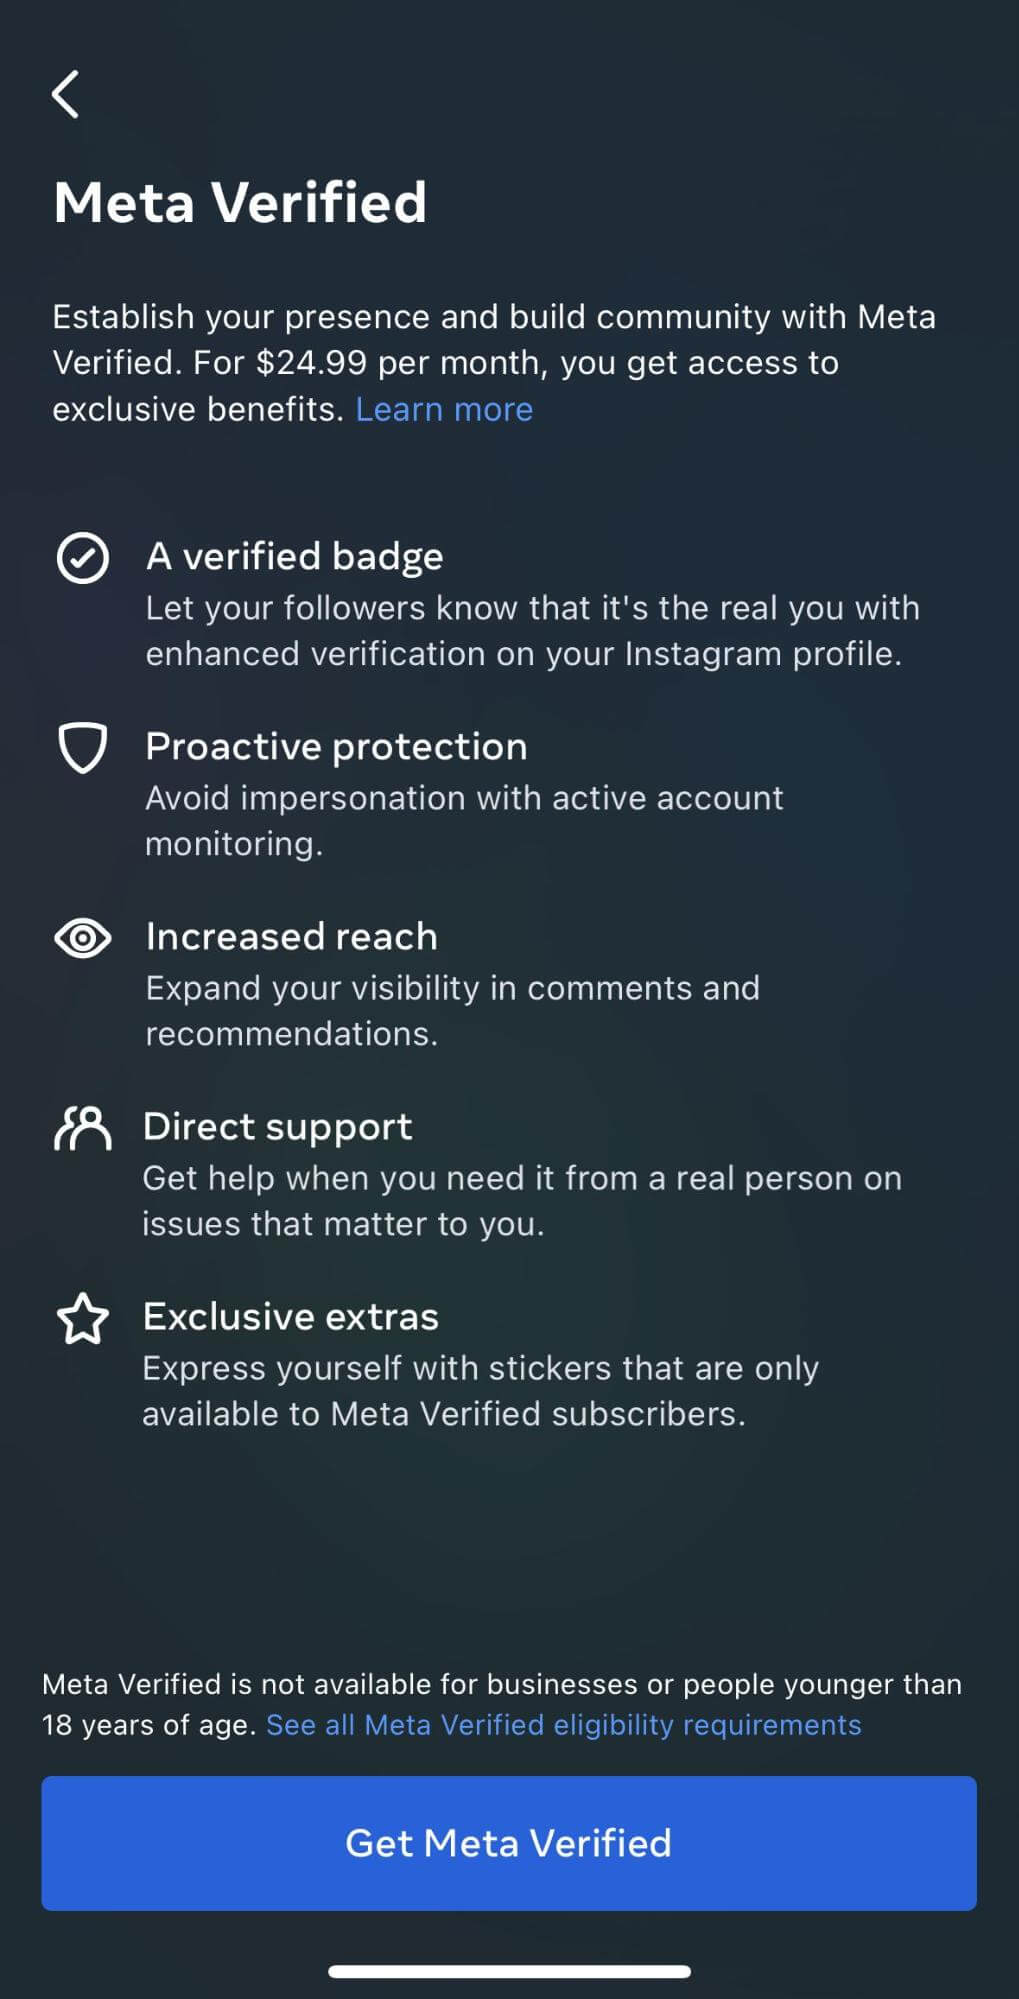
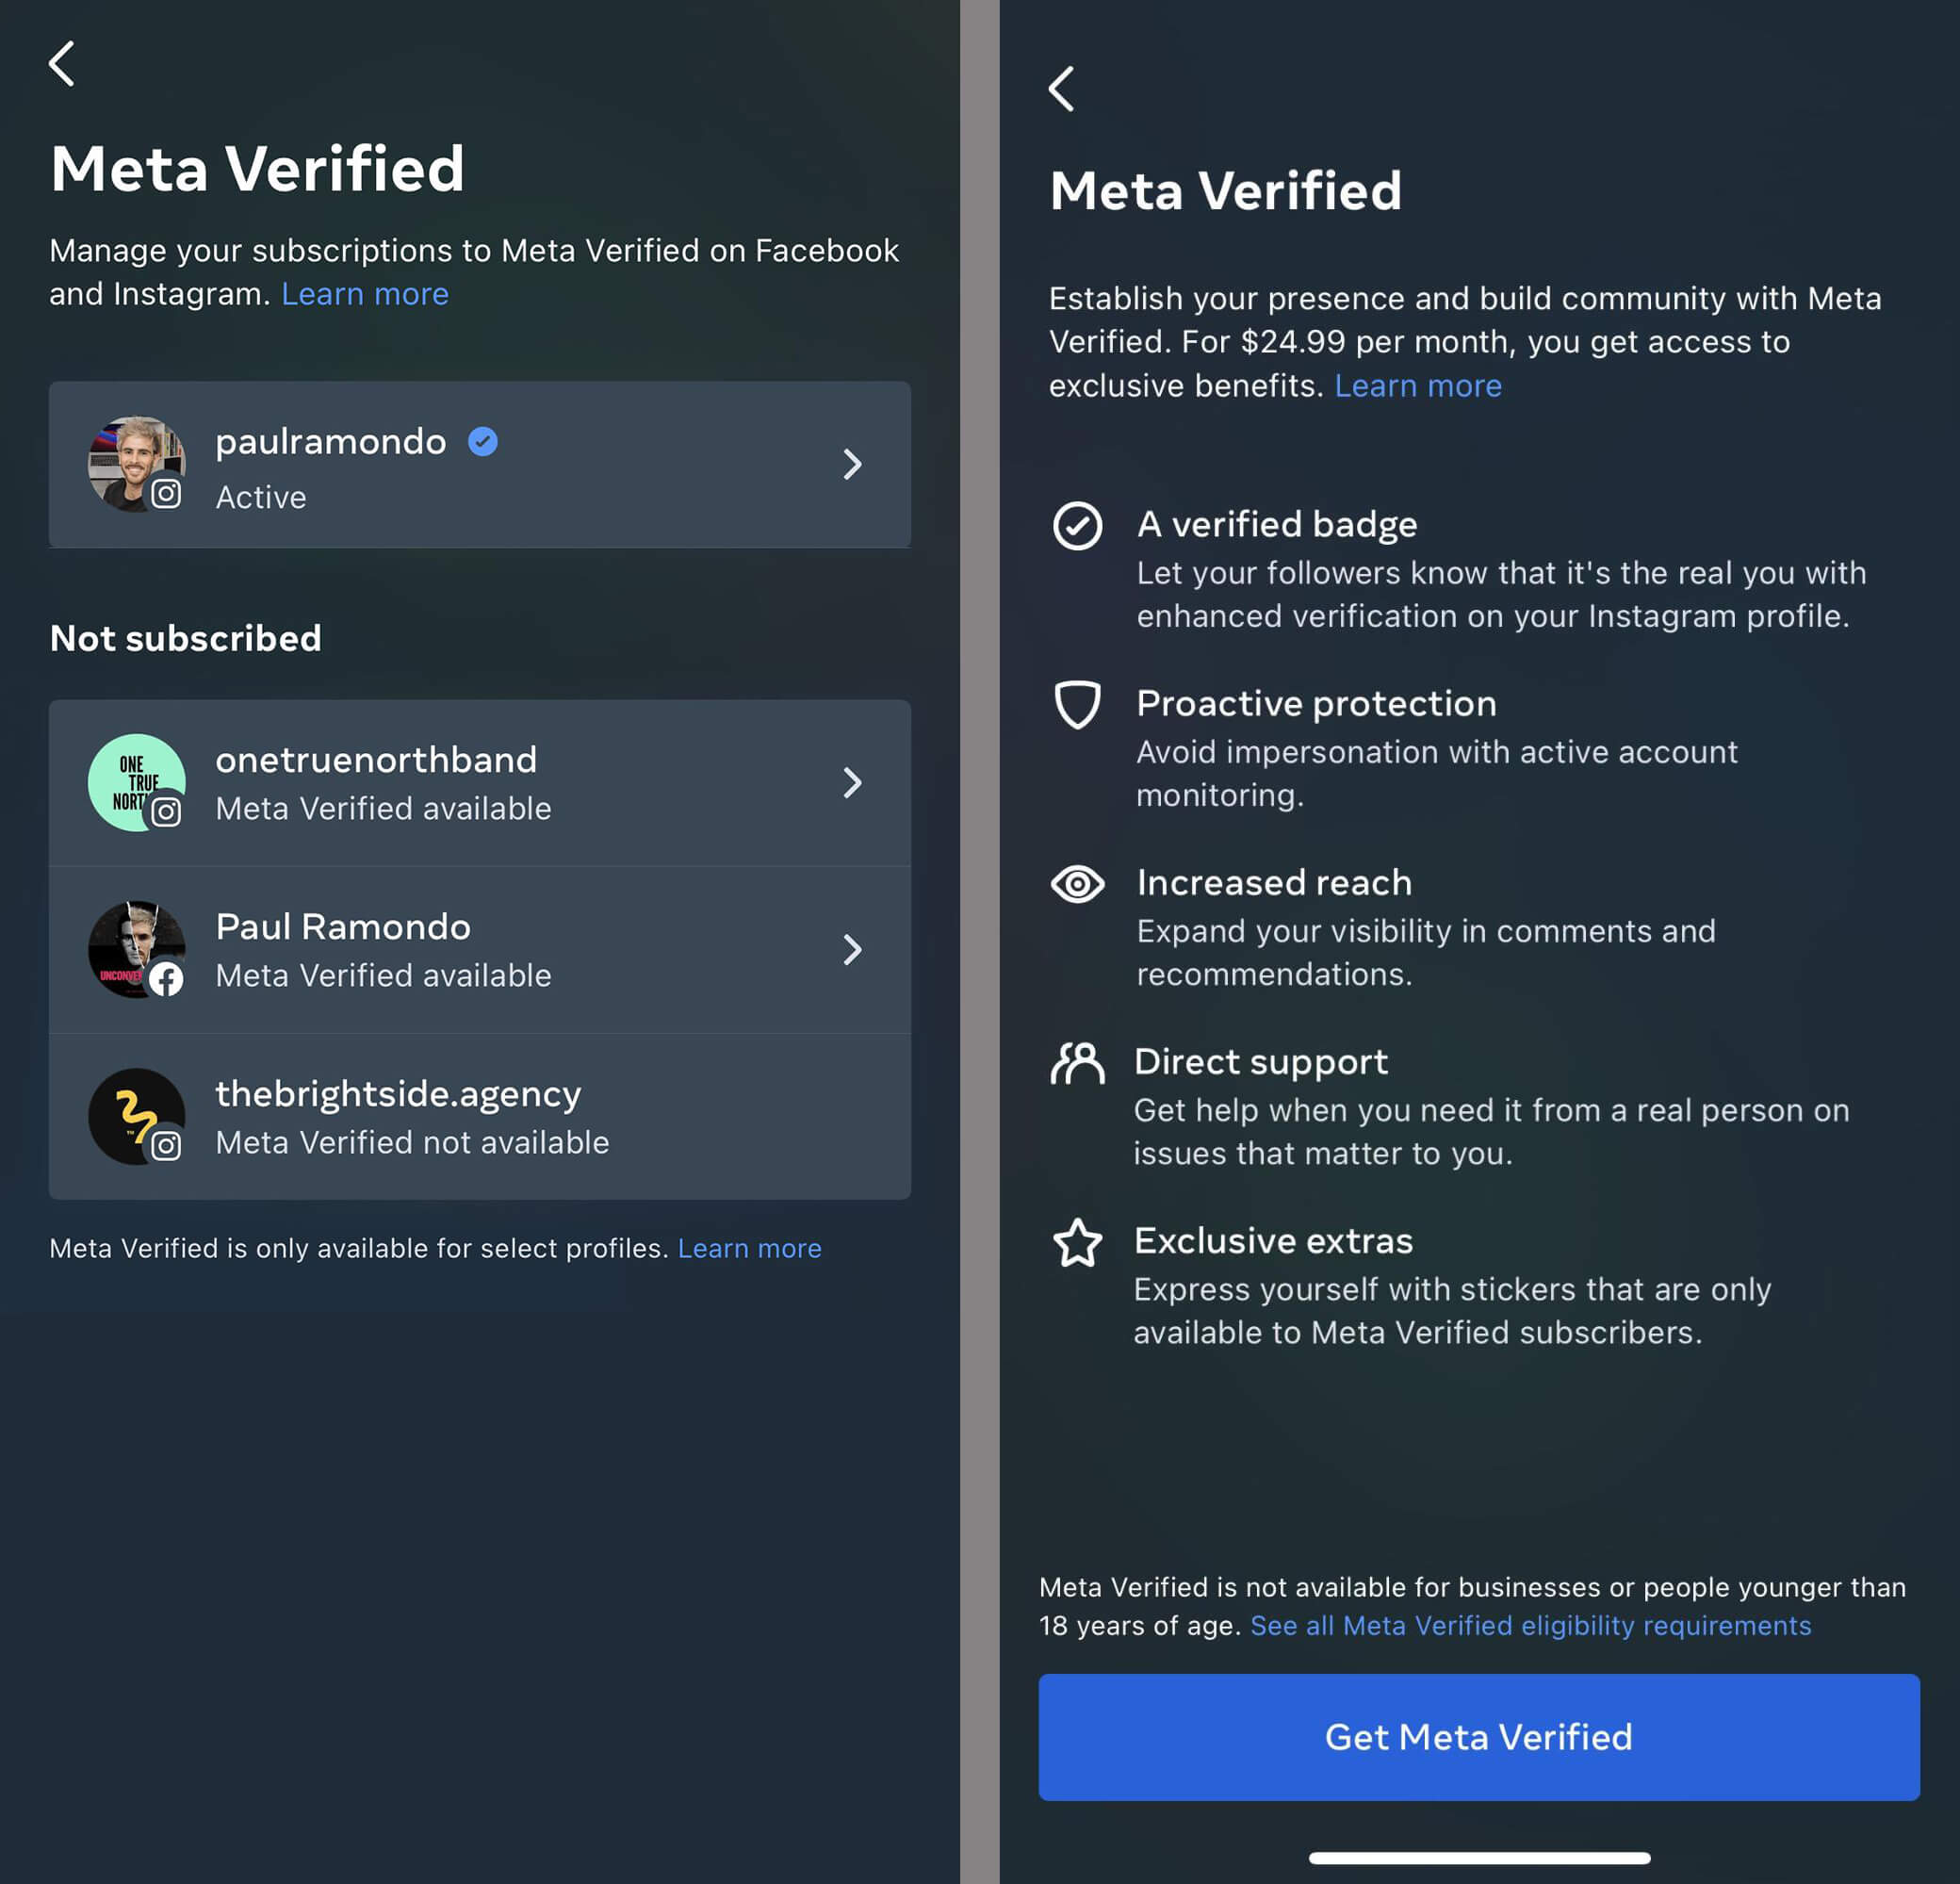
Additionally, Meta Verified subscribers gain access to exclusive features such as unique stickers on Facebook and Instagram Stories and Facebook Reels, as well as 100 Stars monthly to express support for creators.
Increased visibility and prominence on some parts of Facebook and Instagram such as comments, search, and recommendations are also touted; however, at the time of writing, I haven’t seen any functionality confirming my profile has received increased visibility as a result of subscribing to Meta Verified.
How Much Does Meta Verified Cost?
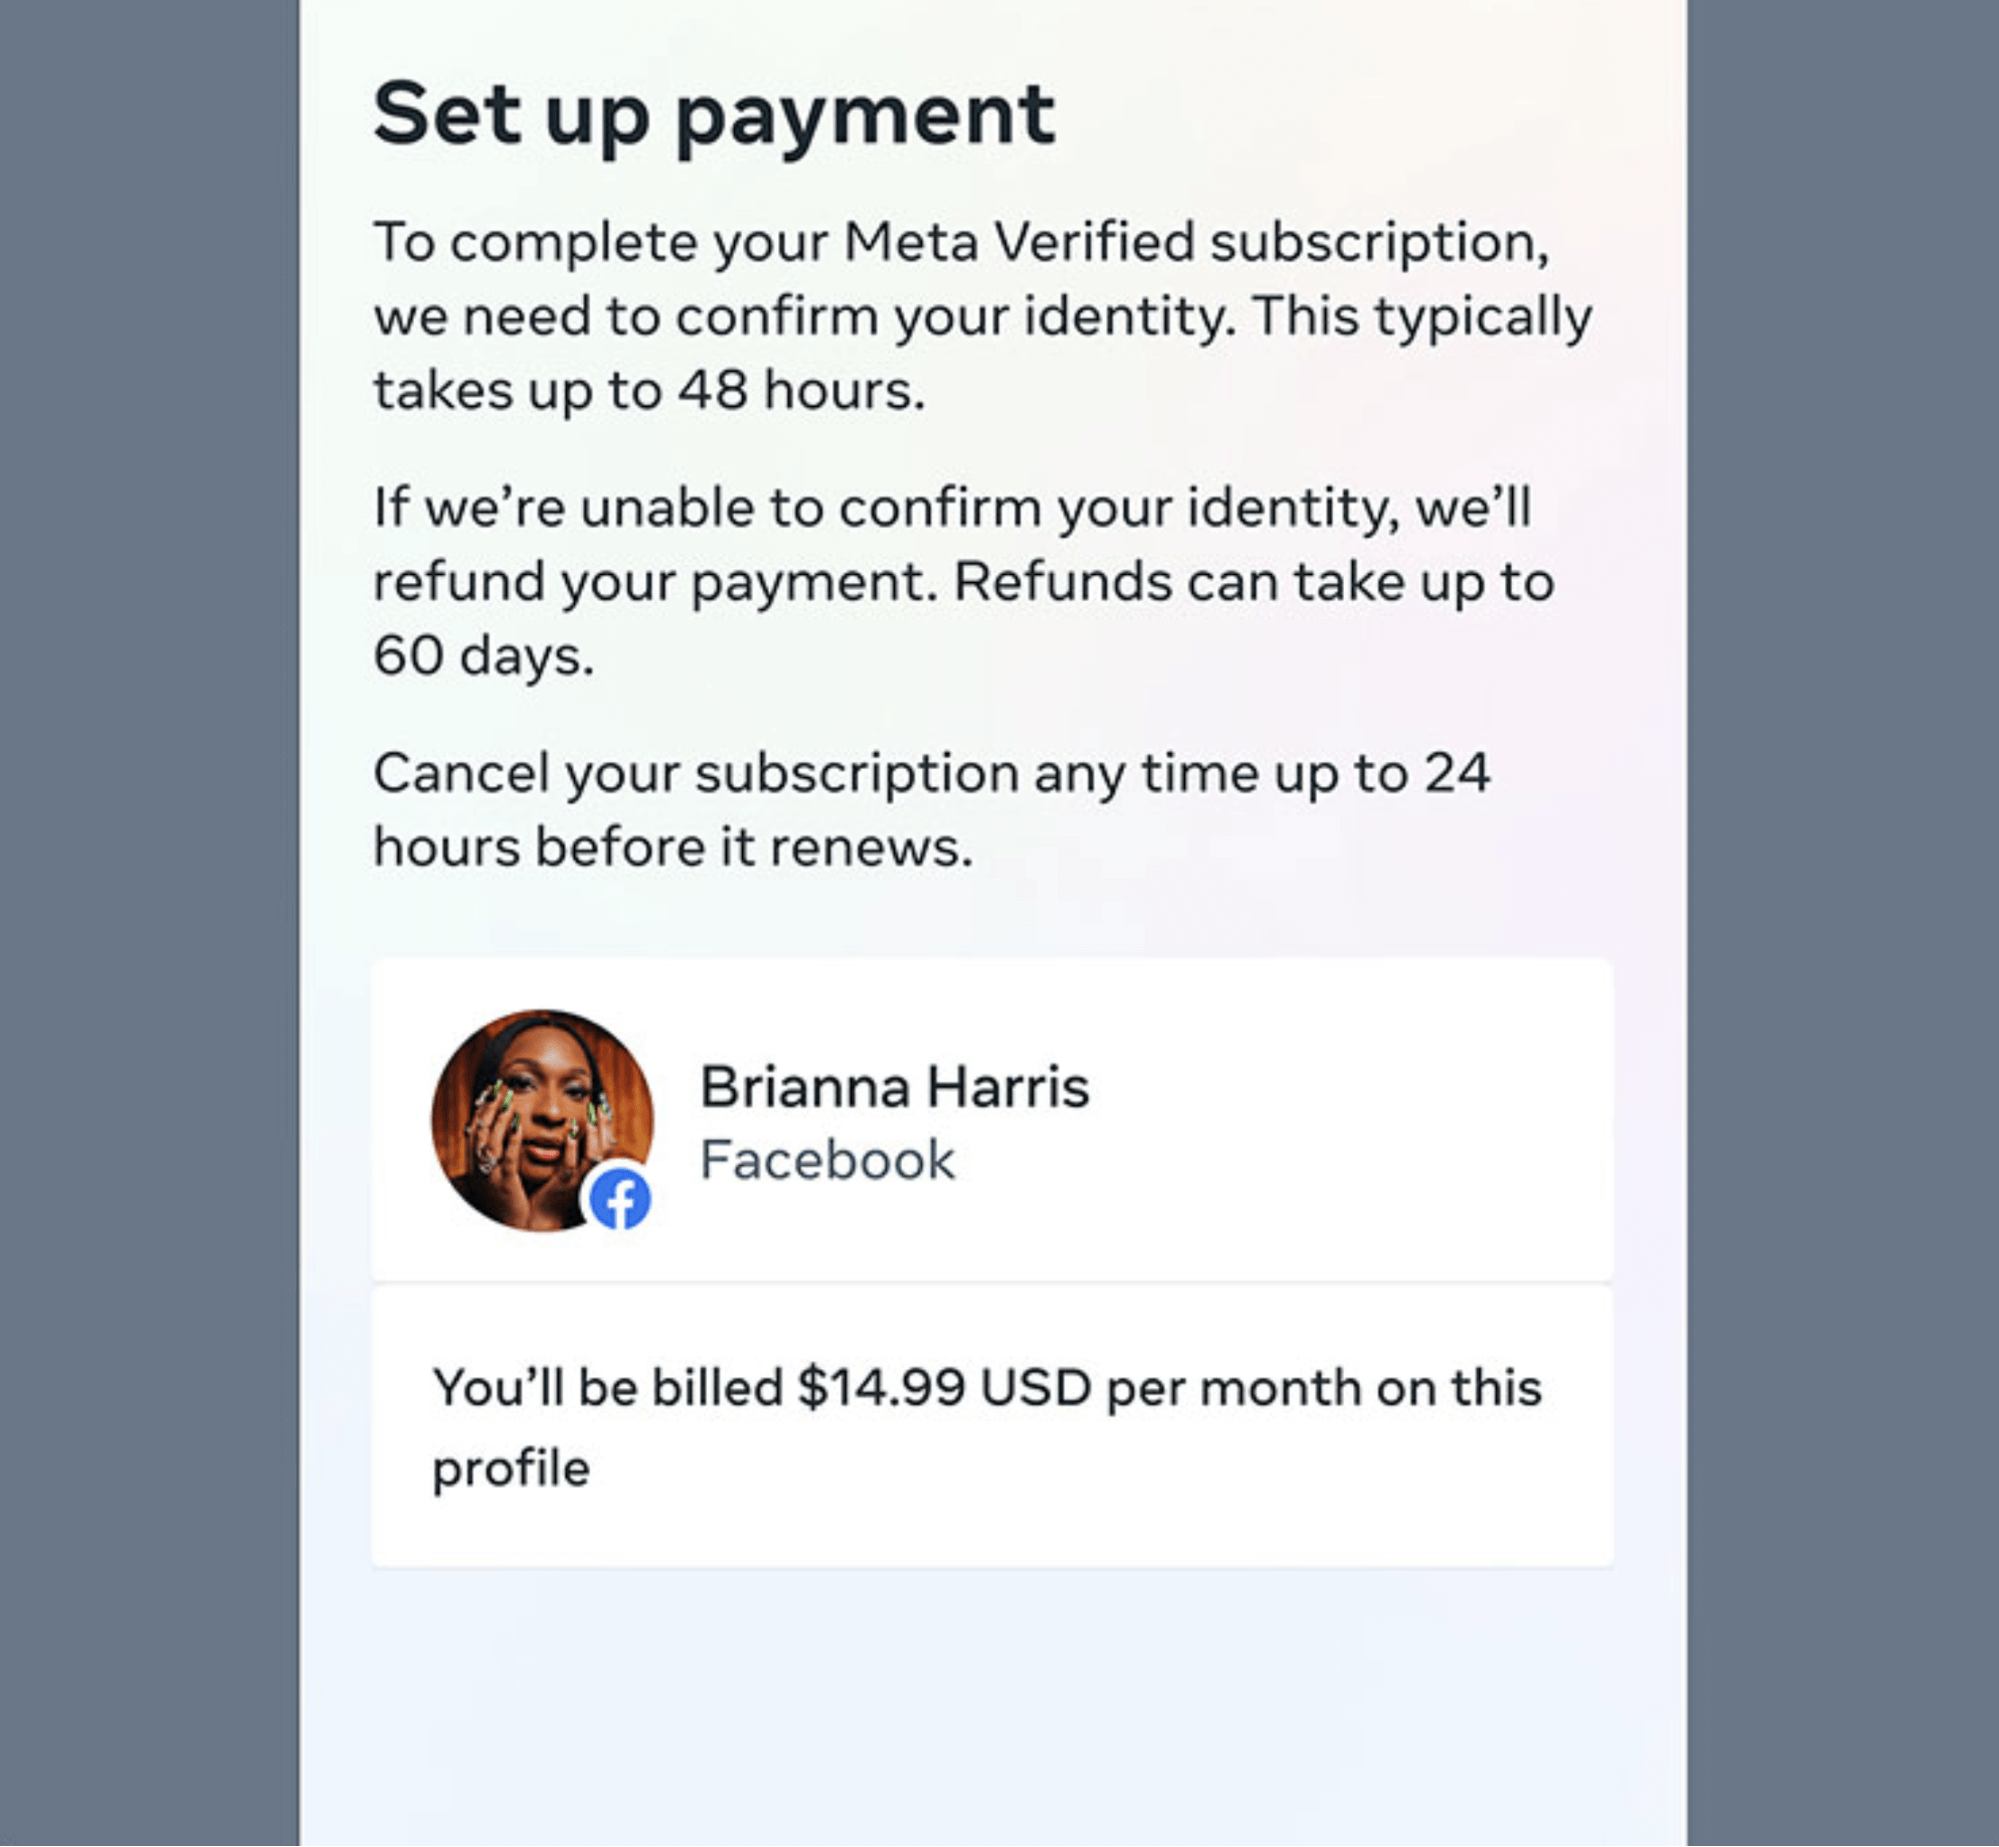
Meta Verified will cost USD 14.99 per month if you sign up on iOS/Android, and USD 11.99 per month if you sign up via the web. The cost is slightly higher in Australia and New Zealand—AUD 19.99 on web, AUD 24.99 on iOS/Android; NZD 23.99 on web, NZD 29.99 on iOS/Android.
A test of Meta Verified is currently running in Australia and New Zealand. Assuming Meta is happy with the results of this test, the feature will go out globally.
How to Apply for Meta Verified
Meta Verified currently has a waitlist for those who are interested in this new feature but do not live in Australia or New Zealand. Click here to join the waitlist.
If you’re a resident of Australia or New Zealand, you can skip the waitlist and move forward with the following steps immediately. This article walks you through the steps of applying for Meta Verified on an Instagram account via a mobile device.
#1: Confirm Your Eligibility to Apply for Meta Verified
To be eligible to apply for Meta Verified, your Facebook and/or Instagram profile(s) must:
- Include your full name
- Clearly show your face in the profile picture(s)
- Meet certain minimum activity requirements with a history of posting, and so on
- Have 2FA set up
As an individual, you must:
- Be 18 years of age or older
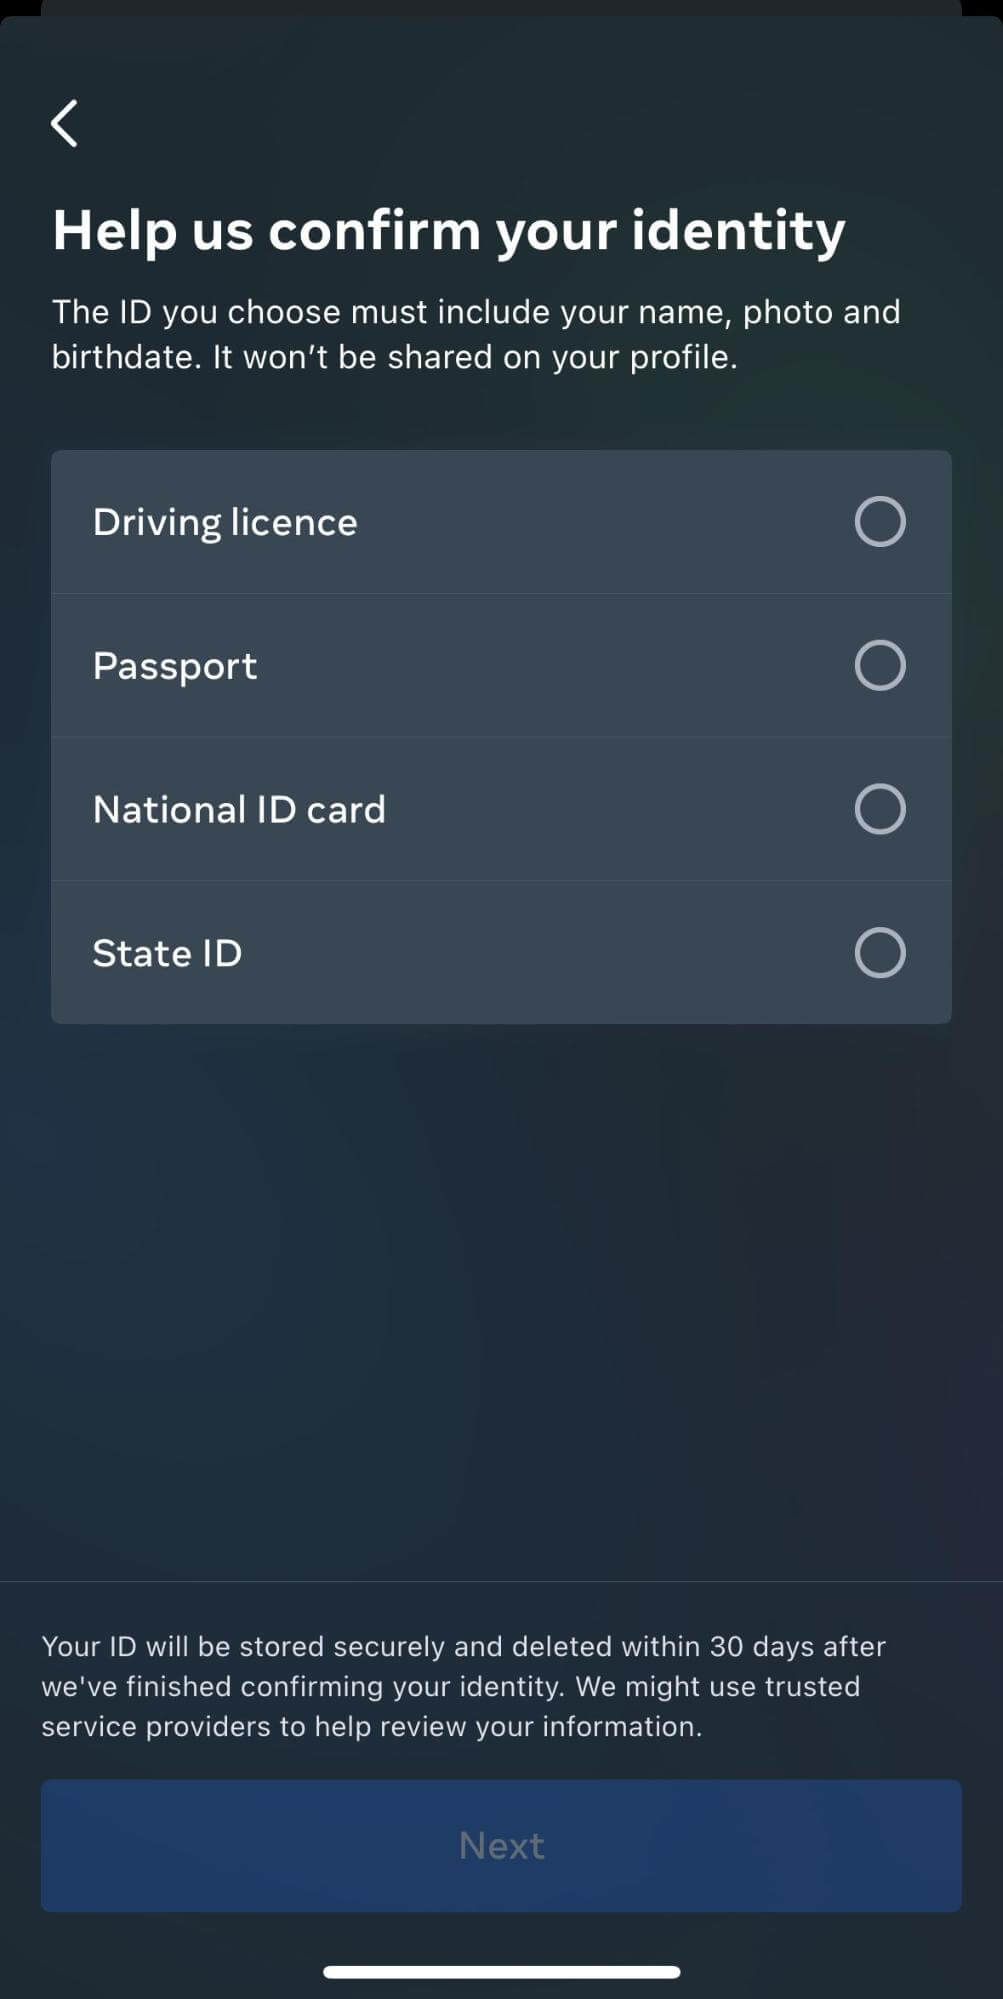
- Possess and upload an official government-issued ID that matches the name and photo on your Facebook and/or Instagram profiles: a passport, a state-issued ID, or a driver’s license.
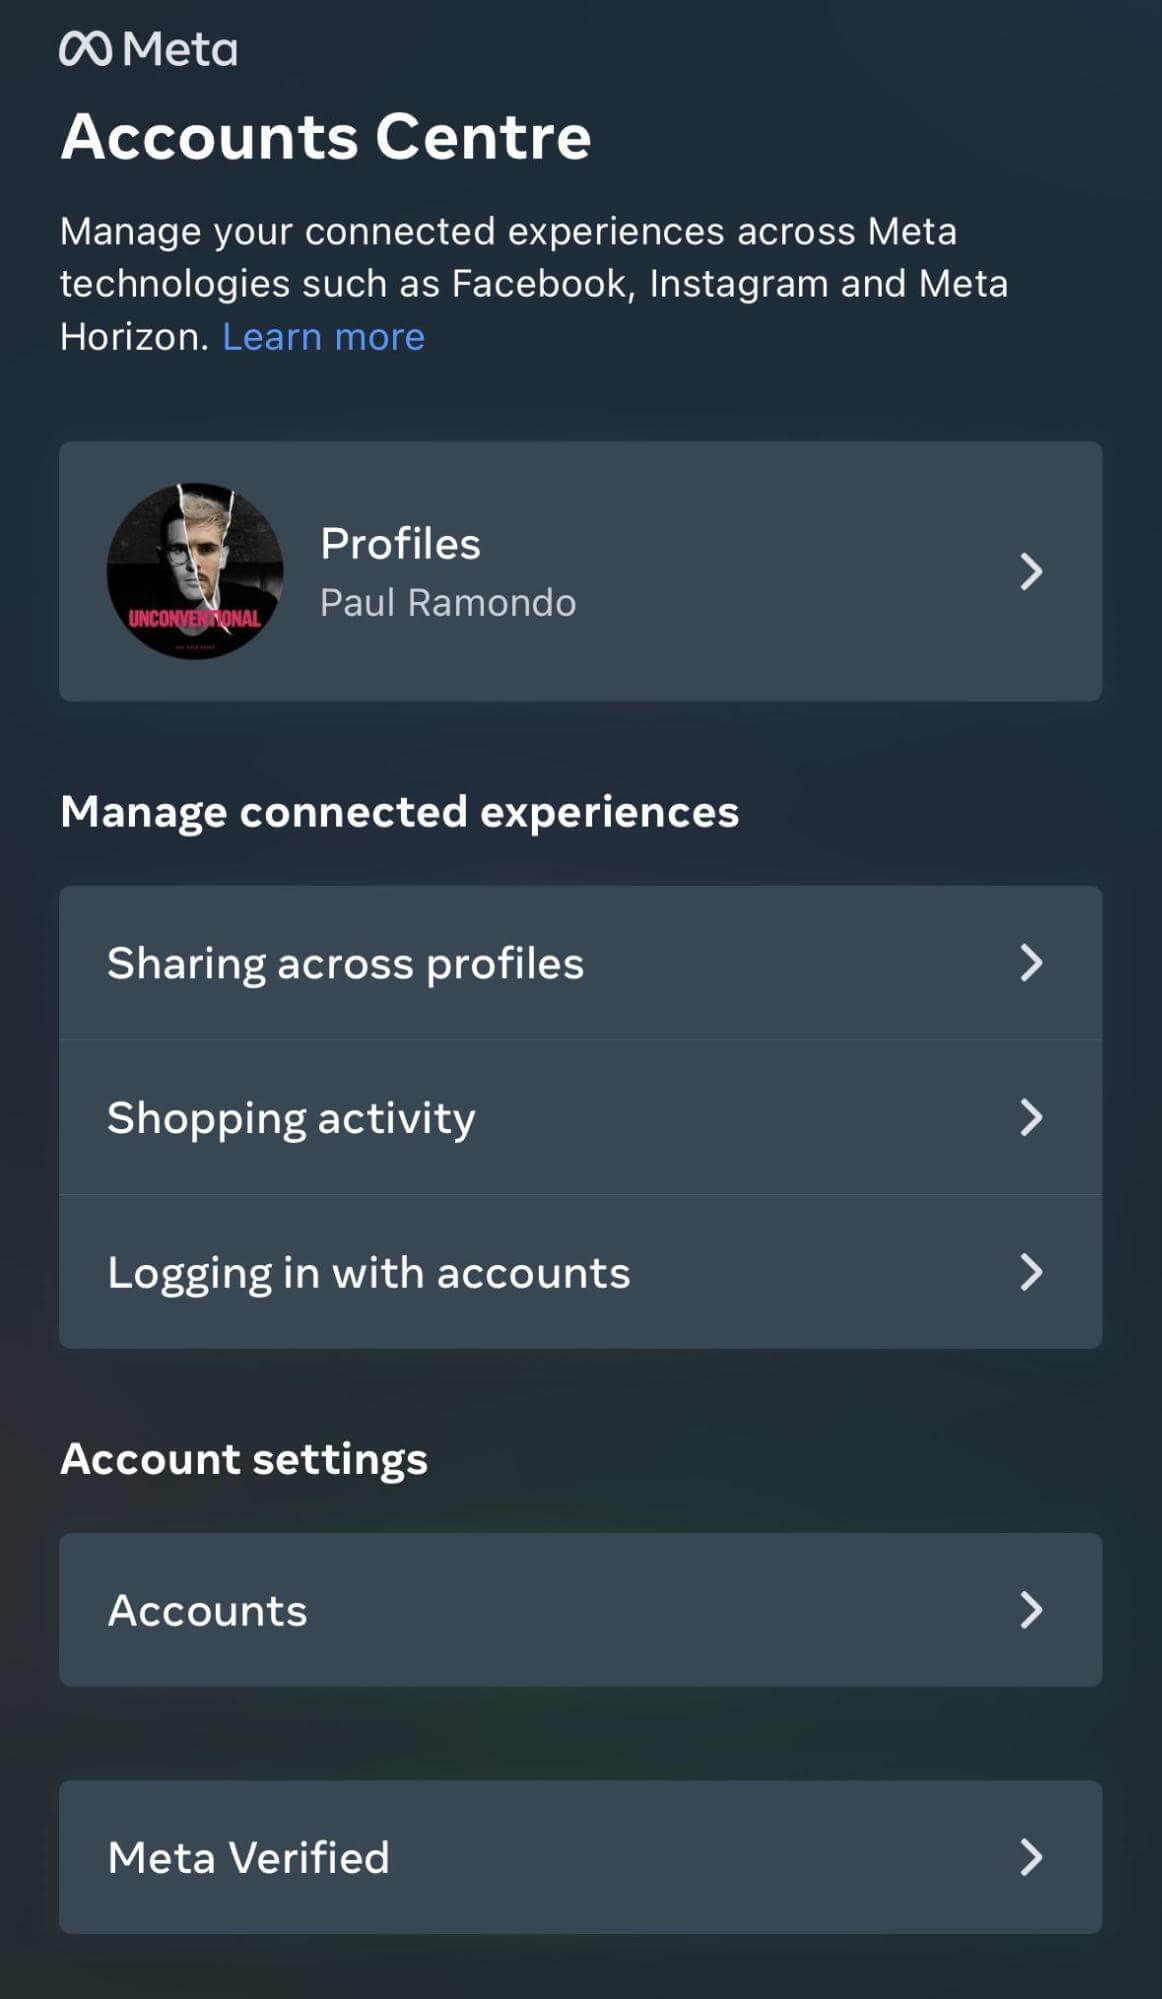
#2: Connect Your Facebook and Instagram Accounts in Meta Accounts Center
If you haven’t yet connected your Facebook and Instagram accounts to the Meta Accounts Center, do so now. Open your Account Center on desktop, click Add Accounts, and follow the prompts.
Which AI Moves Actually Matter?
That's what every marketer is wrestling with now. New AI strategies, new tools, new takes every week — but no clarity. Most marketers and business owners are trying to figure out AI alone.The AI Business Society is your trusted guide. Get expert-led training you can put to work immediately. Plus a community of marketers sharing what's actually working.
I'M READY FOR REAL AI RESULTS
#3: Request Meta Verification
On your mobile device, open the settings on your Instagram profile, and then tap on Meta Verified.
Choose the account you’d like to verify and then tap Get Meta Verified.
3 Days of World-Class Training—Zero Travel!

Couldn't make it to Social Media Marketing World and AI Business World this year? Get all of the great content at a fraction of the price with a Virtual ticket.
That’s full access to recordings of every keynote, workshop, and session—the ones people travel thousands of miles to see. Don't wait. Get your Virtual ticket and enjoy actionable content that you can watch anytime, anywhere.
Next, tap on Pay Now to initiate payment.
Once payment is complete, you’ll need to ensure the following:
- 2FA is set up and active on your account
- Your account details match that of your government-issued ID (more on this below)
- Your profile picture matches the picture on your ID
Next, use your mobile device’s camera to upload a picture of your government-issued ID. This will be used to confirm your identity.

#4: Wait for Meta Verification
Once you’ve submitted your ID, you’ll wait for up to 48 hours for a Meta employee to manually review your identification and confirm your identity.
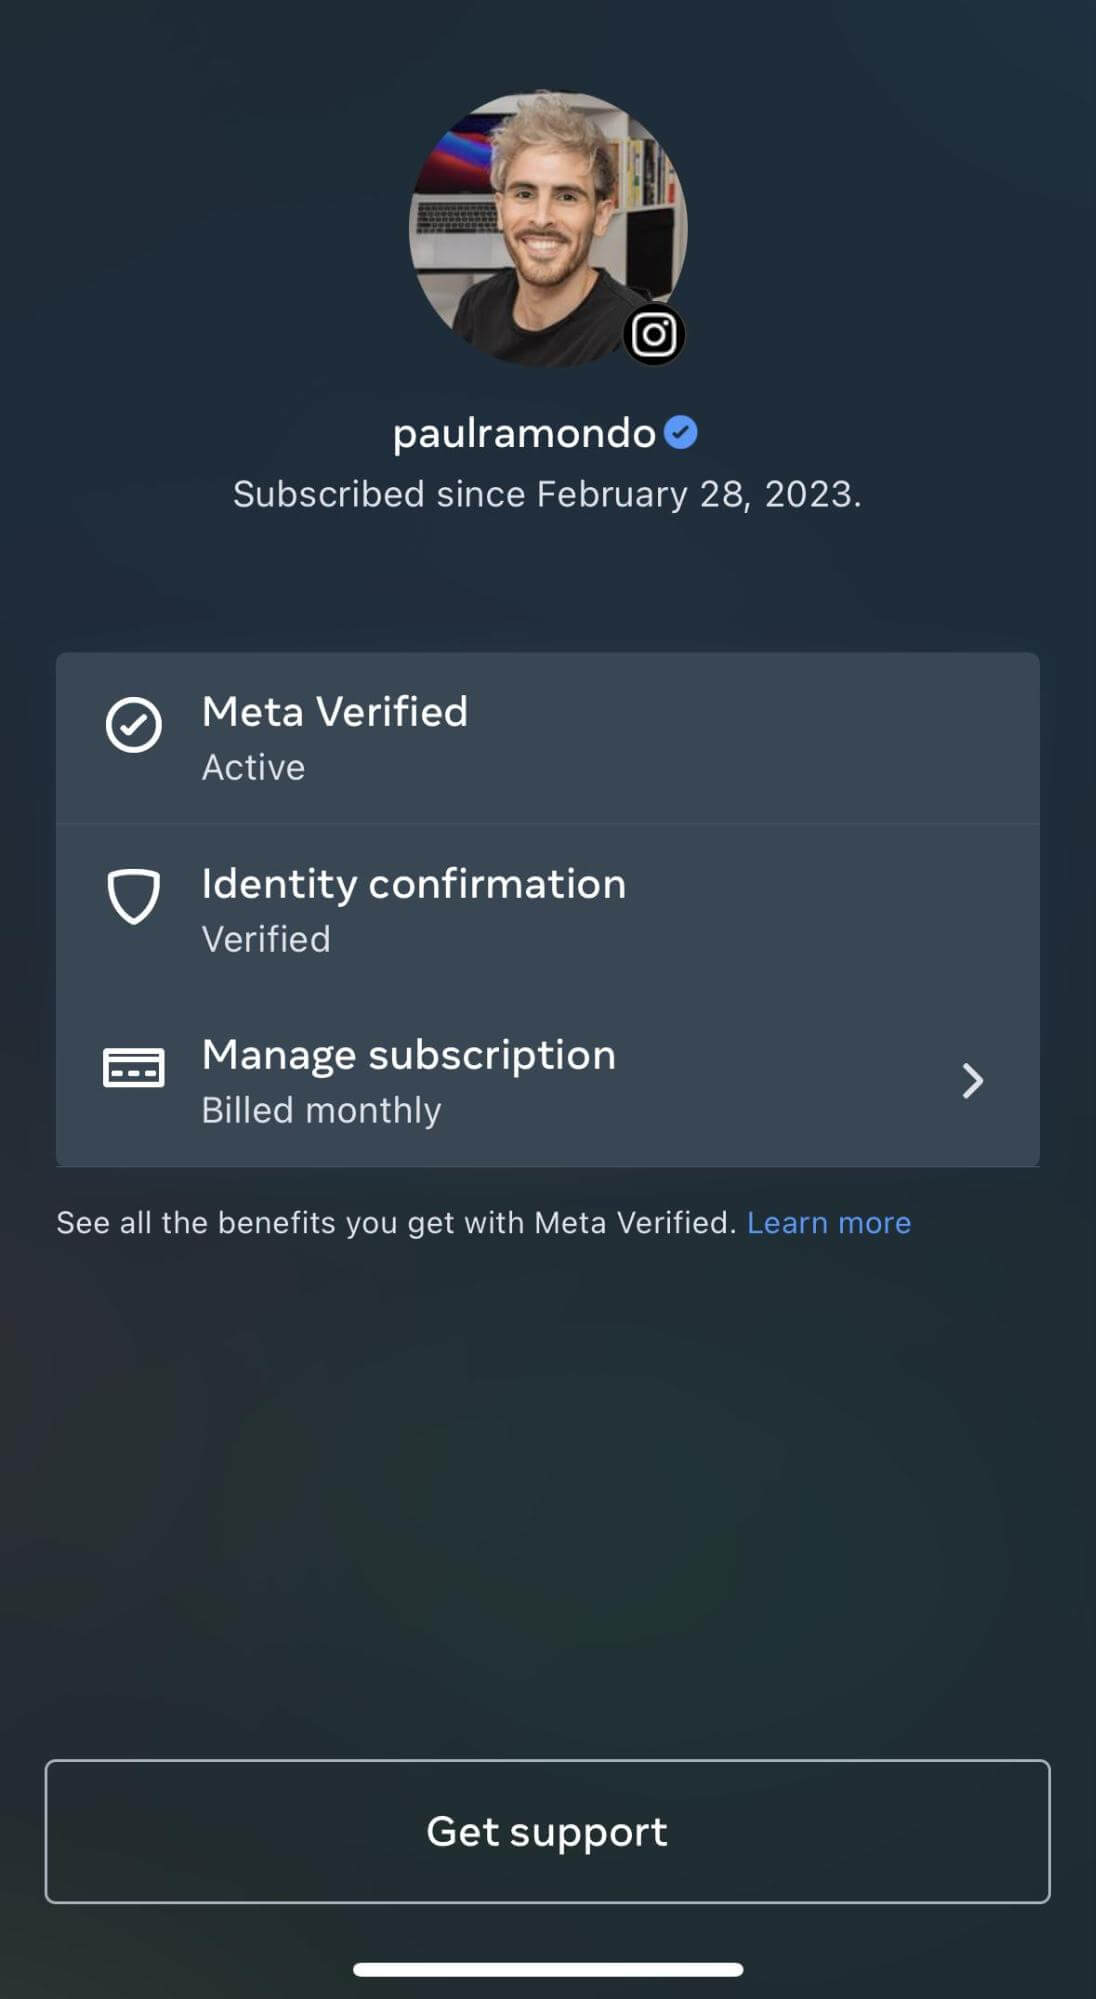
Once the manual review is complete, you’ll receive a notification on your profile confirming your successful verification. You’ll also see a blue checkmark on your profile and have access to the additional paid verification features mentioned in the first part of this article.
FAQs About Meta Verified
What Happens to Accounts That Are Already Verified?
According to Meta, there’ll be no changes made to conventionally verified accounts, stating “the blue badge will look the same as we evolve the meaning of the badge to focus on authenticity.”
However, Meta does have plans for the verification badge in the future, stating “it will display the follower count of legacy verified accounts in more places to differentiate them from Meta Verified accounts.”
For example, if two accounts have identical names, the follower count of the verified account with the legacy status will be visible during a search.
However, it’s uncertain how noticeable this will be for the average user who’s quickly scanning through screens. Additionally, users may not see a follower count while browsing through posts, which could lead to confusion between a Meta Verified account and a well-known account.
Can I Still Apply for Conventional (Unpaid) Verification?
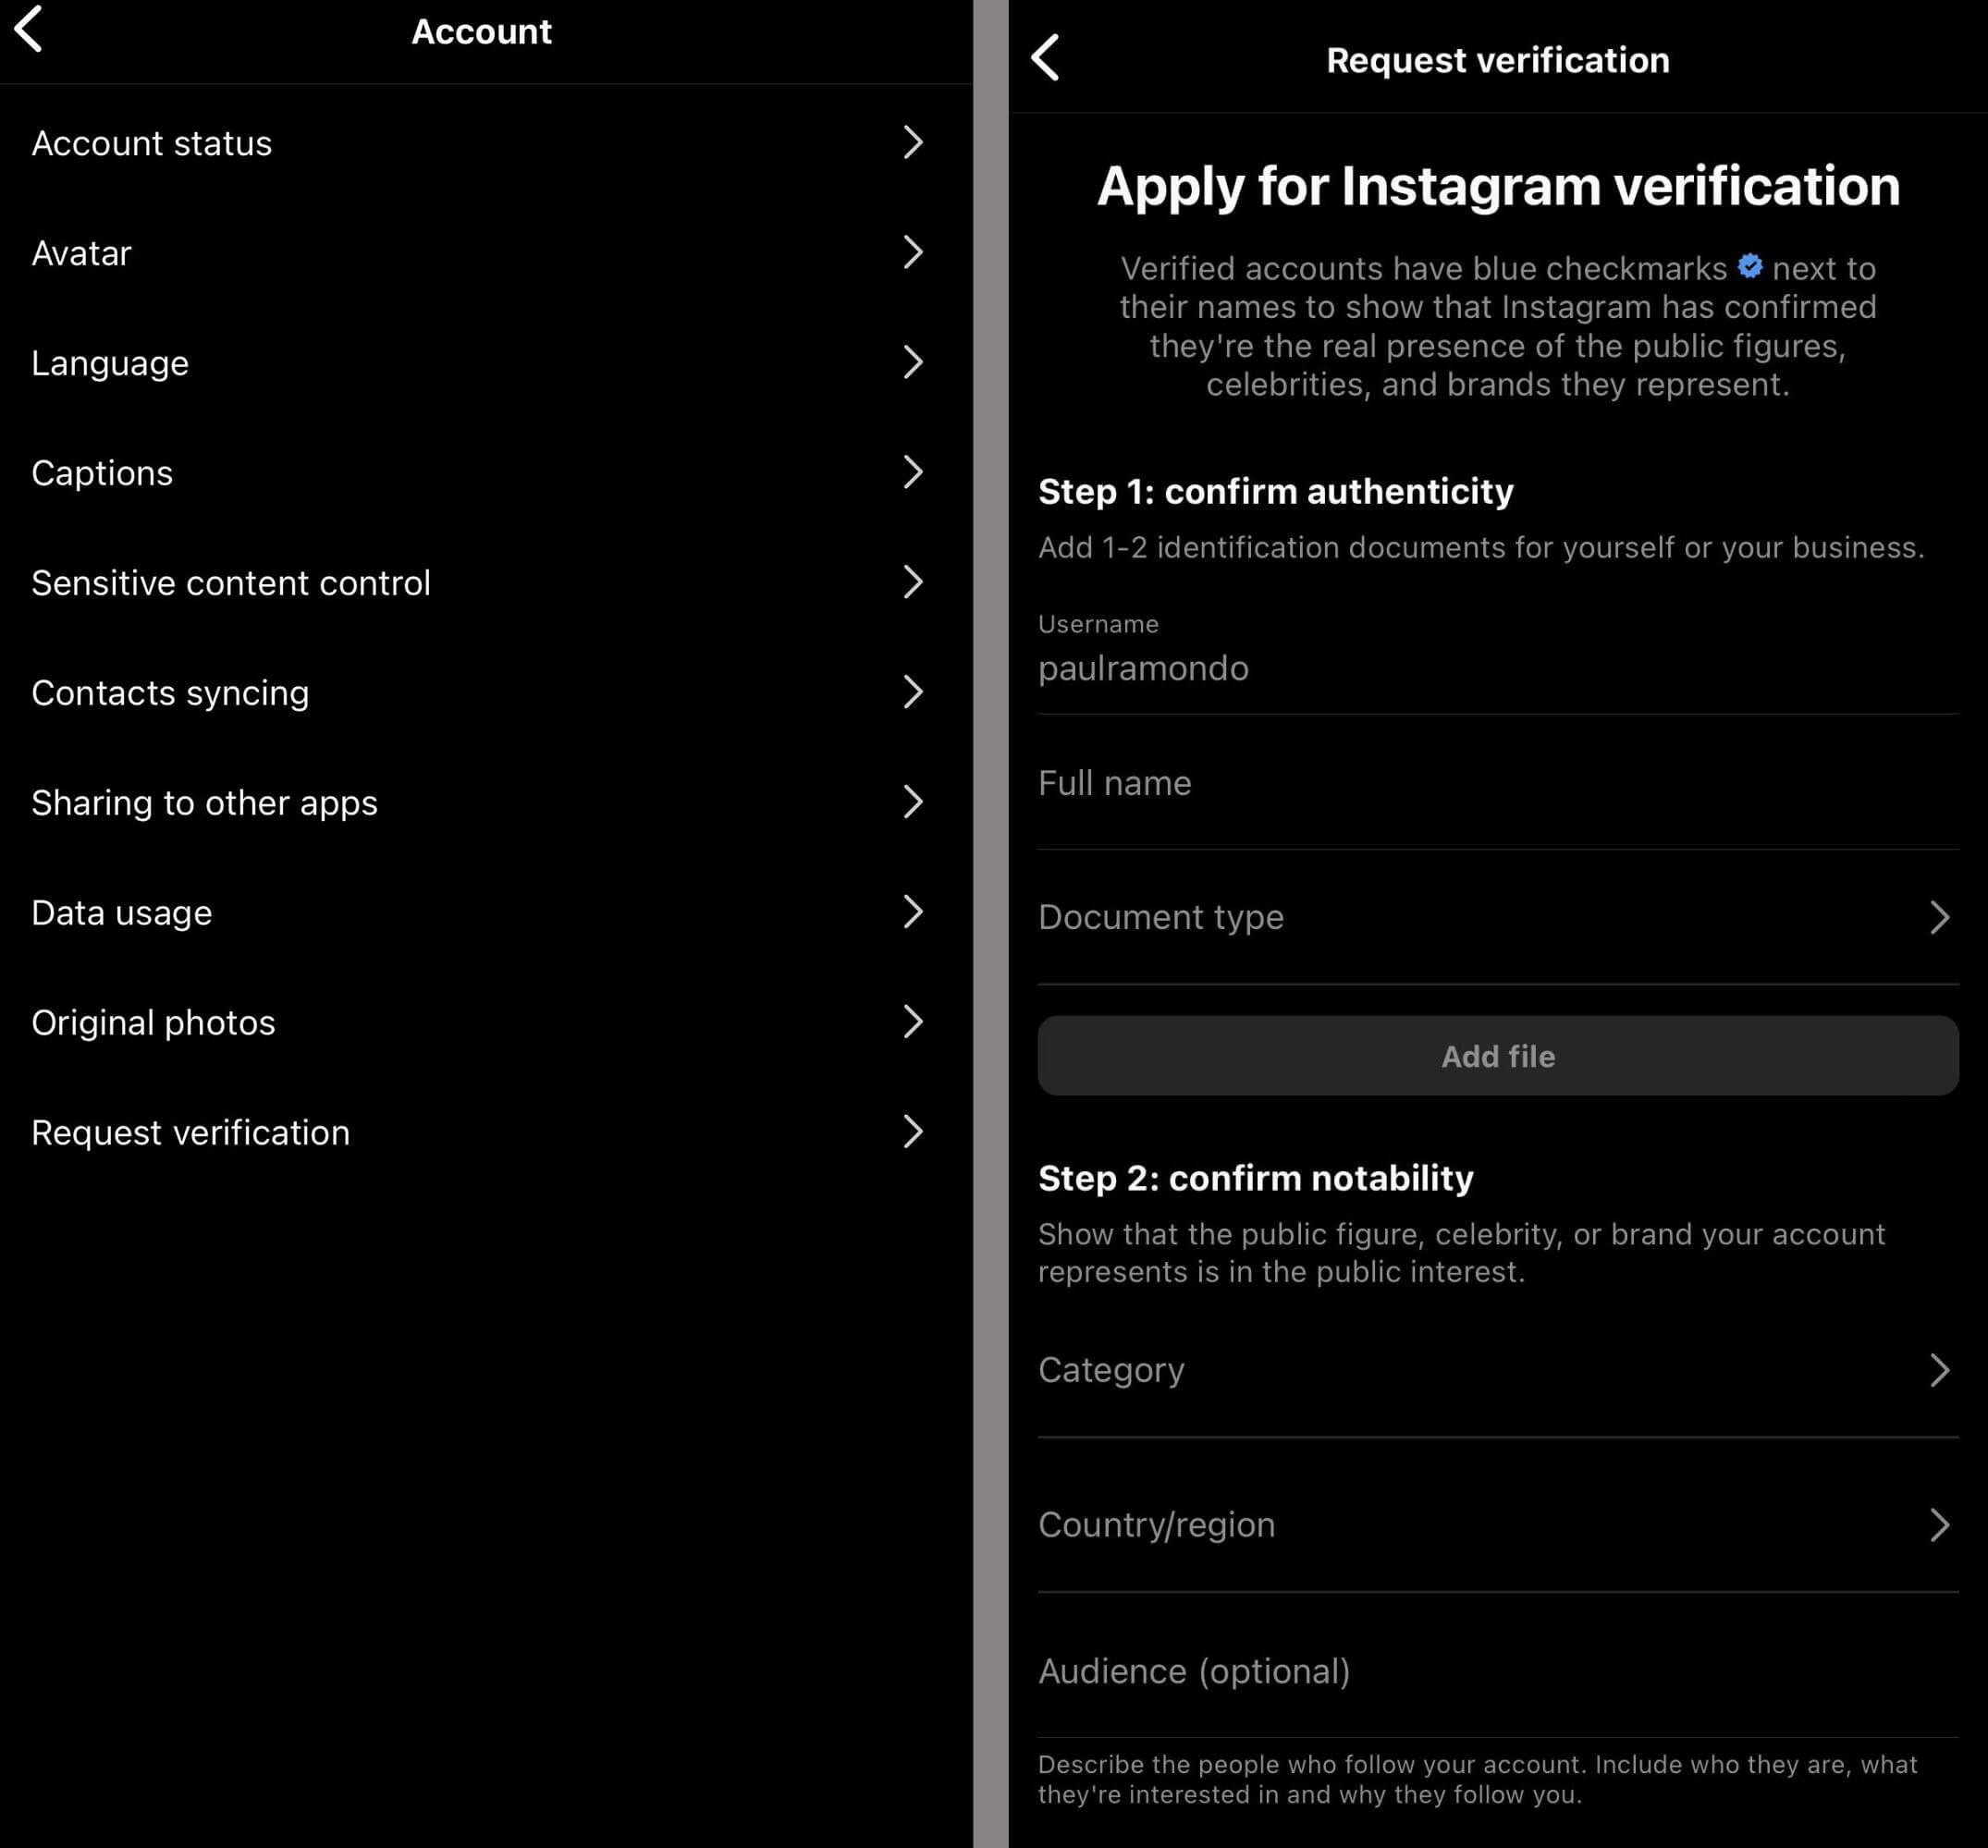
Yes, accounts are still able to apply for conventional (unpaid) verification on Instagram. This feature is already available globally. You can access this feature via your account settings, then click Request Verification.
Can I Change My Profile Name or Username After Meta Verification?
Meta has stated that Meta Verified subscribers must display their real name on their profile.
If you wish to change the name, username, date of birth, or photo on your profile, you must go through the Meta Verification process again.
Currently, re-verification can take up to 48 hours, during which time, you’ll lose your verification status, checkmark badge, and access to any additional paid Meta Verified features.
Can I Verify a Business Page or Profile?
Meta’s official documentation currently states that business profiles aren’t eligible for Meta Verified.
“At this time, Meta Verified will only support your real name on your profile. Once your profile is verified, you can’t change the profile name, username, date of birth, or photo on your profile without going through the Meta Verified subscription and verifications application process again,” the company stated in a blog post.
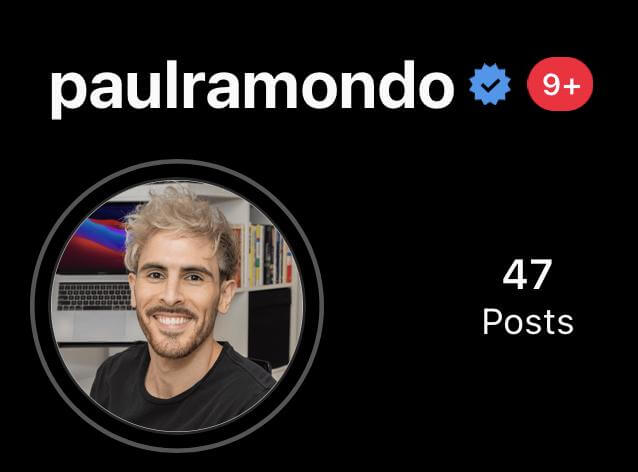
However, I was able to verify my Instagram business profile (@paulramondo); this account is under the Entrepreneur category.
I believe my verification was successful because my profile meets the aforesaid qualification criteria, and my business name matches the name on my government-issued ID.
Can I Use a VPN to Apply for Meta Verified?
While I haven’t personally tested this, a number of my colleagues—Australian citizens with Australian government-issued IDs but living abroad—have tried to use VPNs to change their IP address to Australia to apply for verification.

They have all been unsuccessful, as the paid verification functionality simply didn’t show up inside their Facebook/Instagram apps.
Stay Up-to-Date: Get New Marketing Articles Delivered to You!
Don't miss out on upcoming social media marketing insights and strategies! Sign up to receive notifications when we publish new articles on Social Media Examiner. Our expertly crafted content will help you stay ahead of the curve and drive results for your business. Click the link below to sign up now and receive our annual report!

Curious About How to Use AI?
Our newest show, AI Explored, might be just what you're looking for. It's for marketers, creators, and entrepreneurs who want to understand how to use AI in their business.
It's hosted by Michael Stelzner and explores this exciting new frontier in easy-to-understand terms.
Pull up your favorite podcast app and search for AI Explored. Or click the button below for more information.
