Do you want to take your Instagram photos from decent to great? Looking for photo editing tips to help?
In this article, you’ll learn how to edit photos for Instagram using a combination of pre-production techniques and 15 native Instagram features.
How to Plan Instagram Photos Like a Pro: Pre-Production Best Practices
From native Instagram editing tools to third-party editing apps, you have a lot of options for improving photos and fixing problems. But some issues are difficult or impossible to edit out in post-production.
That's why it's important to start with a good foundation and make an effort to take high-quality photos. Let's look at a few pre-production best practices that you can implement right away to make sure you start with a good photo.
Composition Techniques
Photo composition refers to the way you set up your shot and organize elements in the frame. Good composition is essential for showing viewers where to look and conveying your message effectively. Use the techniques below to set up visually appealing photos with a cohesive look.
Aspect Ratio
Your photo might look amazing in your camera roll. But if it doesn't easily crop to one of Instagram's standard photo aspect ratios (1:1 and 4:5), it may not deliver the results you want.
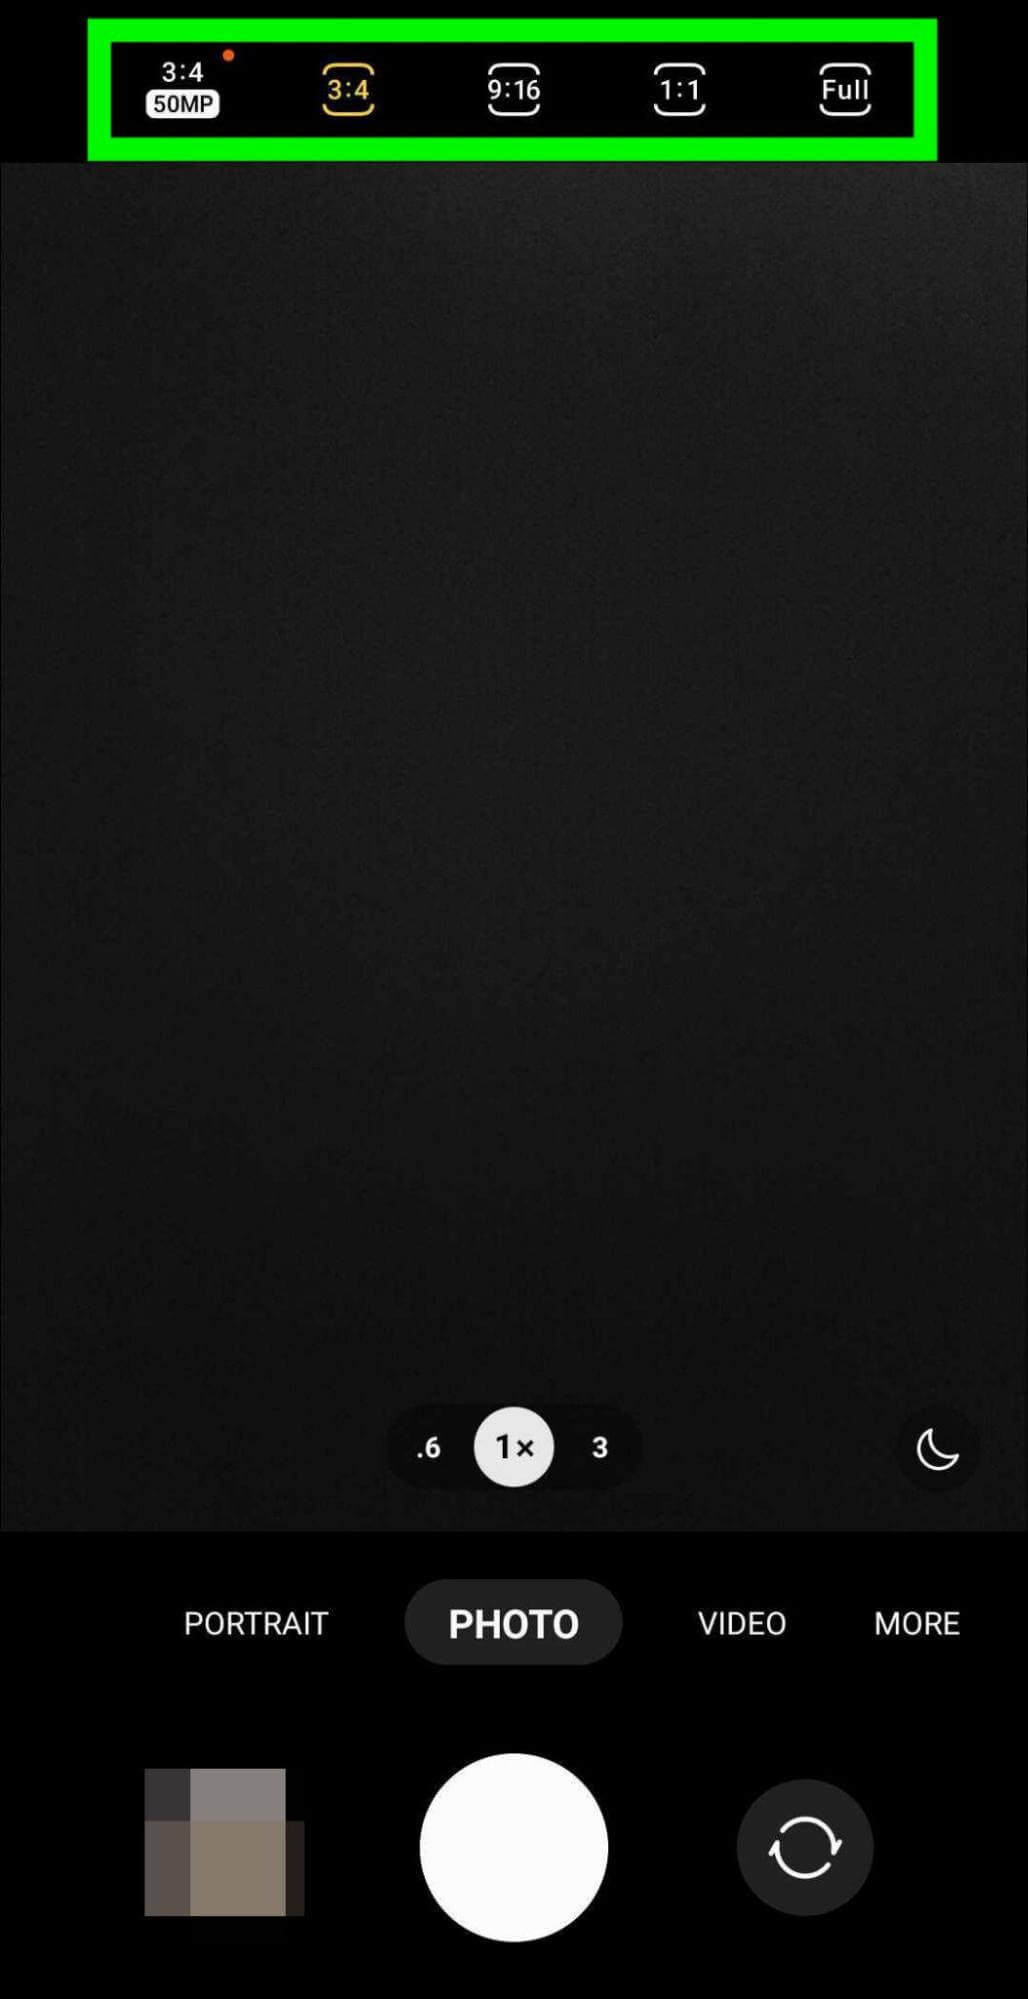
Although you can certainly crop your photo and change the aspect ratio in post-production, it's often easier to choose the right aspect ratio before you snap your shot. Open your camera settings and select an aspect ratio before taking a photograph.
Rule of Thirds
It's tempting to want to place the main element of your photo right in the center of the frame. Sometimes that's a great idea (see symmetry). But in other cases, using the rule of thirds can make your composition more visually interesting.
When you set up your shot, use a grid to divide your image into thirds—vertically and horizontally. Then position the person, product, or action at one or more of the four spots where the gridlines intersect.
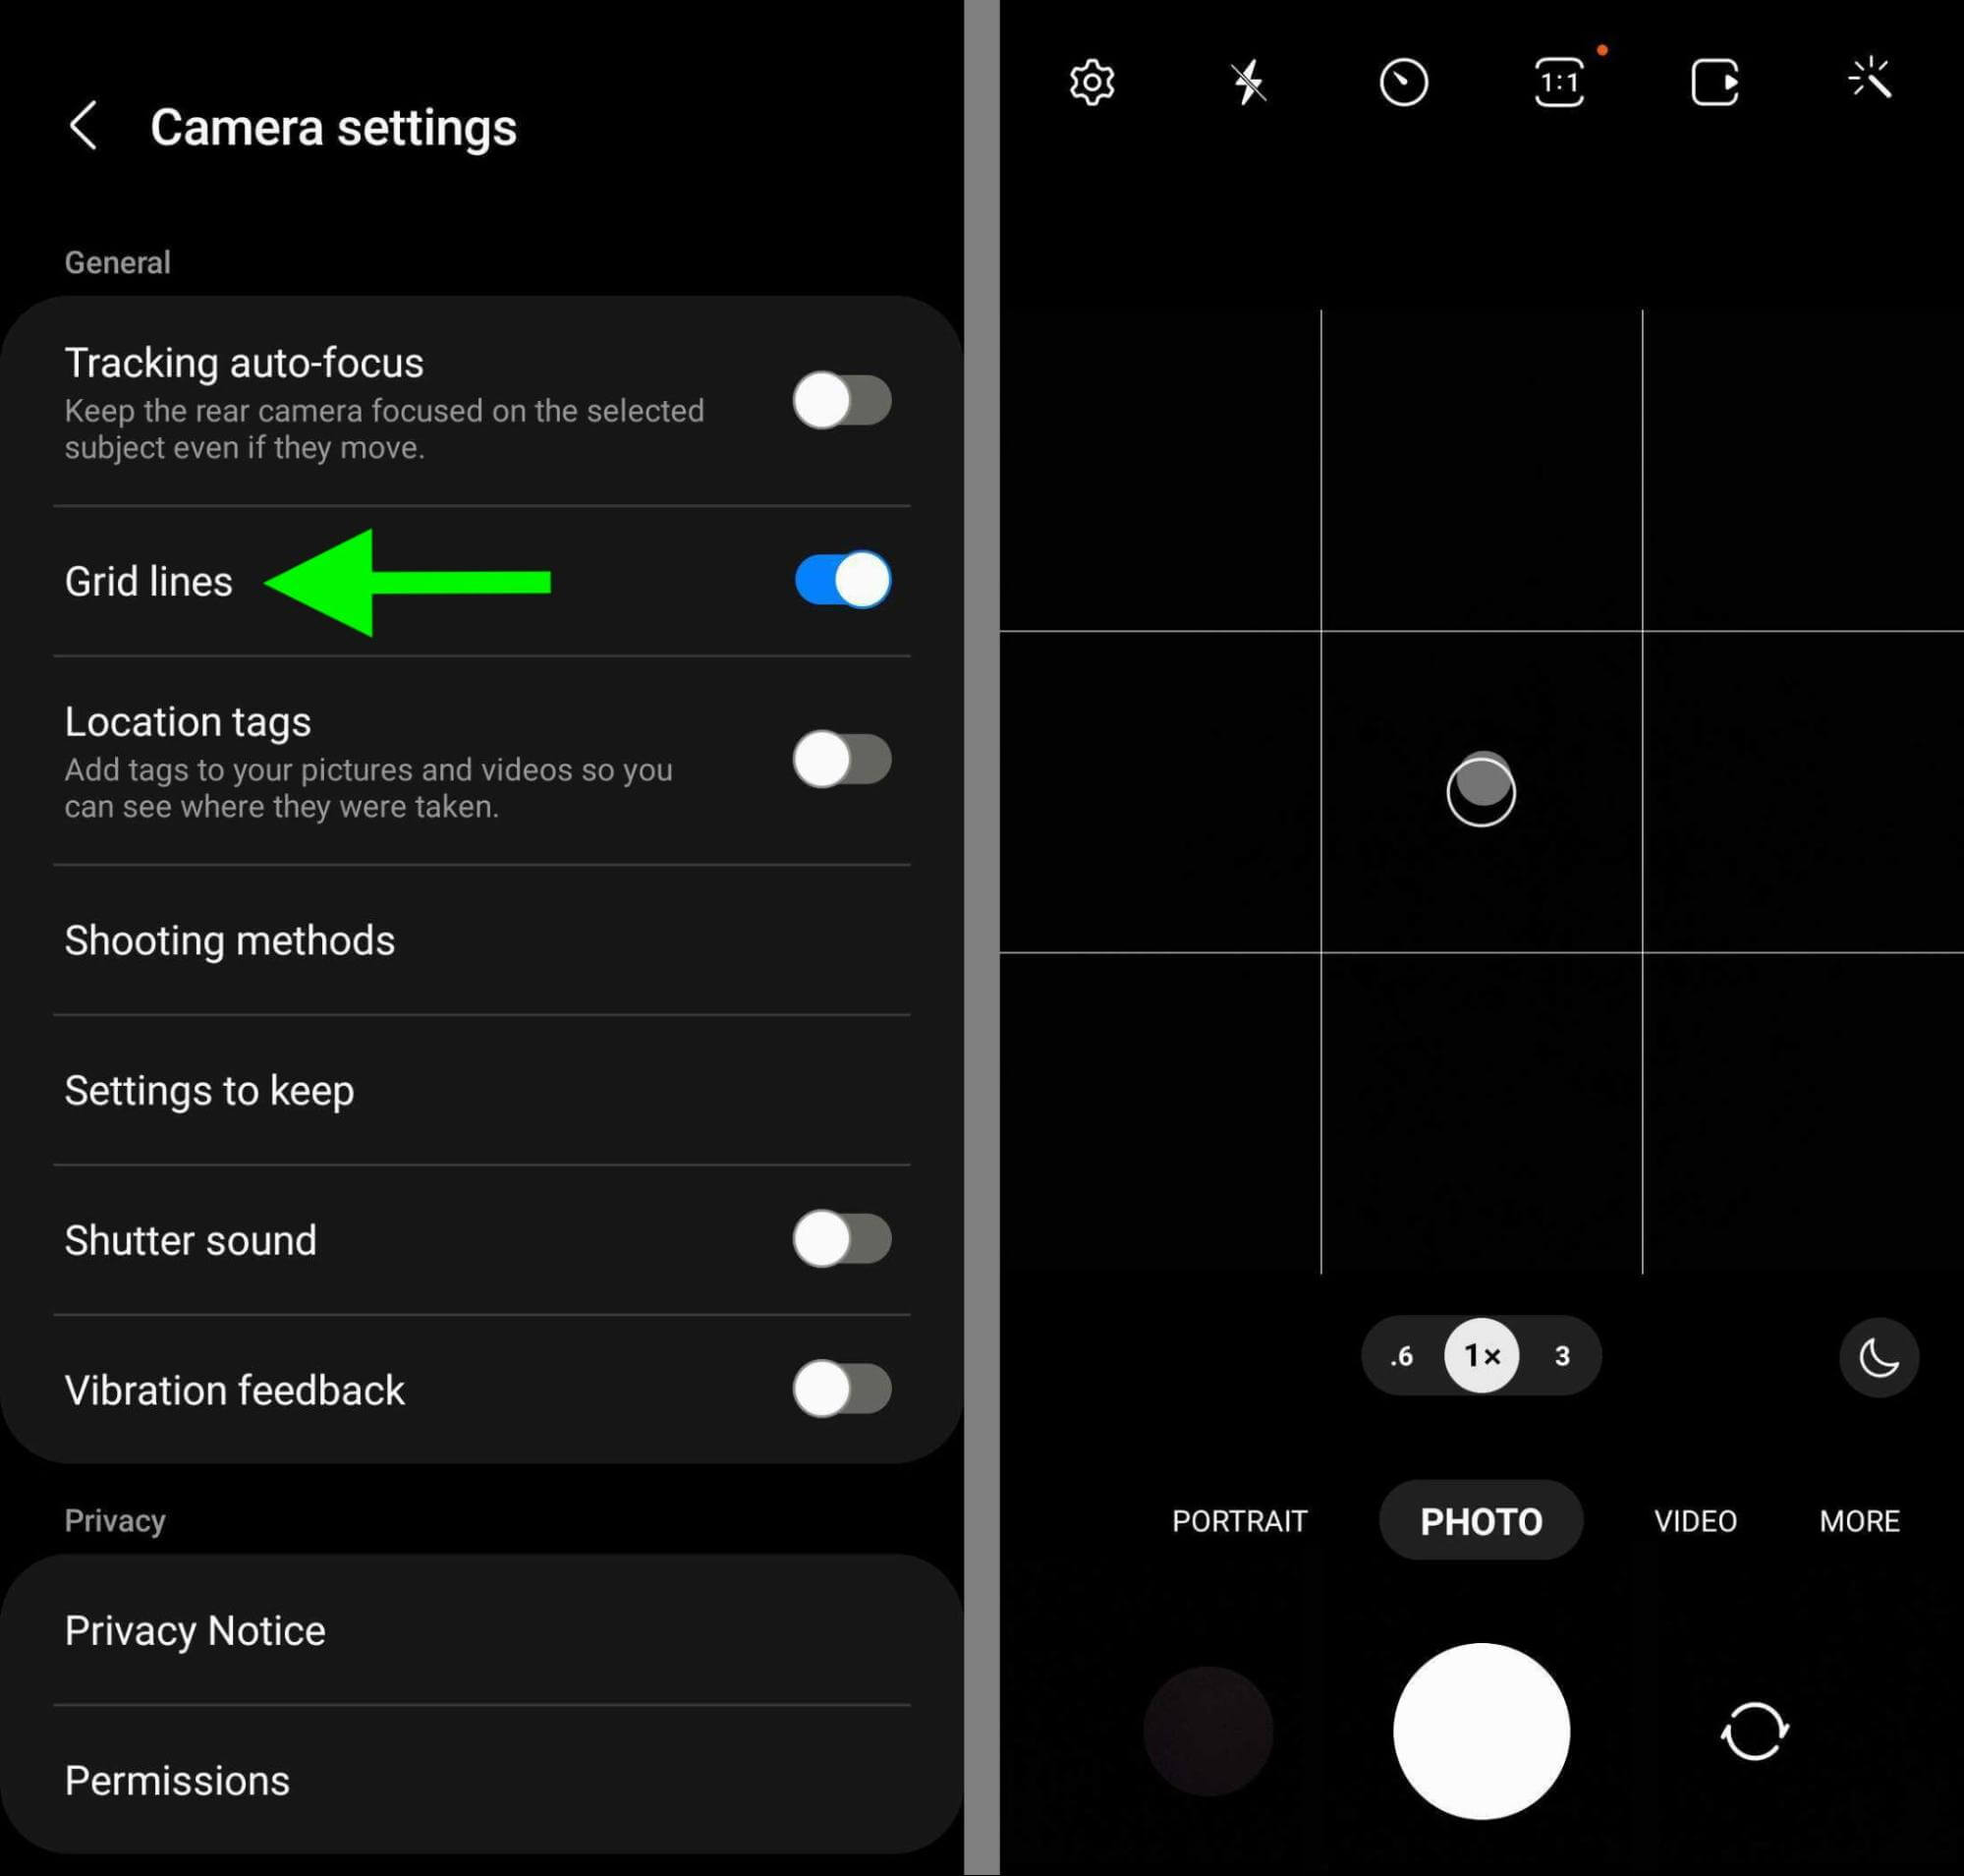
Most camera apps have a built-in grid that you can toggle on to guide your composition. Open your mobile device's camera app, view the settings, and switch on the grid option. This feature can also help you set up a symmetrical composition (see below).
The native Instagram camera also displays a grid automatically. But it's important to note that the built-in camera only supports 1:1 images so you'll need to choose a different camera app for 4:5 images.
Symmetry
Photos with vertical and horizontal symmetry appear perfectly balanced, which can be incredibly appealing to your audience. Your camera app's grid can be a big help with setting up symmetrical shots.
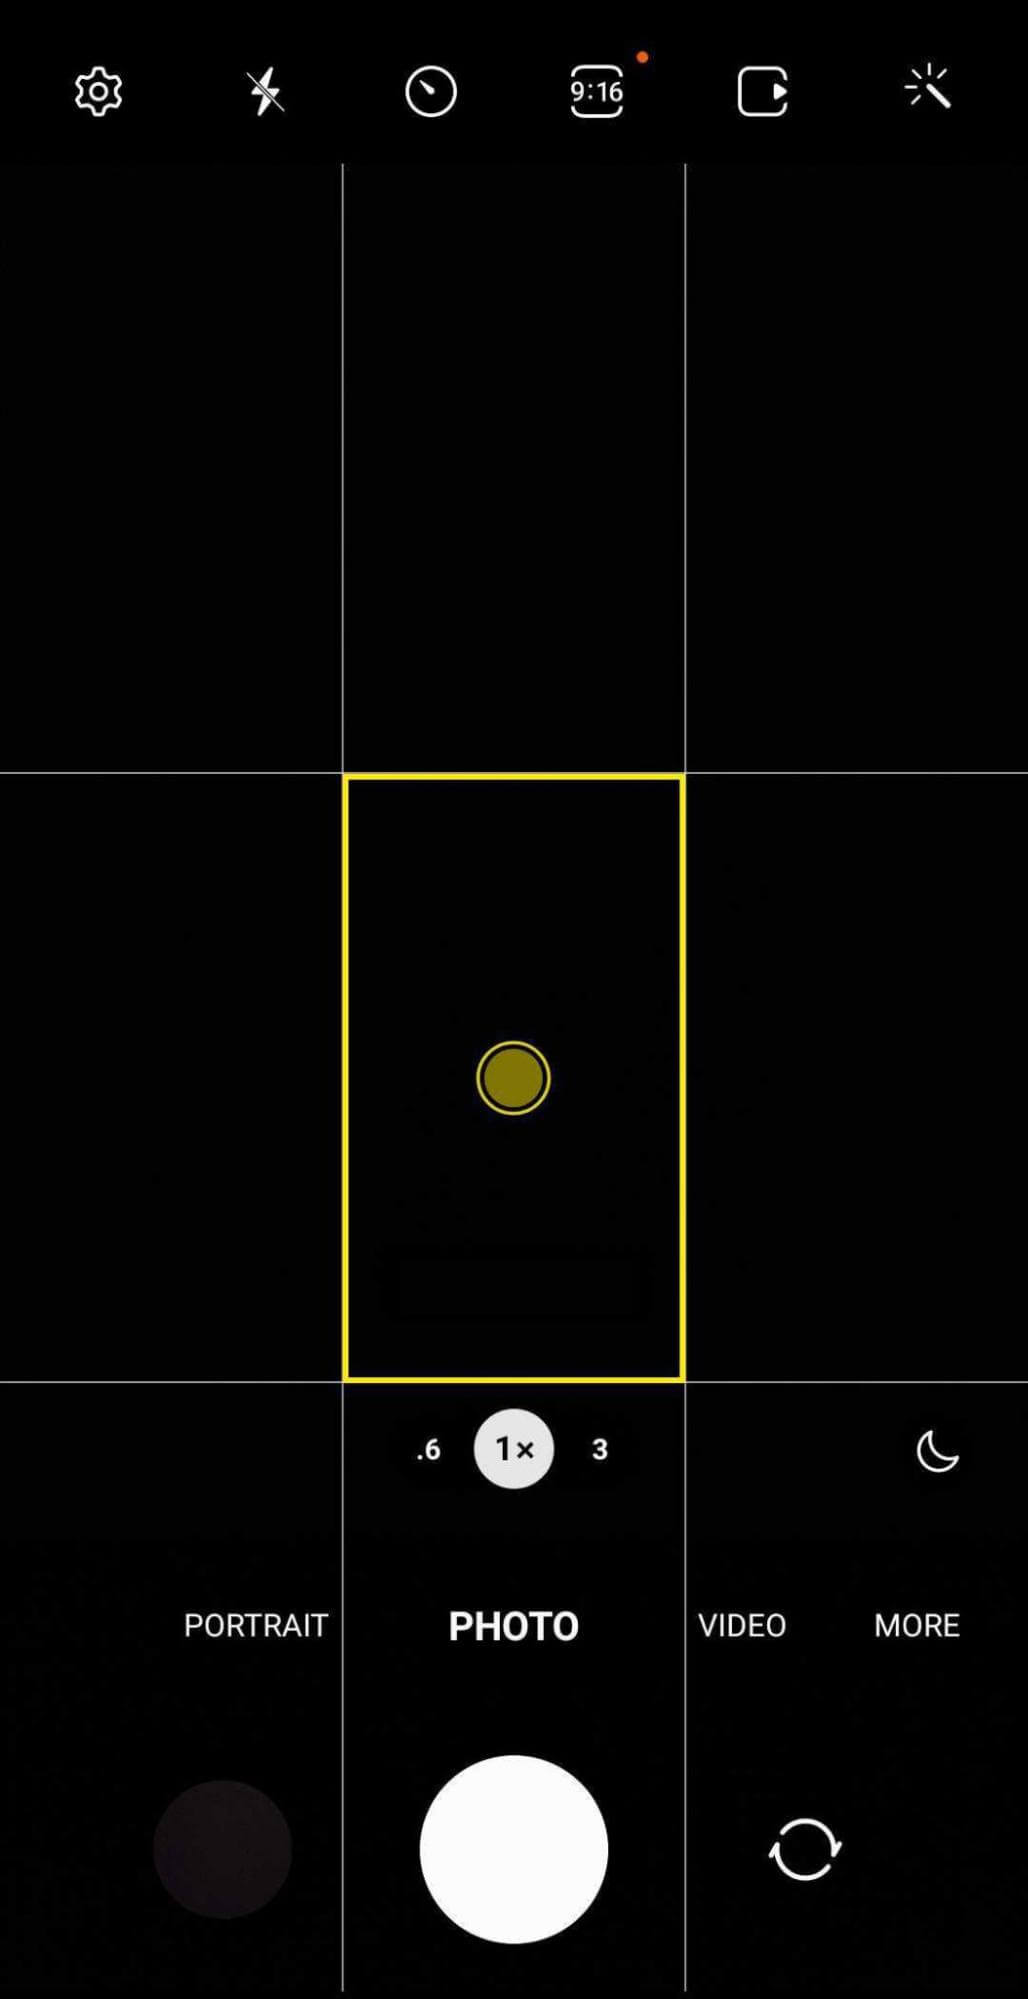
Position the subject at the center of the frame—in the middle of the grid. Then use the gridlines to line up the vertical and horizontal elements of the photo.
Framing
Following the composition rules above can help you frame your subject in a visually compelling way. But sometimes inserting a frame into your composition can be even more helpful for guiding viewers' eyes.
Which AI Moves Actually Matter?
That's what every marketer is wrestling with now. New AI strategies, new tools, new takes every week — but no clarity. Most marketers and business owners are trying to figure out AI alone.The AI Business Society is your trusted guide. Get expert-led training you can put to work immediately. Plus a community of marketers sharing what's actually working.
I'M READY FOR REAL AI RESULTSPicture frames, windows, doors, architectural elements, and natural components can all add an extra layer of framing in your Instagram photos. As you set up your shot, look for ways to add one of these elements into your composition.
Exposure Settings
Before you begin your photoshoot, it's also a good idea to check your camera app's exposure settings. Although many photo editing apps let you adjust exposure in post-production, it's impossible to recover details that aren't present in the original photo.
As you line up your shot, tap on the screen to tell your camera where to focus. Then drag the exposure slider left or right to increase or decrease the exposure.
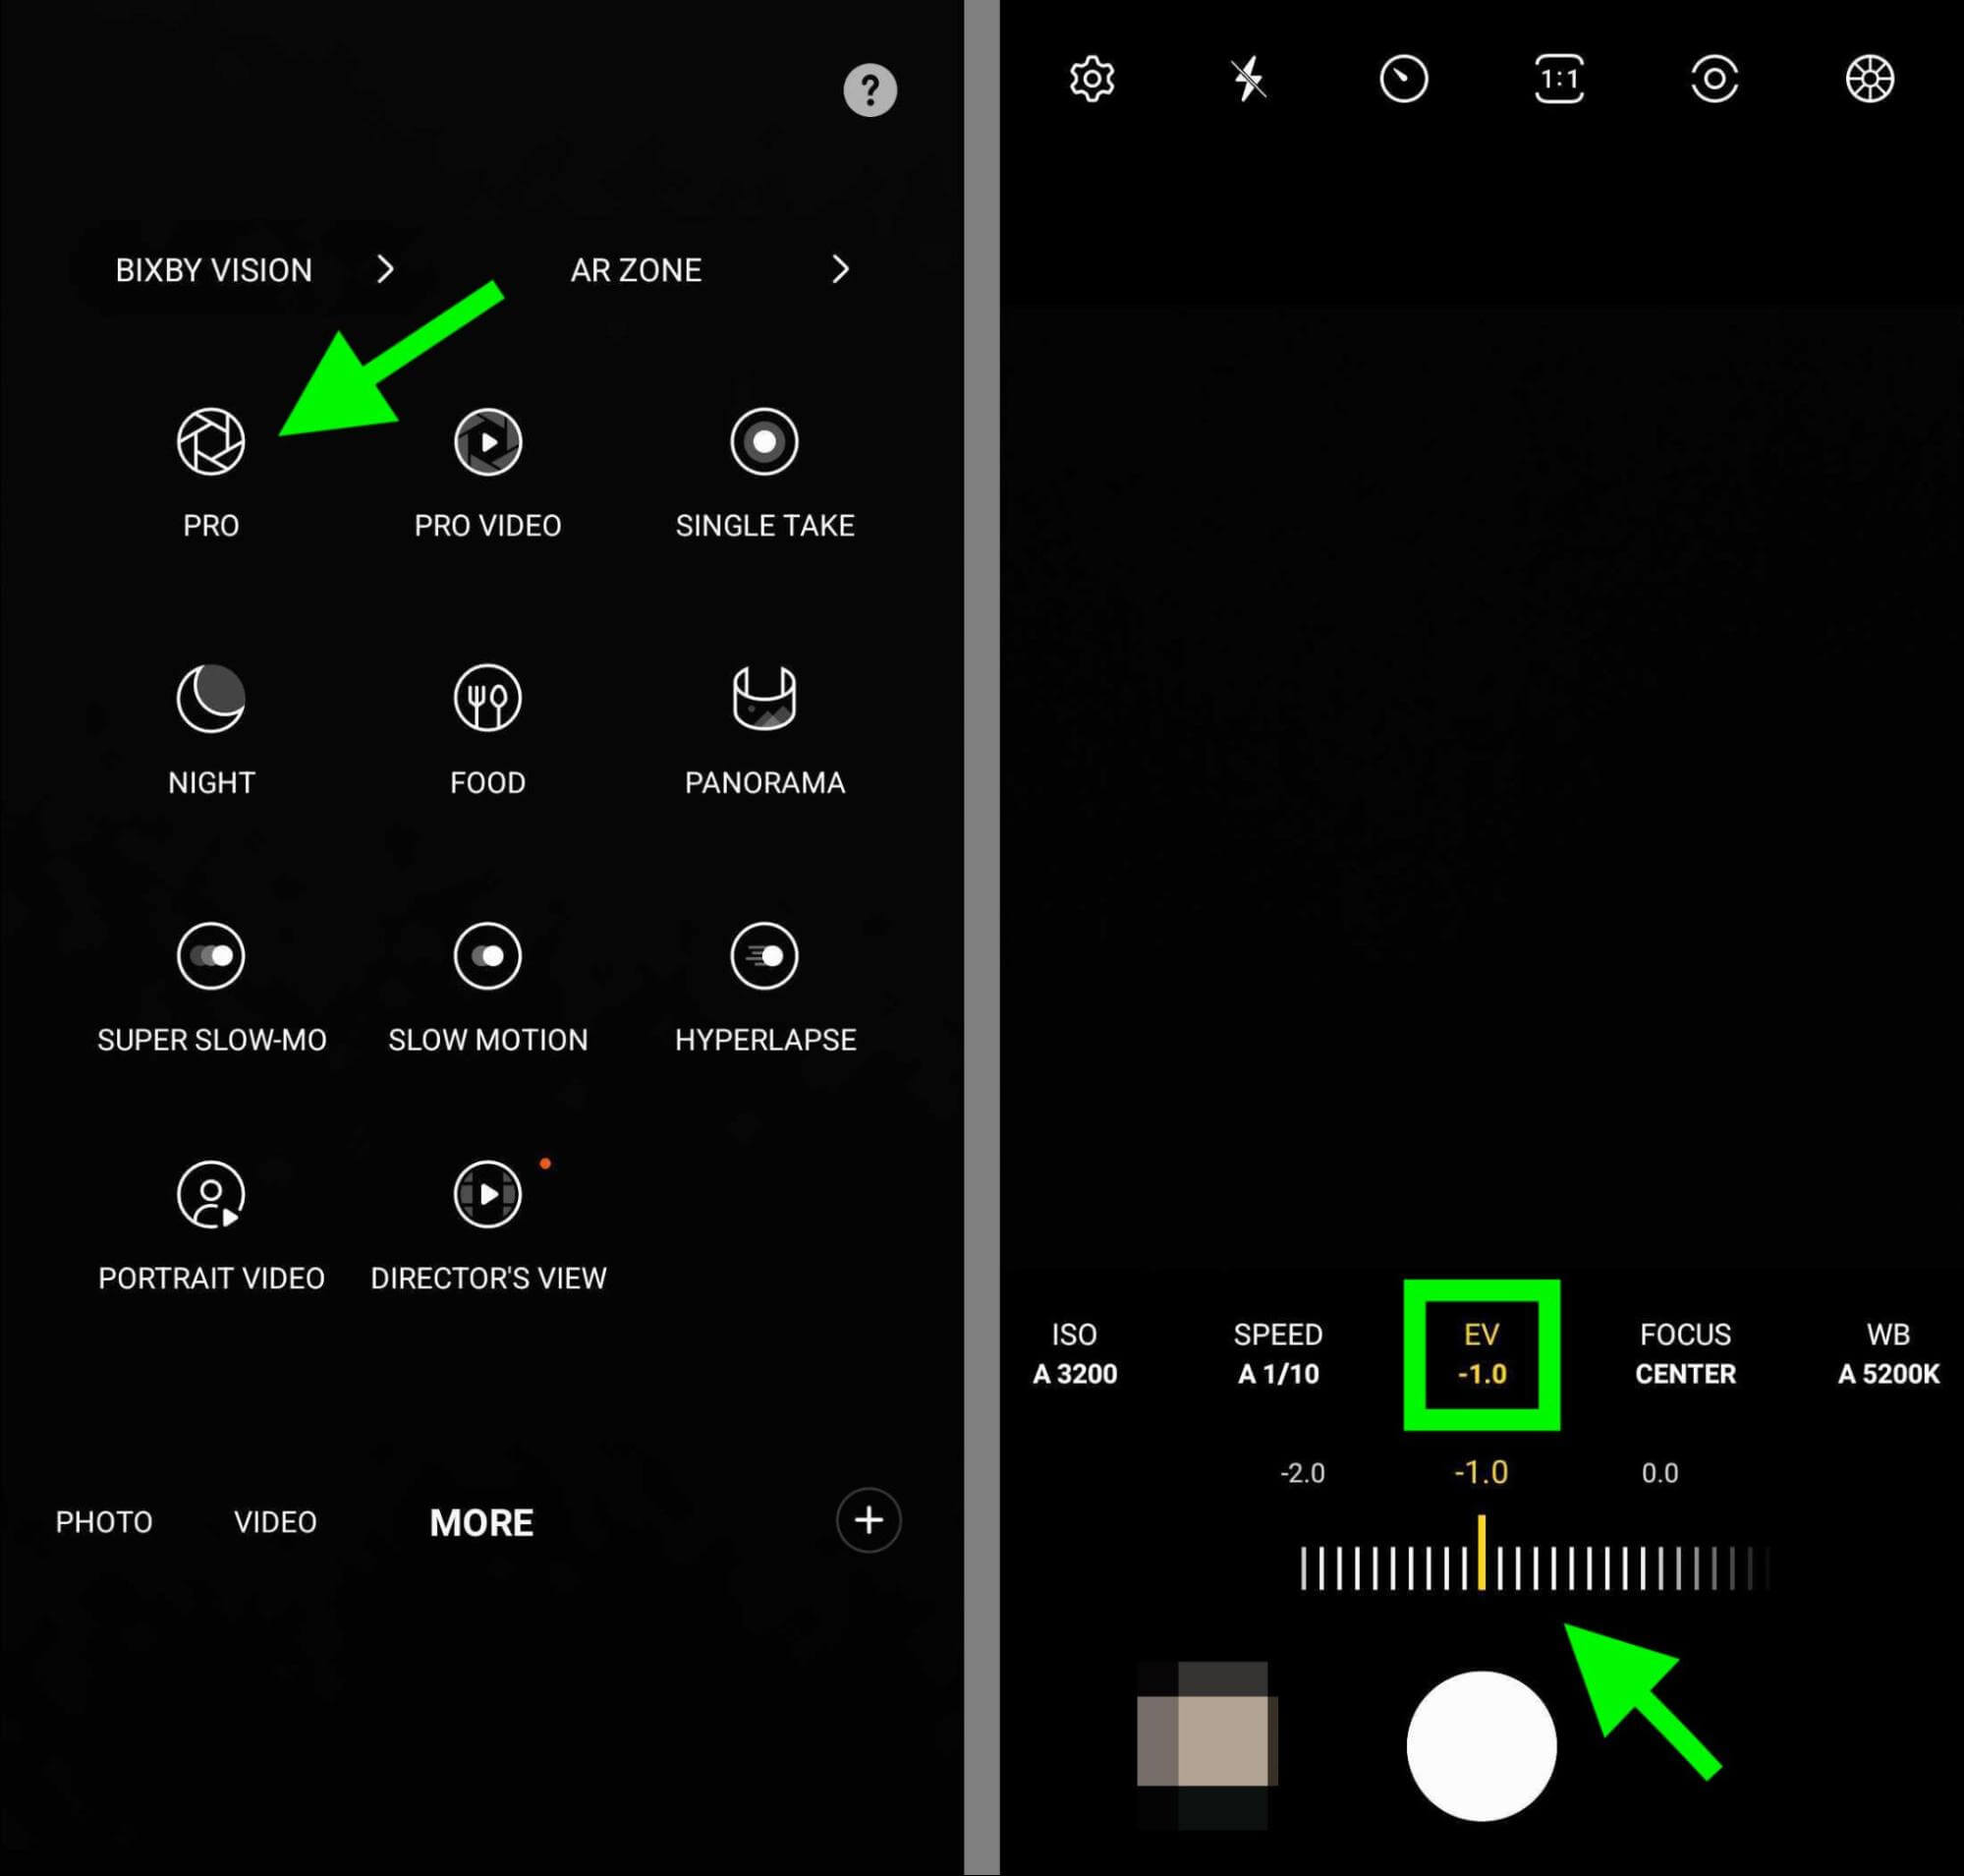
If your device tends to overexpose photos and lose key details, you can also use your camera app's pro mode to adjust the exposure settings. For example, rather than setting the exposure value (EV) to 0.0, dial it down as far as -1.0 to retain details. Then in post-production, use the highlight and shadow tips below to fine-tune the appearance.
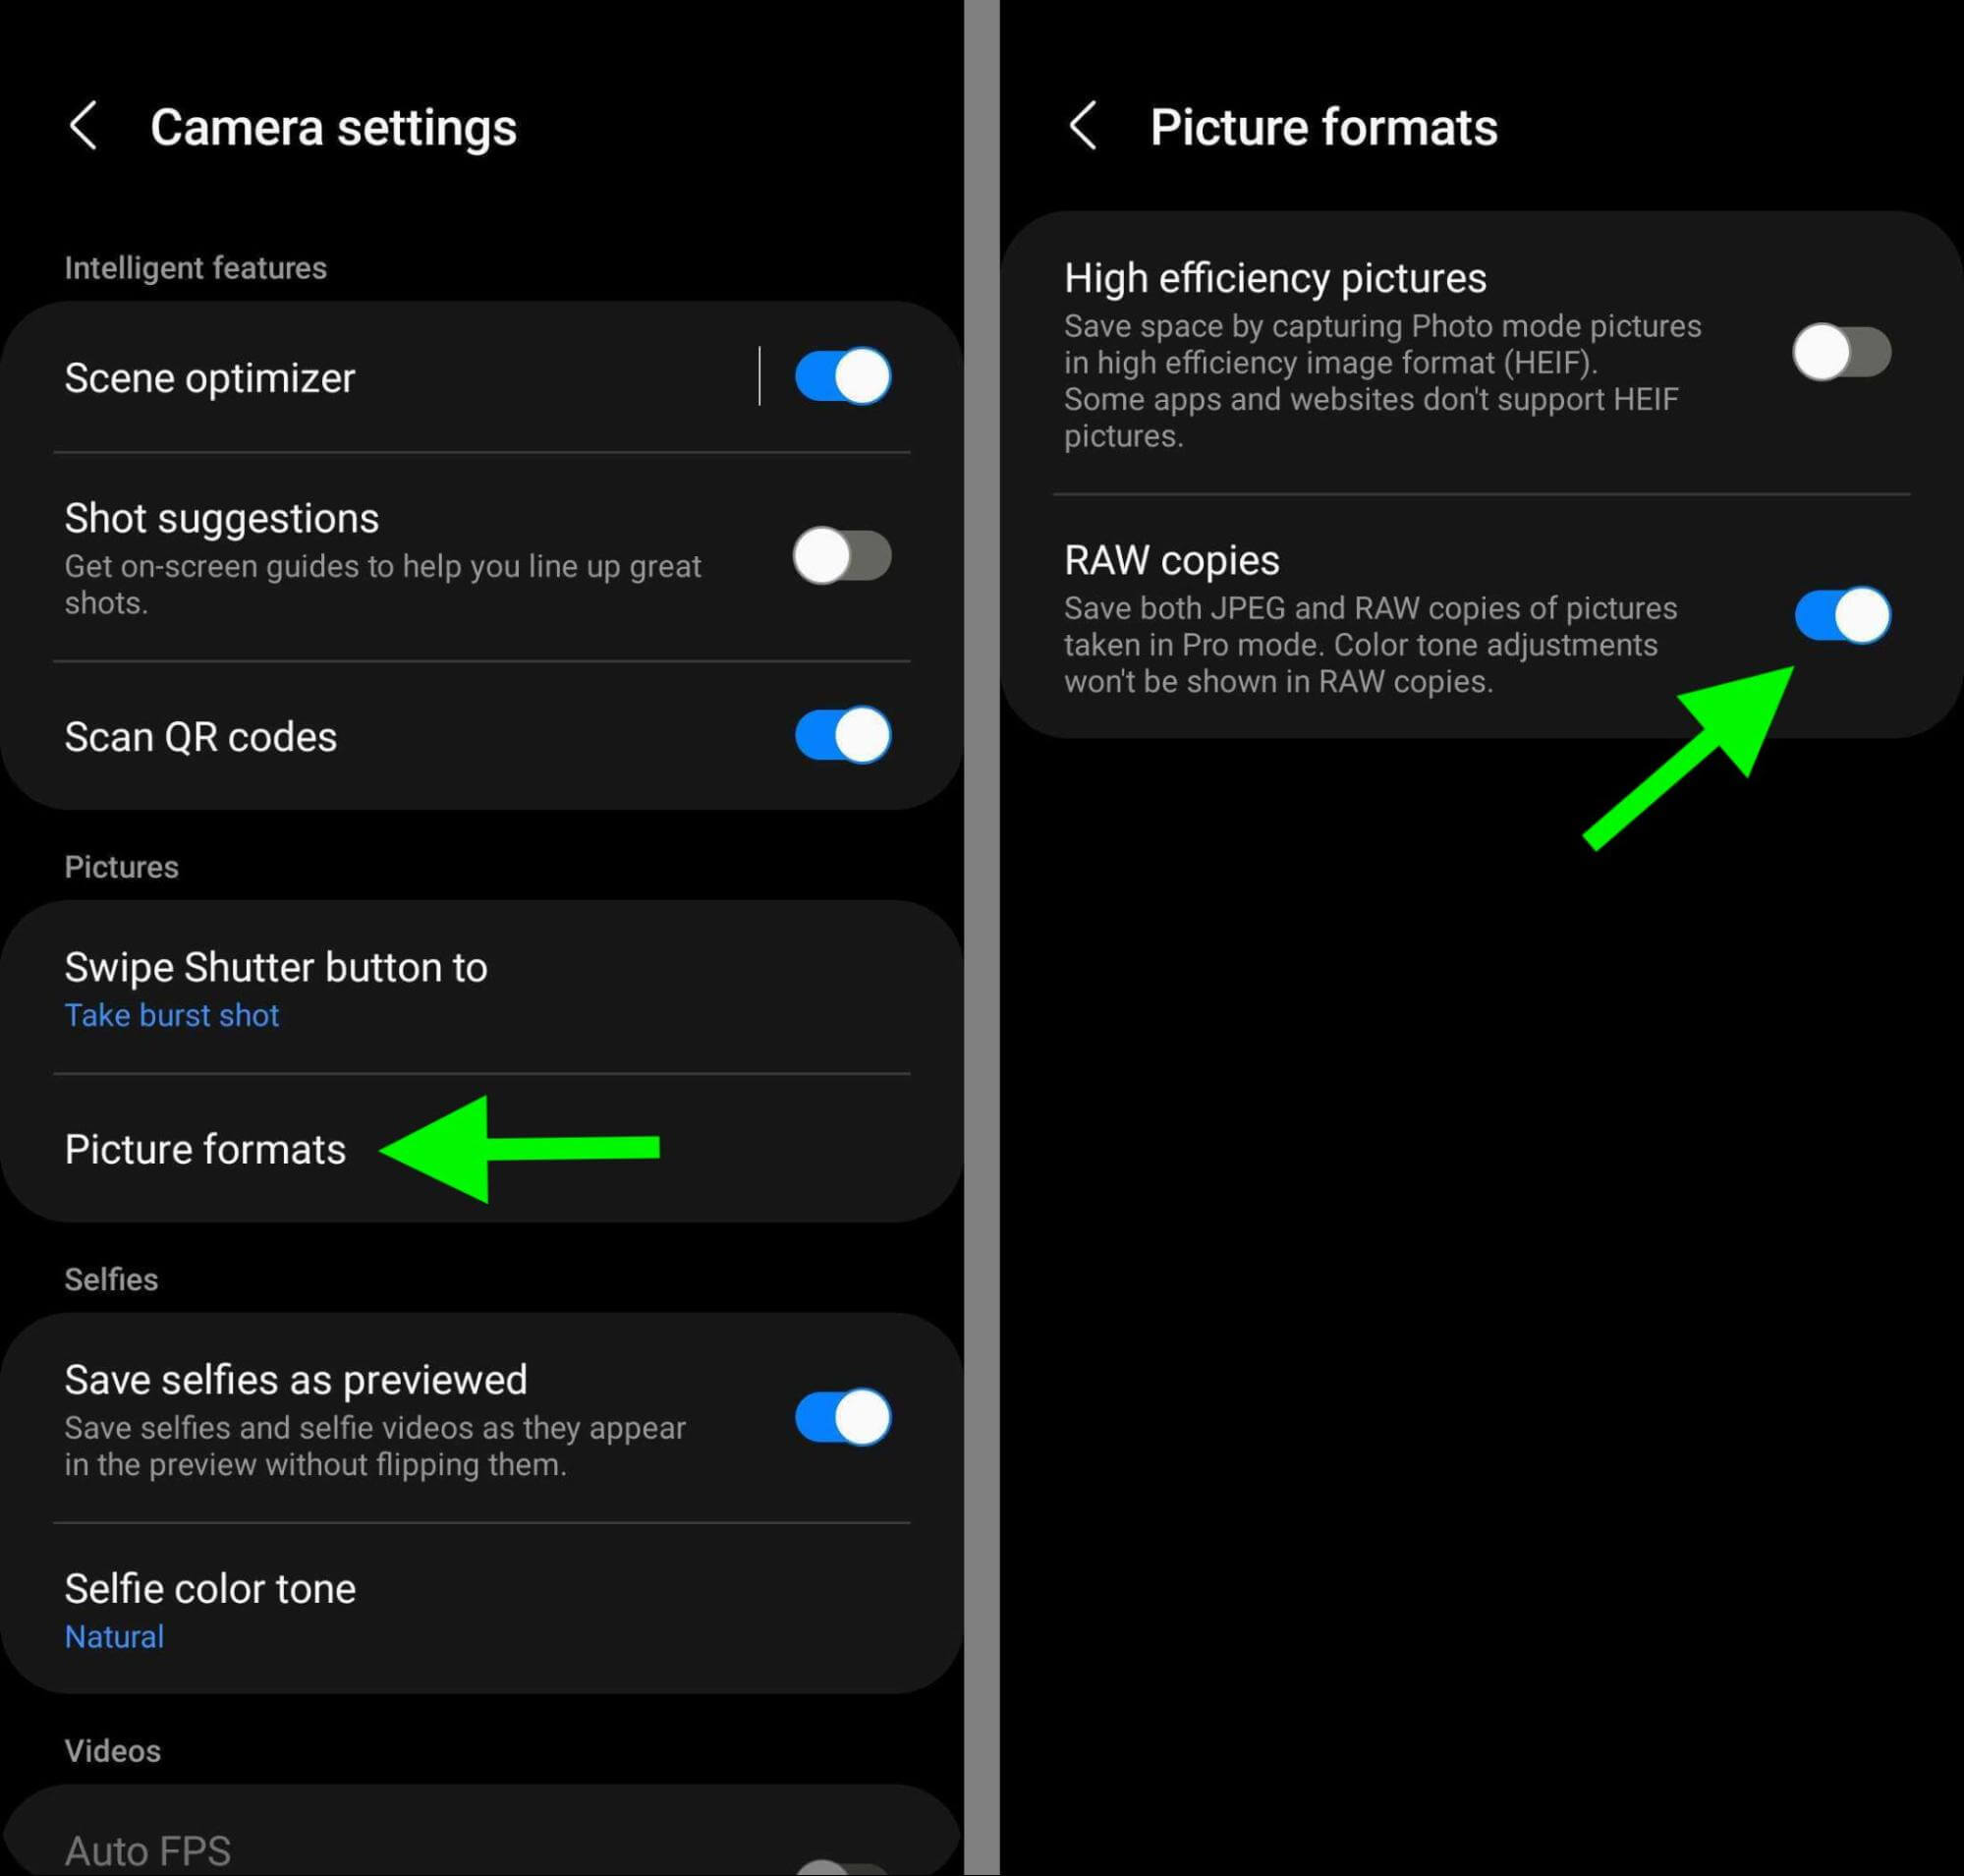
When setting up your camera app, it's also helpful to enable RAW format images in addition to the default JPG files. When your camera produces RAW image files, you get a lot more room to correct the exposure in post-production.
White Balance
Similar to exposure, you can adjust for white balance in post-production, at least to some extent. But it's much easier to fine-tune the color or saturation of your picture when the white balance is already correct.
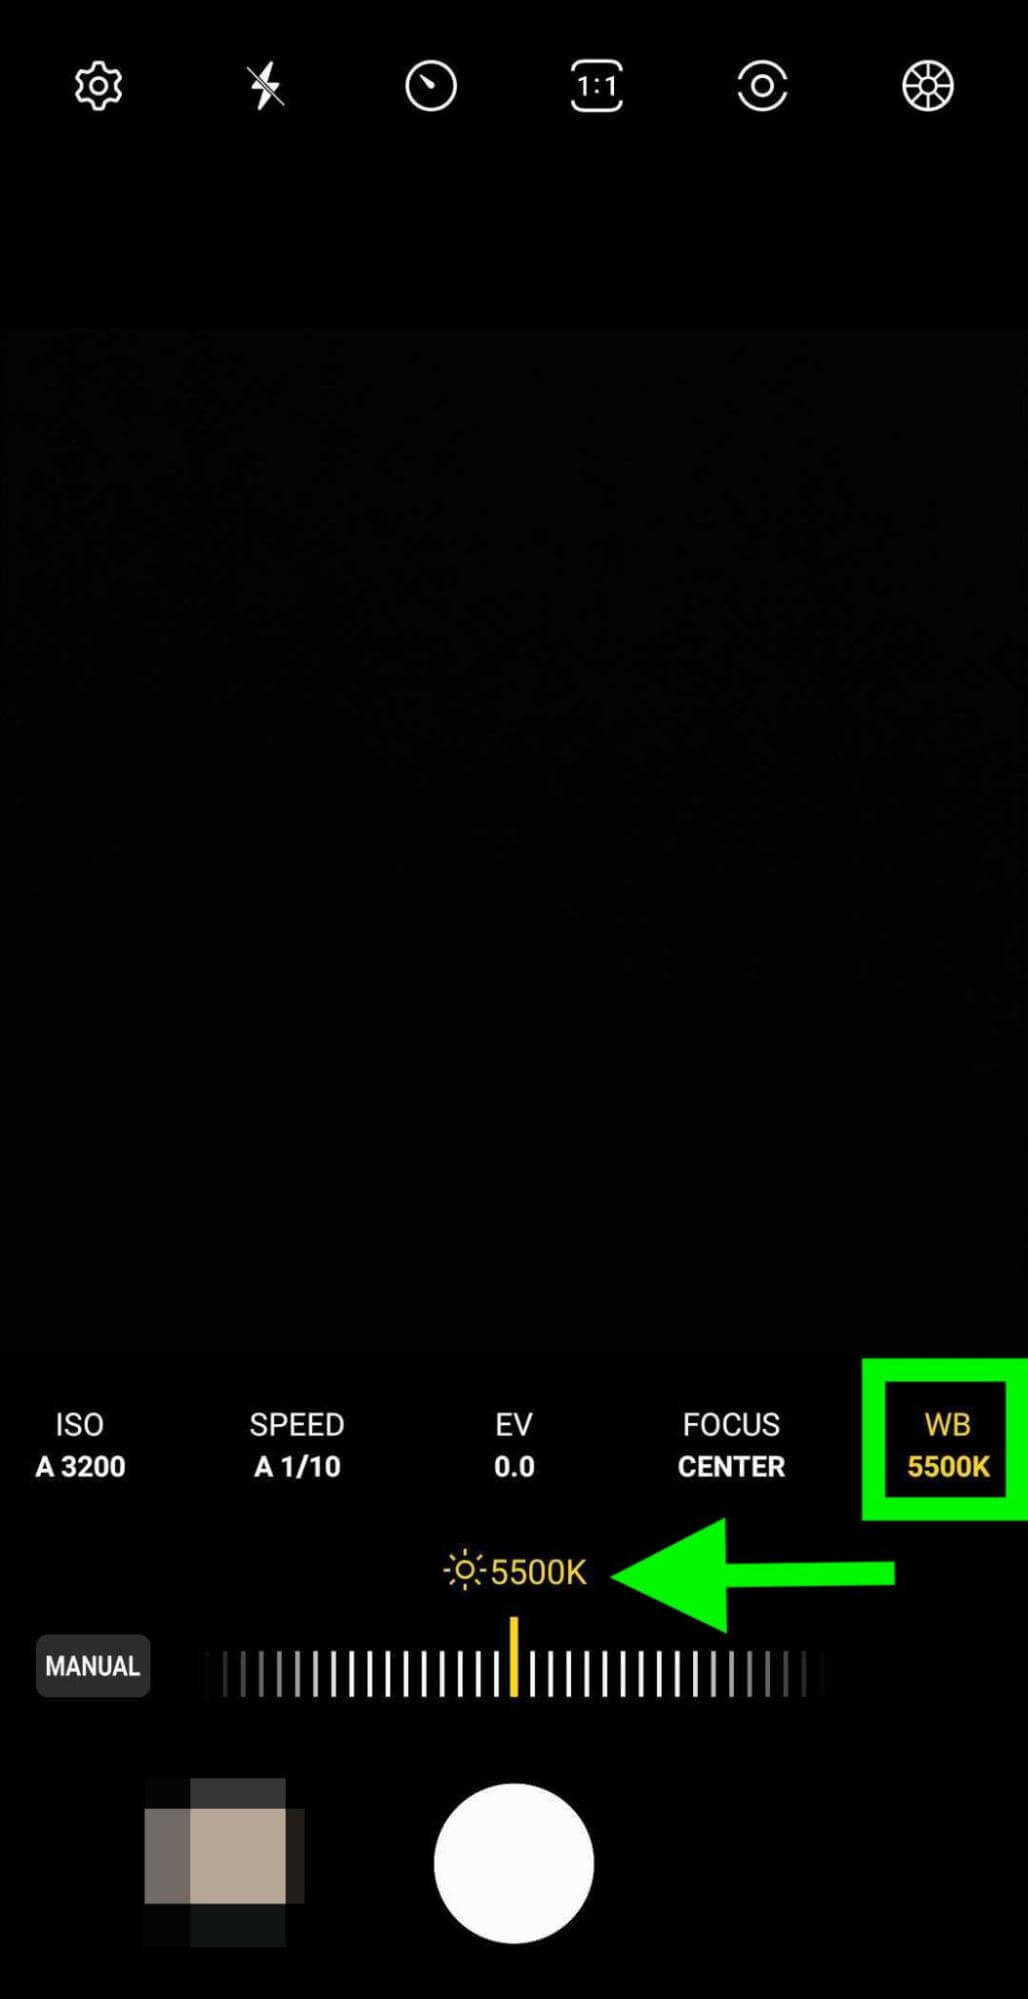
To change the white balance, go into your camera settings or enable pro mode. Then toggle the white balance, keeping in mind that higher numbers tend to appear bluer (cool), while lower numbers appear more orange (warm).
If your device's camera app doesn't allow you to adjust white balance or if you need to adjust these settings in post-production, you'll need a third-party app. Instagram doesn't have built-in editing tools for these settings, but free photo editing apps like Snapseed do.
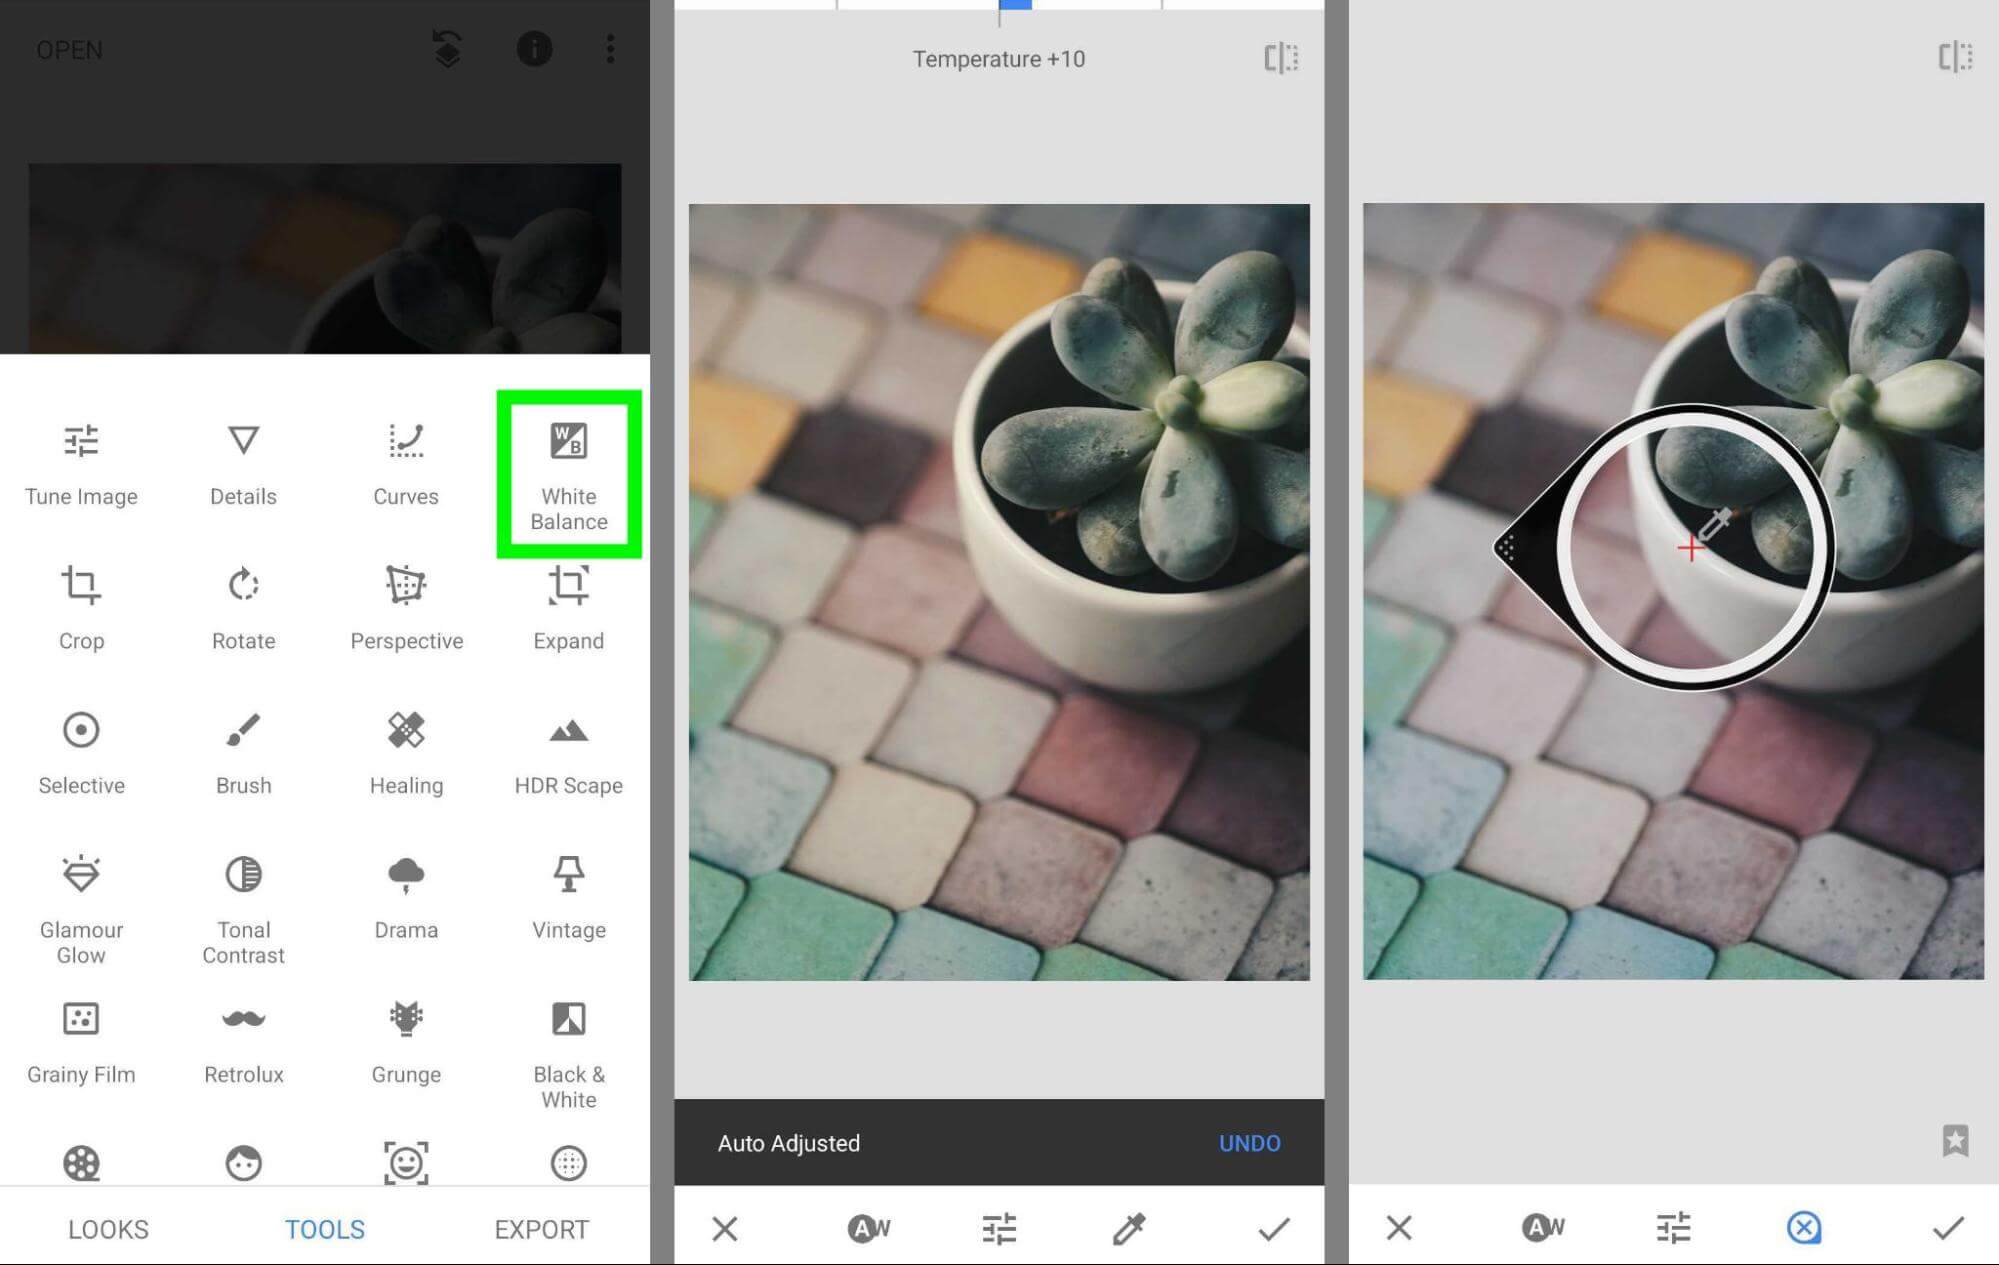
Open your photo in Snapseed and select the Tools tray. Tap White Balance and tap the AW button to automatically adjust. You can also drag the slider to adjust manually or use the dropper to set the white balance for the photo.
How to Edit Pictures on Instagram: 15 Native Instagram Photo Editing Features
Even when you get the white balance, exposure, and composition just right, it's a good idea to enhance your Instagram photos with some editing before publishing. The mobile app's photo editor has more than a dozen editing tools that can help the photos in your Instagram posts stand out and capture your audience's attention.
To access these editing tools, open the Instagram app and create a new post. Upload an image or use the native camera to take a new photo. Then tap the right arrow to view the editing options and begin your photo editing.
#1: Filters
Instagram's filter options let you apply a group of photo editing presets to your image with a single tap. Most include a range of saturation, contrast, and brightness settings, but some also adjust the overall color.
On the plus side, filters can save you time and apply a consistent style across your Instagram grid. But it's important to remember that every business has access to the same 20 or so filters so your images may end up looking like everyone else’s.
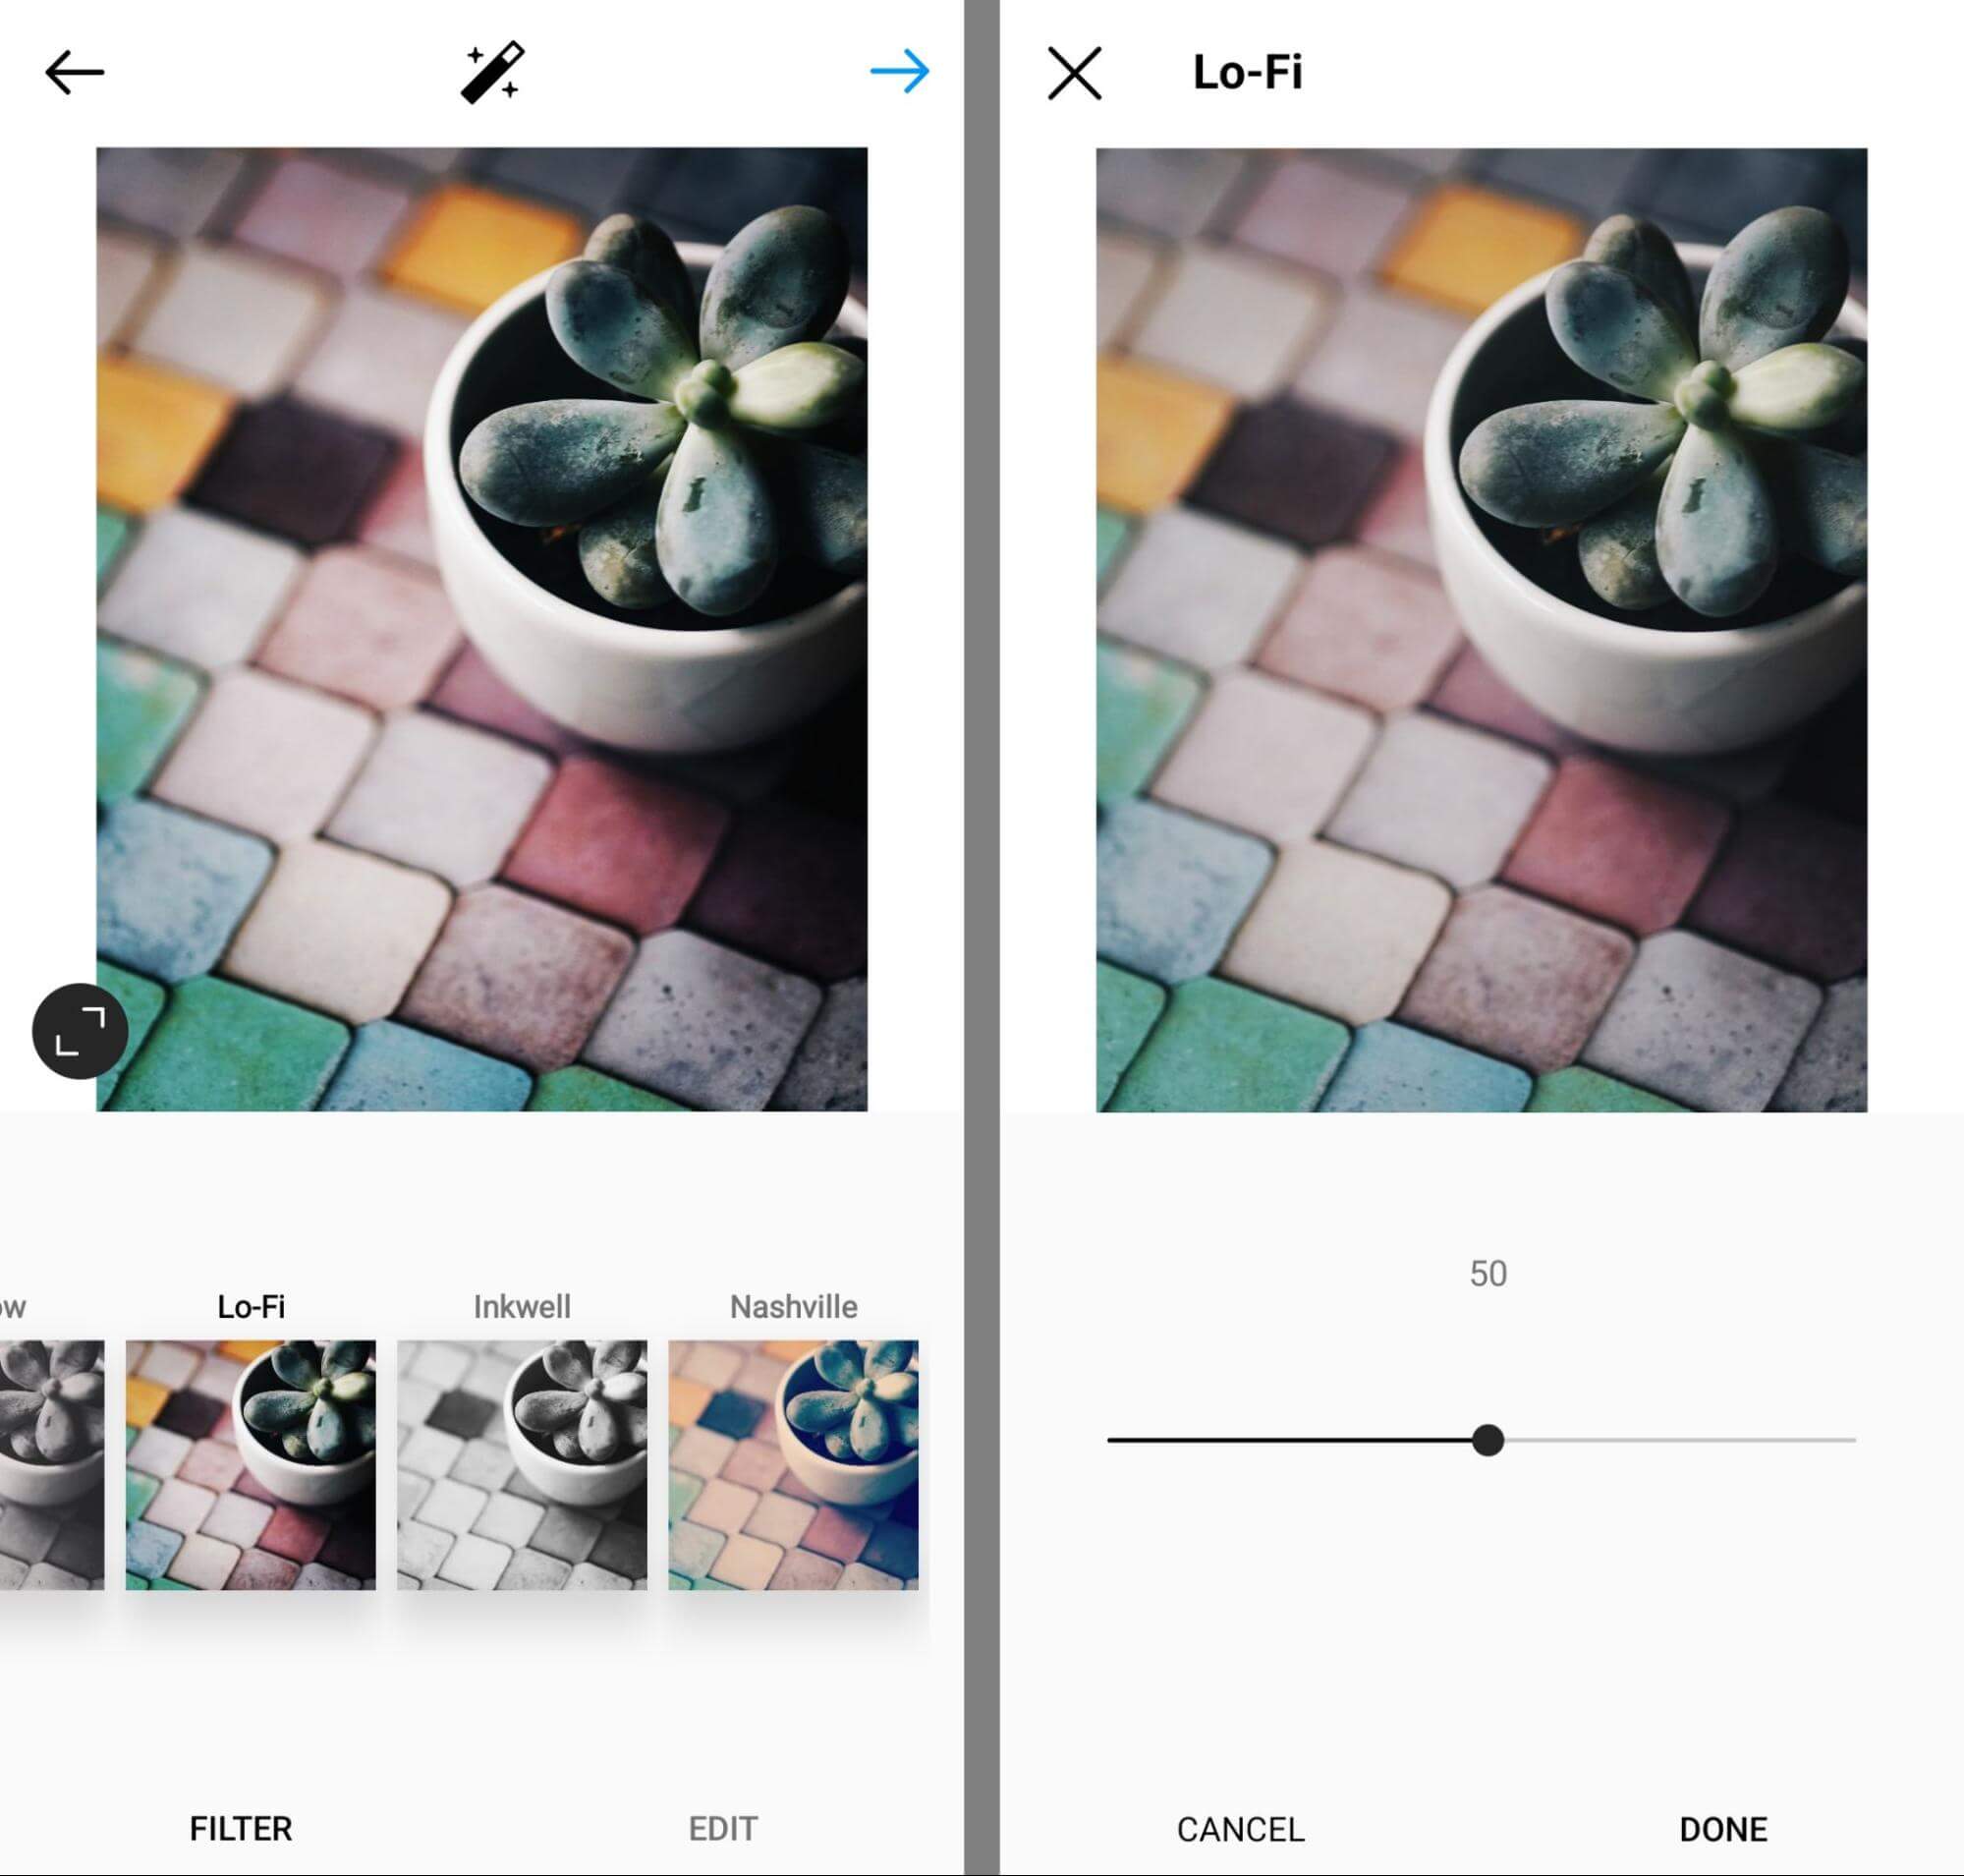
For best results, consider using a filter as a starting point. Double-tap any filter to adjust the intensity. By default, Instagram applies filters at 100% but you can dial it down to create a less extreme effect. Then use the editing tools below to fine-tune your Instagram photos and ensure that they look unique.
#2: Lux
Before you get started manually editing photos, tap the magic wand at the top of the screen. This button opens Instagram's lux tool, which gives you another easy way to create eye-catching images. You can use the lux tool on its own or in addition to the built-in filters.
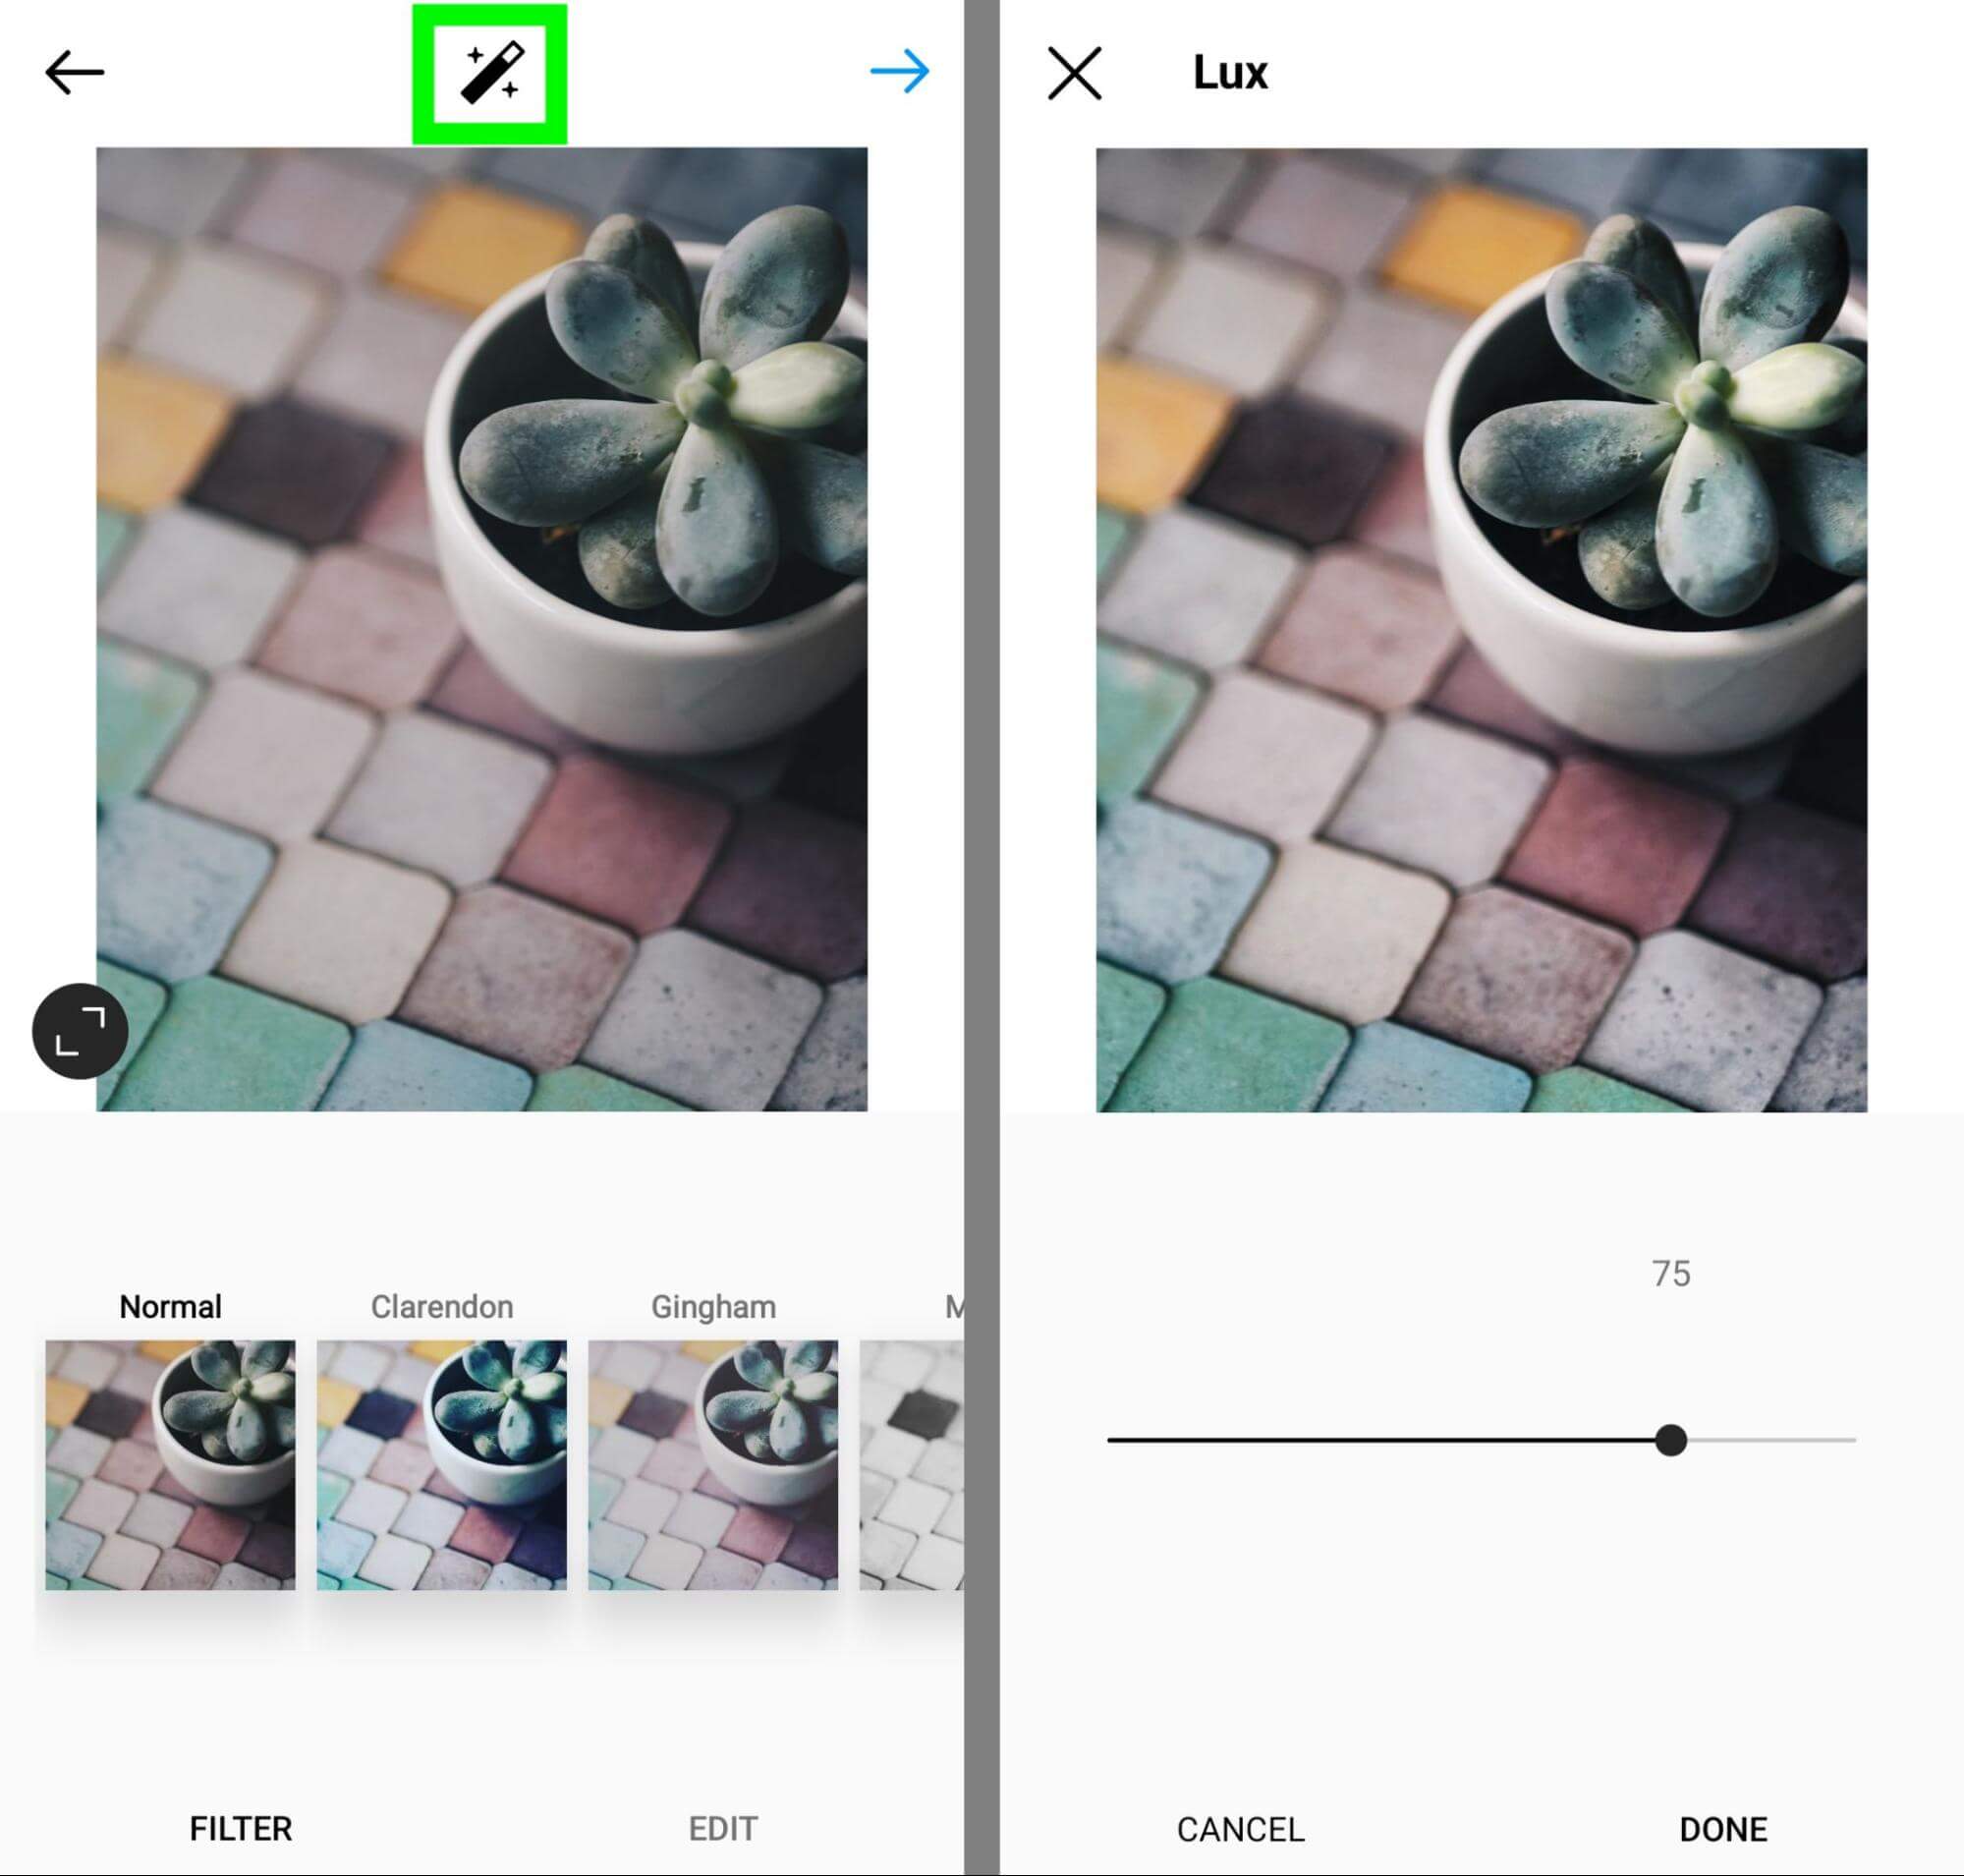
Like filters, the lux tool applies a series of presets, including saturation, contrast, and sharpness. Together, these features make images appear more vivid. When you really want to make your Instagram photos pop, apply the lux filter and then manually dial up these features even more.
#3: Adjust
Next, tap the Edit tab to modify your photos manually. The adjust tool is ideal for changing the orientation of your images while maintaining the aspect ratio. It can also straighten images that are slightly askew, making it appear as though you got the perfect shot.
3 Days of World-Class Training—Zero Travel!

Couldn't make it to Social Media Marketing World and AI Business World this year? Get all of the great content at a fraction of the price with a Virtual ticket.
That’s full access to recordings of every keynote, workshop, and session—the ones people travel thousands of miles to see. Don't wait. Get your Virtual ticket and enjoy actionable content that you can watch anytime, anywhere.
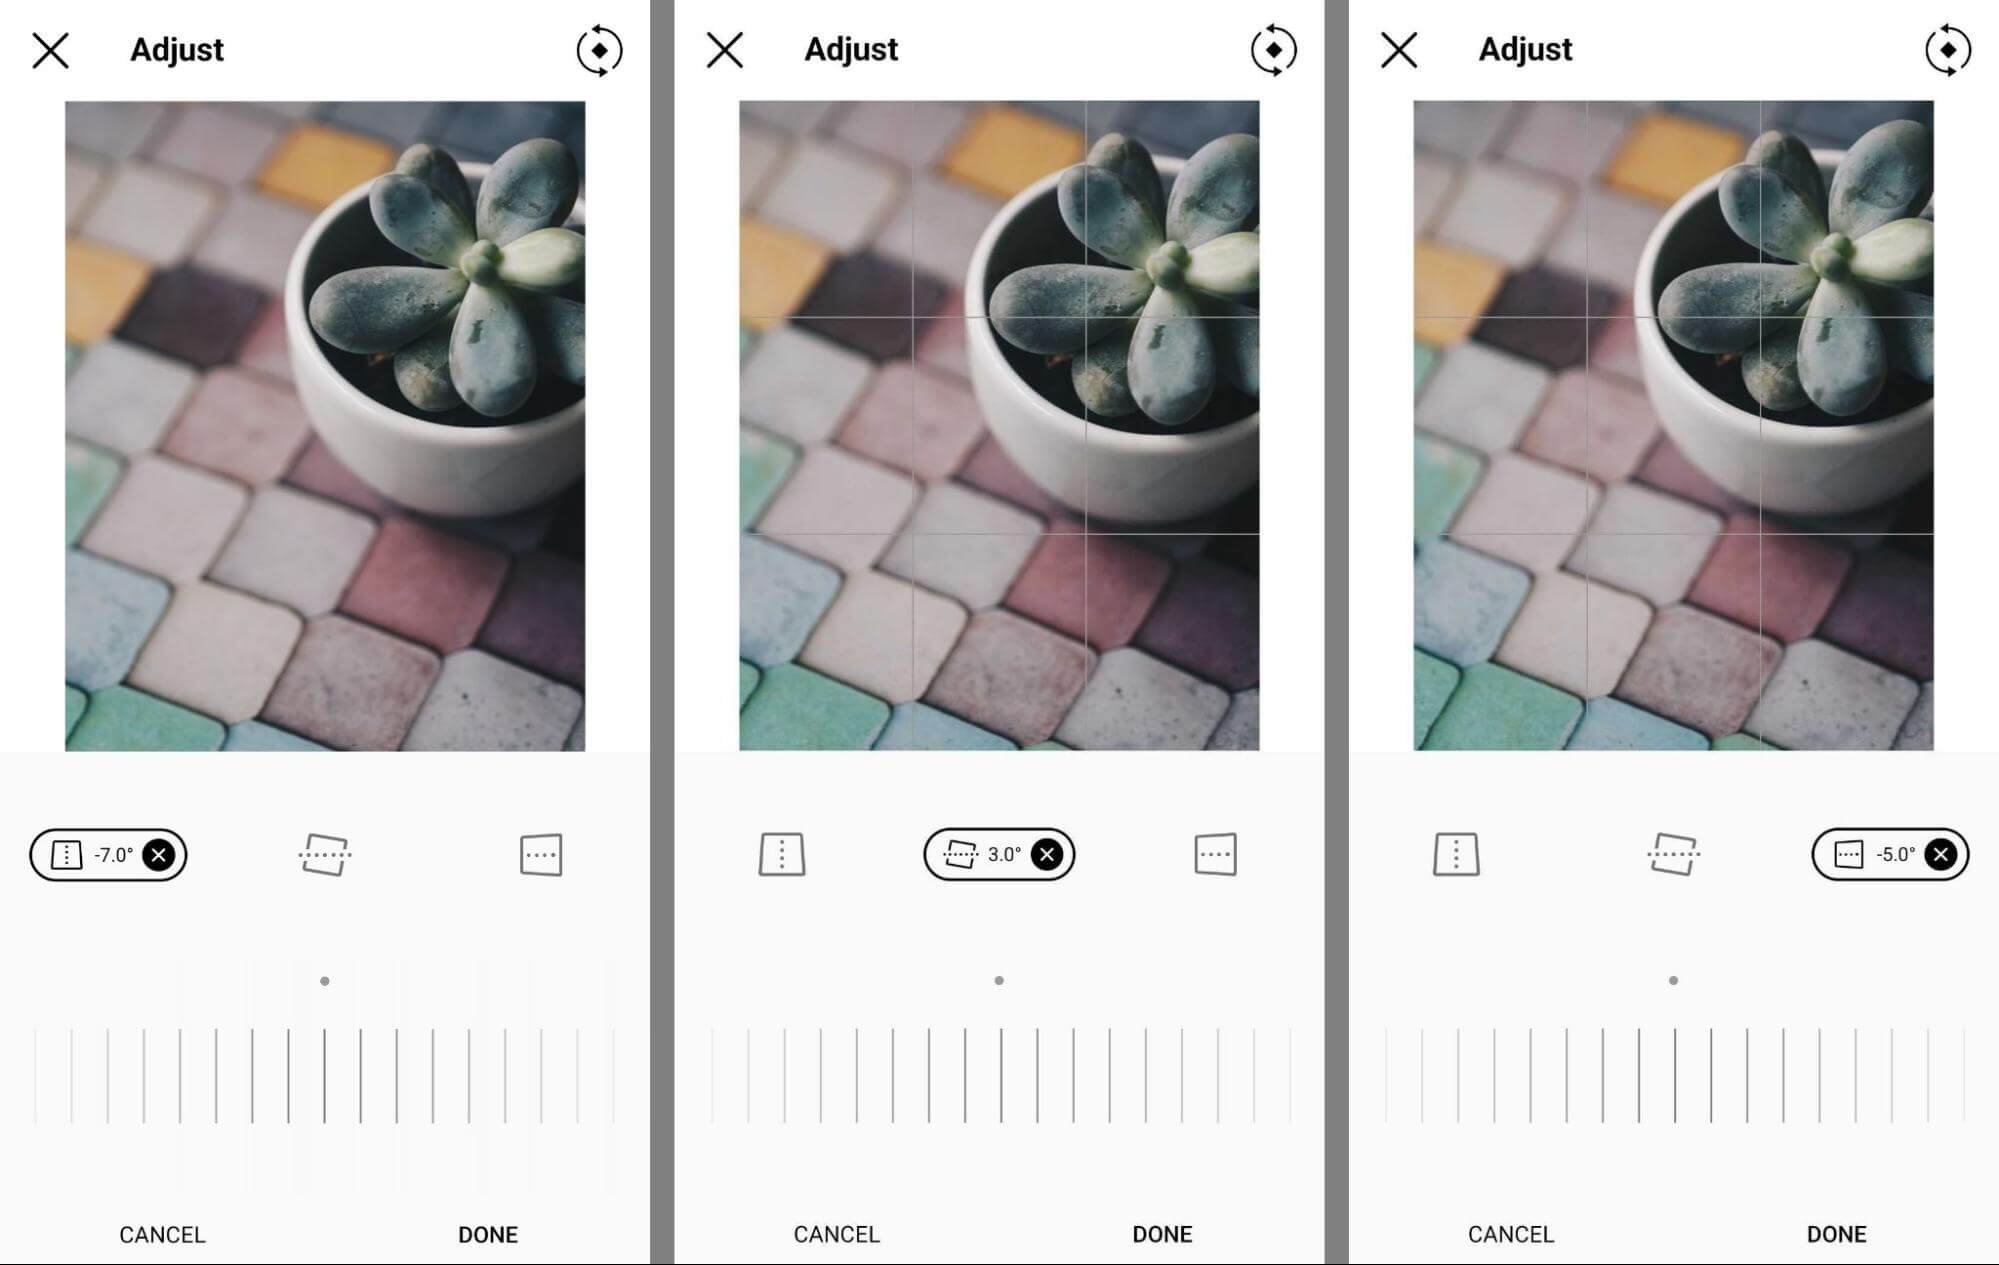
In addition, you can use the adjust tool to change the angles of your photo. Tap the vertical or horizontal tool and use the slider to make the top, bottom, left, or right side of the photo appear closer to the viewer.
#4: Brightness
To increase or decrease the light levels in your picture, tap the Brightness tool. By default, the brightness level is set to 0. You can increase it up to 100 to add more light or decrease it to –100 to remove light.
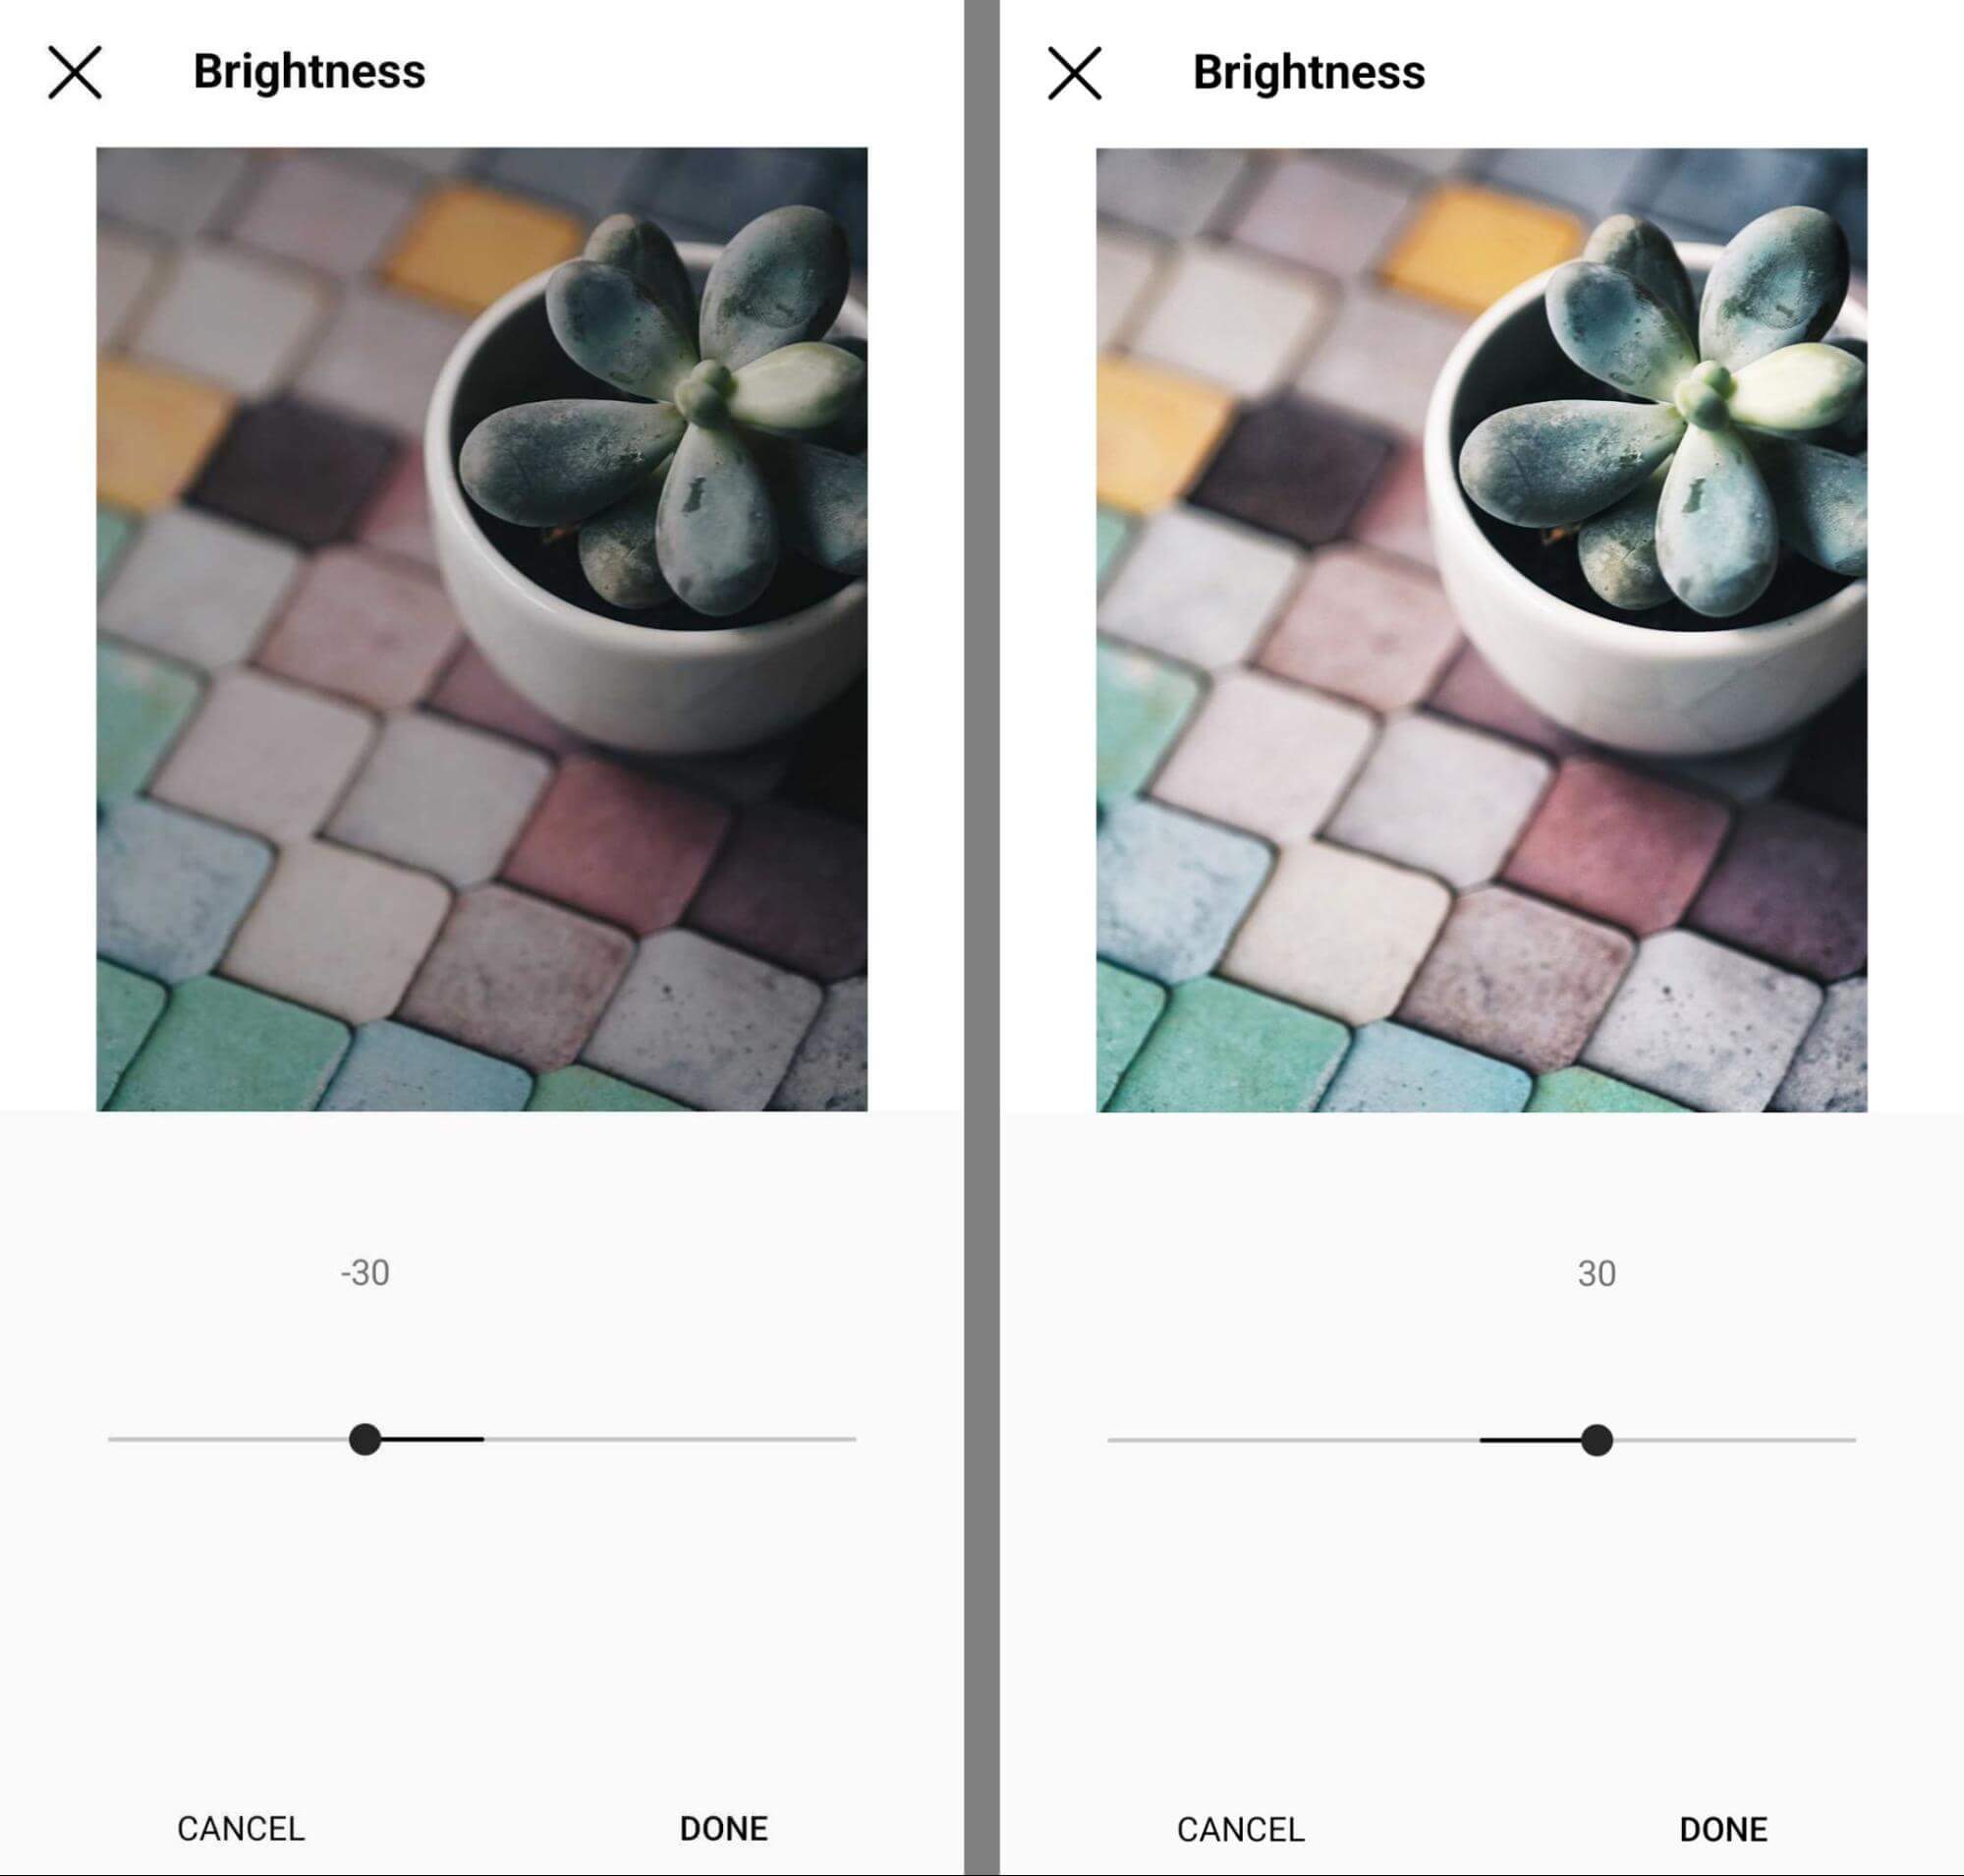
If your original image was over- or underexposed, adjusting the brightness is an easy way to compensate for this common issue. To perfect your image, plan to combine brightness edits with other exposure-related tools like contrast, shadows, and highlights.
#5: Contrast
Like brightness, the contrast tool allows you to dial contrast up or down by 100. By increasing contrast, you essentially add more difference to the components of the photo, effectively making the tones stand out against each other. Higher contrast images tend to look crisper and can be easier to interpret, which may appeal to your audience.
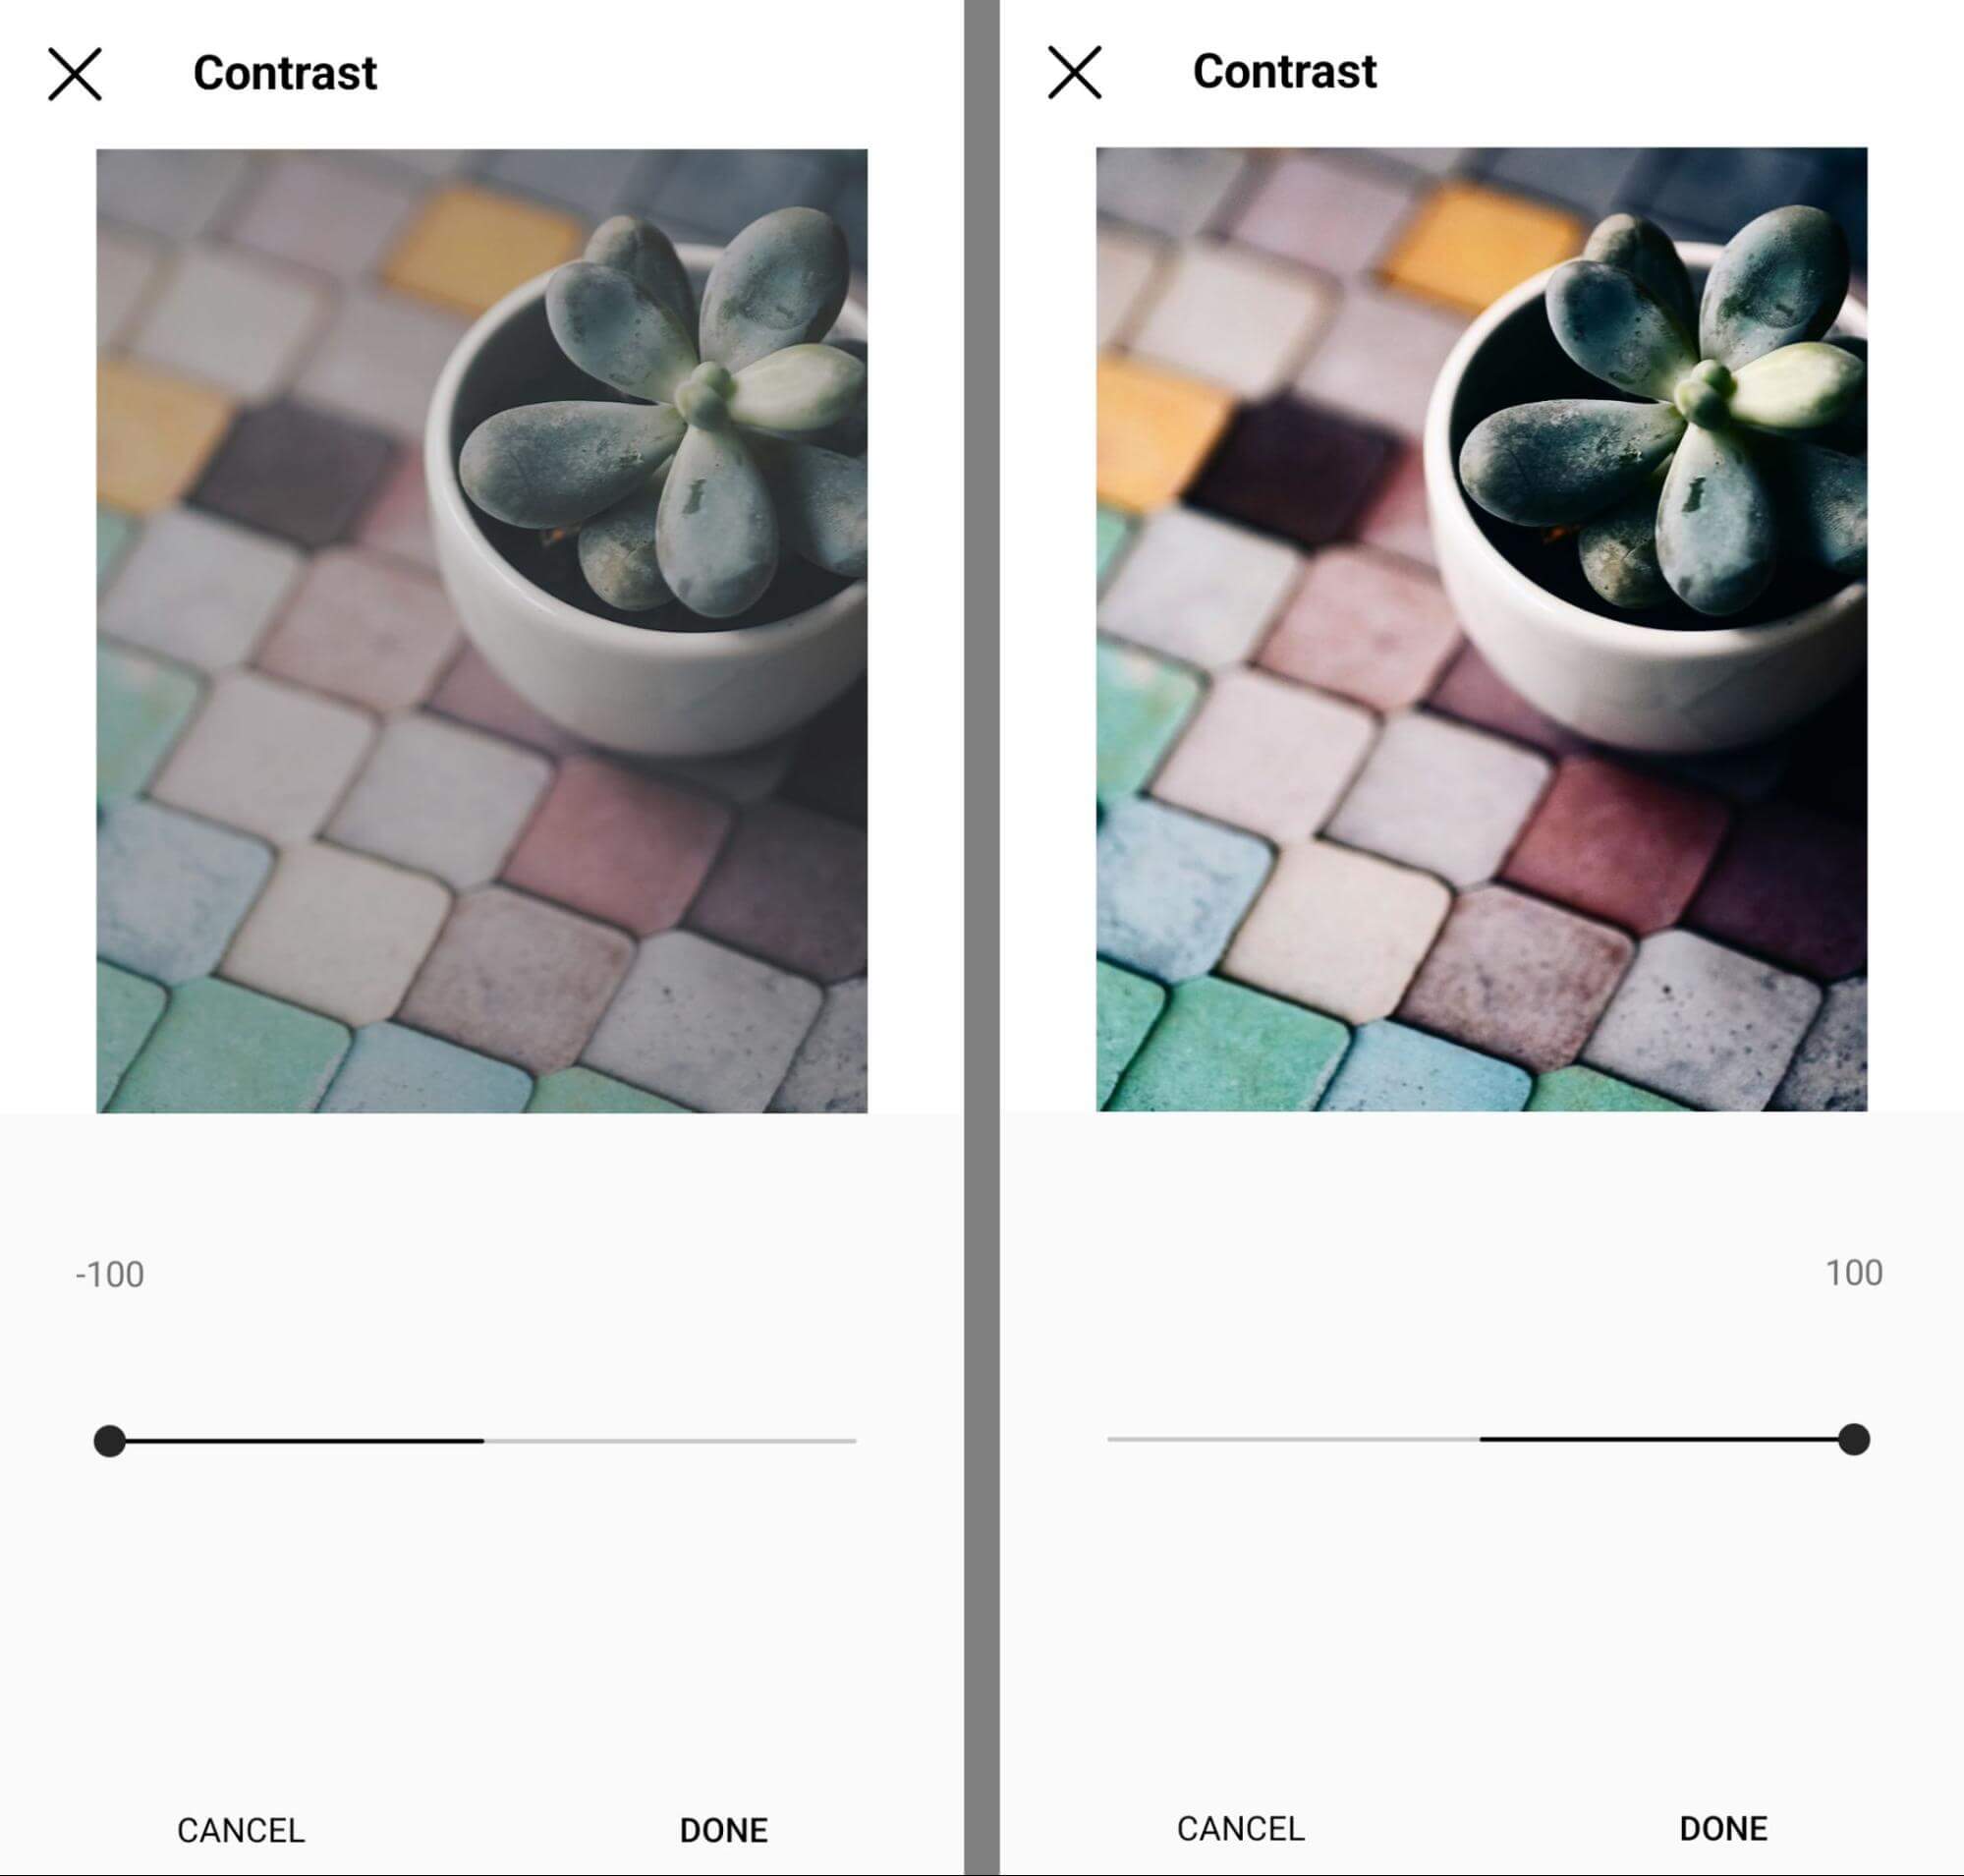
When you decrease contrast, you make the tones appear more similar to each other. Lower-contrast images can appear muted or dreamlike but may be more challenging to process at a glance.
#6: Structure
Instagram's structure tool increases sharpness and adds more definition to the textures in your photo. By default, this editing tool is set to 0. To sharpen the details of your photo, you can use the slider to increase the structure up to 100.
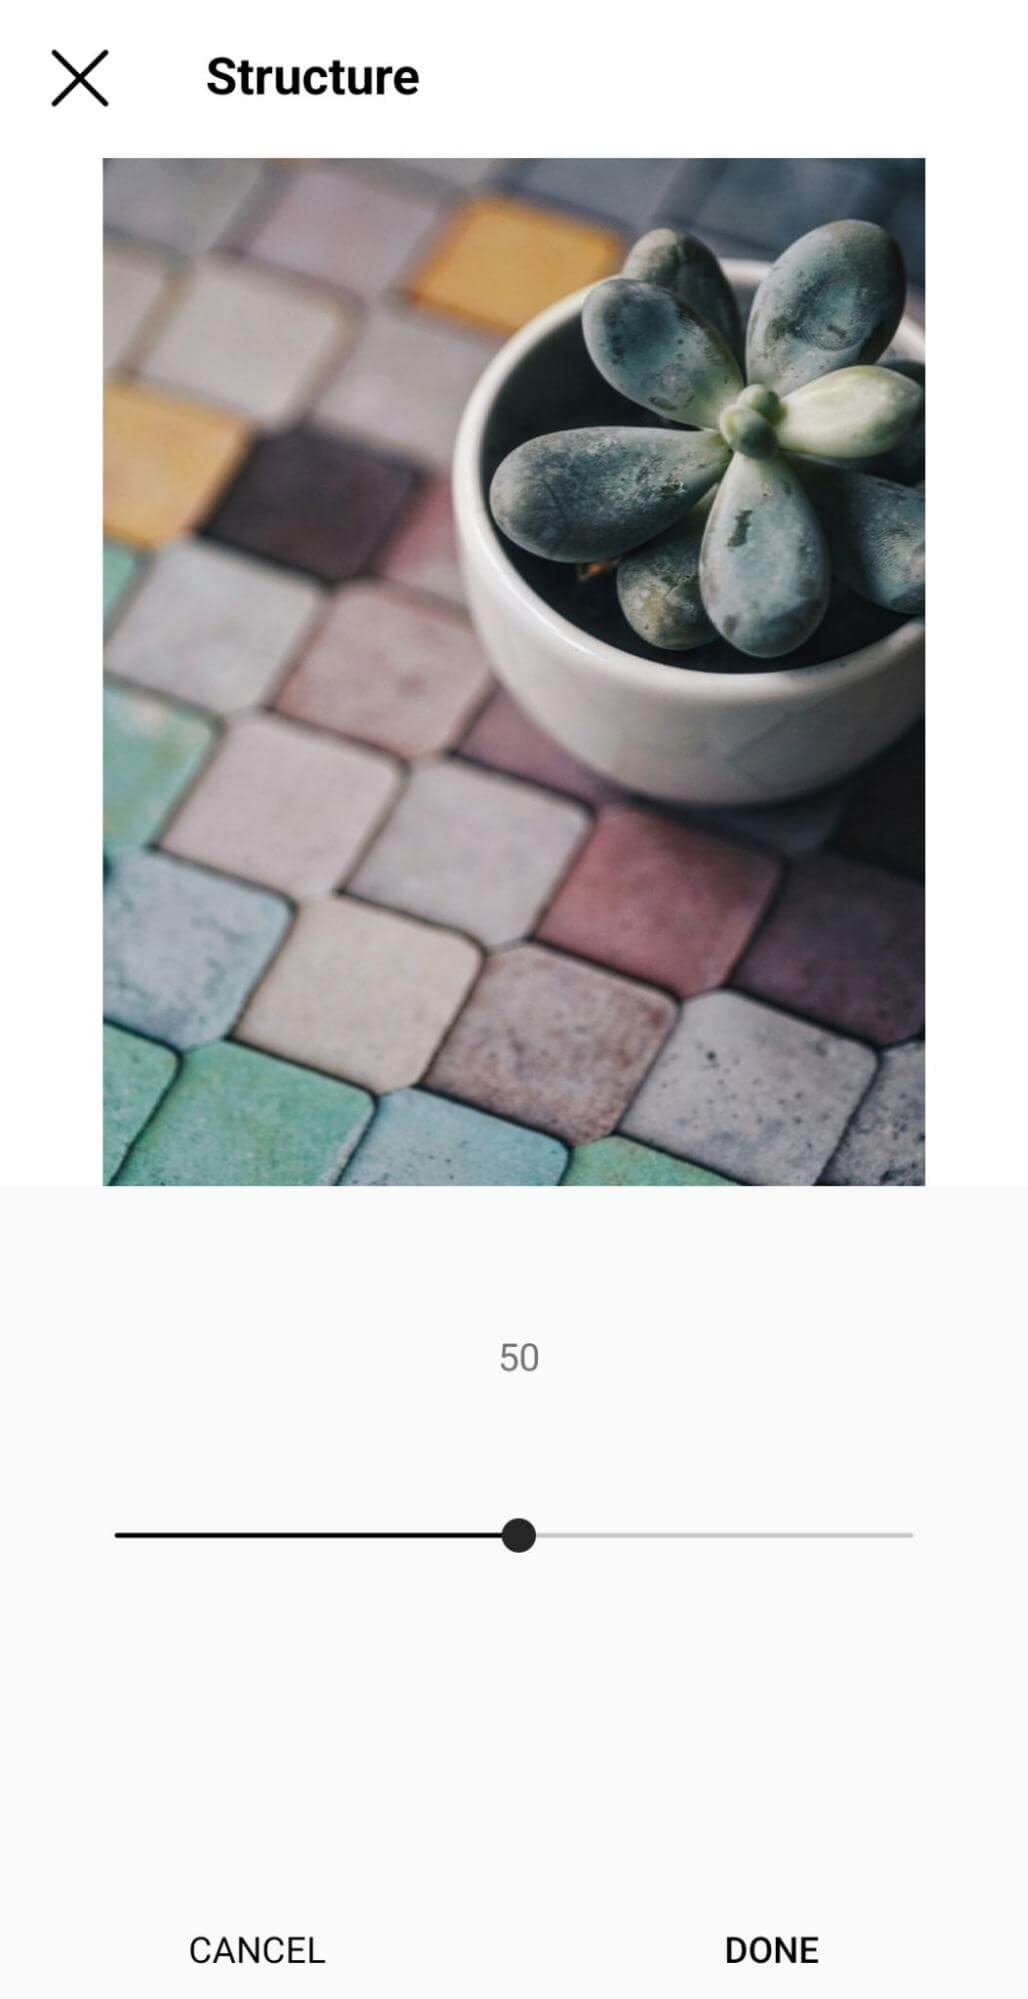
If the subject of your photo lacks definition or if you want to bring out the textures in the image, it's a good idea to use this editing tool in moderation. Avoid overdoing the structure tool because excessive texture can appear unnatural, which can be distracting.
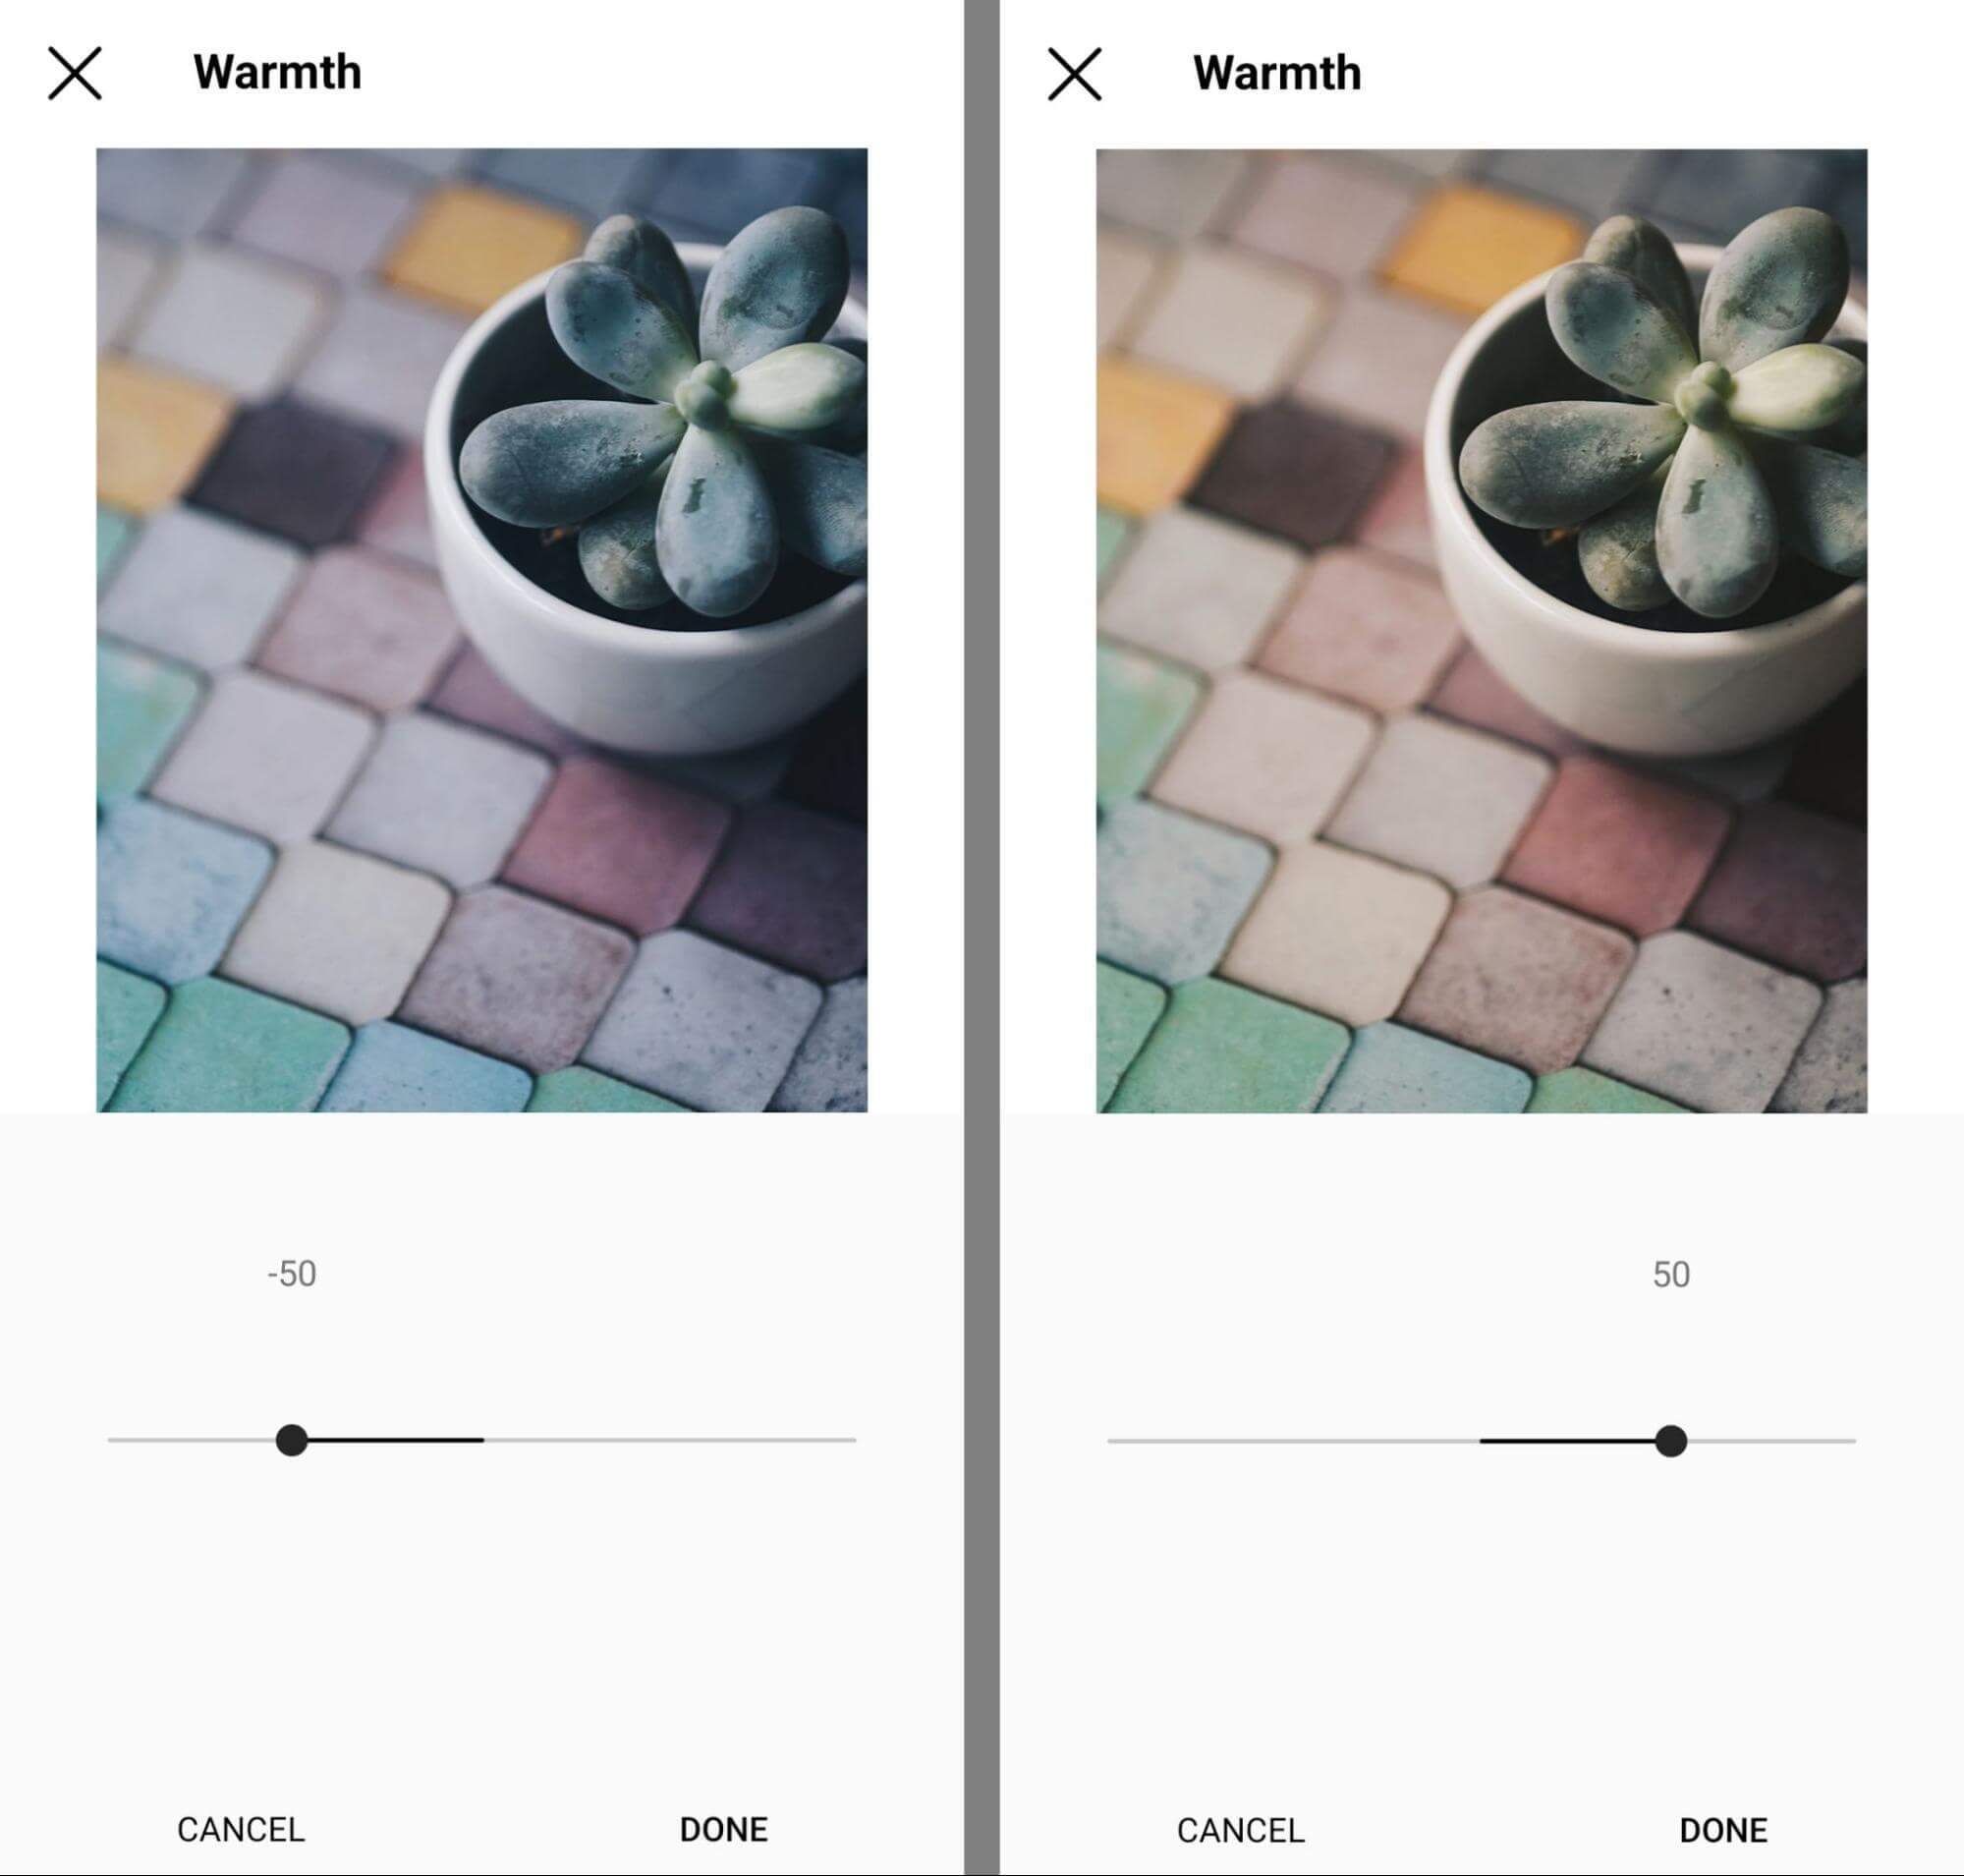
#7: Warmth
The Instagram warmth tool adjusts the tones of your photos. Increase the warmth to add orange tones to your photo or decrease it to add a bluish cast. If your original photo's white balance is off, the warmth tool can help you establish a more natural-looking tone throughout.
#8: Saturation
The Instagram saturation tool modifies the intensity of the colors in the image. Dial it up to 100 to make the colors look more concentrated. Alternatively, take it down to –100 to remove color completely, creating a black-and-white (monochrome) image.
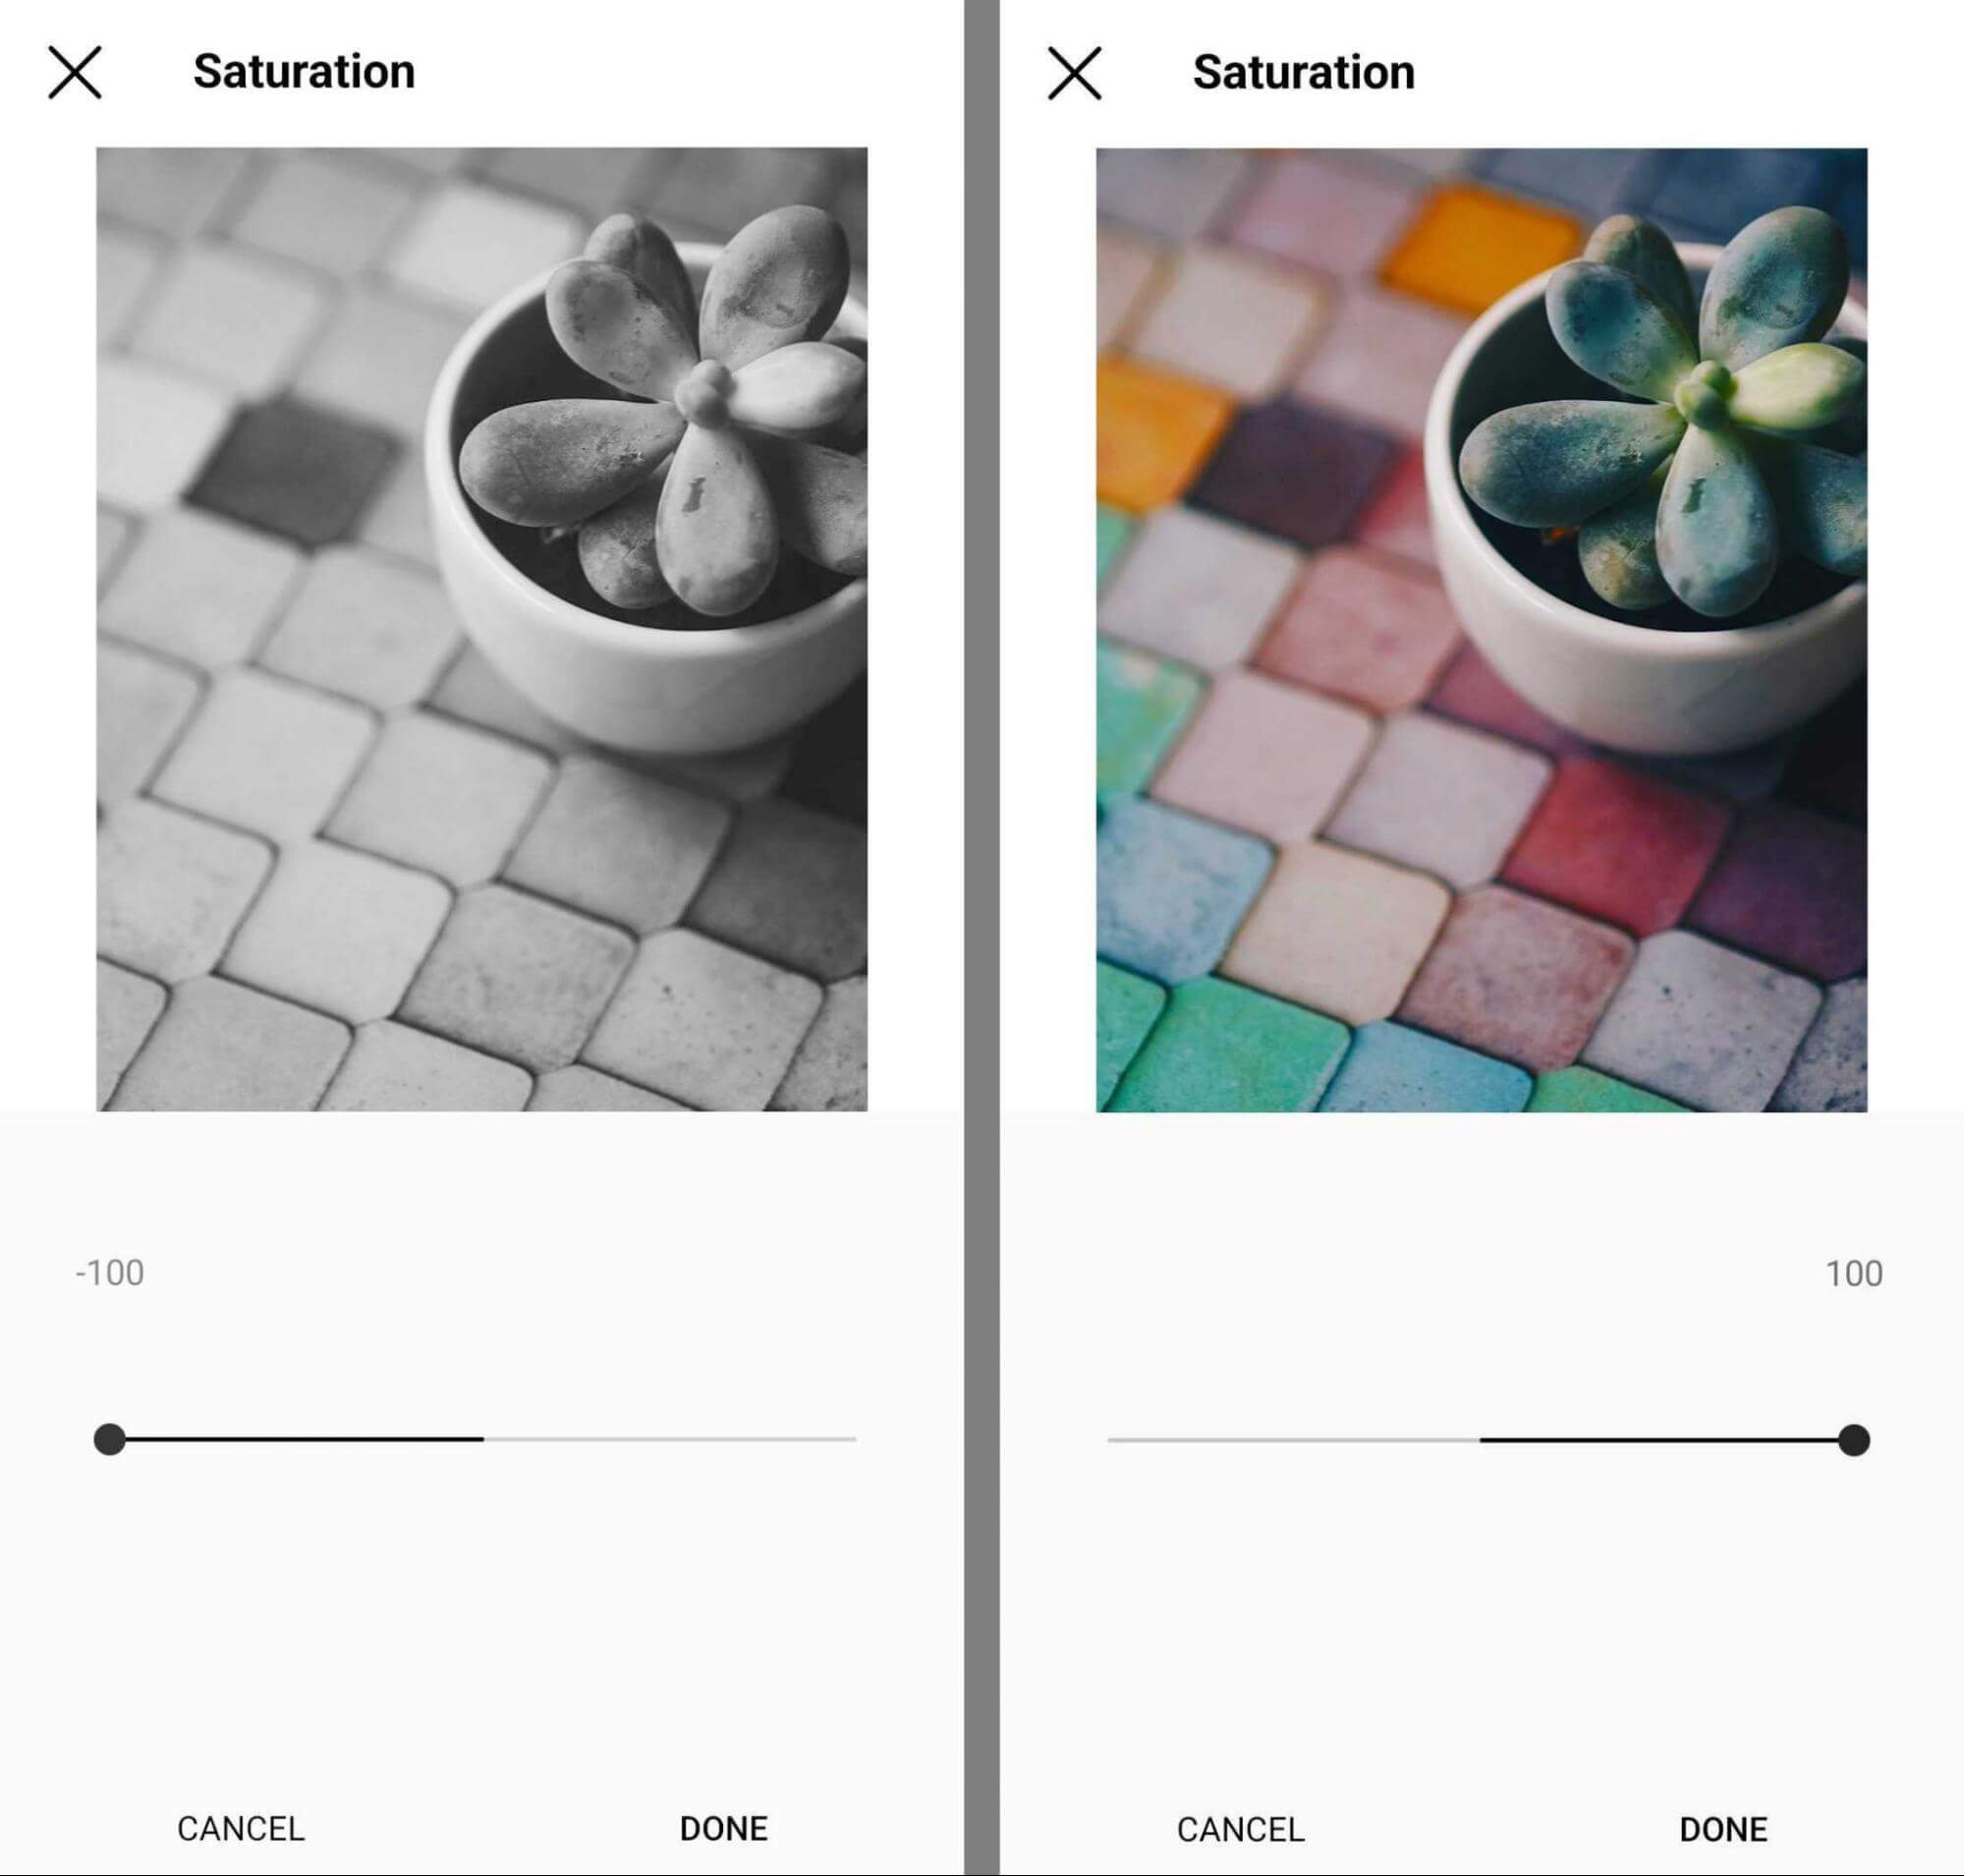
The deeper tones of saturated images tend to stand out in the feed easier. Yet it's important to use saturation in moderation, especially if you need images to look realistic; for example, when you publish product photos.
#9: Color
While the Instagram warmth tool gives images an orange or blue tone, the color tool gives you more control over the hue you add to your photo. With the Instagram color tool, you can choose from eight tones that span the entire spectrum of the rainbow.
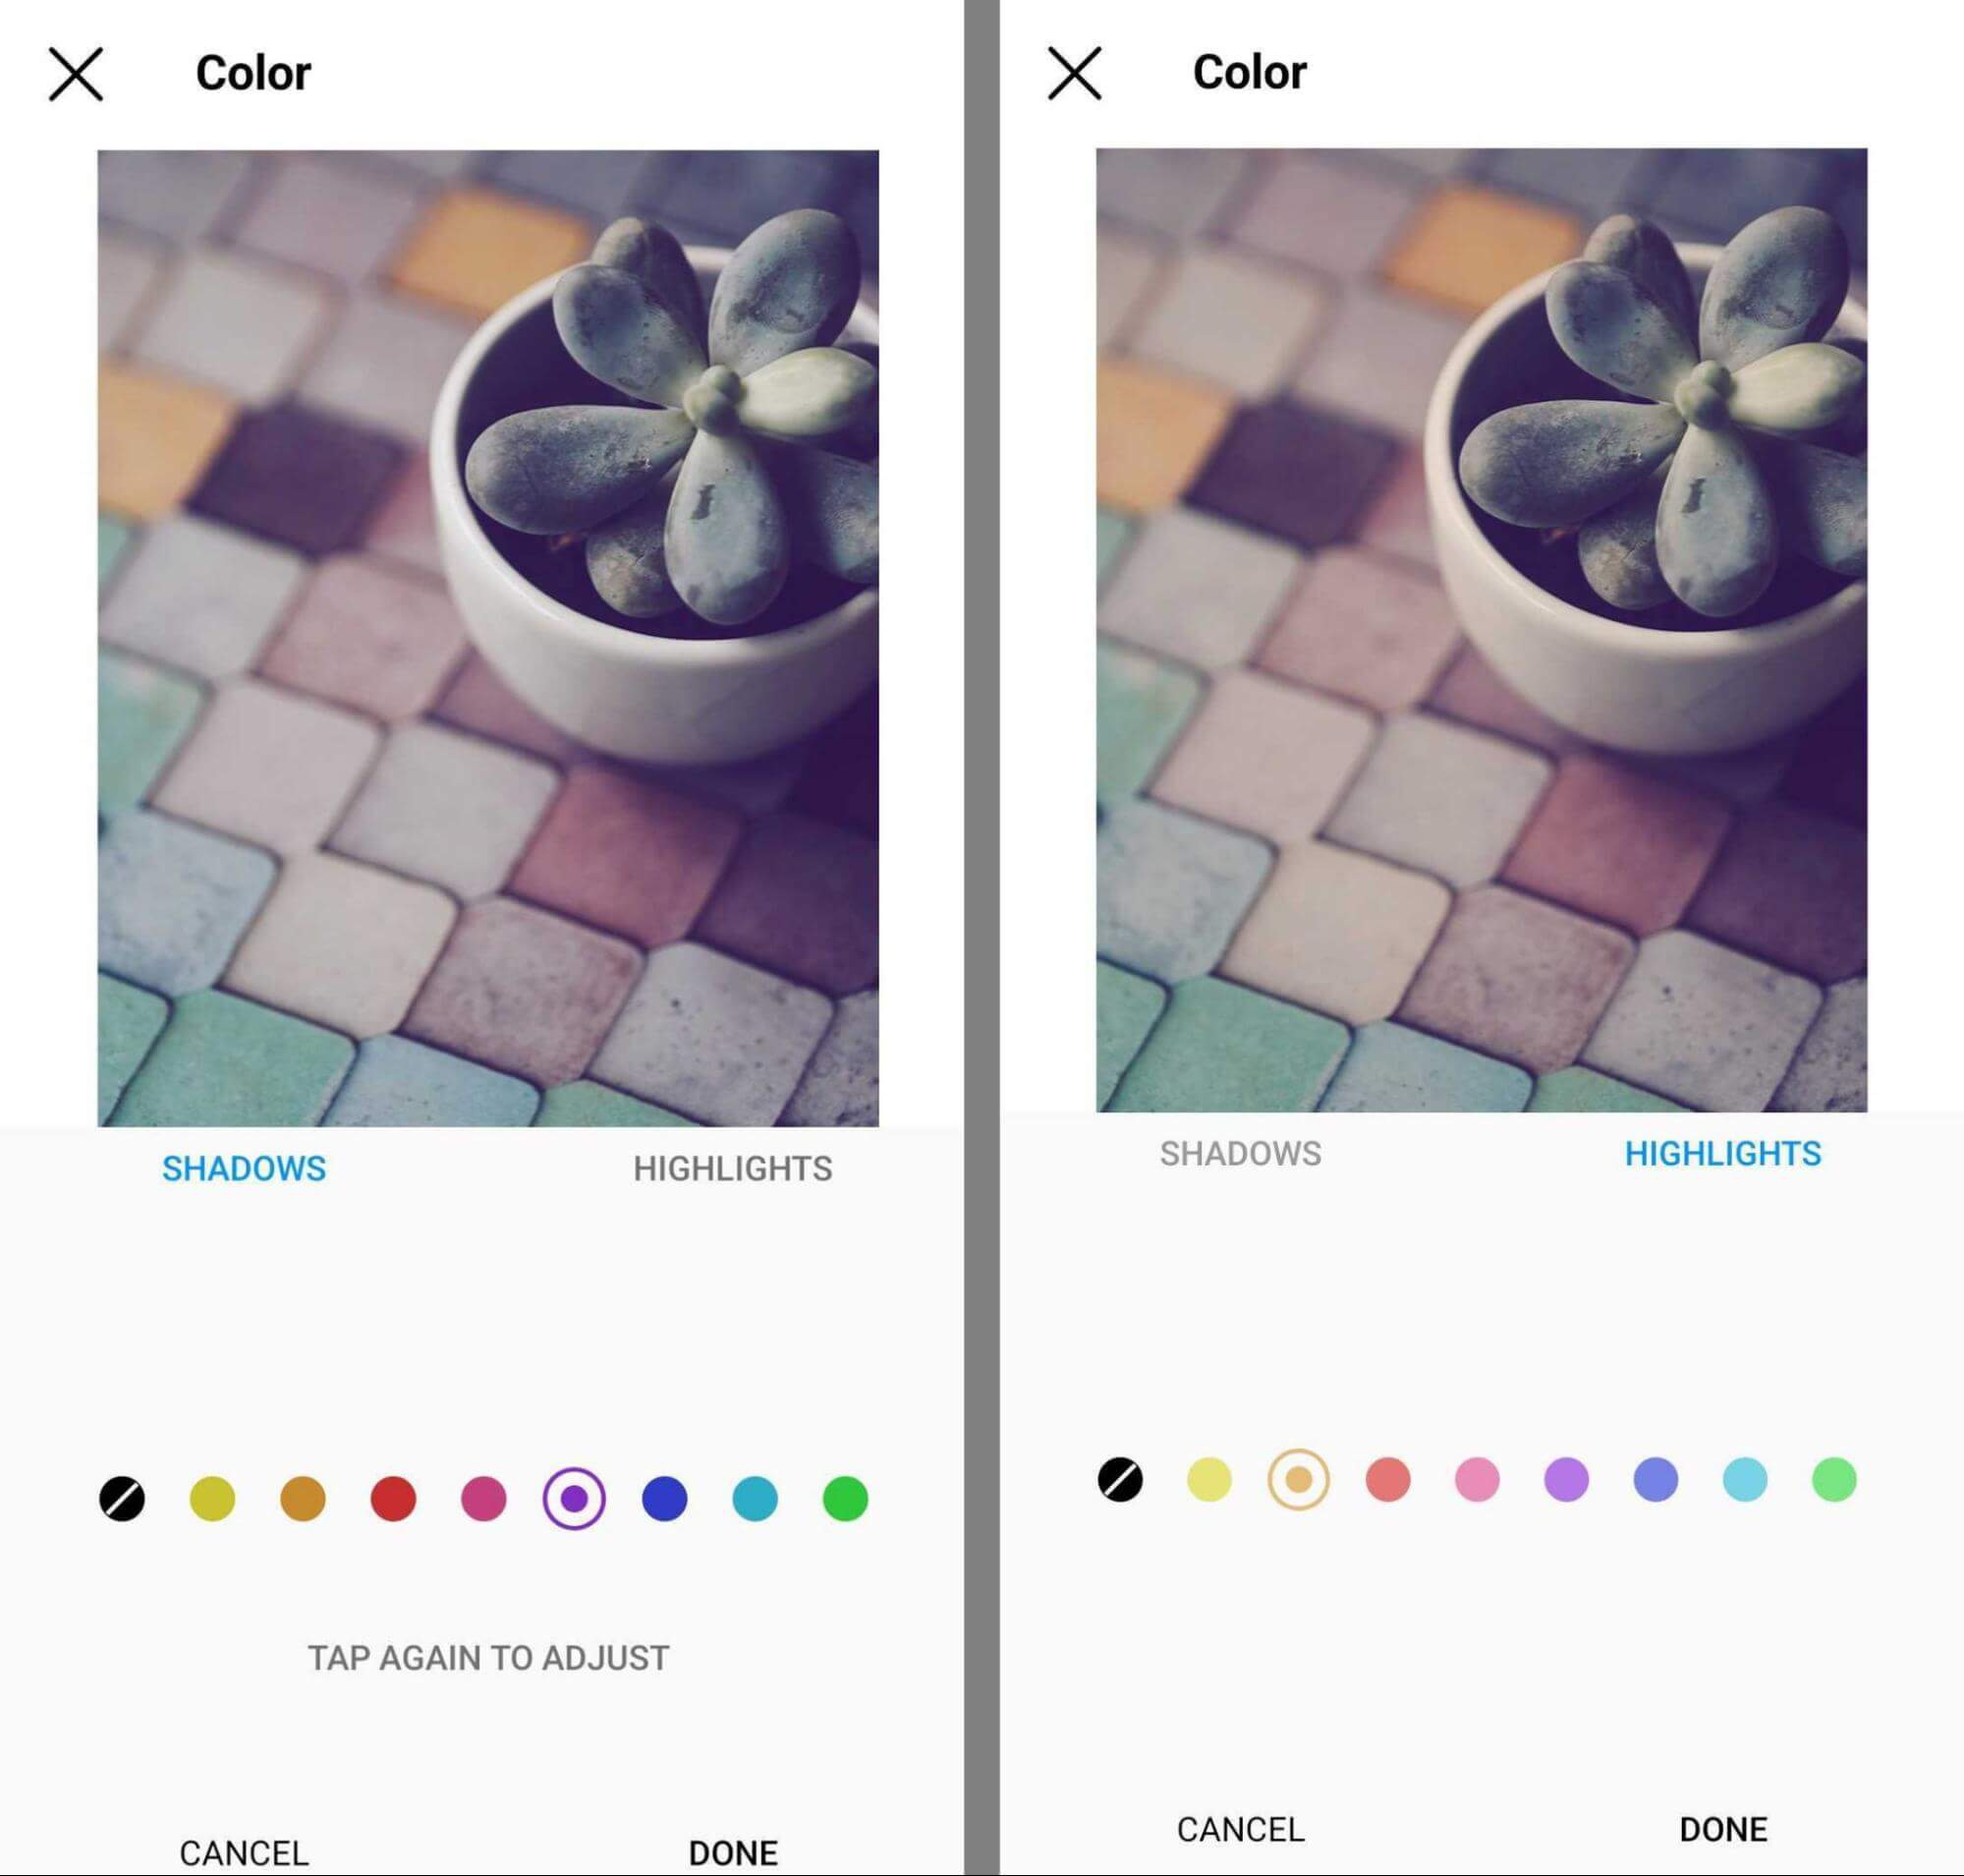
When editing Instagram photos, you can also opt to apply the color to the image's shadows or highlights. In other words, you can add color to the darkest or lightest parts of the photo. Double-tap any color option to access a slider that can adjust the intensity from 0 to 100.
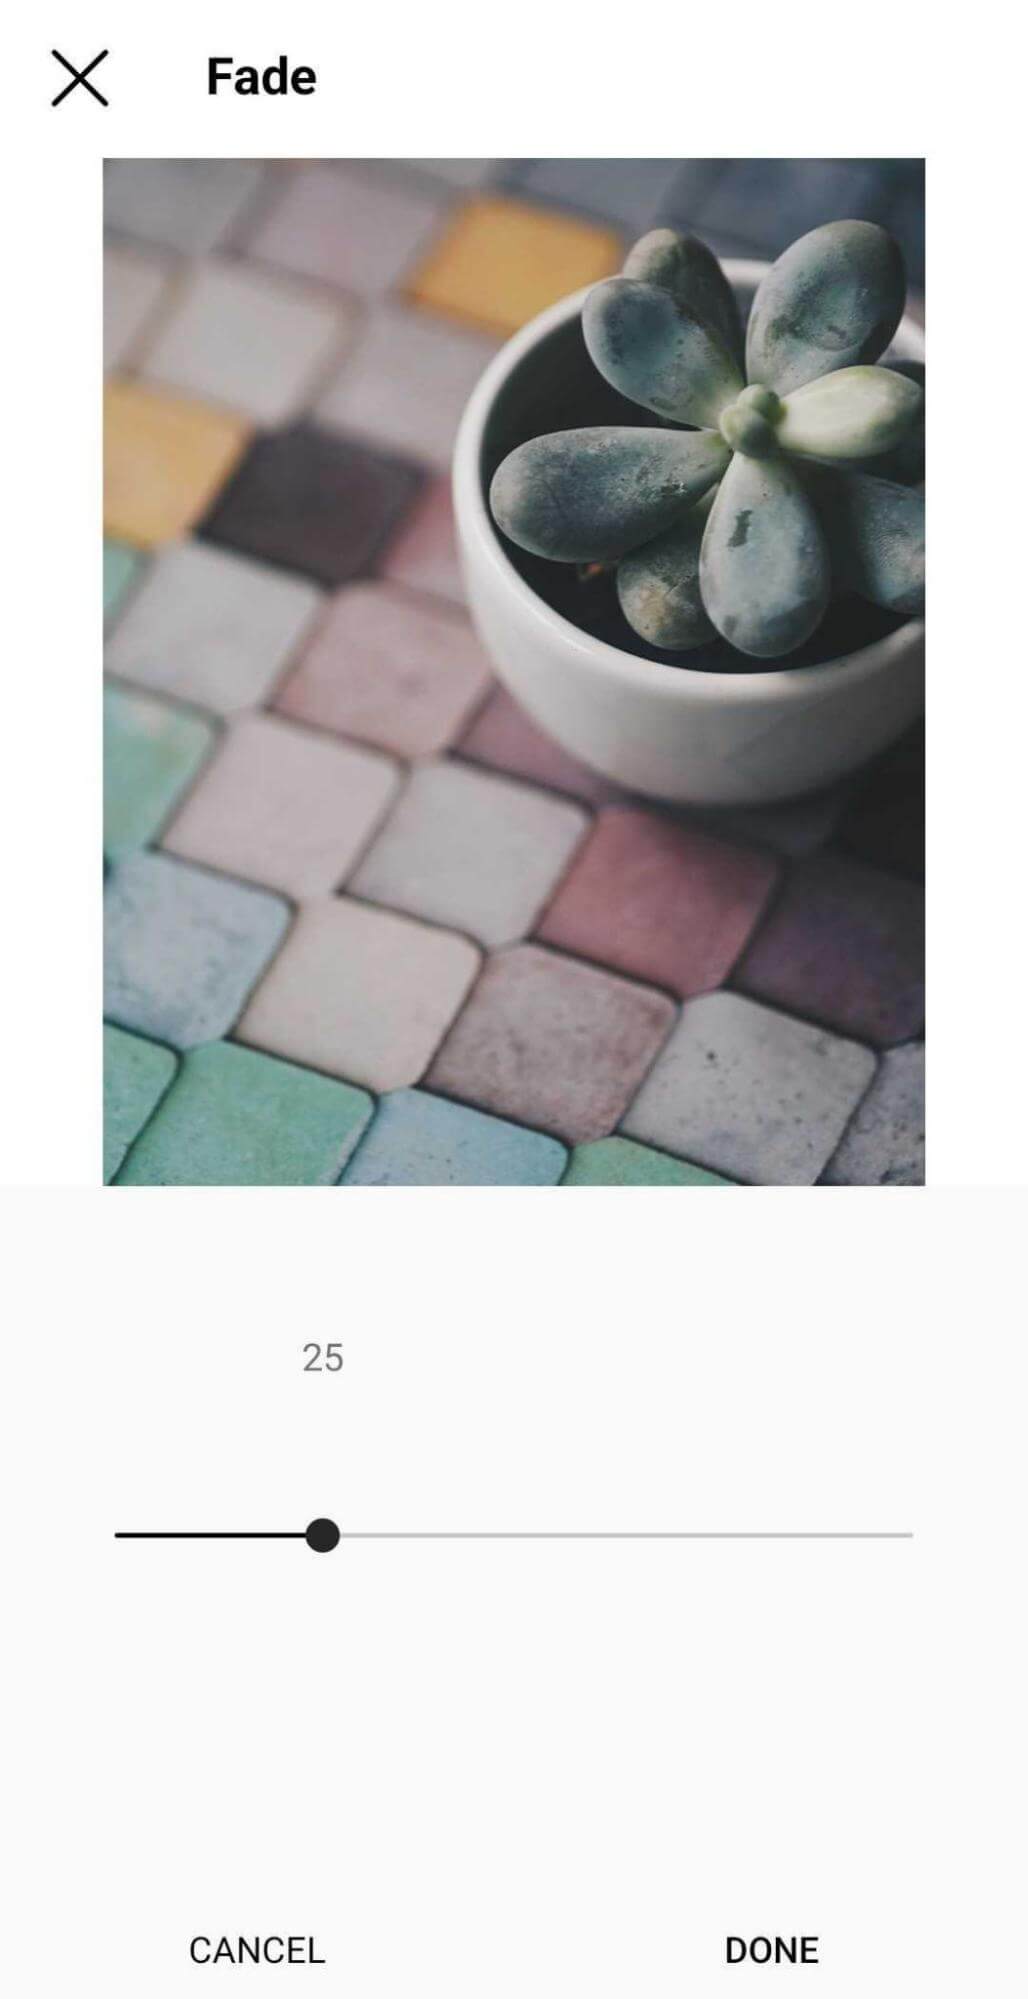
#10: Fade
Editing your photos with the Instagram fade tool can give them a softer note. This tool dials down saturation and contrast slightly to moderate textures and make your images appear smoother overall. It offers a simple fix for images that look too harsh or textured.
#11: Highlights
Although Instagram doesn't have a photo editing tool specifically for exposure, the highlights and shadows tools can help you address exposure-related issues. With the highlights tool, you can brighten or darken the lightest parts of the image. The slider goes from –100 to 100.
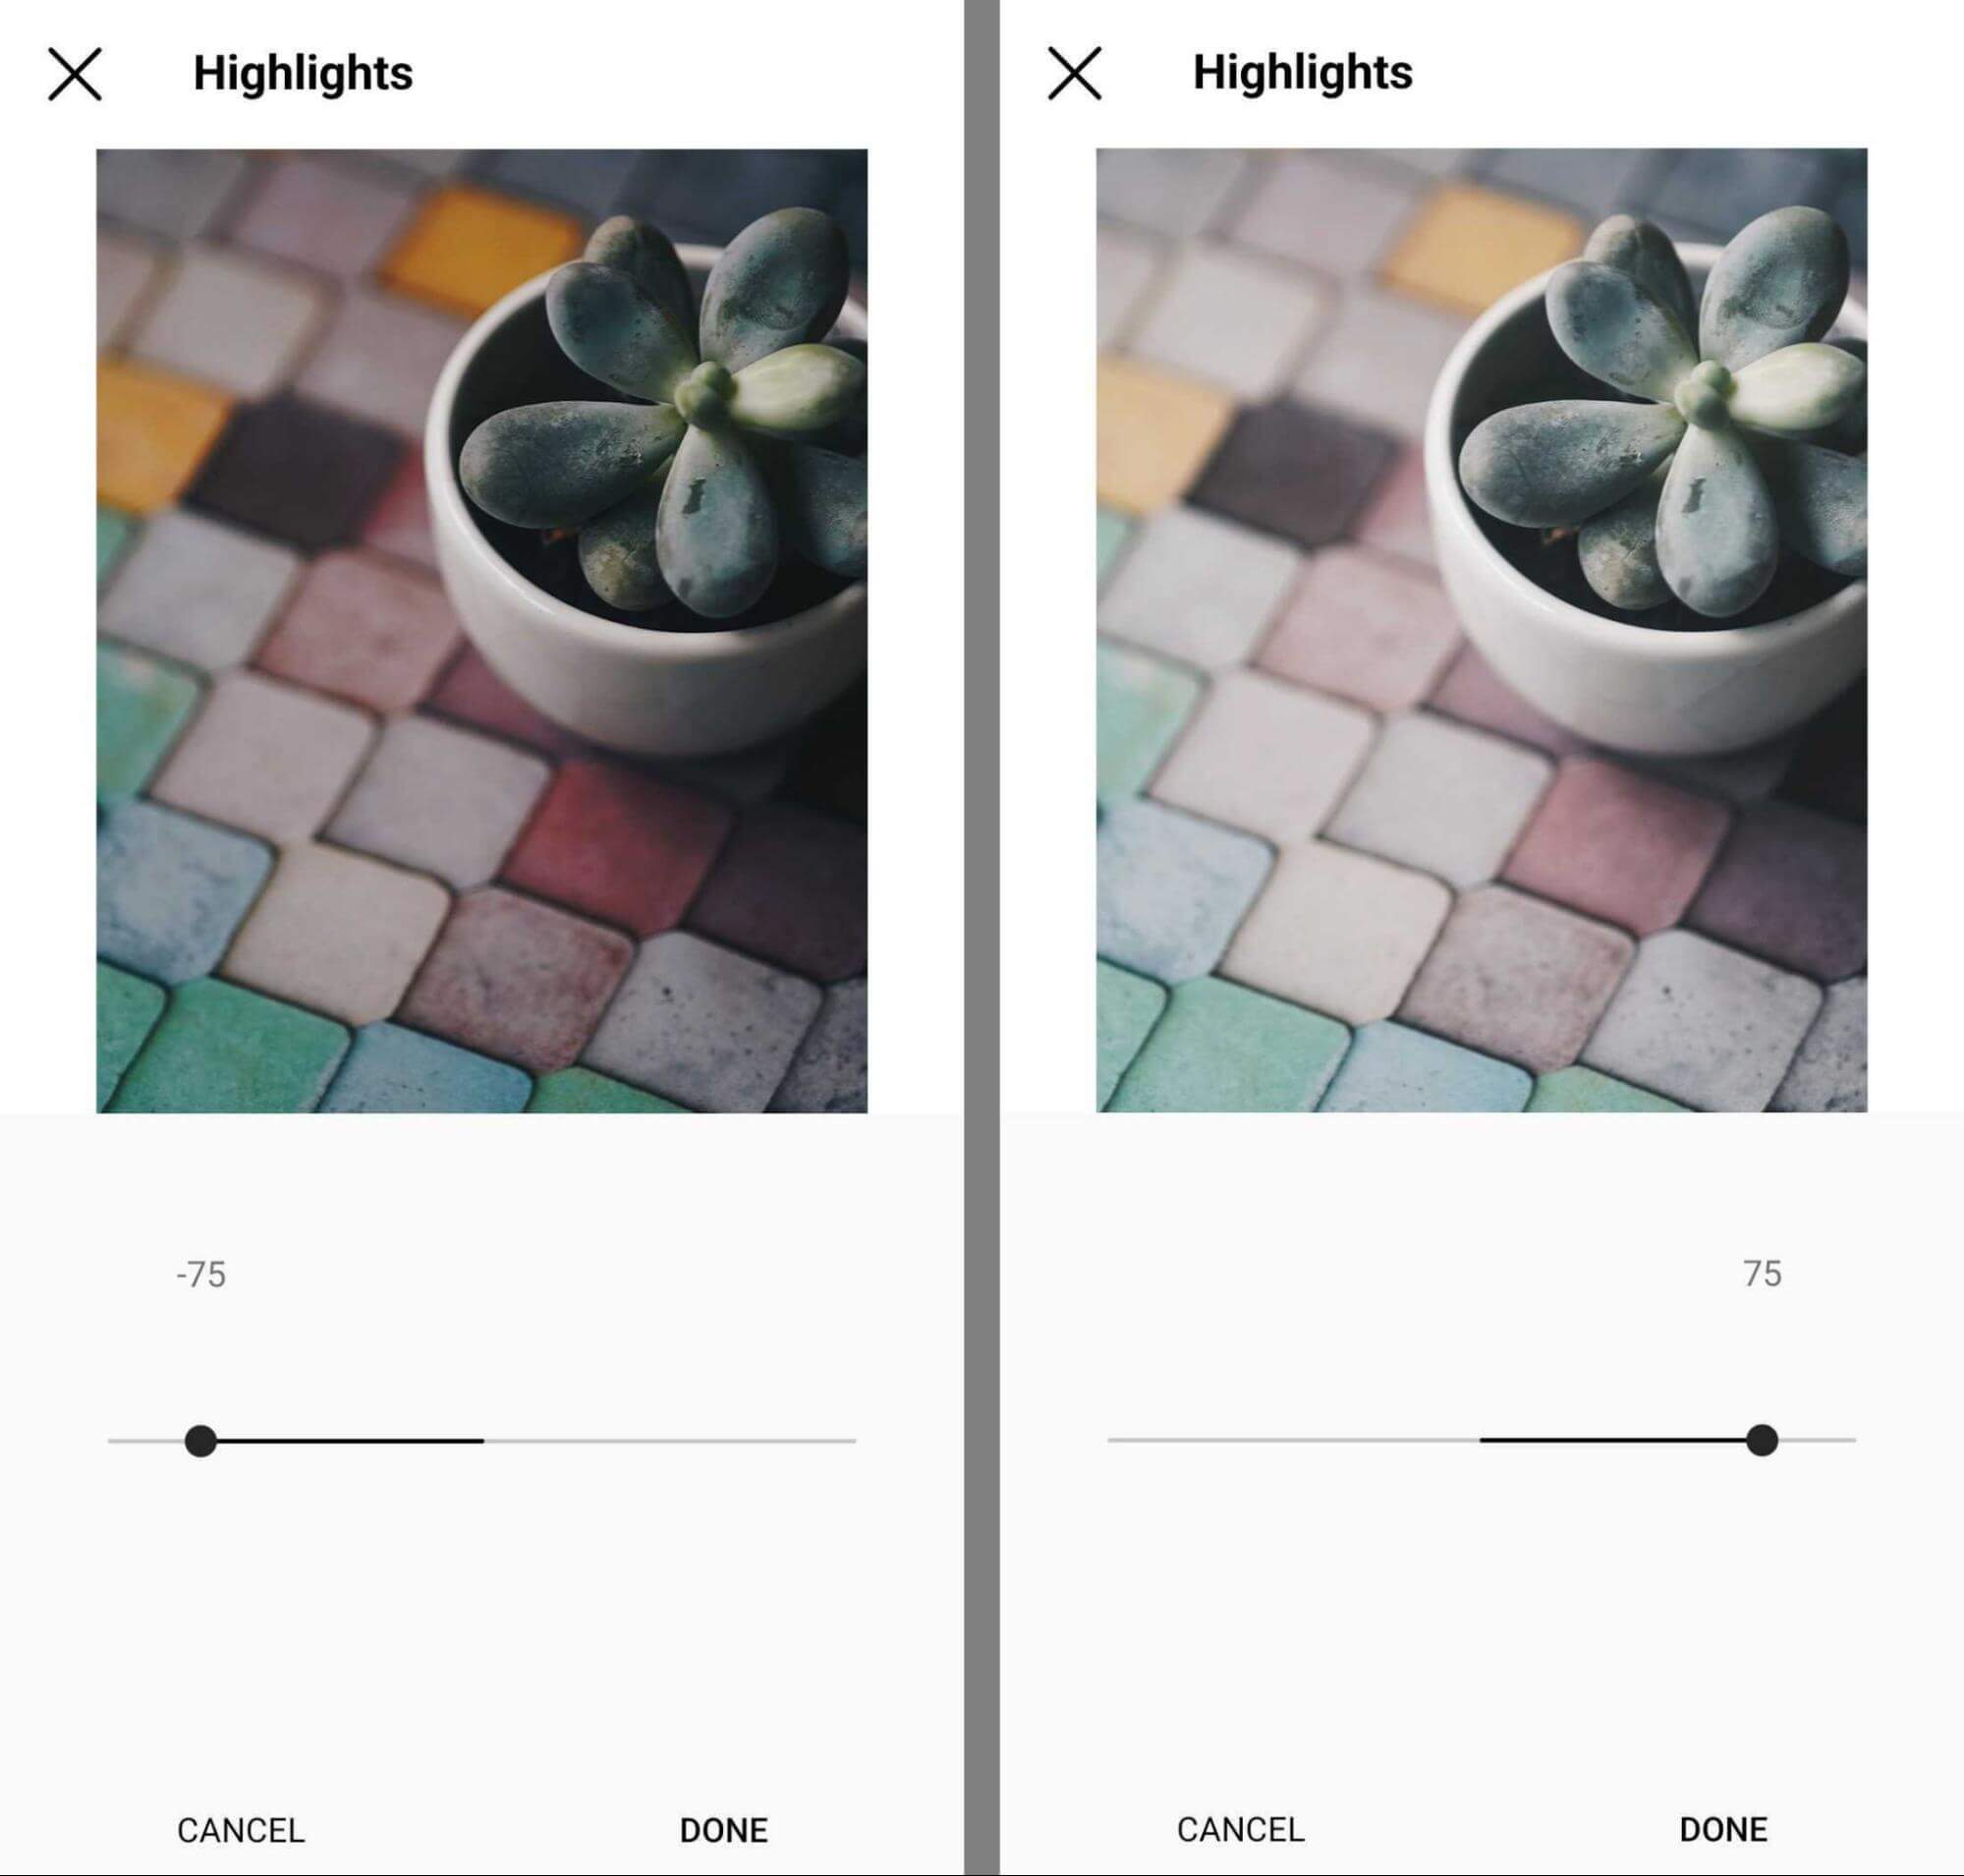
If you use the Instagram highlights tool to brighten images, take care not to overdo it. Excessive highlighting tends to be distracting for viewers and can remove details from your photos, making them appear washed out.
#12: Shadows
While the Instagram highlights tool addresses the lightest parts of the image, the shadows tool modifies the dark areas of the image. Drag the slider to the left to darken the shadows, but watch out for crushed shadows—completely black areas that lack detail.
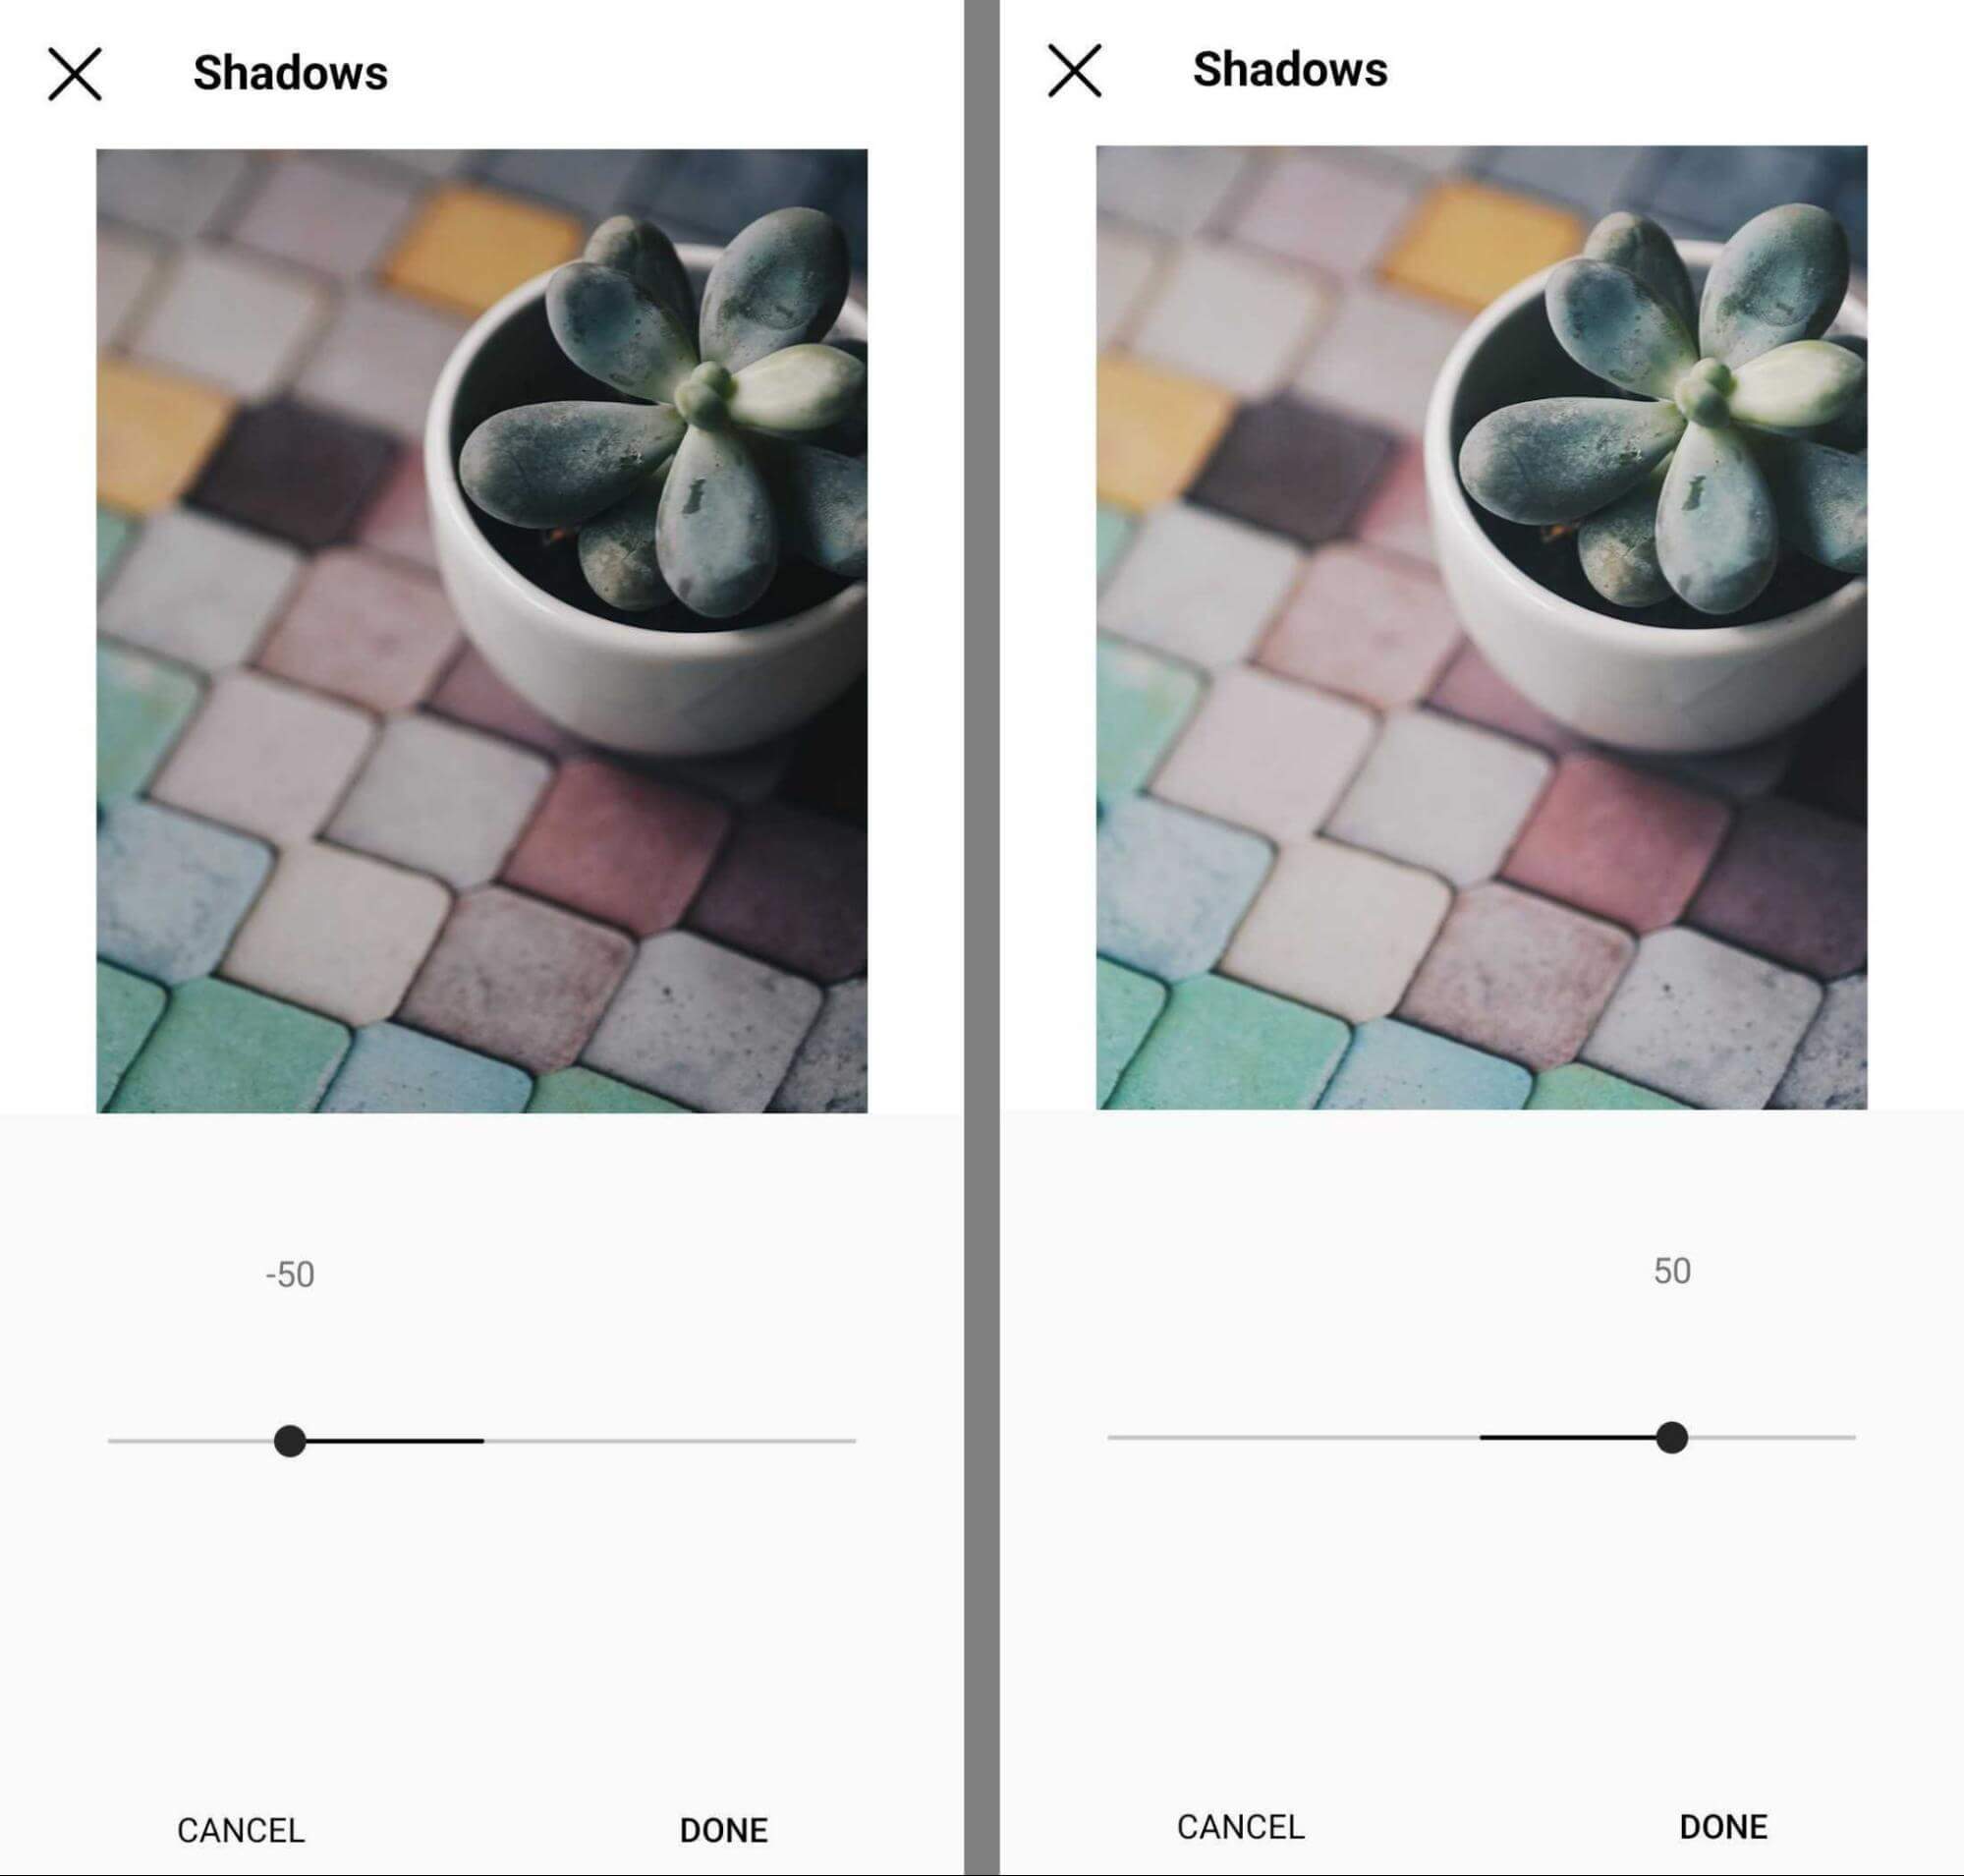
To brighten the shadows in an image, drag the slider to the right. By brightening shadows, you can bring out subtle details and address underexposure issues.
#13: Vignette
The Instagram vignette tool is designed to darken the edges of photos while maintaining lighter tones at the center, giving them a slightly vintage look. By default, the vignette is set to 0. You can use the slider to dial it up to 100.
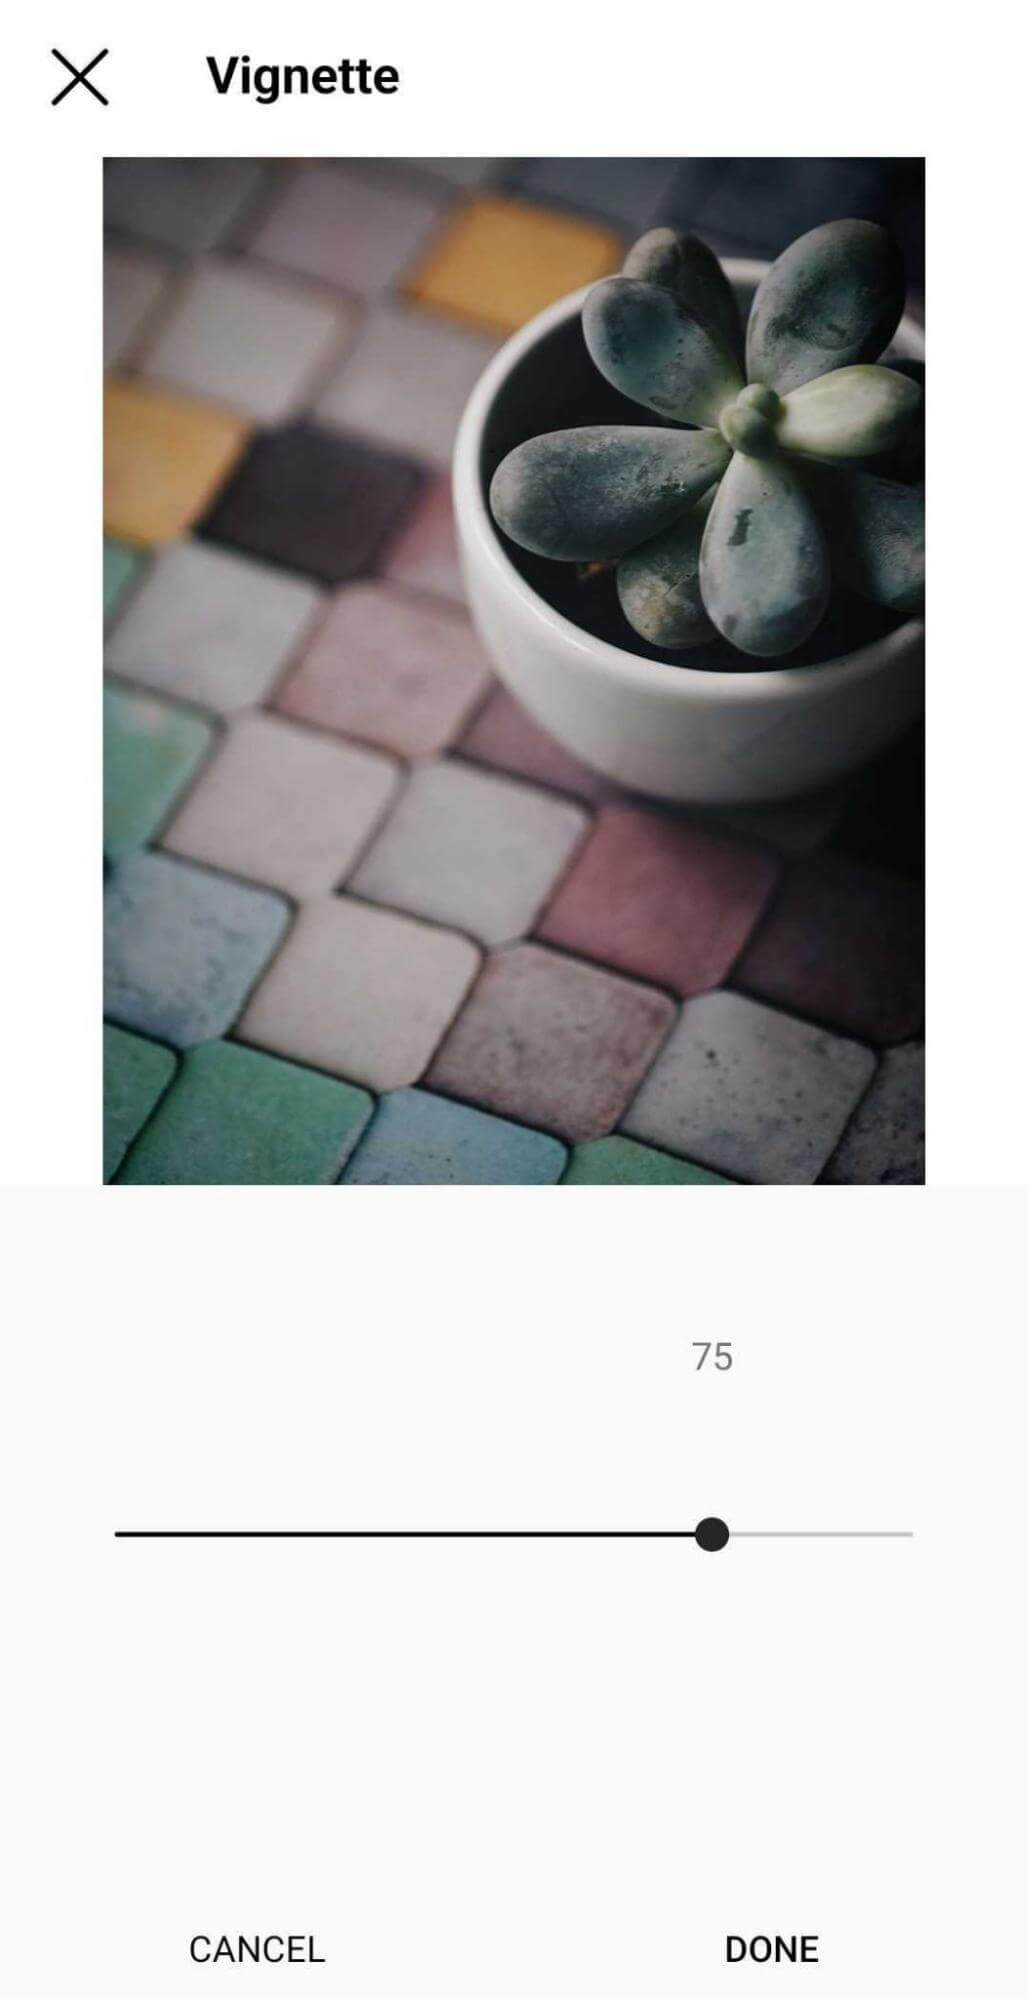
This tool is particularly helpful if you want to guide your audience's eyes away from the edges and toward the center of the image. But it's best to skip this tool if your photo uses the rule of thirds or has a focal point that isn't in the center of the image.
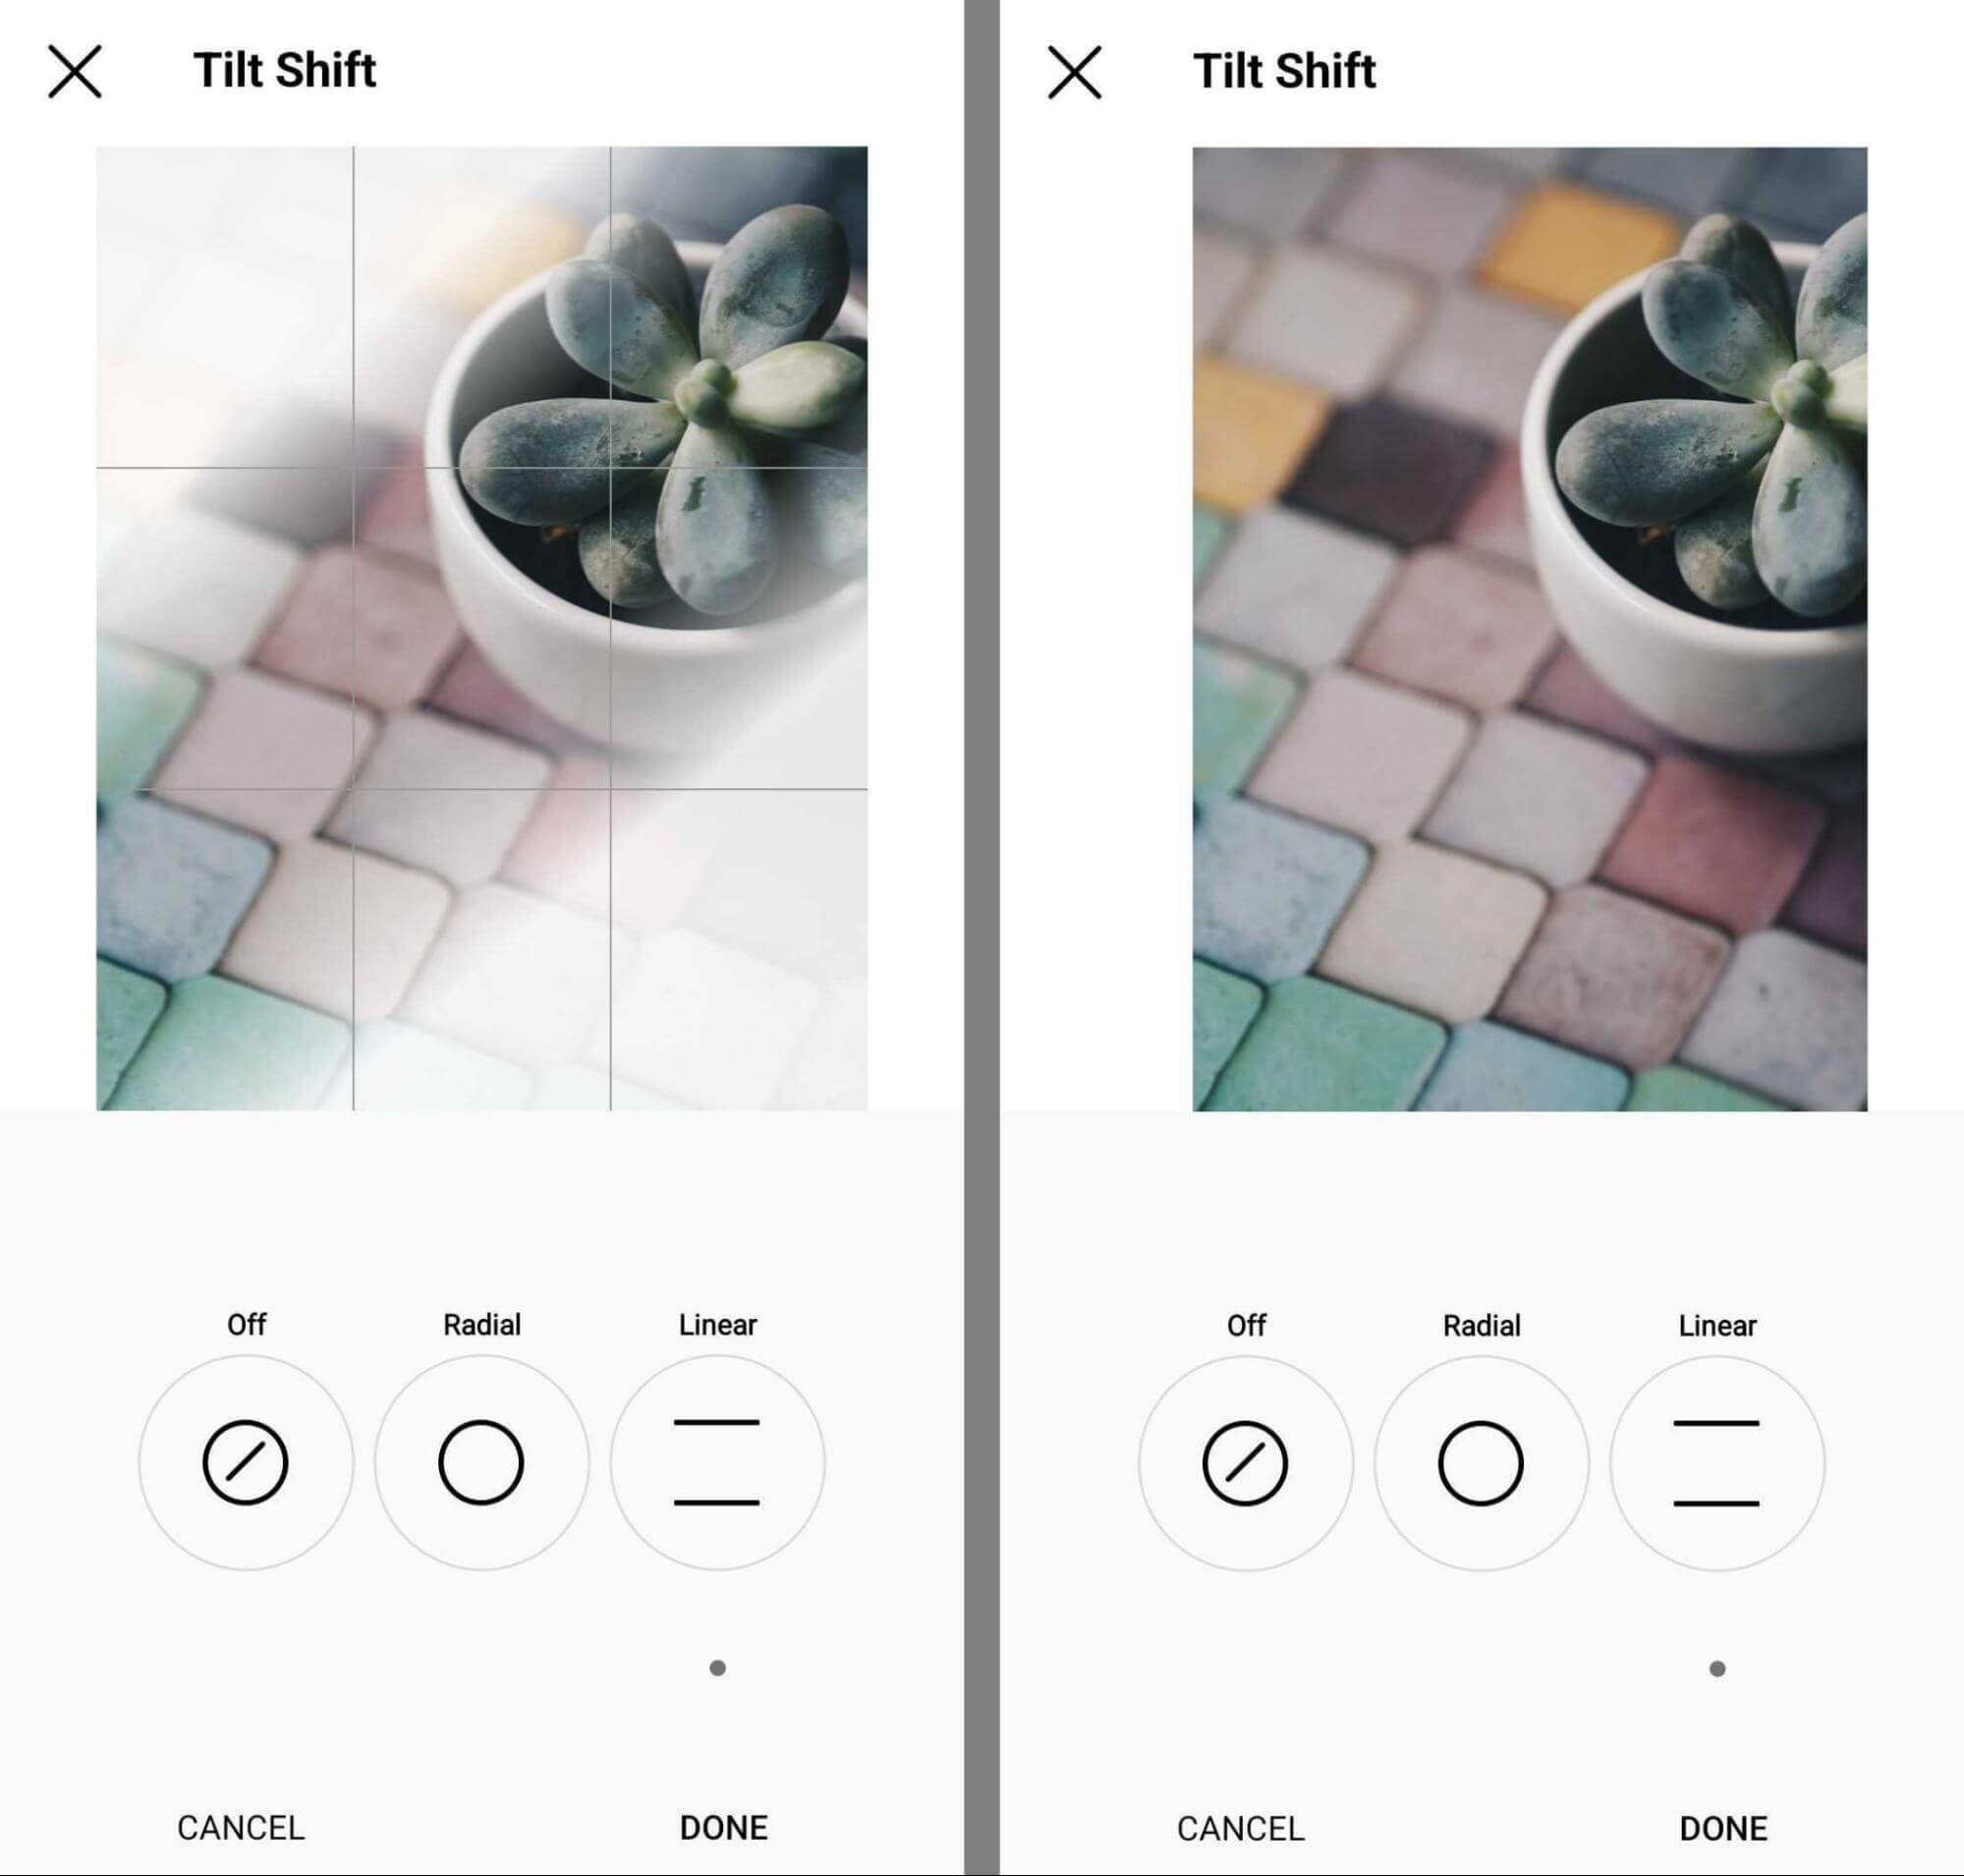
#14: Tilt Shift
With the Instagram tilt shift tool, you can alter the depth of field in your photo, effectively changing the focus of the image and blurring out surrounding areas. The radial tilt focuses on a circular area, while the linear tilt creates a focal line across the photo.
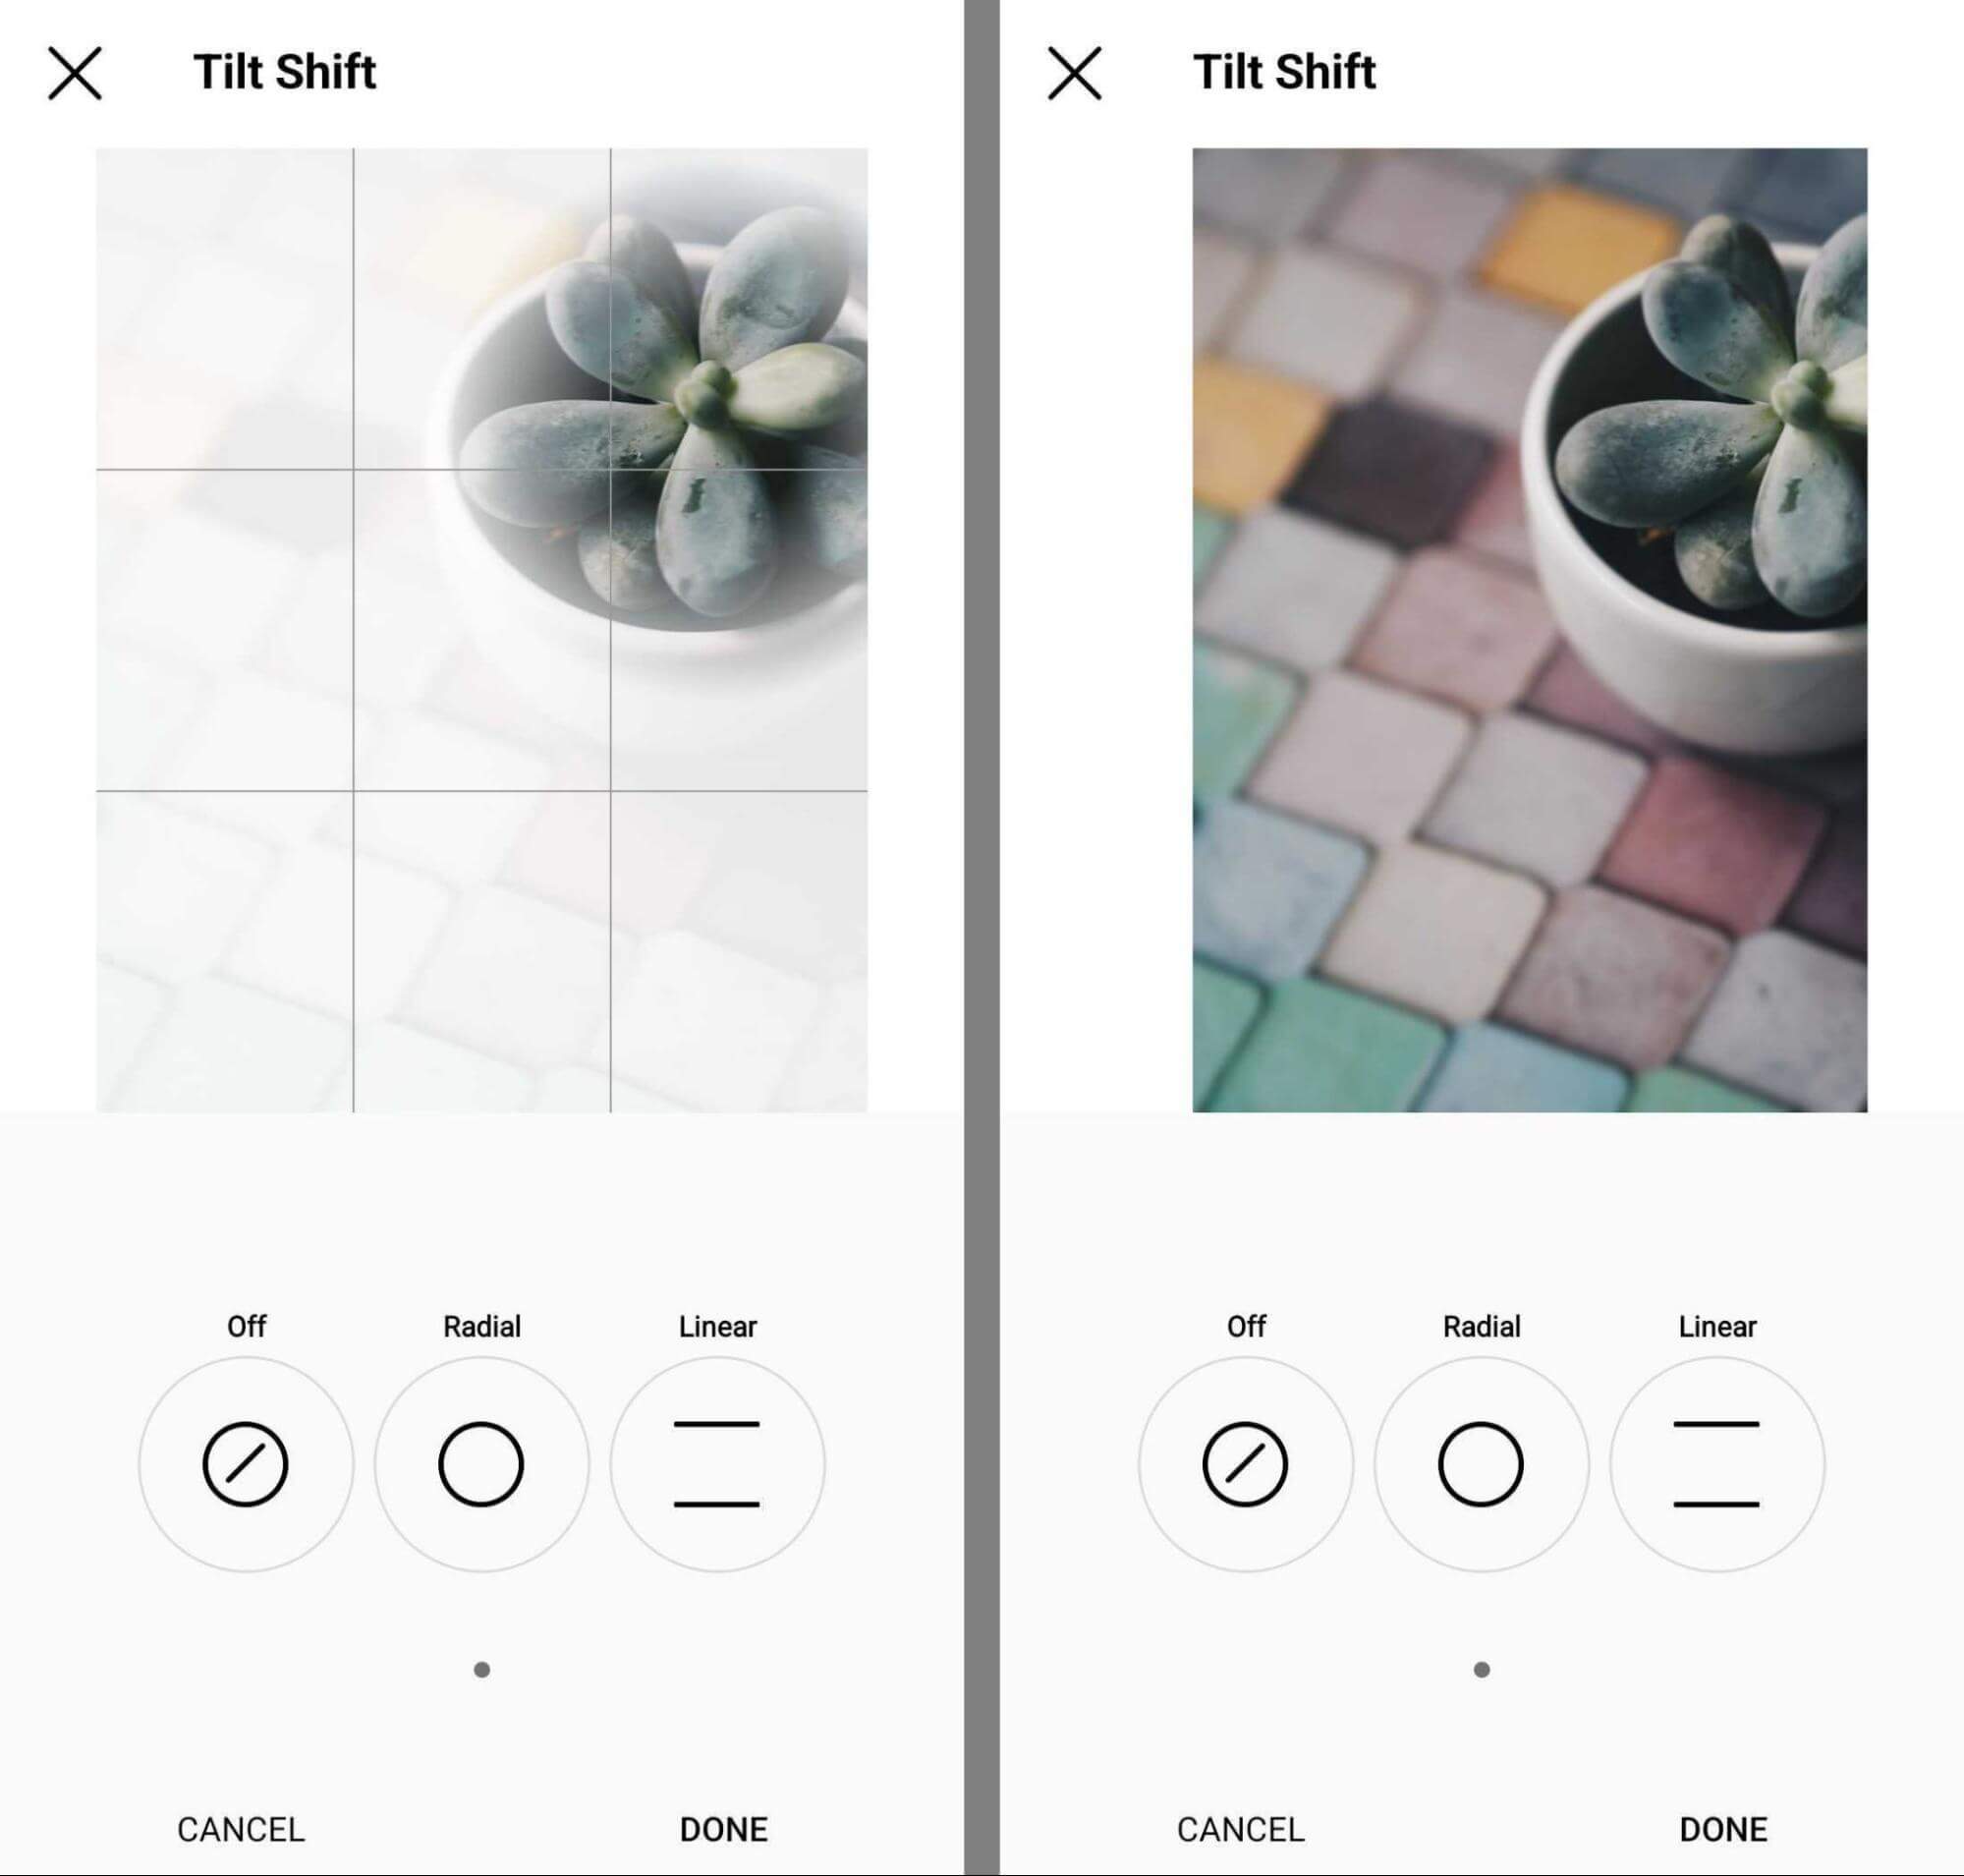
Both Instagram tools allow you to choose the focal point, which can be anywhere in the image. Beware that these tools crop non-square (1:1) images, which can result in losing a lot of information from your photos.
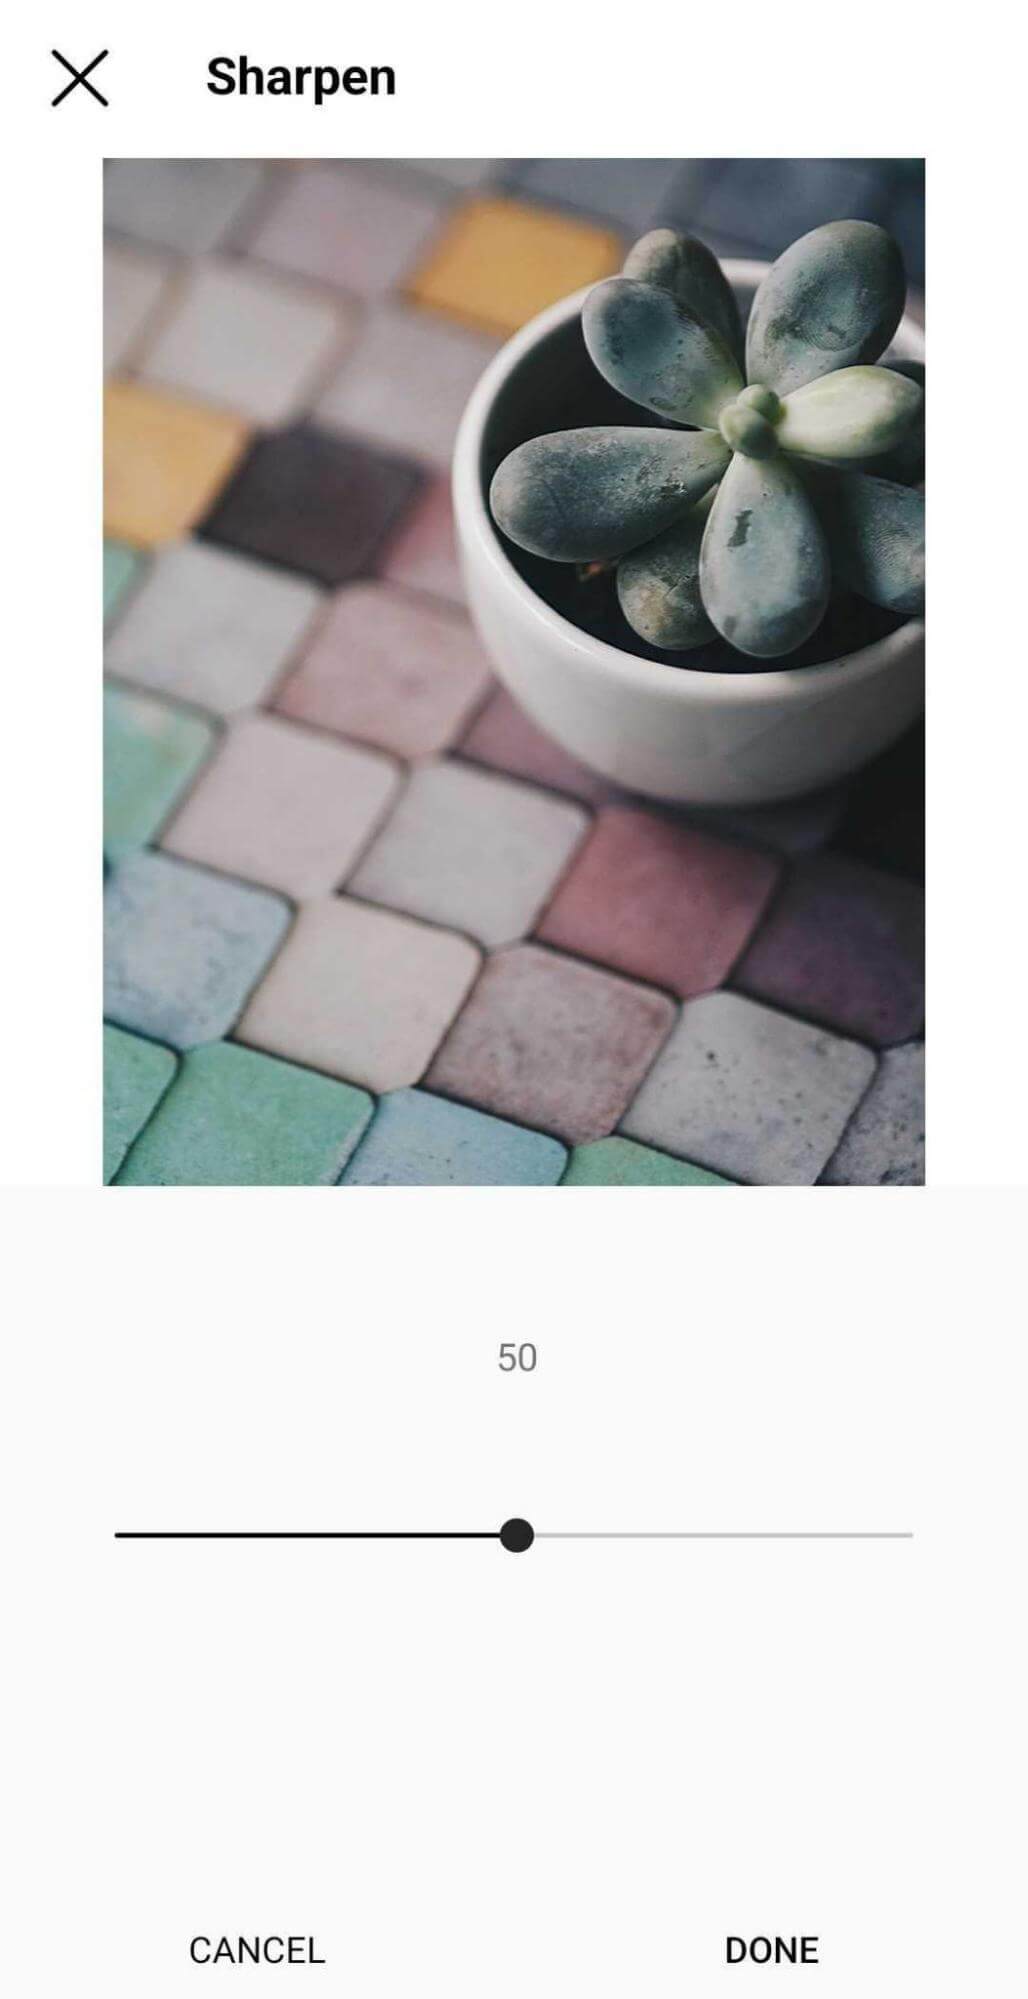
#15: Sharpen
The Instagram sharpen tool reduces blurriness and makes all elements of your picture appear crisper. This tool is ideal for adding clarity to fuzzy images and making photos easier for your audience to understand at a glance.
Conclusion
Follow these pre-production best practices to create a solid foundation for your photos, and use the post-production Instagram photo editing tips to make great images even better. By using both sets of recommendations, you can create eye-catching pictures for your Instagram feed that look like you've used professional editing tools.
Get More Advice on Instagram Content:
- Discover four Instagram grid layout planning tools that will help you create a visually attractive profile grid.
- Learn how to create an Instagram style that’s easy for fans to recognize.
- Find out how to plan, create, and optimize Instagram content for your business.
Stay Up-to-Date: Get New Marketing Articles Delivered to You!
Don't miss out on upcoming social media marketing insights and strategies! Sign up to receive notifications when we publish new articles on Social Media Examiner. Our expertly crafted content will help you stay ahead of the curve and drive results for your business. Click the link below to sign up now and receive our annual report!

Curious About How to Use AI?
Our newest show, AI Explored, might be just what you're looking for. It's for marketers, creators, and entrepreneurs who want to understand how to use AI in their business.
It's hosted by Michael Stelzner and explores this exciting new frontier in easy-to-understand terms.
Pull up your favorite podcast app and search for AI Explored. Or click the button below for more information.
