Looking for an easy way to book more appointments or reservations? Did you know you can use Facebook to simplify the process?
In this article, you’ll learn how to set up the reservation and appointment action buttons on your Facebook page and discover how to promote your offerings with organic posts and Facebook ads.
How Do Book Now and Reserve Facebook Action Buttons Work?
Every Facebook business page has access to a blue action button that prompts potential customers to do something specific. For example, the action button can encourage users to send the page a message, browse the page’s shop, or visit a linked website.
Ideally, your action button should align with your Facebook marketing goals. For service-based businesses, choosing a relevant action button hasn’t always been easy. But with Facebook’s Reserve and Book Now buttons, service-based businesses have smarter options.
Once you set up one of these action buttons, Facebook users who visit your page will see a Reserve or Book Now call to action (CTA) button at the top of the screen. They can click or tap to engage with the button and seamlessly book an appointment or make a reservation.

If your business relies on appointments or reservations for leads or sales, these action buttons are convenient tools to help you reach your business's goals.
- Eager to improve visibility for your services? By adding a Book Now or Reserve button to your Facebook page, you can make your offerings clear to any visitor.
- Want to increase awareness of your offerings? By adding services to your Facebook page and creating engaging content, you can highlight what your business does best.
- Need to generate more revenue? By promoting your action button and creating conversion-focused content, you can get more reservations and bookings.
Because the action button is built into your Facebook page, it’s always visible whenever a potential customer visits. That means it also gives you an opportunity to book reservations and appointments passively.
So are there any disadvantages to creating a Book Now or Reserve action button? Keep in mind that Facebook pages allow just one action button at a time. If you use a booking button, you won’t be able to create one that encourages emails, messages, sales in your Facebook shop, or other common goals.
Before switching over to a booking button, consider your business goals carefully. If another goal is more important, use a different button instead. Switching to another action button only takes a few minutes so you can always test and adjust as necessary.
#1: How to Set Up the Book Now and Reserve Action Buttons on a Facebook Page
Whether you want to create an action button for reservations or appointments, the setup processes are similar. But the workflow is a little different depending on which Facebook page configuration you have. Let’s look at the available options for creating and managing these action buttons.
How to Create a Reserve or Book Now Action Button for a Classic Facebook Page
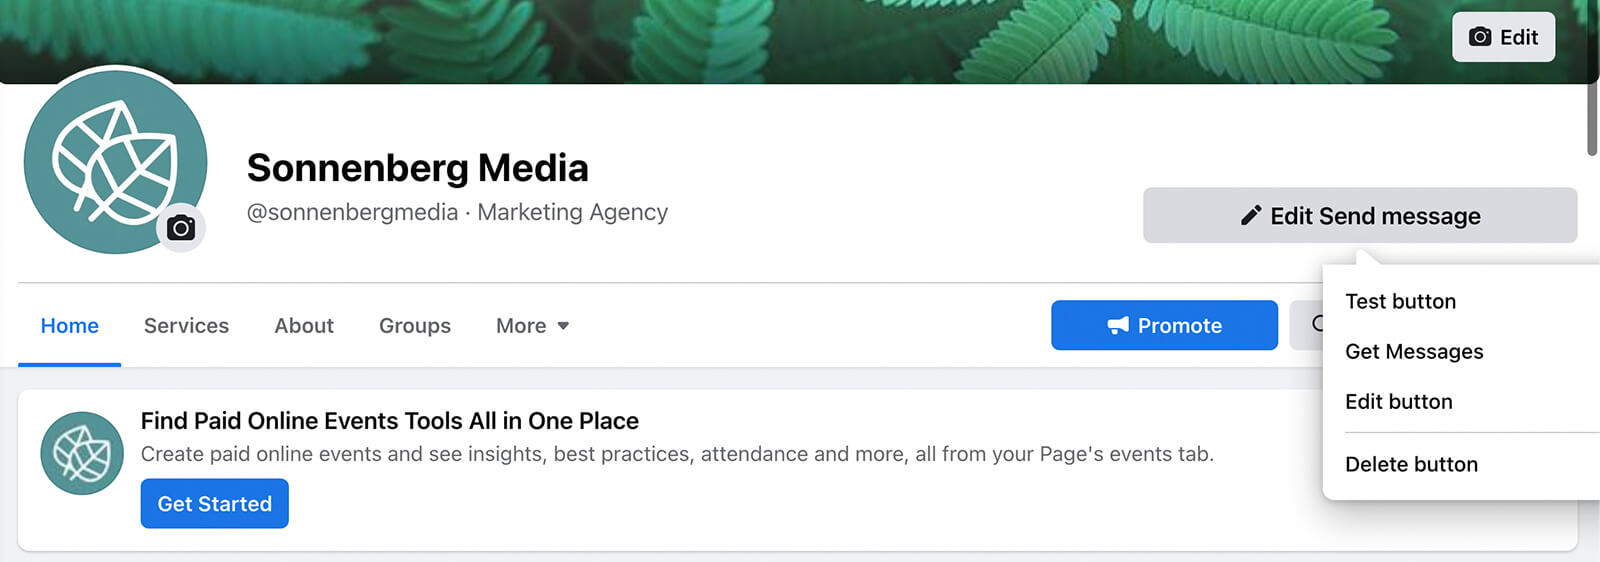
If your Facebook page still uses the classic page format, you can configure the action button directly from the page. Navigate to the page and click the existing action button. From the drop-down menu, select the Edit Button.
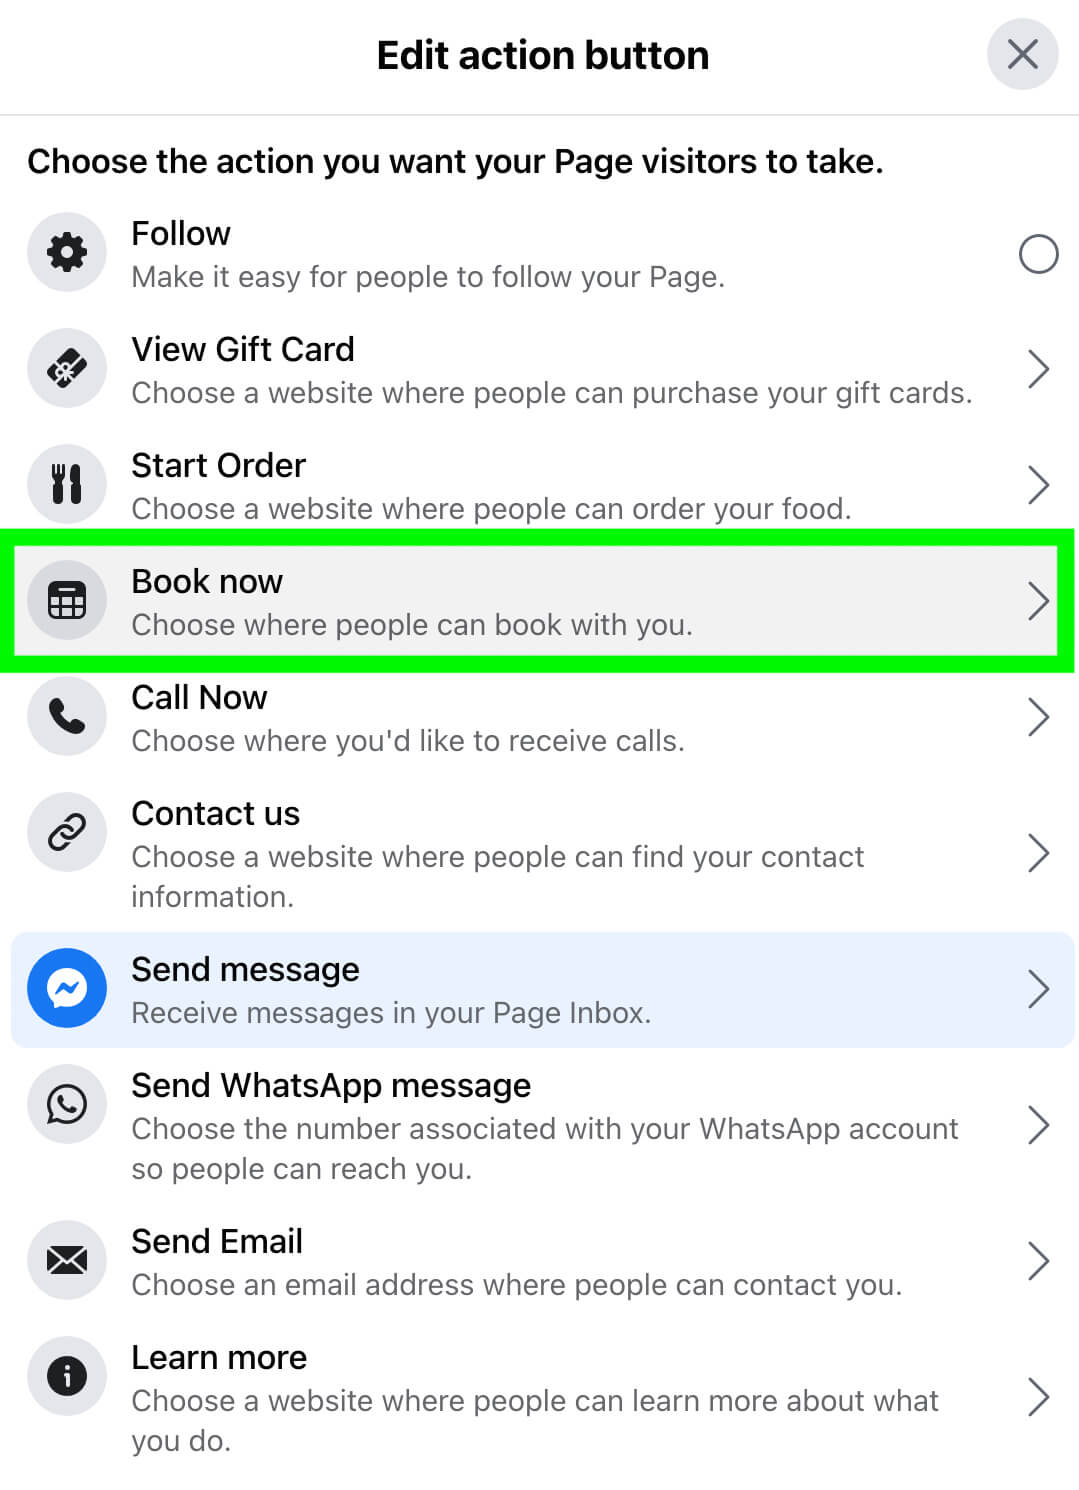
Then choose the Book Now action button, which works for both appointments and reservations.
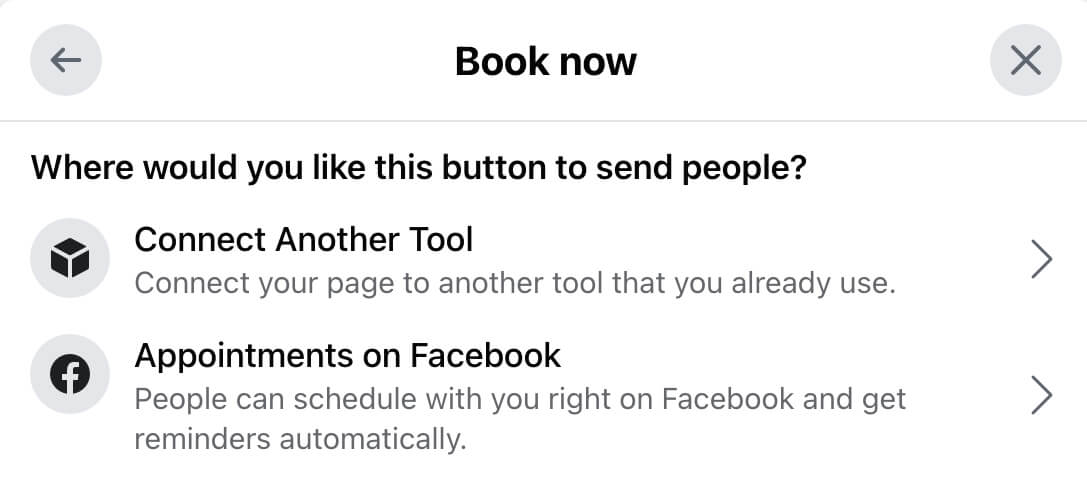
Next, choose how you want to configure it. If you already use a supported booking platform, select Connect Another Tool.
Pick your platform from the list. Facebook currently supports several dozen major booking and reservation platforms so there’s a good chance yours will be on the list.
Get World-Class Marketing Training — All Year Long!
Are you facing doubt, uncertainty, or overwhelm? The Social Media Marketing Society can help.
Each month, you’ll receive training from trusted marketing experts, covering everything from AI to organic social marketing. When you join, you’ll also get immediate access to:
- A library of 100+ marketing trainings
- A community of like-minded marketers
- Monthly online community meetups
- Relevant news and trends updates
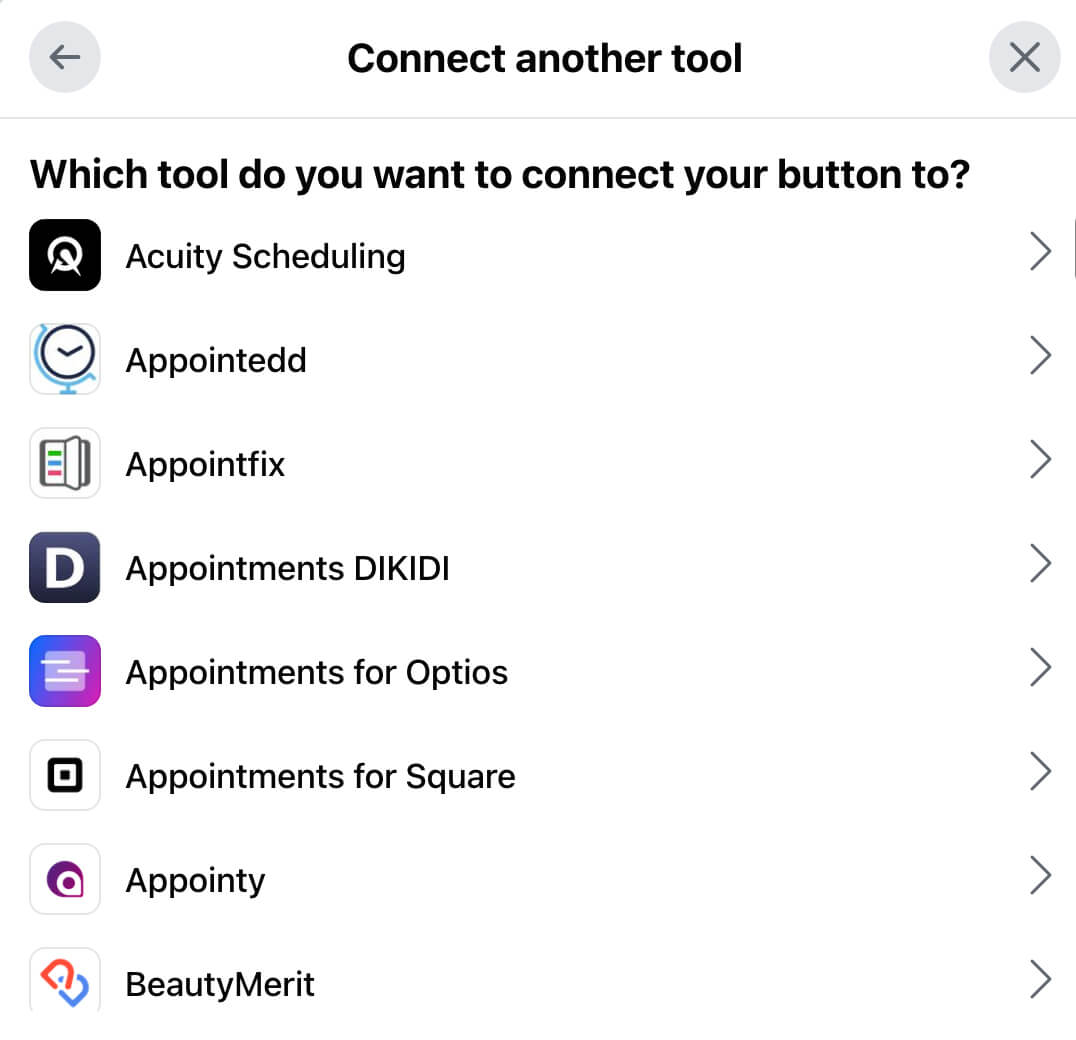
Grant permission to link your booking platform with Facebook. Then sign into the platform and follow the steps to complete the connection. You’ll need to set up appointment times, availability, and reminders in the third-party platform.
Alternatively, you can set up appointments directly on your Facebook page. (Note that this direct option doesn’t work with reservations.) Select Appointments on Facebook and set your availability. You’ll need to set up a regular weekly schedule to use this tool effectively.
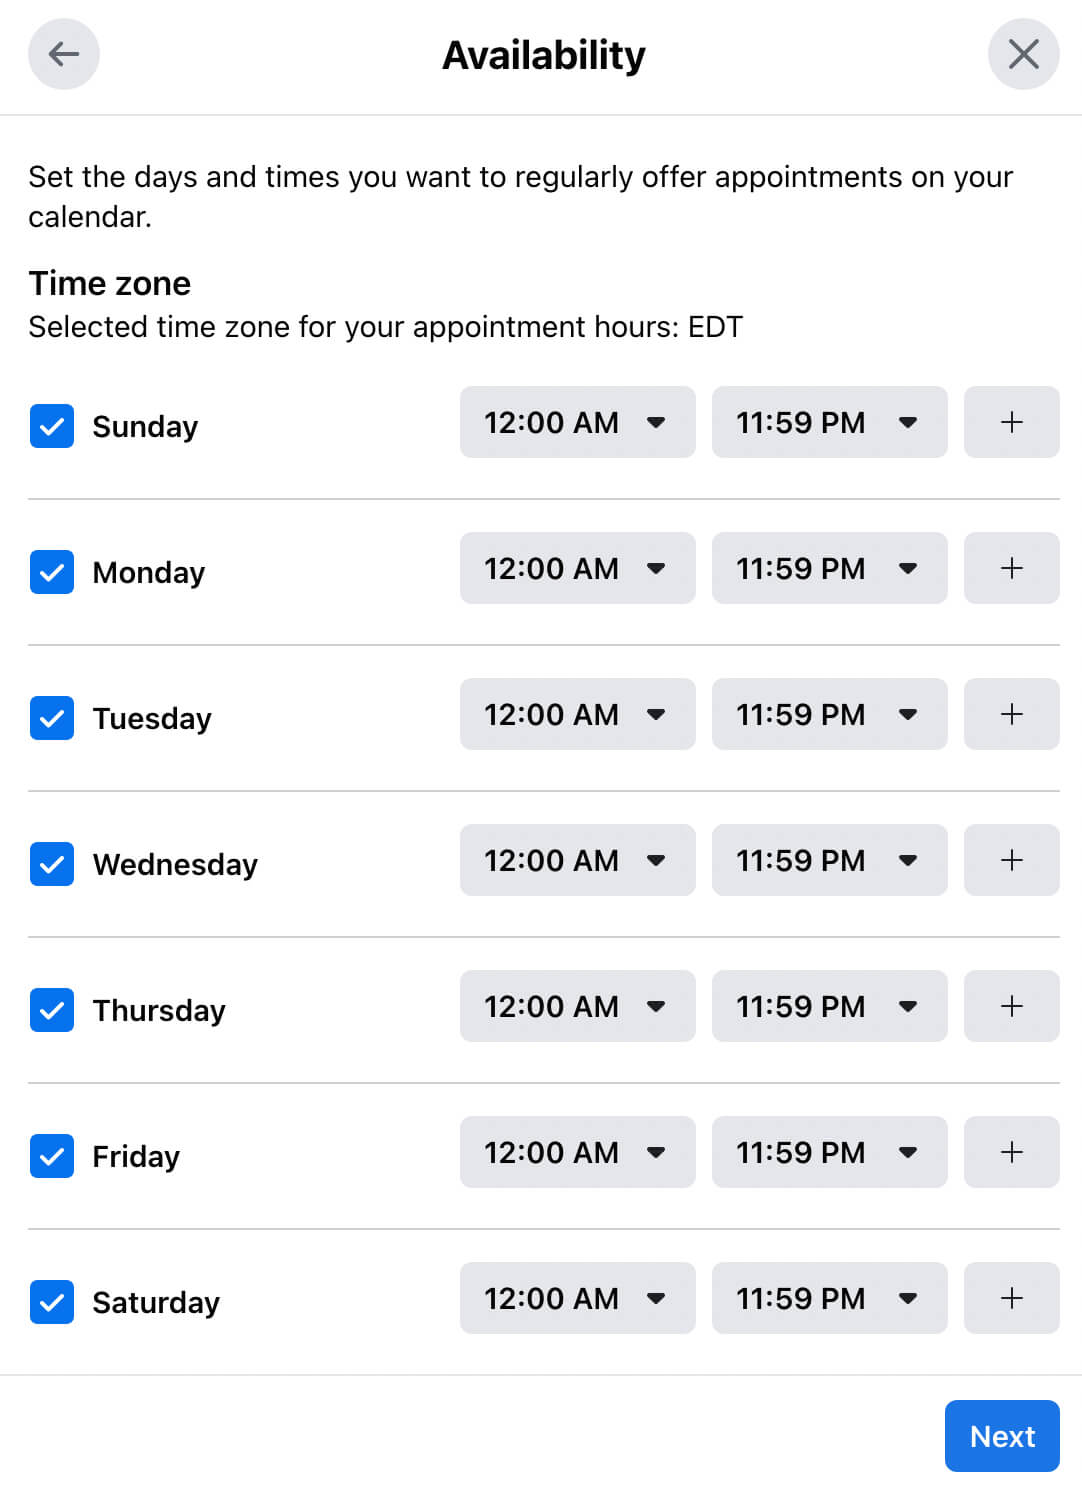
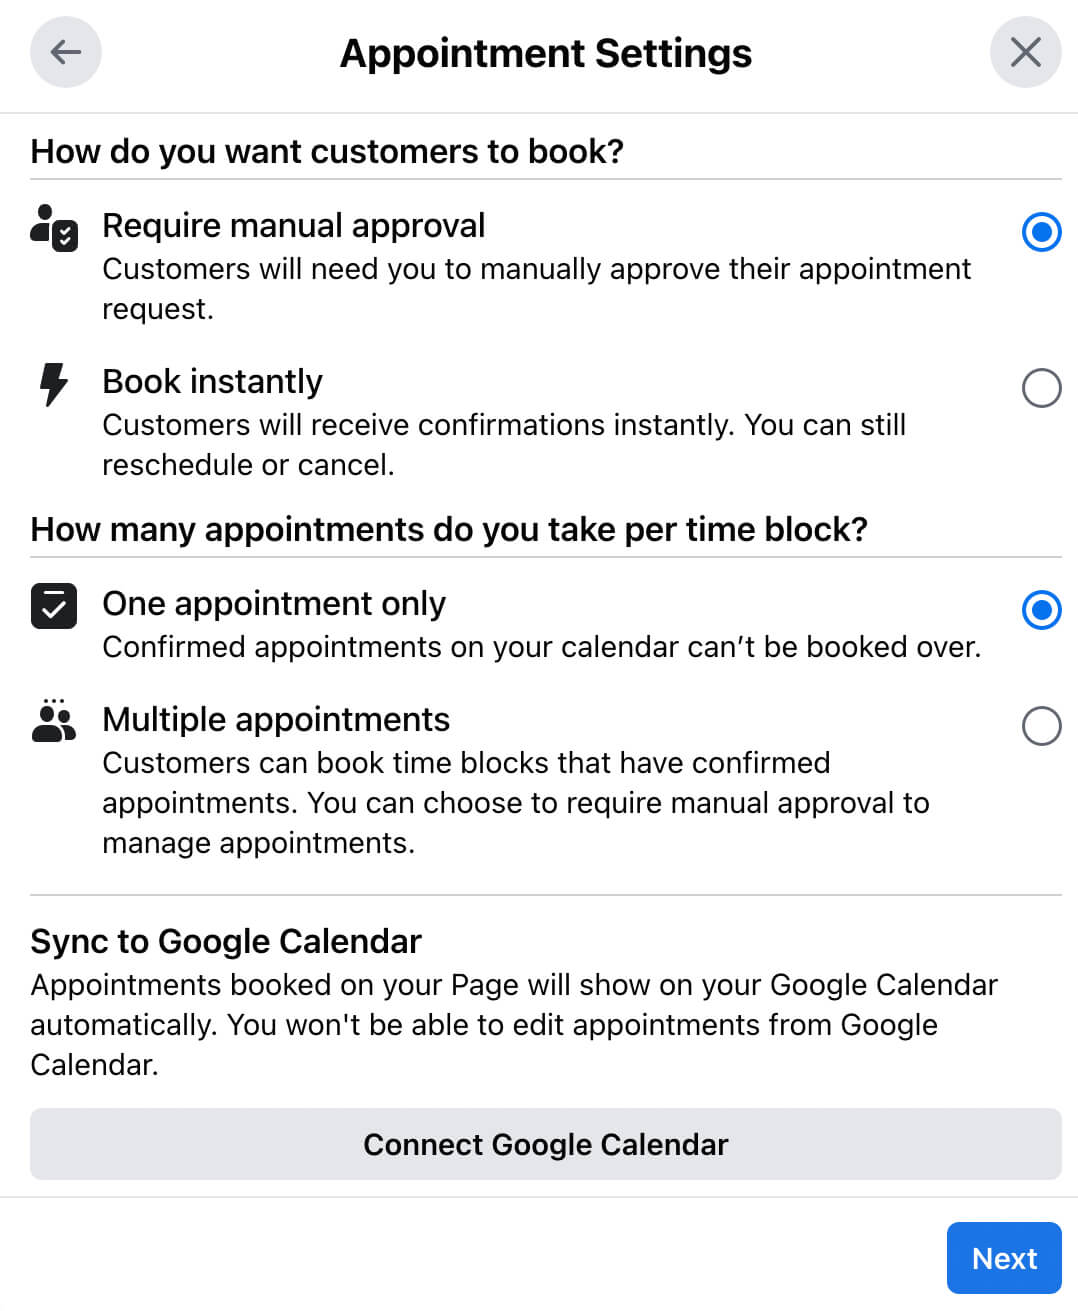
Next, confirm your appointment settings. For example, you can allow customers to book instantly or you can review all appointments manually. You can also use the native Facebook page settings to prevent double bookings. To streamline the process, you even have the option to sync all appointments to your Google calendar.
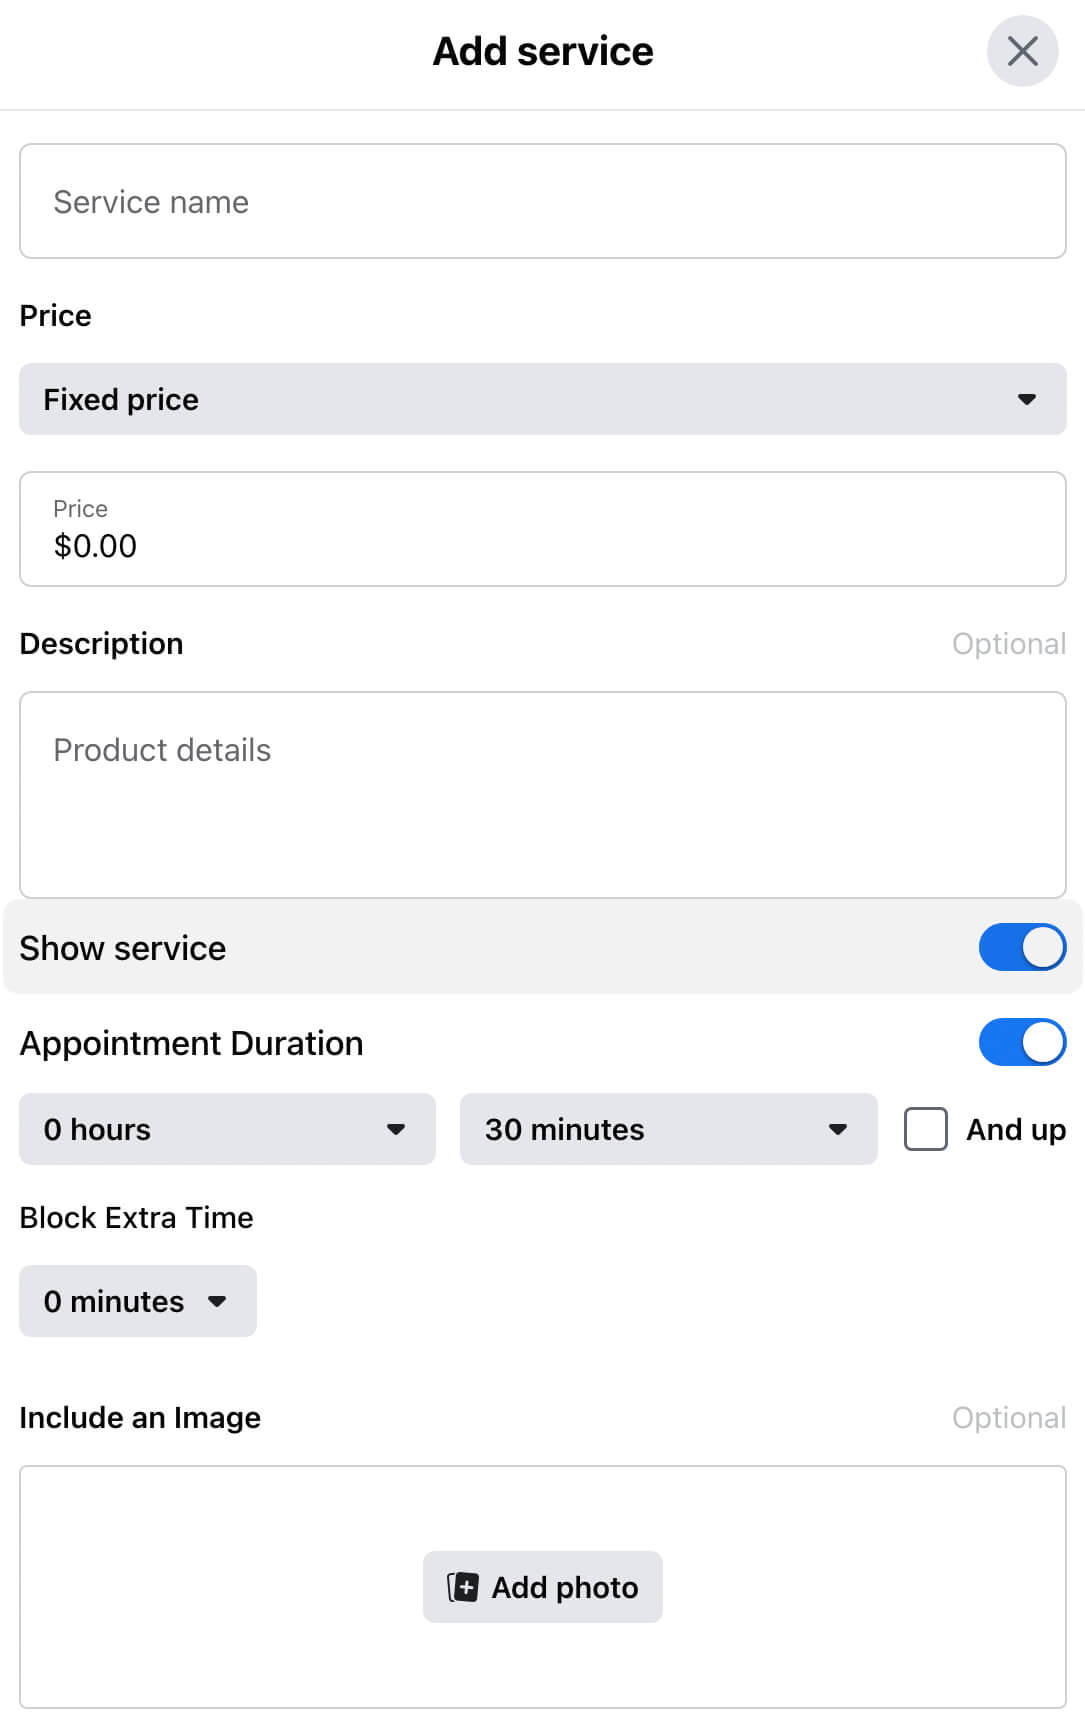
Then add your services one by one. In addition to writing a description, you can set a price, clarify the timing, and upload an image. When you’re finished adding services, you can launch your new Book Now button and start taking appointments.
How to Set Up a Book Now or Reserve Action Button With the New Facebook Pages Experience
If your Facebook page has switched to the new pages experience, the workflow is slightly different. Start by switching your profile so you’re navigating Facebook as your business. Then visit your Facebook business page.
Tap the three dots in the upper-right corner, just underneath the Edit button. From the menu, select Edit Action Button.
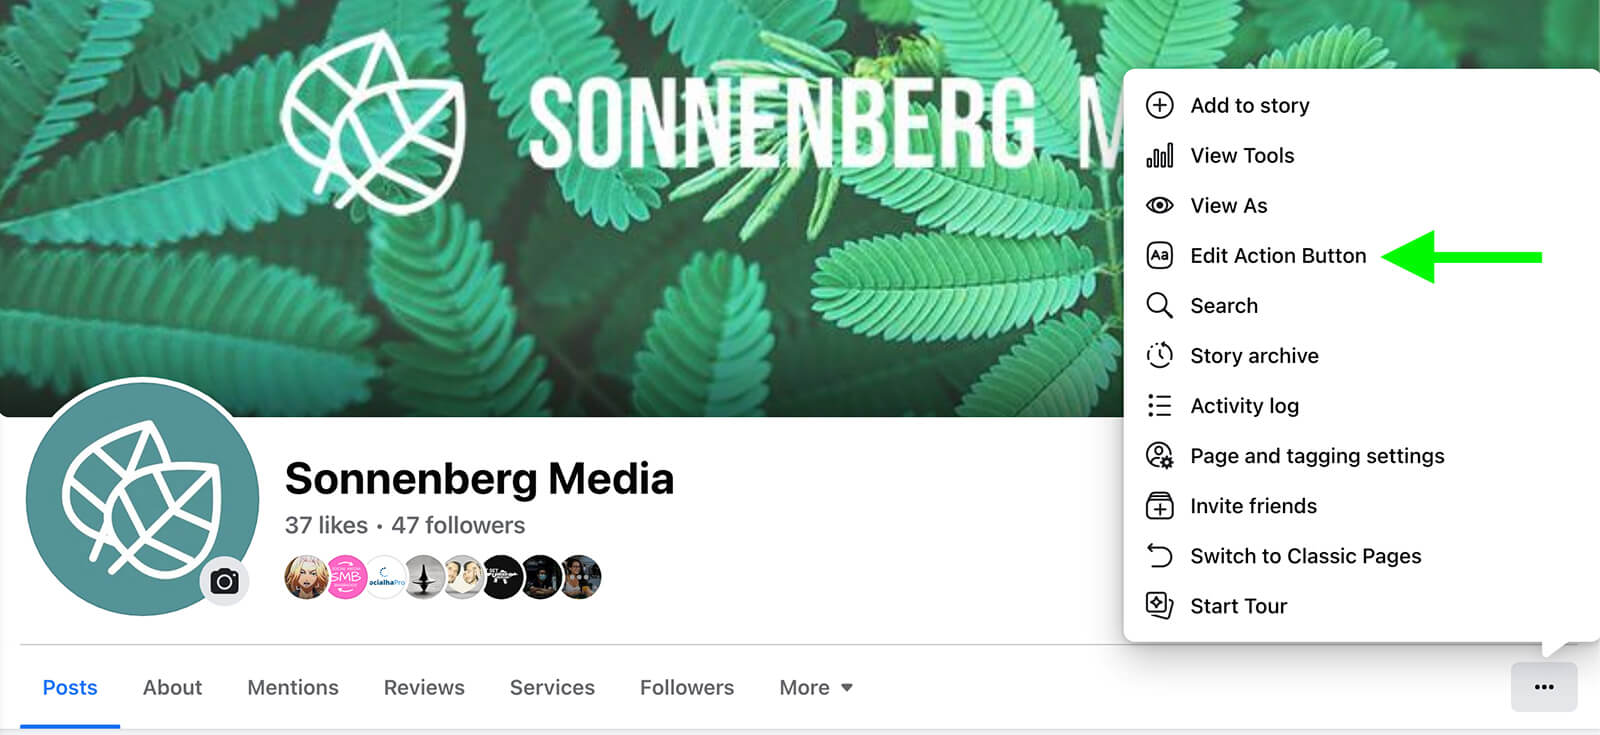
Click Change Button and select the new action button you want to configure.
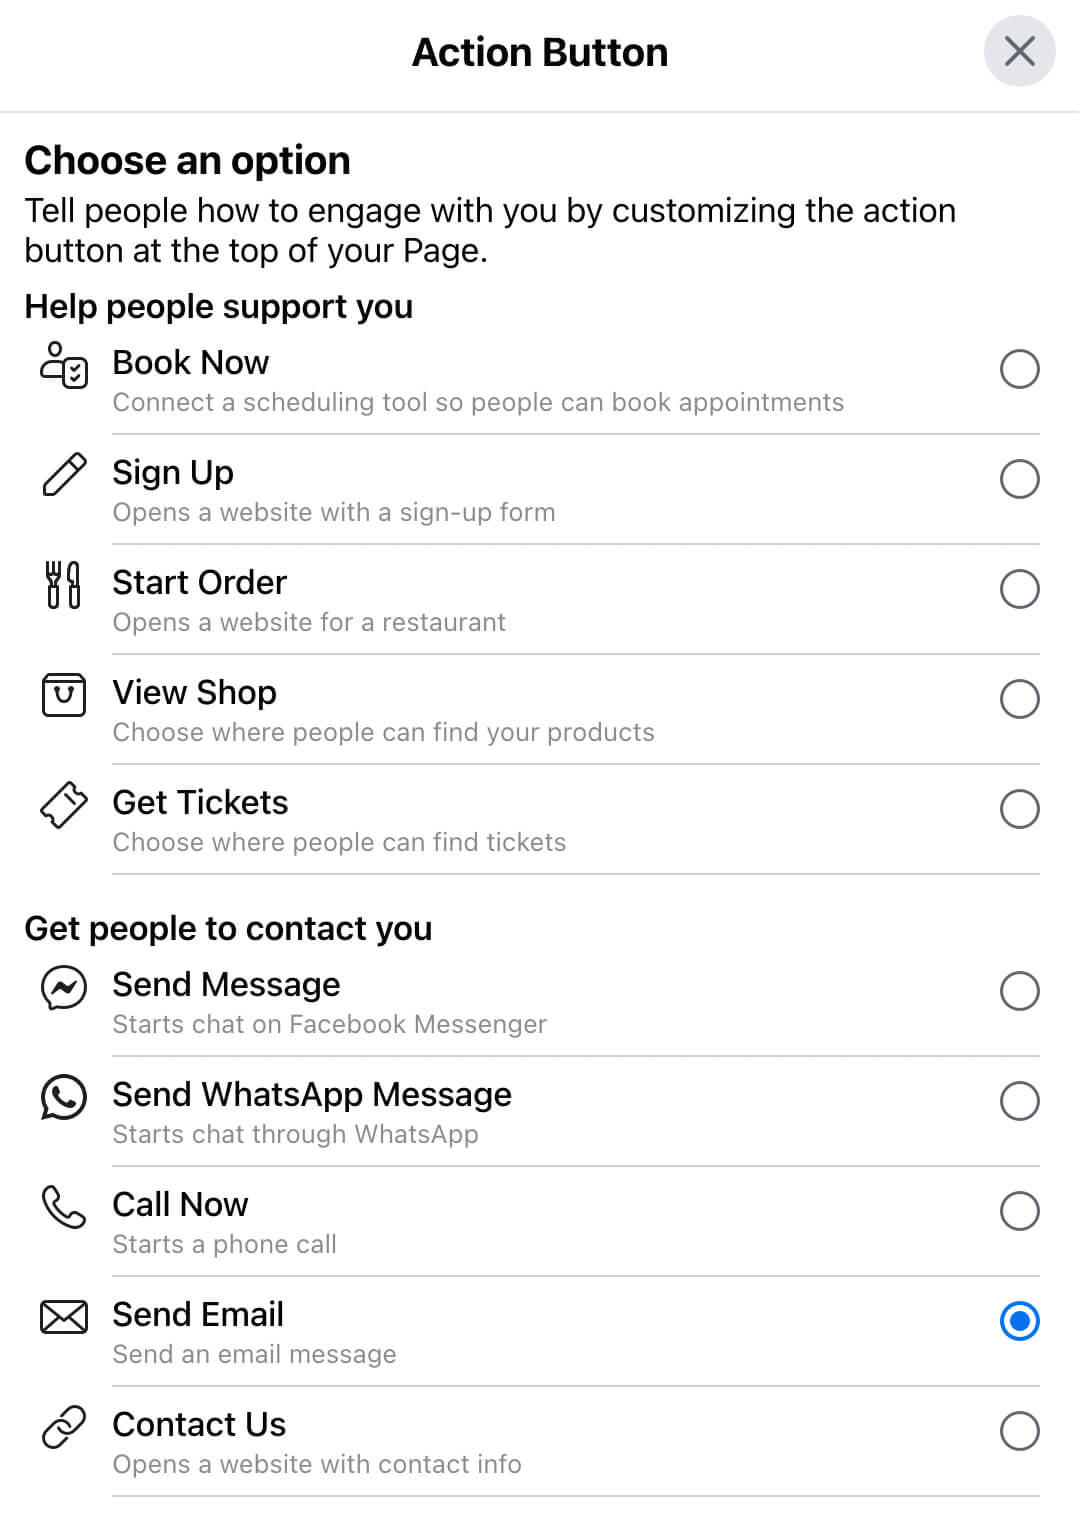
If you opt for Reserve, you’ll see a prompt to connect a third-party app. Note that you have to use one of the approved apps to enable the Reserve action button on Facebook. Give Facebook permission to link to the platform, sign in, and follow the steps to finish the setup.
If you choose Book Now, you have the option to link a third-party booking tool or set up Facebook’s native scheduling tool.
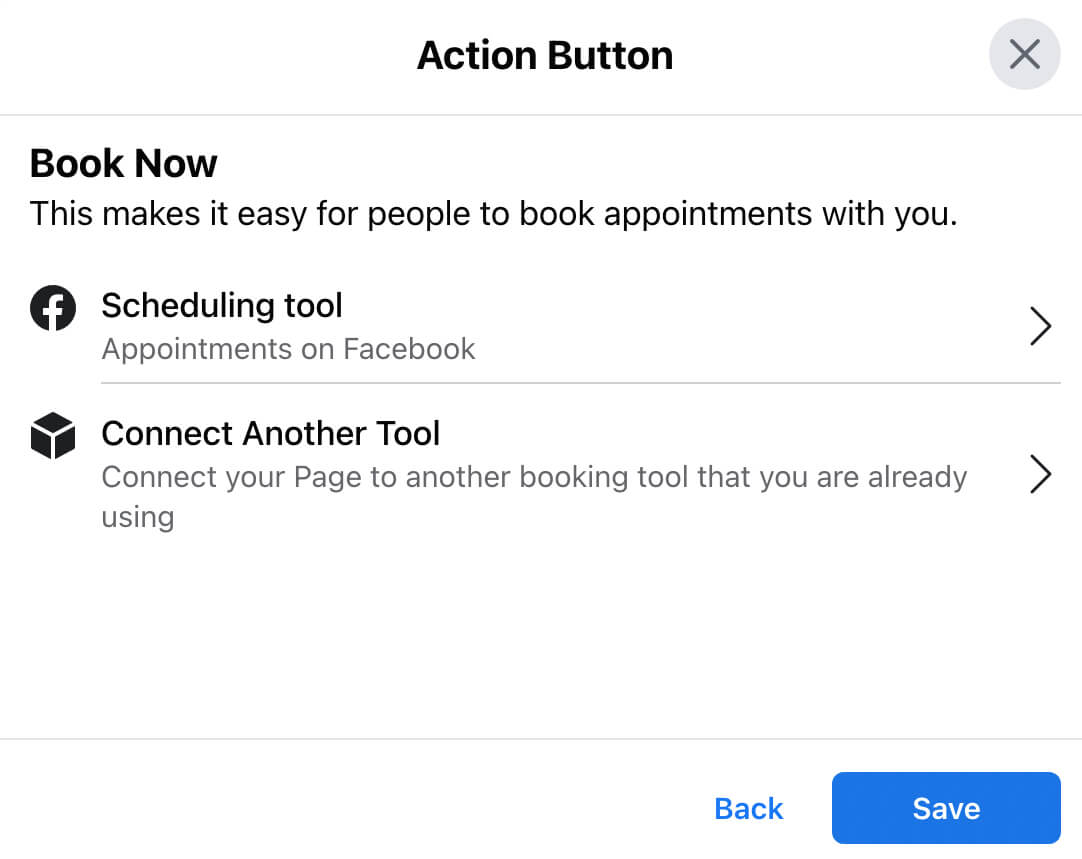
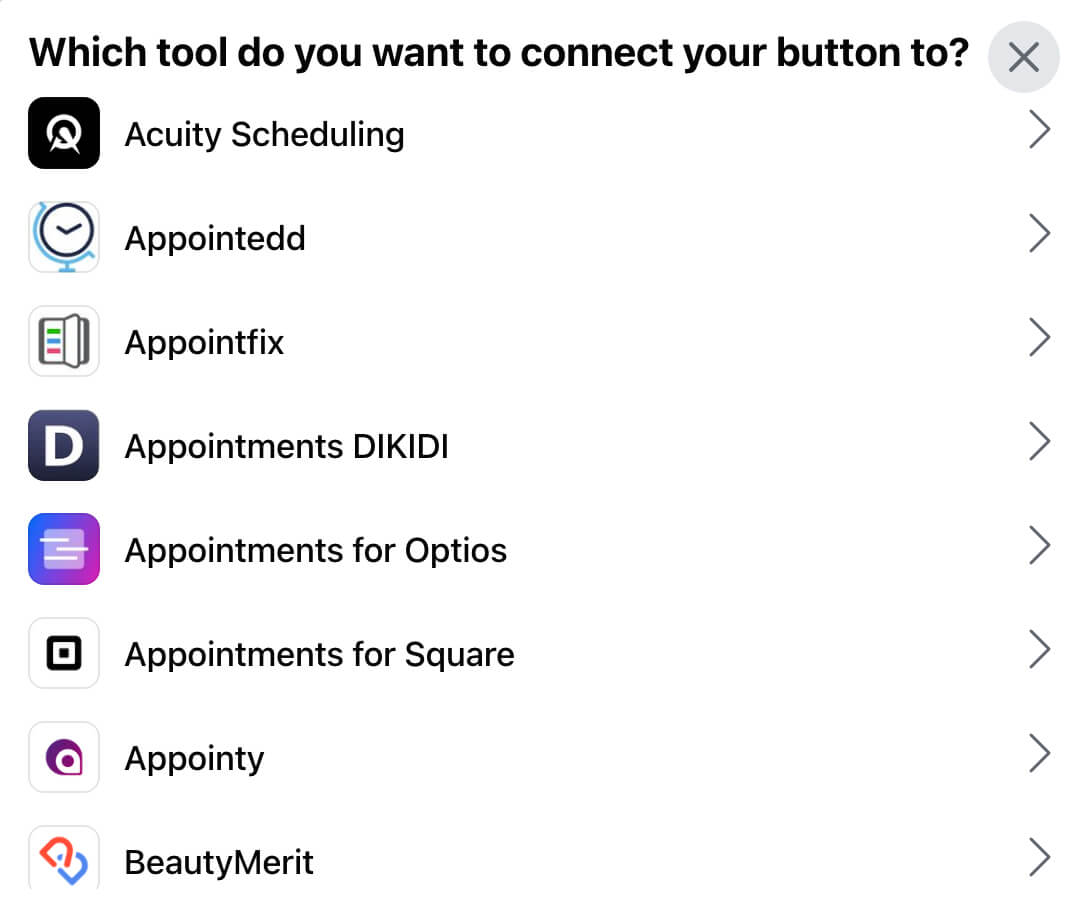
If you use a third-party tool, link it with Facebook and set up your appointments on the external platform.
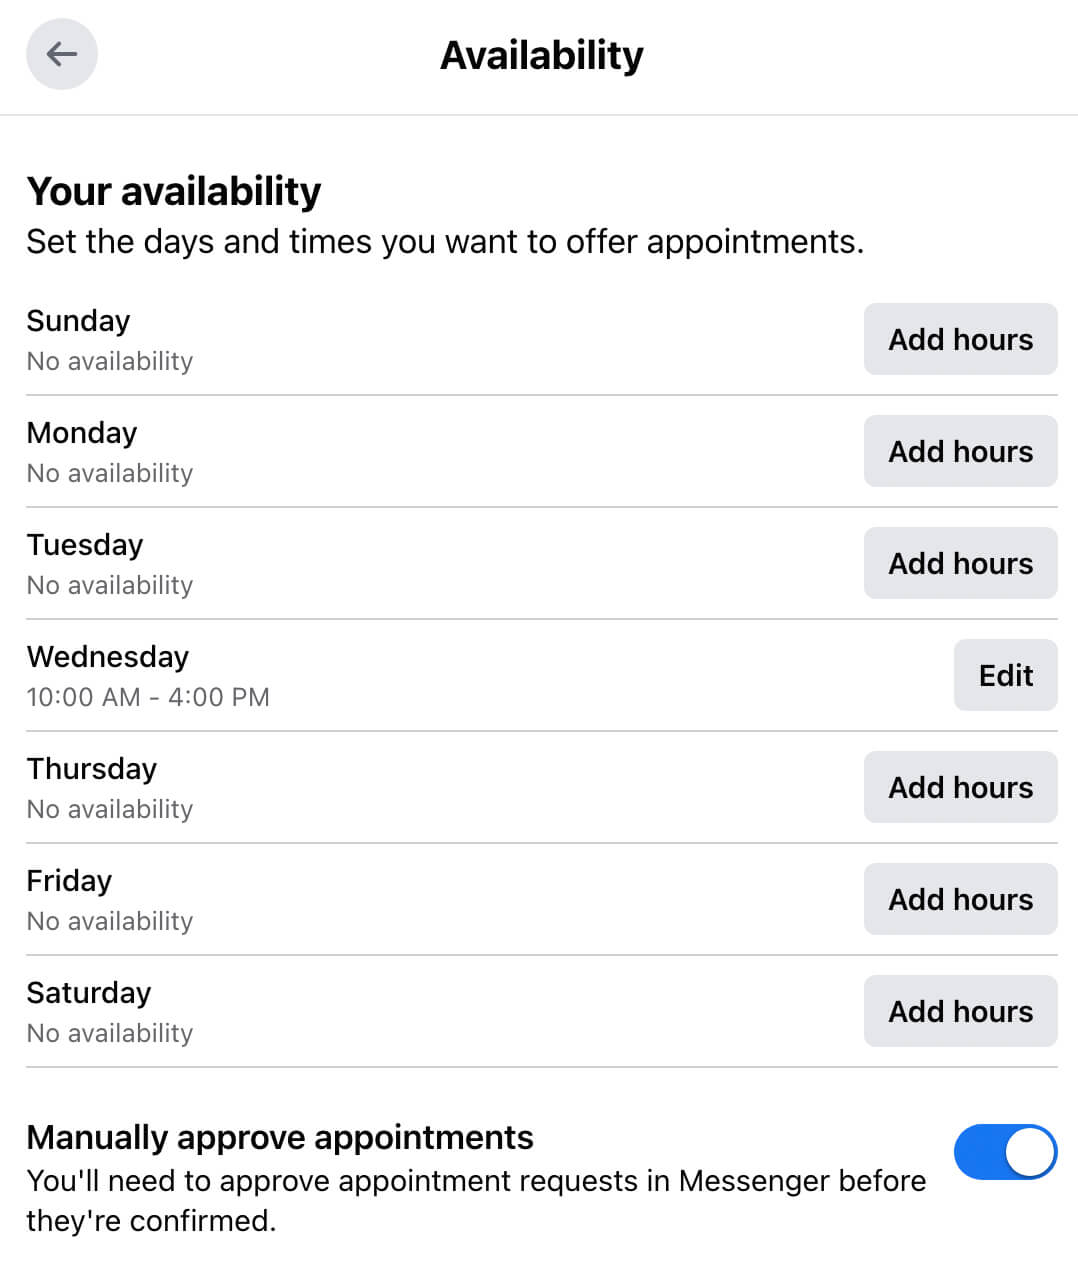
To create a more seamless booking experience, set up appointments directly on Facebook. Select Scheduling Tool and click Edit Availability. Then enter your standard weekly schedule. If you want to review and approve appointments via Messenger, make sure the Manually Approve Appointments toggle is switched on.
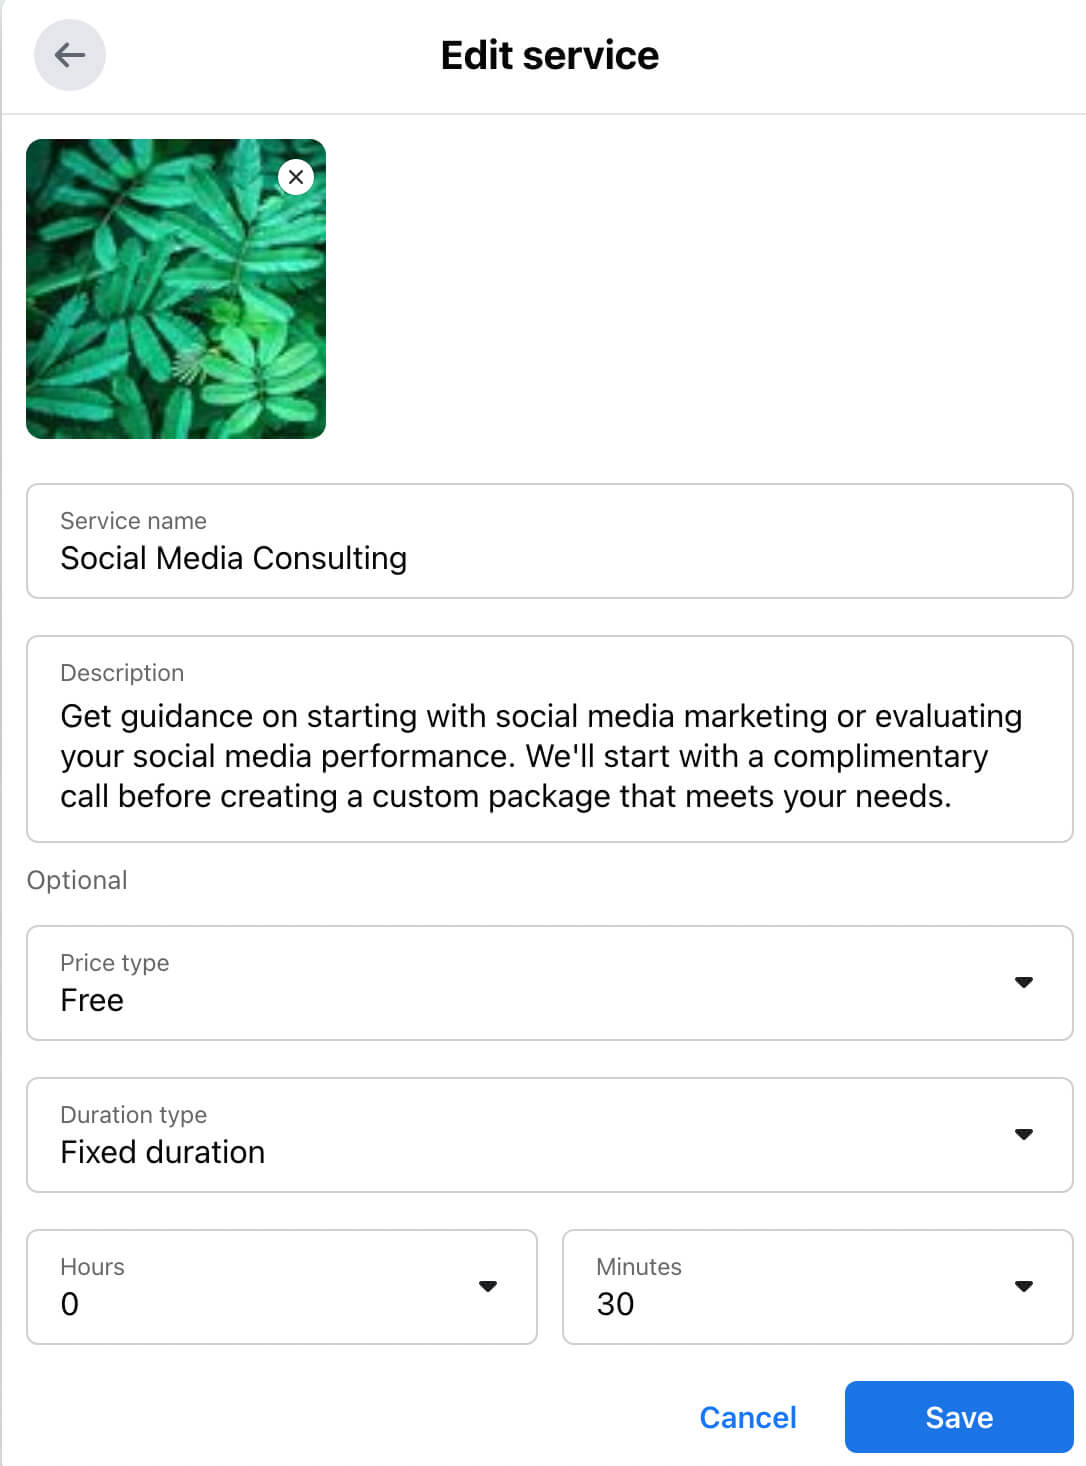
Then select Edit Services and click the Add a Service button to enter the first one. Similar to the classic pages experience, you can write a description, add an image, set a price, and specify a timeframe for each service. Add as many services as you like and click Finish to complete the setup.
#2: Manage Booked Appointments or Reservations Through Meta Business Suite
If you use Meta’s native tools for appointment booking, you can manage services and availability through your Facebook page. Go to the Services tab on your page and click Manage or go to your page’s professional dashboard and click Appointments. Then choose either Edit Services or Edit Availability.
With Meta Business Suite, however, you’ll have an easier time and be able to access more options for managing services. You can also confirm bookings and keep track of appointments through Business Suite.

Discover Proven Marketing Strategies and Tips
Want to go even deeper with your marketing? Check out the Social Media Marketing Podcast! Publishing weekly since 2012, the Social Media Marketing Podcast helps you navigate the constantly changing marketing jungle, with expert interviews from marketing pros.
But don’t let the name fool you. This show is about a lot more than just social media marketing. With over 600 episodes and millions of downloads each year, this show has been a trusted source for marketers for well over a decade.
Manage Your Services
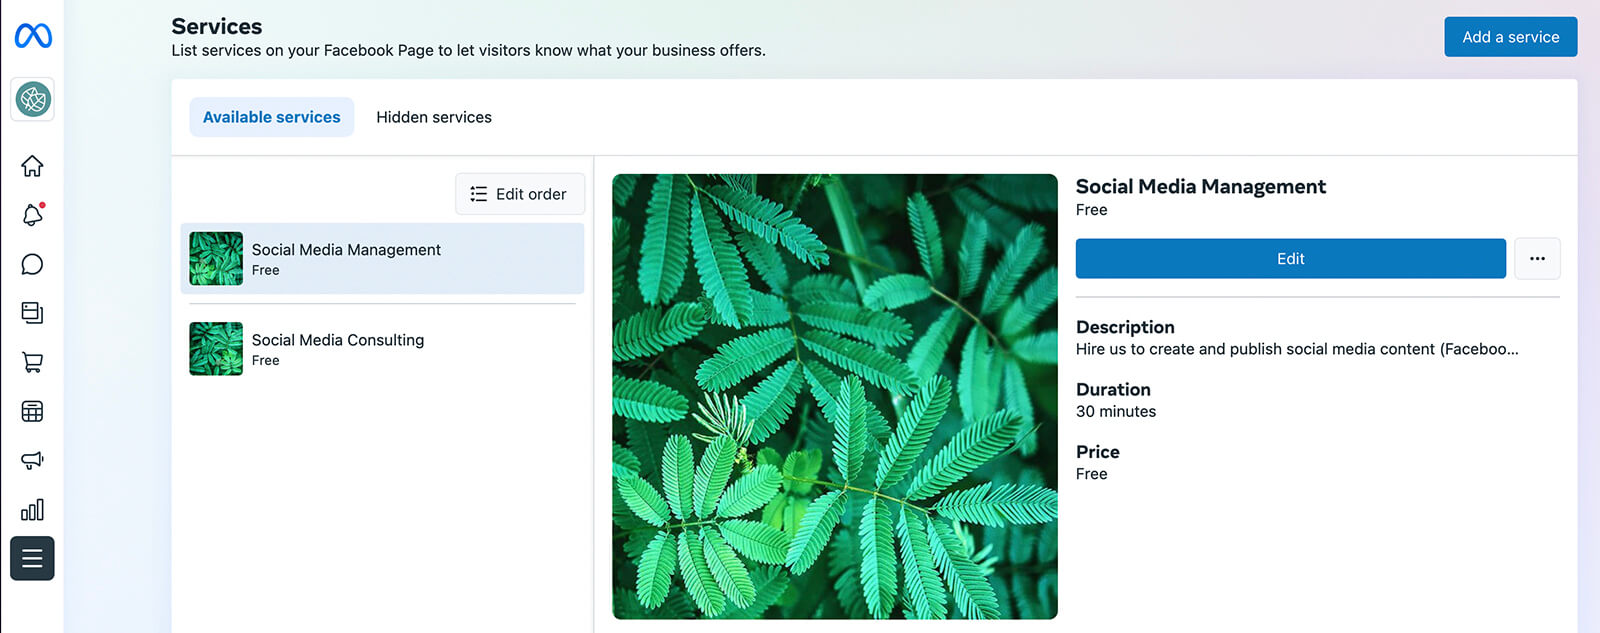
To add, remove, or edit your offerings, open the All Tools menu in Business Suite and click Services. You can select any item from the list to review your existing services. To modify the service, change the price, or adjust the time, click the Edit button.
To add a new service to your lineup, click the Add a Service button in the upper-right corner. Then write a description, set a price, and upload an image. You can click the Edit Order button in the upper-left corner to highlight your newest services first or display them in order of price or other qualities.
Confirm Your Bookings
If you selected the manual confirmation option for bookings, you can manage them in Messenger. When a customer requests an appointment slot, you’ll receive an automated appointment request in your Business Suite inbox.
From there, you can accept or decline the appointment request. If you confirm, Messenger automatically books the appointment.
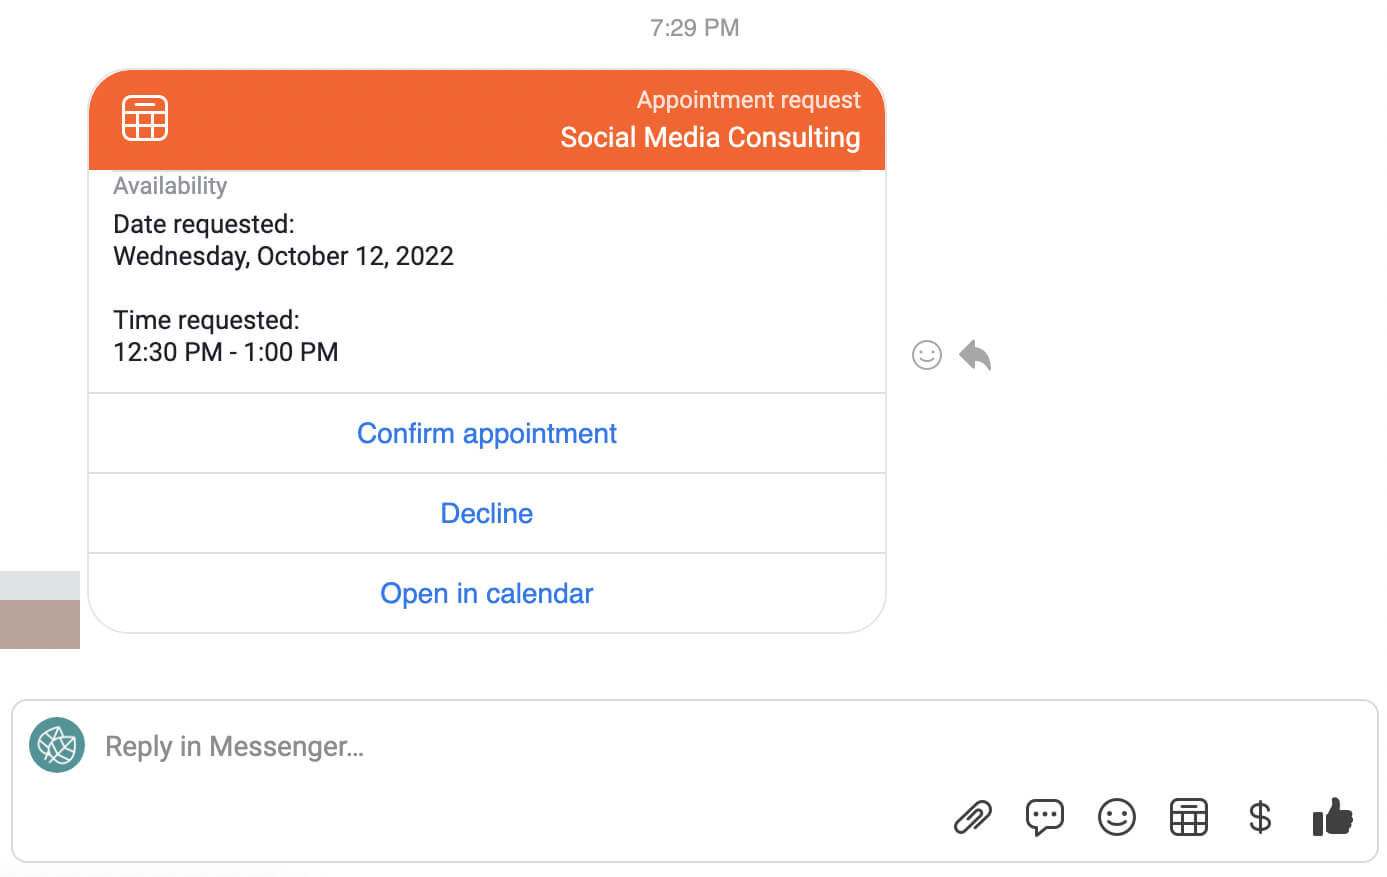
You can click View Details to add internal notes or cancel the appointment.
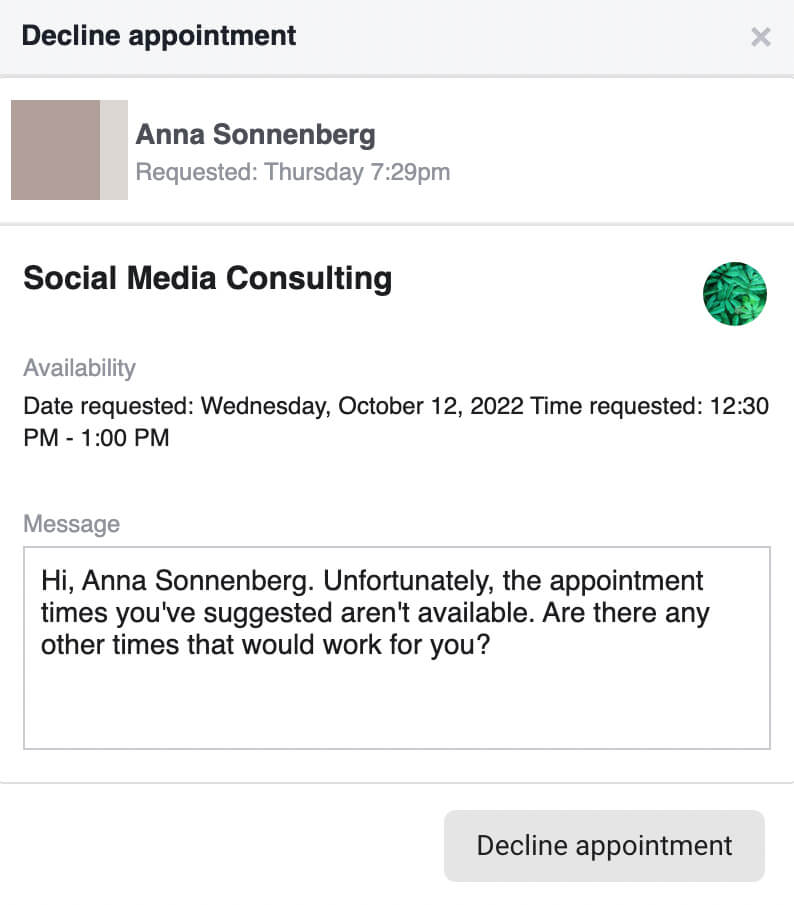
If you decline the appointment, Messenger automatically generates a message for you to send to the customer. That means you can manage appointments in seconds and you always have the option to edit your message before sending it.
Monitor Your Booked Appointments
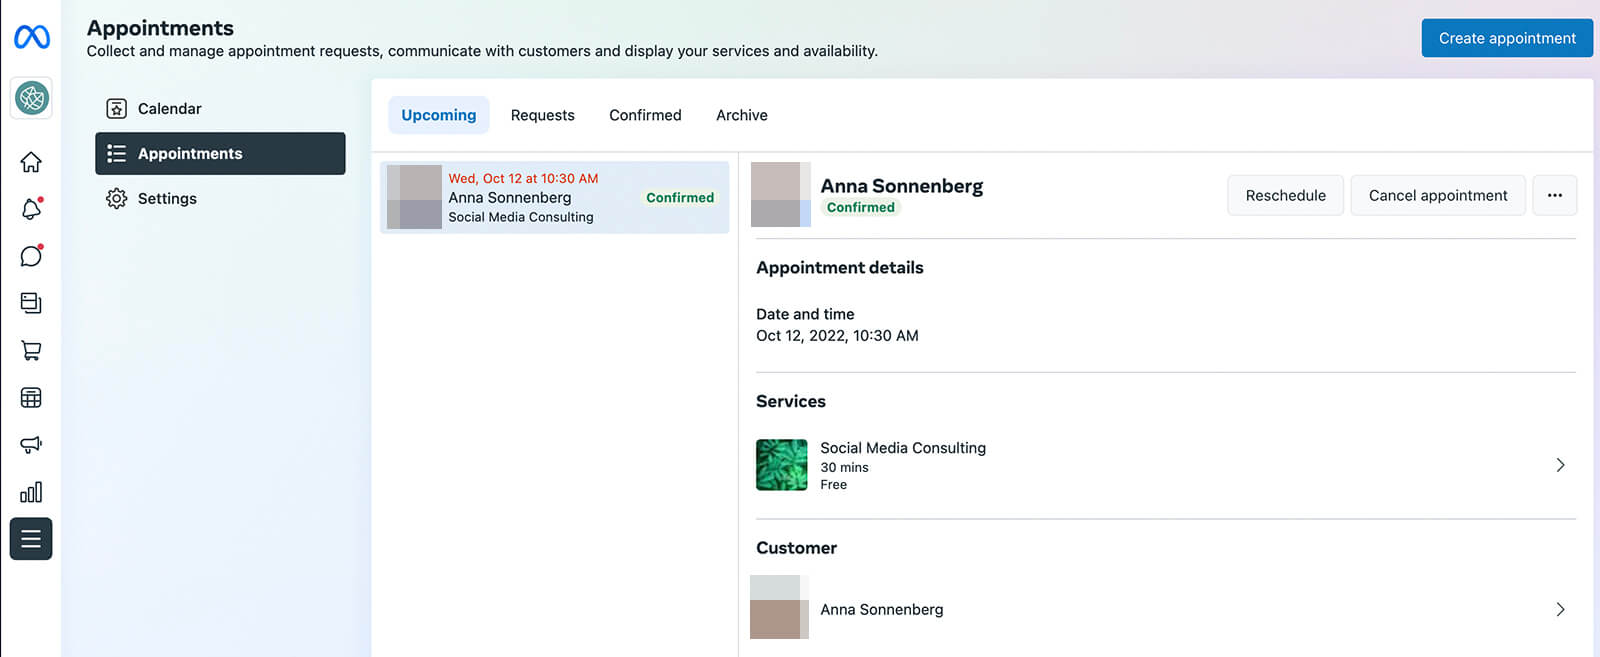
When customers make bookings using Meta’s native tools, you can view them in Business Suite. Open the All Tools menu and select Appointments. You’ll see a list of upcoming, requested, and confirmed appointments. From here, you have the option to reschedule, cancel, or add notes about appointments.
Select the Calendar tab to view your bookings for the week or the month. You can click any calendar item to view details. You can also click the Create Appointment button in the upper-right corner to set up an appointment manually.
Send Reminders to Customers
Business Suite’s Calendar tool makes it easy for your team to keep track of appointments. And when you enable the Reminder feature, you can make sure customers don’t miss their appointments either.
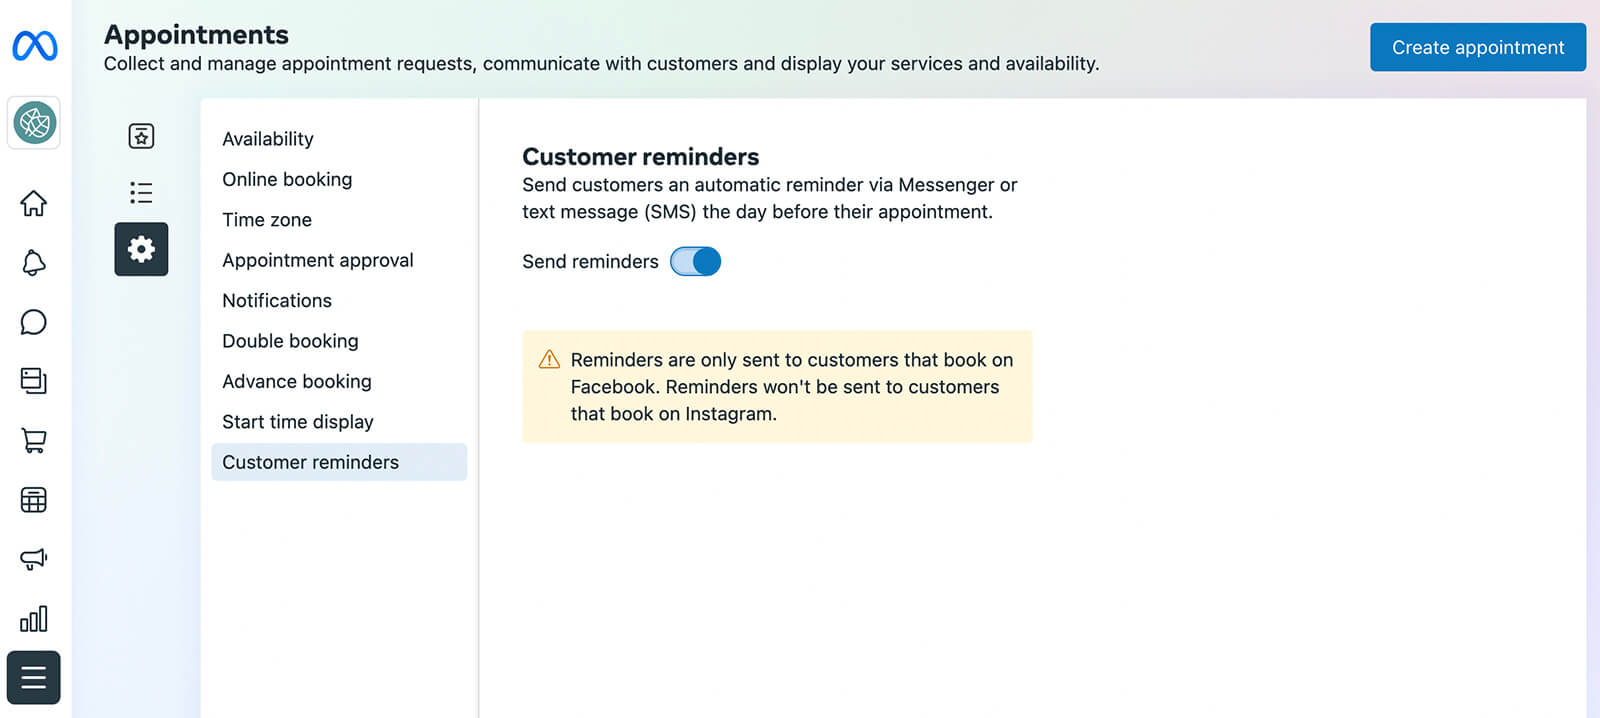
In the Appointments panel, click the Settings tab and select Customer Reminders. Click the toggle to enable this feature, which automatically reminds customers via Messenger a day before the appointment.
#3: How to Promote Your Book Now or Reserve Action Buttons on Facebook With Organic Content
The most straightforward way to promote your reservation and appointment options is to create organic content about your services. For example, you might post testimonials from happy clients, share user-generated content, or create lifestyle content highlighting your service-based business and add a CTA guiding prospects to your action button
When you use Facebook’s native appointment booking tool, you have a couple more options. Use the native tools below to improve results from your organic efforts.
Feature Services on Your Facebook Page
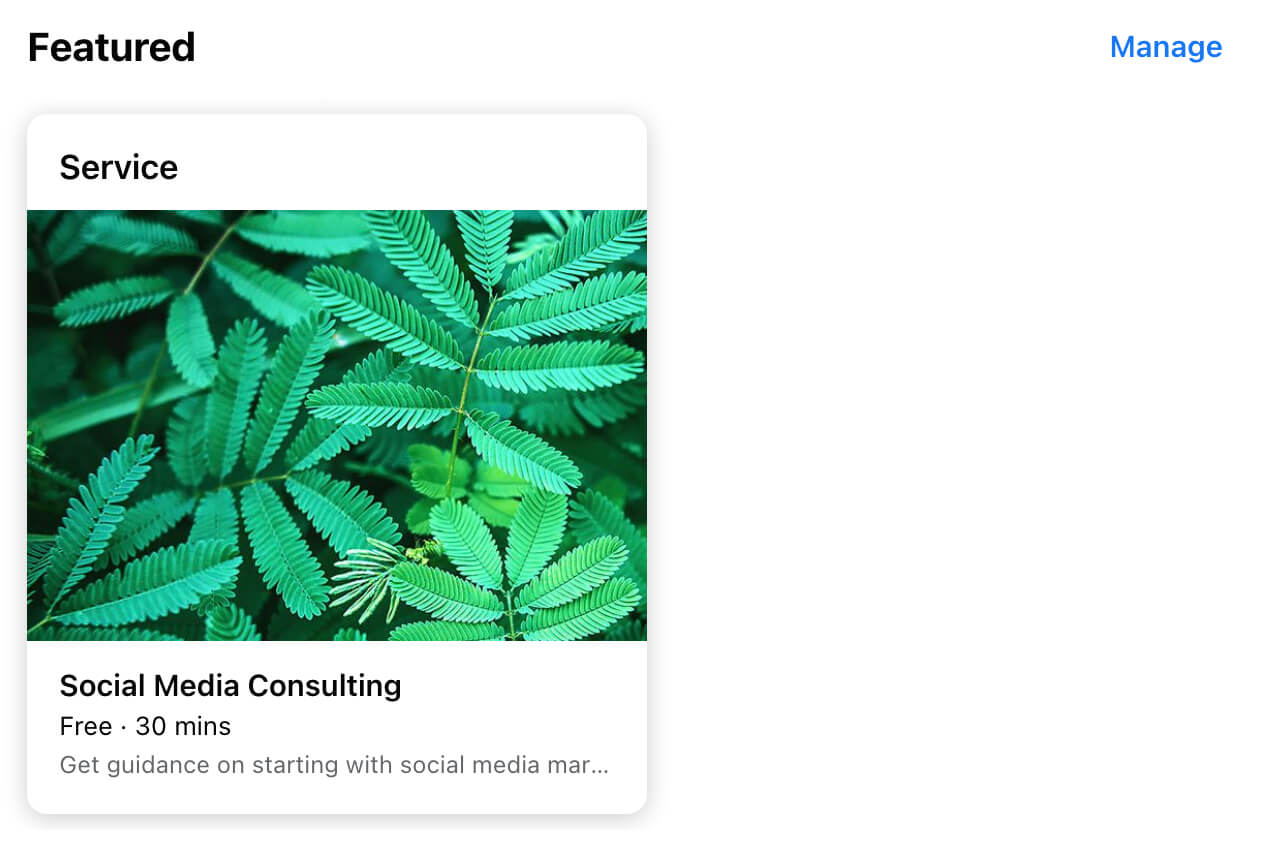
In addition to creating an action button, you can pin services to your page to drive additional conversions. Go to your page and click the Manage button in the Featured section, which is right above your page’s posts.
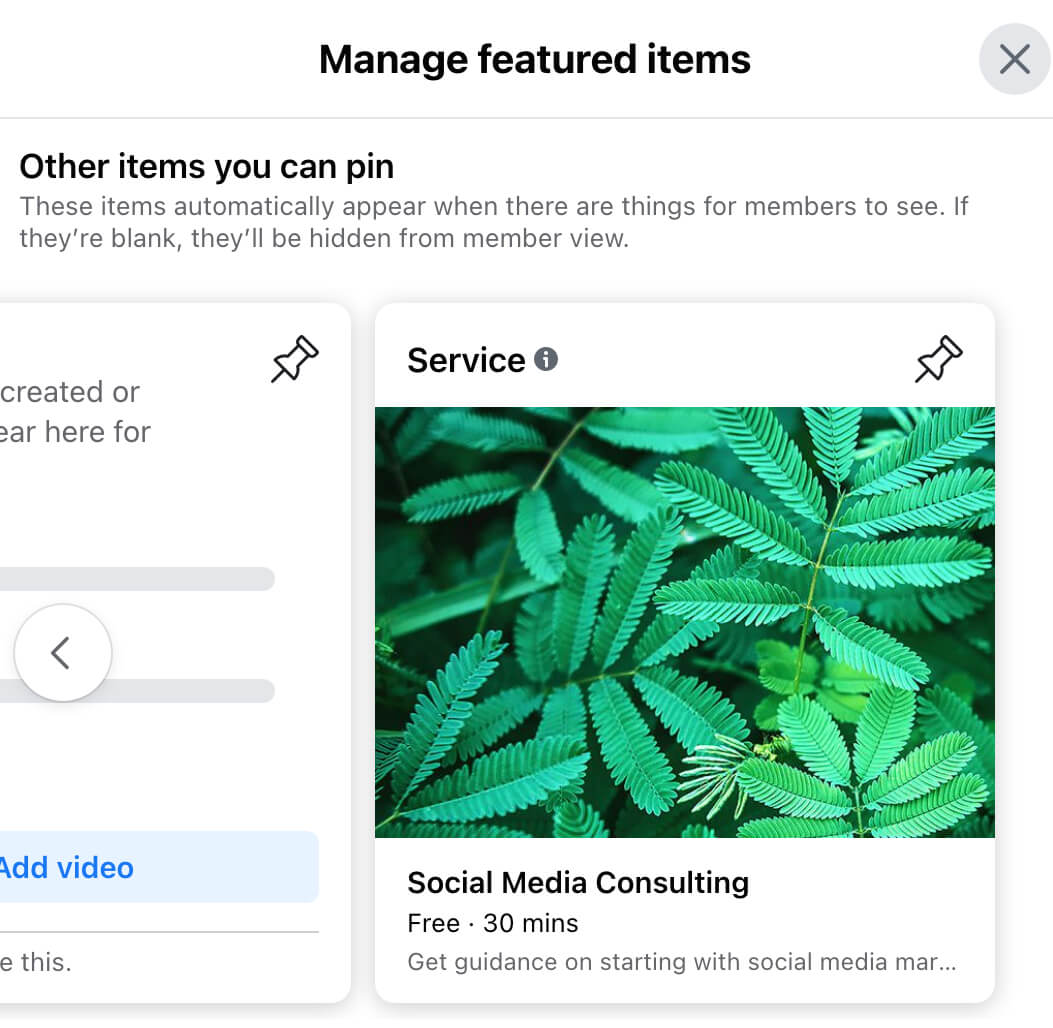
Then scroll through the available items and look for services you want to pin to the top of your page. Featured services and other content display just underneath your page’s cover image and Book Now button.
Book Appointments Via DMs
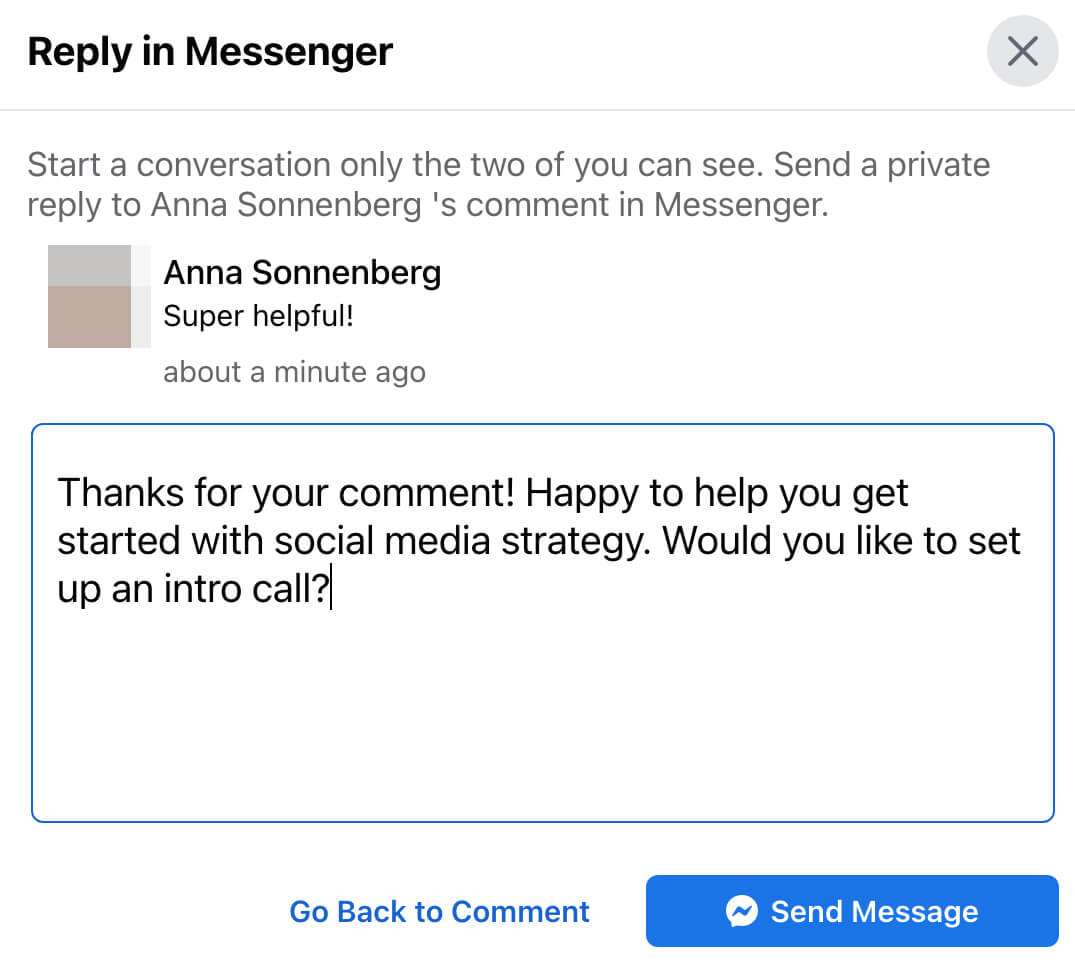
Does your Facebook page receive a lot of comments or DMs? You can use this engagement to get even more bookings. In Business Suite, go to your page’s inbox and select the Facebook Comments tab. Rather than replying with a comment, you can click Send Message to DM the customer via a Messenger pop-up.

Once you send the DM, you can switch over to the Messenger tab in your inbox. If the customer responds positively, you can set up an appointment via DM.
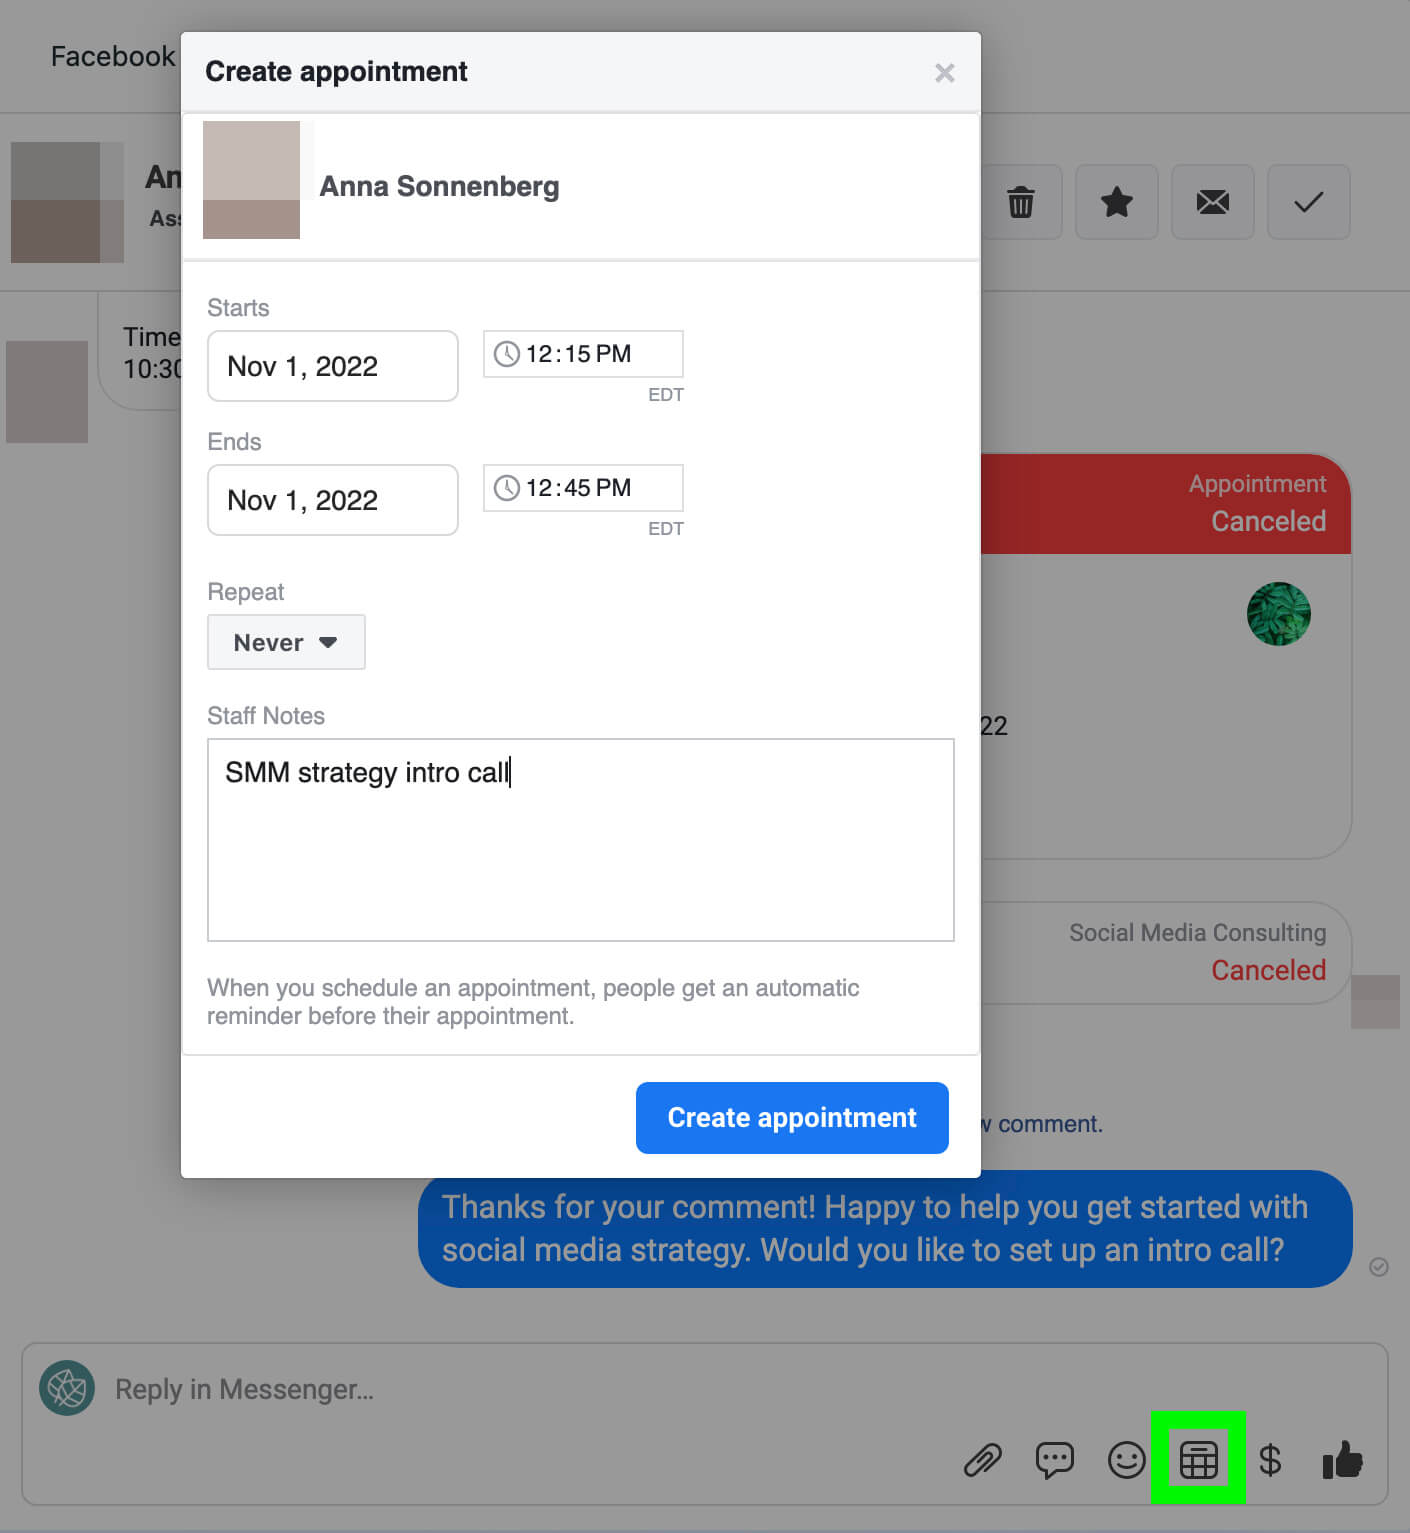
Click the appointment icon and choose a time from the pop-up. Customers automatically get a confirmation and a reminder via Messenger. Although this option doesn’t let you link services, it does book the time on your calendar to help you avoid double bookings.
#4: How to Promote Your Book Now or Reserve Action Buttons With Paid Facebook Campaigns
To fill your reservation or appointment calendar more efficiently, consider using a paid campaign to promote your action button. You can set up a promotion directly from your Facebook page, or you can use Ads Manager to send customers to your page.
Promote Your Action Button From Your Facebook Page
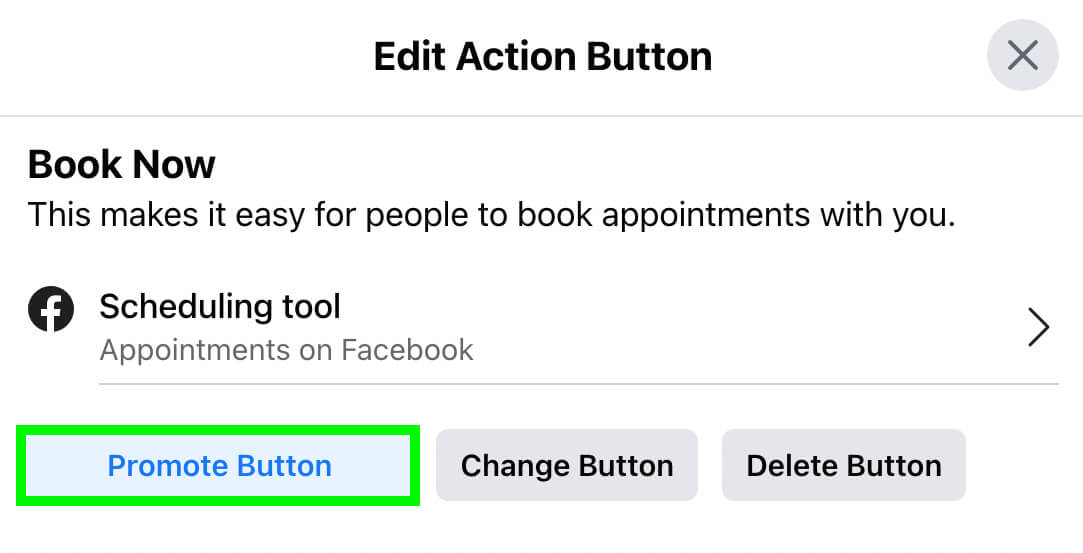
To set up a promotion from your Facebook page, click the three dots in the upper right, just below your cover image. Select Edit Action Button, and then click Promote Button. Facebook will automatically generate an ad for you, using your action button as a CTA.
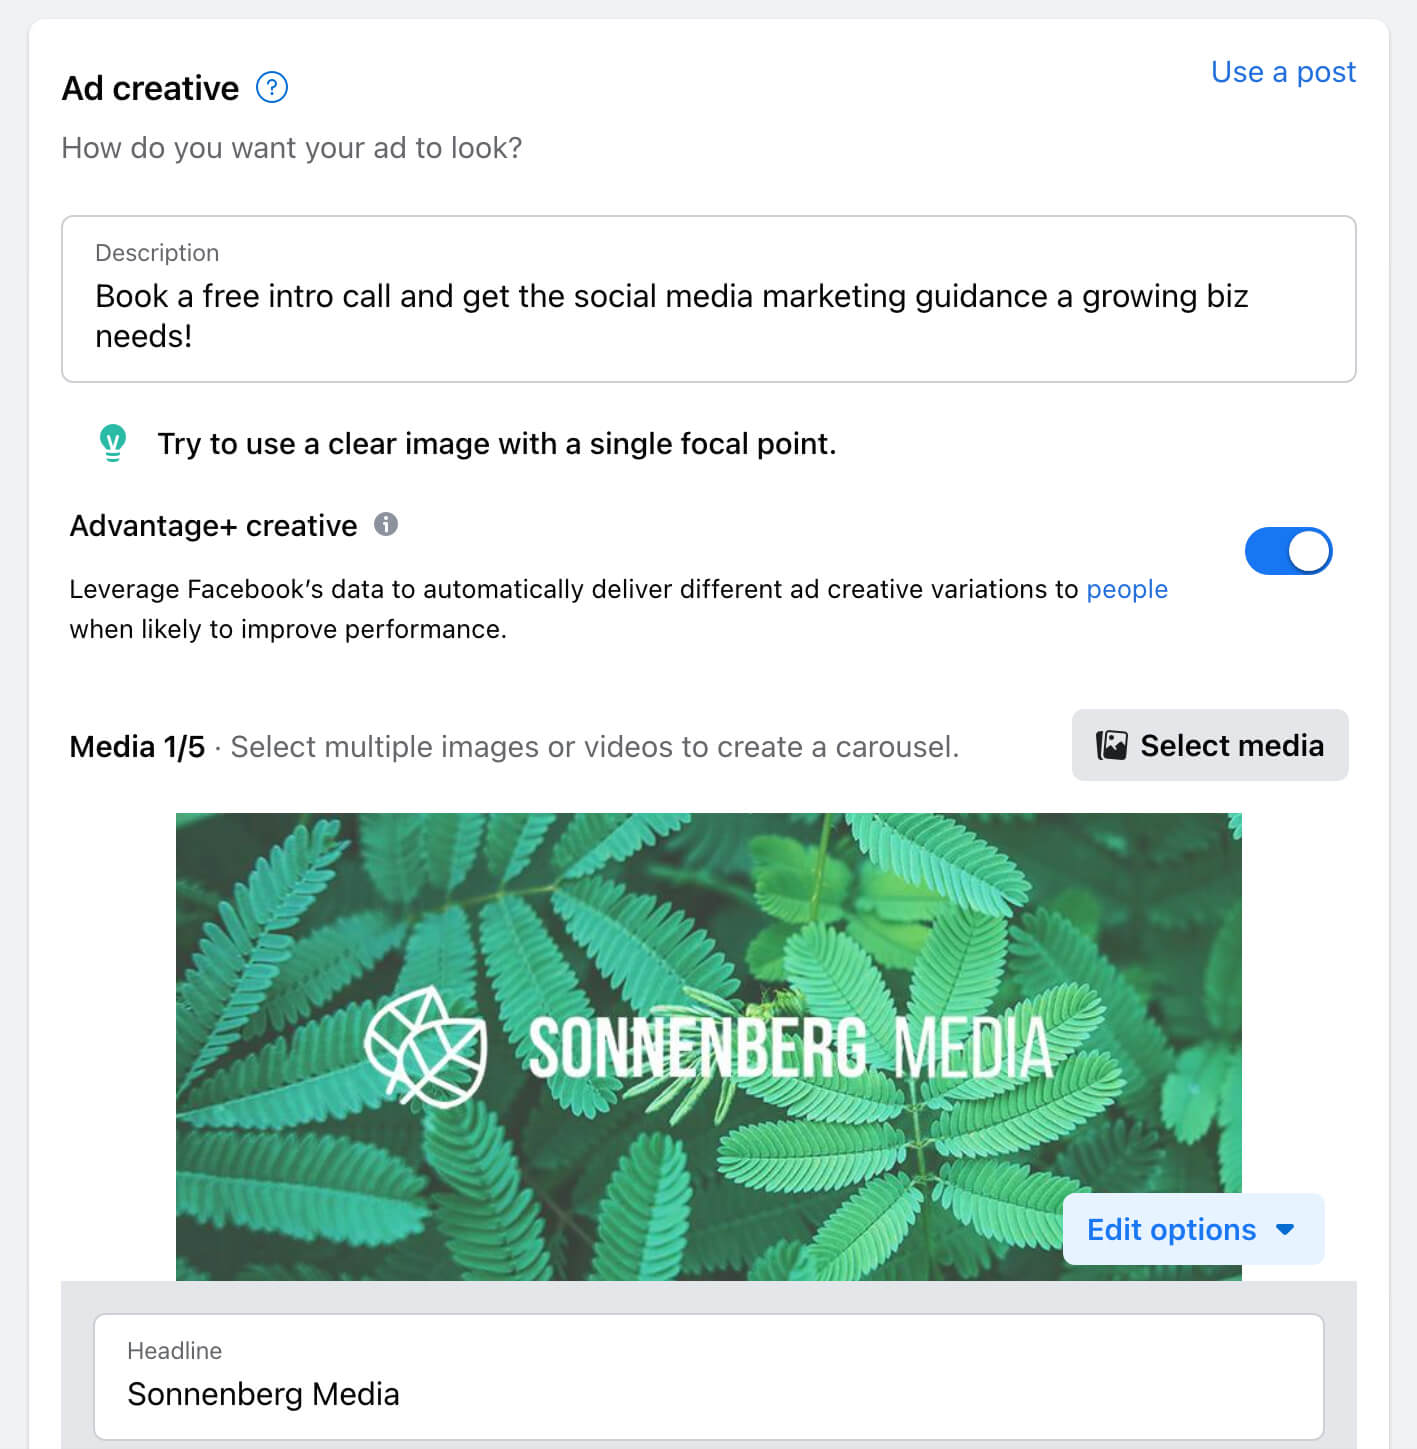
In addition to modifying the auto-generated description, you can add up to five creatives to build a carousel. You can also leverage Advantage+ Creative to deliver the optimal version of each creative to each person.
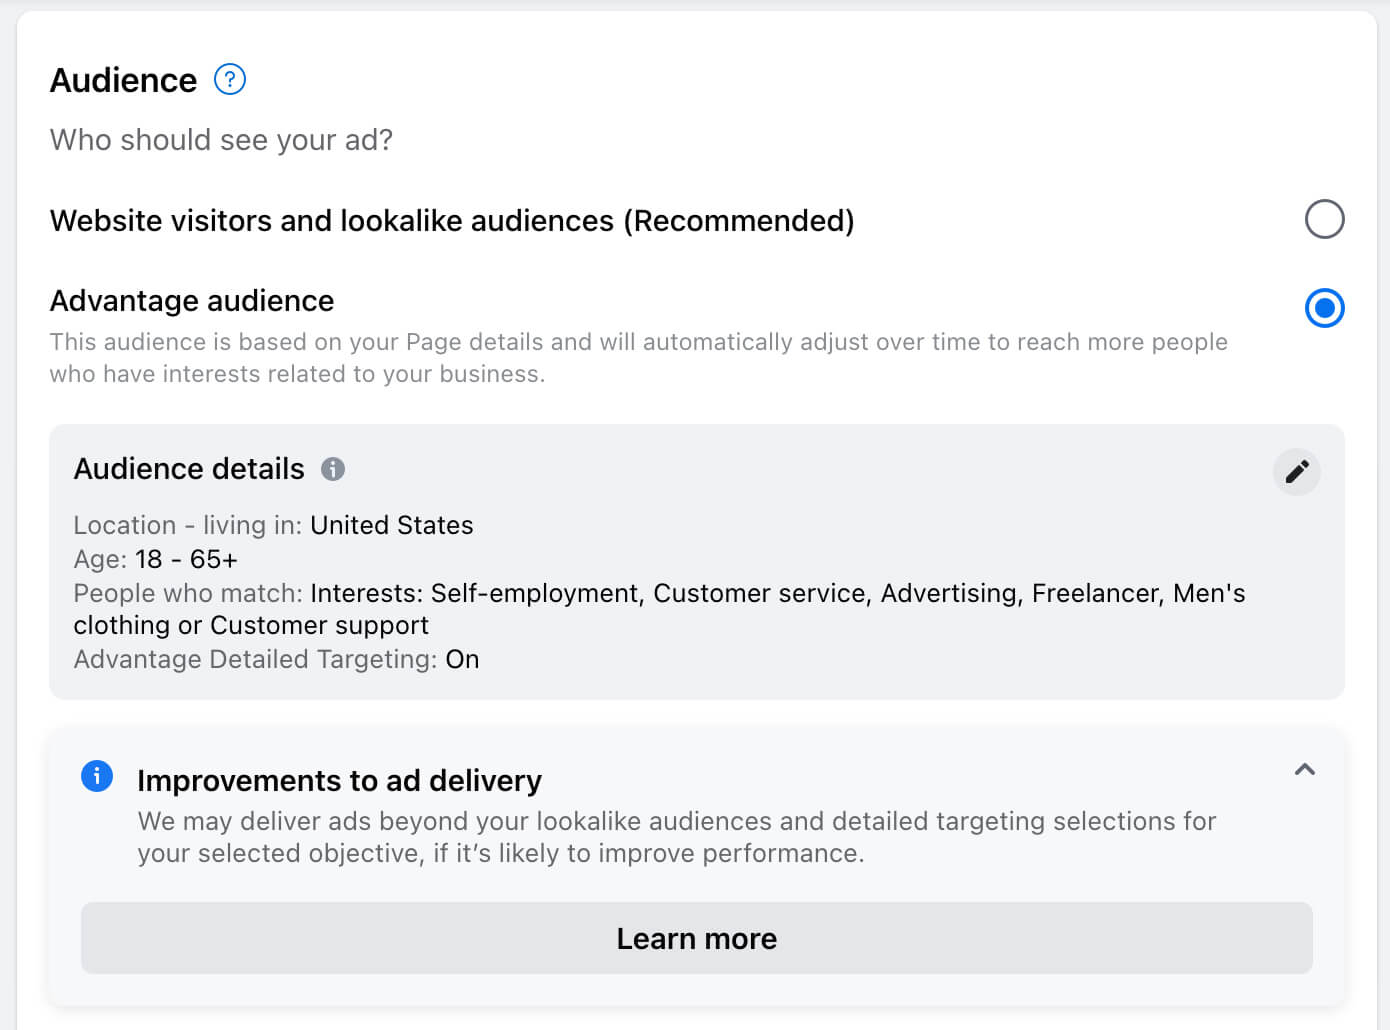
Although boosted content has limited audience targeting options, you do get access to a couple of interesting options. Facebook automatically creates a Website Visitors and Lookalike Audiences option to help you reach people like your site visitors. You can also use the Advantage Audience, which automatically reaches people based on your page.
Finally, set a daily budget and a duration and confirm the placements for your boosted content. You can opt to deliver it on Facebook and in Messenger to reach as many of your target customers as possible.
Advertise Your Services Using Ads Manager
While boosting an action button is relatively straightforward, advertising services in Ads Manager is a little trickier. There’s no built-in option to boost your action button so you have to direct customers to your booking or reservation options.
If you use a third-party booking or reservation platform, for example, you can create an ad using the traffic objective. Then you can enter the booking or reservation platform URL as the ad destination.
If you use Facebook’s native appointment tool, you can create an ad using the engagement objective. Then you can direct customers to your Facebook page, where they can click the Book Now button to make an appointment.
Are you launching a new service or offering a limited-time discount? In your ad, give customers a reason to book an appointment immediately. That way, you can prompt them to take action and you can fill your calendar.
Conclusion
Facebook’s appointment and reservation buttons make bookings seamless and give service-based businesses a more targeted CTA option. Whether you plan to focus solely on organic content or you intend to use ad spend for promotions, these Reserve and Book Now buttons have plenty of potential to help marketers reach key goals.
Stay Up-to-Date: Get New Marketing Articles Delivered to You!
Don't miss out on upcoming social media marketing insights and strategies! Sign up to receive notifications when we publish new articles on Social Media Examiner. Our expertly crafted content will help you stay ahead of the curve and drive results for your business. Click the link below to sign up now and receive our annual report!
Attention Agency Owners, Brand Marketers, and Consultants

Introducing the Marketing Agency Show–our newest podcast designed to explore the struggles of agency marketers.
Join show host and agency owner, Brooke Sellas, as she interviews agency marketers and digs deep into their biggest challenges. Explore topics like navigating rough economic times, leveraging AI, service diversification, client acquisition, and much more.
Just pull up your favorite podcast app, search for Marketing Agency Show and start listening. Or click the button below for more information.

