Are you spending thousands of dollars on video production when you could create professional content yourself? Do you think AI video requires extensive technical expertise you don't have?
You'll discover how to create high-quality AI videos for your business using a proven three-phase production framework, the specific tools and workflows that deliver professional results, and how to avoid the common mistakes that make AI videos look amateur.
AI Video and Your Business
The belief the AI video production is complicated stops many business owners from even attempting to use these tools. The reality is that AI video has become accessible to anyone willing to learn the basics, and the barrier to entry continues to drop as the technology improves.
For small businesses, the practical benefits are substantial. You can create professional video content without hiring production crews, renting equipment, or booking studio time. This saves significant time and money while allowing you to test creative concepts, iterate quickly, and produce more content than traditional methods would allow.
#1: Pre-Production Planning for Marketing Videos
Pre-production focuses on defining exactly what you want to create before you touch any generation tools. Without this foundational clarity, you'll edit yourself into a corner where nothing makes sense.
Simply stating who you are, what you do, what your service is, and how to contact you no longer works. There are too many businesses competing for attention across social media, TV, and digital platforms. Added to the competition is the fact that attention spans are extremely short. Videos are shifting toward 15-second formats because that's what people will actually watch, but you don't have time to explain everything you do in that short timespan.
Standing out requires a different strategy. Each video must focus on one specific problem, one specific audience segment, and one specific solution—rather than your credentials. This shift requires you to answer one critical question: What do you solve?
Case Study: AI Video In Action
One of Eve's students owns a furniture store. After taking her class, he started producing AI videos at a rate of one or two per day with the goal of building brand awareness. Within weeks, he messaged Eve saying his business was blowing up because people were seeing his content online. The videos transformed his entire business direction.
His strategy was to hook audiences by tapping into current events and trending topics. If you can connect your business to the zeitgeist, people are more likely to stop scrolling and stay watching. Each video reinforced his tagline: “No matter what it takes, we'll get your furniture to you.”
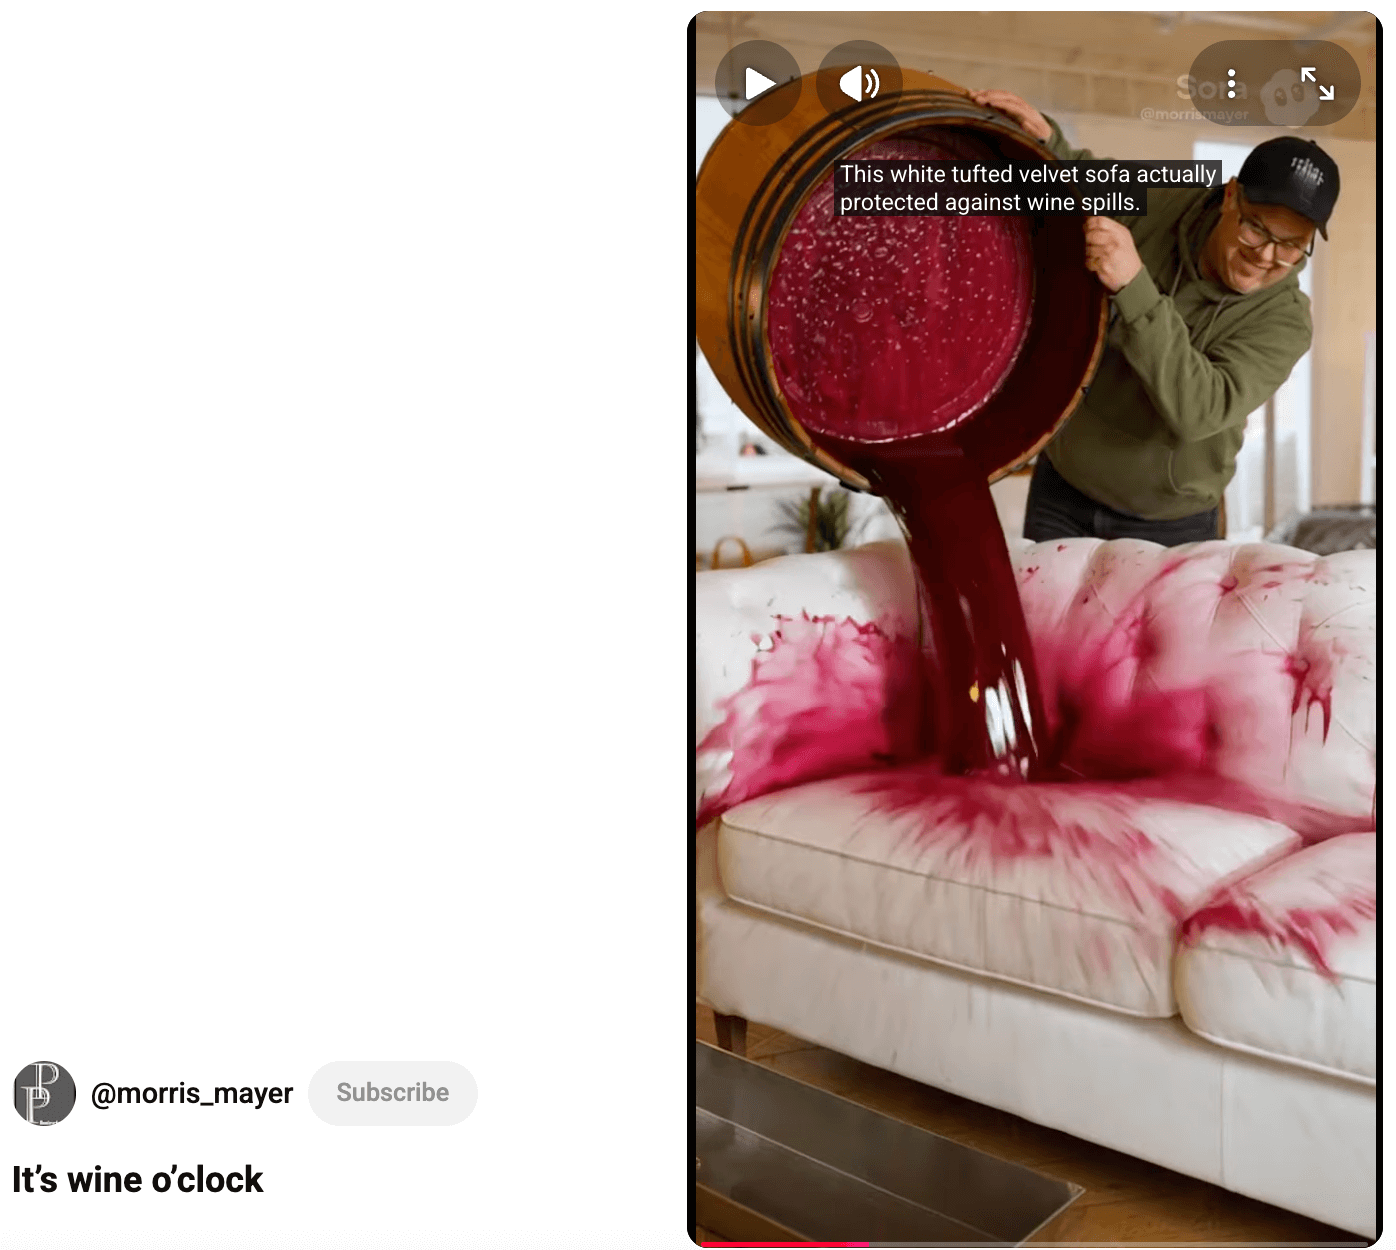
Once he built an audience through creative brand awareness content, he began to showcase what his furniture actually does that competitors' furniture doesn't. He chose to highlight his upholstery's stain resistance—but instead of showing a realistic demonstration, he went big.
Rather than spilling a glass of wine on the couch, he created a video where his avatar character appears with a giant barrel of wine and dumps the entire thing all over the couch. The wine drained off. He delivers his tagline: “Whatever it takes, it's stain resistant.”
He was able to create this demonstration by using AI video tools.
#2: How to Prompt and Generate AI Video Content With Sora
The quality of AI video tools has undergone a dramatic transformation in recent months. Eve describes the shift as going from “awful to pretty darn good” rather than perfect. This distinction matters because it sets realistic expectations for what you can achieve.
She recommends Sora for first-time AI video creators because it has a forgiving nature and approaches prompting similarly to traditional film production.
Ready to Supercharge Your Marketing Strategy?

Get expert training and an unbeatable conference experience when you attend Social Media Marketing World—from your friends at Social Media Examiner.
Broaden your reach, skyrocket your engagement, and grow your sales. Become the marketing hero your company or clients need!
🔥 Save $500 on an All-Access ticket. Sale Ends Tuesday! 🔥
GET THE DETAILS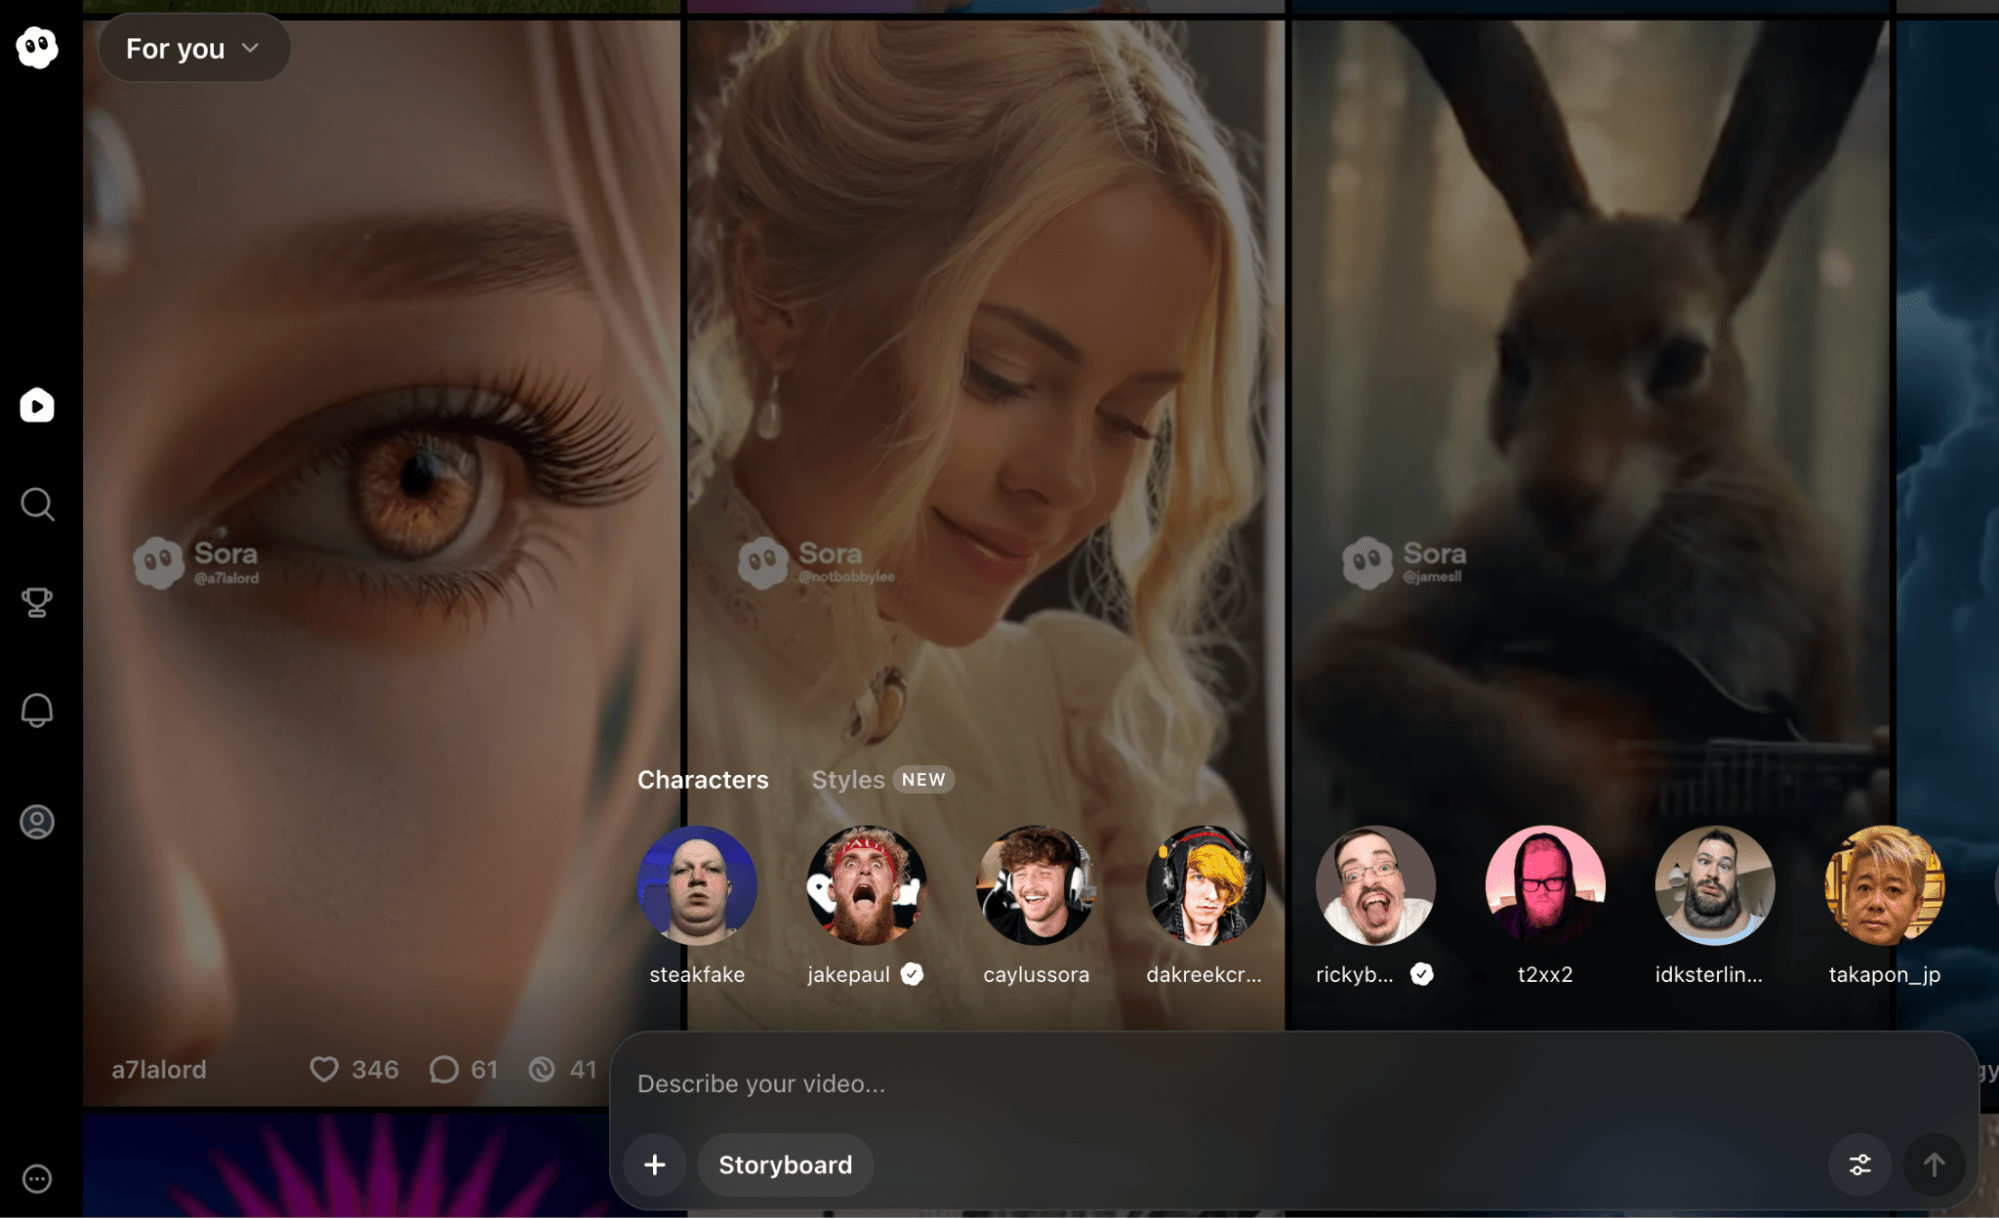
The tool can generate multiple scenes within a single 12-15 second clip, which differs from most other AI video platforms that produce shorter, single-scene outputs. Even mediocre prompts tend to produce usable footage in Sora, though better prompts naturally generate better results.
Sora thinks in timelines and accepts prompts structured around time codes, which mirrors how producers plan actual shoots. You can access Sora through a desktop interface—it runs through ChatGPT but operates as a separate tool.
For users with ChatGPT subscriptions, Sora doesn't charge per render as of the time of the interview. This removes the financial barrier that makes iteration expensive on platforms like Runway or Veo, which use credit systems where each render costs money.
Develop Your Shot List Prompts Manually
This is where you transform your pre-production plan into prompts for each video clip you want to produce. You have to decide on camera angles, movement, and framing for each shot before you start generating.
Instead of prompting for an entire 30-second commercial, plan individual shots. A shot list breaks your video into individual scenes with specific technical details, giving you control over the final result. Each entry should specify the shot type (wide, medium, close-up), the subject, the action happening, camera movement if any, and duration.
Tips to Structure Your AI Video Prompts
Start with mood direction to specify whether you want Pixar-style animation, documentary realism, or cinematic film quality. You can get technical by mentioning frame rates—24 frames per second looks more like film, while 30-35 frames per second looks more like video. The more specific information you provide about the visual style, the better Sora delivers what you envision.
Next, add our time code—literally stating “from 1 second to 3 seconds”—followed by what should happen in that window. Then describe what you want the camera to do and what your character or subject should be doing.
Include camera angles, whether you want music playing, exactly what you want your character to say, and any sound effects you need such as footsteps, door creaks, or wind. If you don't want music, you need to prompt “no music.”
Here's an example structure:
Documentary style, 24 fps. 0-3 seconds: Drone shot flying over a city skyline, moving downward toward street level. 3-6 seconds: Medium shot of a car speeding around a corner. 6-9 seconds: Close-up of hands gripping a steering wheel tightly. 9-12 seconds: Wide shot of the car approaching an intersection. No music. Sound effects: engine roar, tire screech.
When you generate multiple separate clips, maintaining visual consistency becomes challenging. Sora doesn't remember previous renders, so you must use identical prompt language for setting, mood, lighting, and style across all clips in your sequence.
If your first clip specifies “documentary style, 24 fps, overcast natural lighting, desaturated color palette,” every subsequent clip needs those same descriptors. Copy and paste this foundational language, then modify only the specific action and camera work for each new shot.
For character consistency without using the character feature, maintain extremely detailed descriptions. If your subject is “a woman in her 30s with long brown hair wearing a red sweater,” that exact description must appear in every prompt. Even small variations can result in different-looking people across clips.
Tips to Reference Camera Angles and Shot Types
Incorporating basic camera terminology into your prompts significantly improves output quality. Learn and use terms like:
- Establishing shot – a wide view showing the overall scene
- Medium shot – frames a person from the waist up
- Close-up – shows facial details or product features
- Pan – where objects enter and leave the frame
- Dolly – moving forward or backward
- Zoom – moving closer to or further from the subject
These technical terms communicate precisely what you want to the AI system and activate the AI's training on professional cinematography. Instead of prompting for “a woman with coffee,” you can say:
A medium shot of a woman holding a coffee cup, camera dollying forward slowly.
Tips for Using Product Reference Images and Characters in Prompts
Sora allows you to upload one reference image per prompt, which changes everything for product-based businesses. You can photograph your actual product—whether you sell eyeglasses, phones, furniture, or services represented by your logo—and Sora will incorporate that exact item into generated scenes. This means you can show your product in environments you couldn't access in real life or situations that would be expensive to film traditionally.
The character feature (previously called Cameo) lets you create an avatar of yourself using Sora's mobile app. The app walks you through a process where you look up, down, left, right, and count while it captures your face from multiple angles. Whatever you're wearing during this capture becomes part of your avatar.
Tips to Create Cutaway Clips
Cutaways are separate shots of details within your scene—objects, textures, or background elements that provide visual interest and editing options. A cutaway might be a close-up of a coffee cup on a desk, a picture on the wall, or hands typing on a keyboard.
When two shots show a character facing different directions or a scene transition feels jarring, cutting to a detail shot masks the problem. The viewer's brain fills in the gap, accepting the cutaway as intentional style.
AI Is No Longer Optional for Marketers—Ready to Master It?
Join over a thousand forward-thinking marketers at AI Business World—a conference-in-a-conference at Social Media Marketing World.
Get two days of practical AI training where you'll discover:
✅ Systems that 3x your output—leaving time for strategy and creativity
✅ Proven strategies you can deploy right away—no guesswork, no wasted budget
Become the indispensable AI expert your company needs.
GET YOUR TICKETS—SAVE $150Generate cutaways as separate clips with their own specific prompts. If your main scene shows someone working at a desk, also generate close-ups of their hands on the keyboard, the computer screen, items on the desk, and perhaps a window view. These become your B-roll that you'll weave into the final edit.
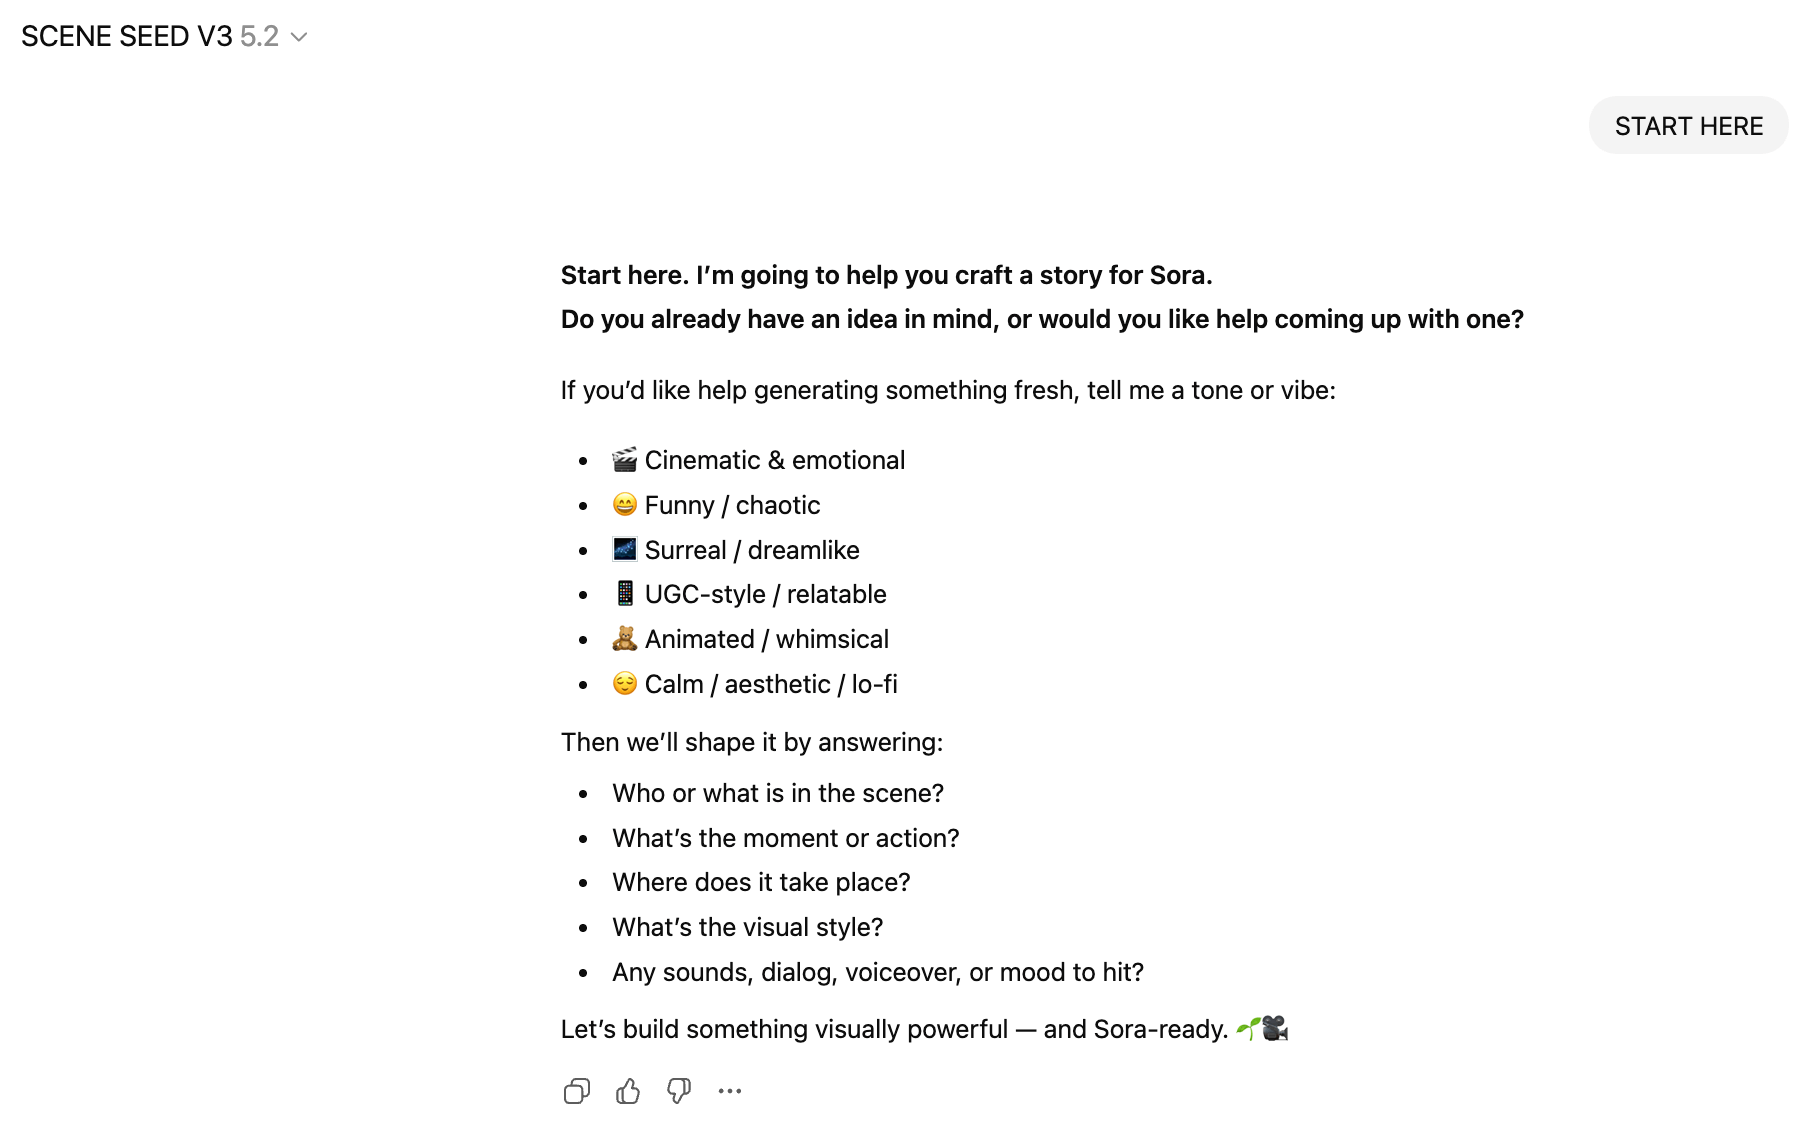
Develop Your Shot List Prompts With the Seed Scene GPT
Eve created a custom GPT called Scene Seed that guides beginners through this pre-production process. The tool asks questions about your vision and walks you through the story structure, helping you develop your ideas into prompts you can use in Sora.
Generate Your AI Video
With all your prompts ready, begin adding them to Sora.
Eve stresses that expecting an AI video to work perfectly on the first attempt sets you up for frustration. The technology simply isn't there yet. Sometimes Sora produces exactly what you envisioned. Other times, the same prompt generates something completely wrong. This variability is normal.
Always generate at least 3-4 versions of important shots. For hero moments in your video—the money shot that makes the biggest impact—render 5-6 variations. This gives you options during editing. You might discover that render #3 has perfect lighting but weak camera movement, while render #5 nails the movement but has timing issues. You can often combine the best portions of different renders to create the ideal final clip.
#3: Edit and Polish Your Final Video With CapCut
Eve uses Final Cut Pro for edits but recommends CapCut to beginners because it costs approximately $90 per year and provides professional-level tools without the expense of Final Cut Pro.
AI video tools handle approximately 75 percent of the work, but you must complete the remaining 25 percent through editing.
No current AI video platform generates perfect, finished videos in one prompt. Anyone showing polished AI video content has edited their outputs.
Understanding this from the start frames AI video properly. These tools are production assistants that dramatically reduce filming costs and logistical complexity. They're not magic buttons that produce finished content. Plan for the editing phase from the beginning rather than treating it as a failure when raw AI outputs need refinement.
For a Santa roofing commercial, Eve combined six different Sora renders. One version generated the perfect collision. Another captured Santa's best reaction shot. A third produced the cleanest bag-dropping sequence. By cutting these strongest moments together, she created what appeared to be a seamless, continuous shot even though it combined elements from multiple separate renders.
The Edit Workflow
Eve builds her videos in three distinct layers.
First, she lays out all the visual clips in sequence on the timeline, getting the complete story structure in place and keeping extra cutaways nearby for coverage. This video layer forms the foundation.
Second, she adds the music track underneath the visuals, positioning it to align with key moments—impacts, reveals, emotional beats. Sometimes she adjusts clip timing slightly to match musical rhythm, creating a tighter relationship between audio and visuals.
Third, she adds sound effects on a separate layer where cuts occur, where actions happen, or where environmental sounds enhance realism. The whoosh of something flying past. The thud of an object landing. The crunch of impact. CapCut provides a sound effects library, or you can generate custom sounds with AI audio tools.
This three-layer approach keeps your edit organized and allows independent adjustment of each element without disrupting the others.
Start by importing your AI-generated clips into CapCut and lay them out in your timeline according to the shot list you created during pre-production. This initial assembly is called sequencing.
As you work, don't just drag everything onto the timeline. Instead, identify the strongest 2-3 seconds within each 5-second clip. AI generation often produces moments of brilliance surrounded by weaker footage. Your job is to extract those brilliant moments and discard everything else.
Tips to Cut Your Video Down Your First Edit
Most people's first edits run too long. Eve plays a game with students to teach ruthless editing. She has them edit a scene to 60 seconds, then requires them to cut it down to 30 seconds, then 15 seconds. This exercise forces you to recognize what actually matters versus what you think is important.
This principle comes from her experience working at MTV, the network that fundamentally shortened attention spans across media. MTV pioneered quick cuts, dynamic angles, and rapid information consumption. That style now dominates social media and online video. If your content moves slowly, viewers scroll past it.
When you cut clips together, they must make sense to the human eye. Beginning editors typically show complete actions: a person stands still, begins walking, crosses the frame, and stops. Then a new clip shows a door closed, the handle turning, and the door opening completely.
Instead, start the clip while the person is already walking. Cut to the next shot when the door is half-open. The viewer's brain doesn't register these as gaps—it processes them as intentional style choices that maintain momentum.
This concept applies to all transitions. If a car speeds around a corner, cut to a close-up of hands gripping the steering wheel before the turn completes. If someone reaches for an object, cut to a different angle mid-reach rather than showing the complete motion. Action continuity comes from matching movement direction and energy, not from displaying every moment.
Tips to Handle Transitions Strategically
Beginning editors discover transitions and immediately use ten different effects in one video. Eve stops this habit immediately. Most cuts should be simple cuts—one clip ends, the next begins. No fancy effects, no elaborate wipes, no spinning transitions.
The dissolve is the most common transition. A dissolve gradually blends one clip into the next, showing the passage of time or change of location. Use it when you're jumping ahead hours or moving to a different setting. It signals to viewers that context has shifted without disrupting flow.
All those other creative transitions available in editing software exist for specific stylized purposes. Unless you're intentionally creating a retro aesthetic or a specific artistic effect, skip them. They distract from your message, make your video longer, and mark your content as amateurish.
Tips to Add Text and End Slates
AI-generated text remains unreliable—letters appear distorted or illegible. Create all text elements separately using design tools and import them as graphics.
Your end slate should last for 3 seconds and display your business name, logo, website, phone number, and call to action. Keep the design clean and simple. Complex end slates overwhelm viewers.
You can also add text overlays throughout your video for emphasis, statistics, or context. Keep these minimal. Text should enhance understanding, not clutter the screen or compete with your visuals for attention.
Review Your Video Before You Render
After hours of editing, you become blind to problems in your own work. Eve shares work-in-progress edits with trusted colleagues, students, partners, or even family members. She watches their reactions carefully. When do they seem bored? When do they lean forward with interest? When do they look confused?
This feedback catches issues before your video goes live. Maybe your establishing shot runs too long. Maybe a transition feels jarring. Maybe the music overwhelms the message. Fresh viewers notice what you've stopped seeing because you've watched the same clip 50 times.
You can also test this yourself through multiple viewing methods. Watch at normal speed to check flow and pacing. Watch without sound to ensure visuals tell the story independently. Listen without watching to verify the audio works alone. Each method reveals different improvement opportunities.
Render the Final Video
Once you've assembled clips, added music and sound effects, incorporated transitions where necessary, standardized color and brightness, and added text elements, you're ready to render your final video. CapCut exports in various formats and resolutions. For social media, 1080p works well. For ads requiring submission to platforms, check their technical specifications.
Rendering typically takes a few minutes for a 15-30 second video. Watch the final render all the way through before publishing or sharing. Sometimes compression creates unexpected artifacts or audio sync issues. Better to catch these during final review than after your video is live.
Eve Whitaker is an AI consultant and educator who helps small businesses create professional video content. She runs the Video Spark membership where she provides ongoing training and support. Follow her on Facebook, Instagram, TikTok, and YouTube.
Other Notes From This Episode
- Connect with Michael Stelzner @Stelzner on Facebook and @Mike_Stelzner on X.
- Watch this interview and other exclusive content from Social Media Examiner on YouTube.
Listen to the Podcast Now
This article is sourced from the AI Explored podcast. Listen or subscribe below.
Where to subscribe: Apple Podcasts | Spotify | YouTube Music | YouTube | Amazon Music | RSS
✋🏽 If you enjoyed this episode of the AI Explored podcast, please head over to Apple Podcasts, leave a rating, write a review, and subscribe.
Stay Up-to-Date: Get New Marketing Articles Delivered to You!
Don't miss out on upcoming social media marketing insights and strategies! Sign up to receive notifications when we publish new articles on Social Media Examiner. Our expertly crafted content will help you stay ahead of the curve and drive results for your business. Click the link below to sign up now and receive our annual report!