 Are you thinking of publishing your content on Facebook?
Wondering how to use Facebook Instant Articles?
In this article you'll discover everything you need to know to publish Facebook Instant Articles that stand out in the Facebook news feed.
Editor's Note: The Instant Articles review process now allows publishers to submit with 10 articles, instead of the 50 articles originally required.
#1: Sign Up for Instant Articles
The first step in getting started with Facebook Instant Articles is signing up. On this page, you select your page from the list of pages you have access to.
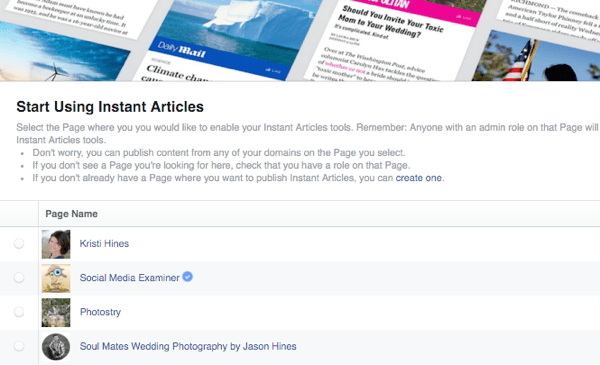
Then check the box to agree to Instant Articles Terms and click the Enable Instant Articles button.

#2: Explore the Setup Area
Once you enable Instant Articles, you'll be taken to your Instant Articles setup area.
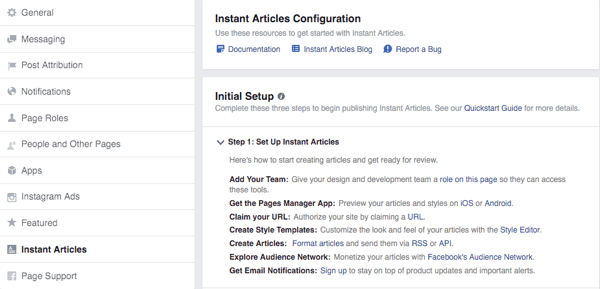
You'll see the Instant Articles menu option in the left sidebar of your page's settings.
You'll see the Quickstart Guide to Instant Articles configuration.
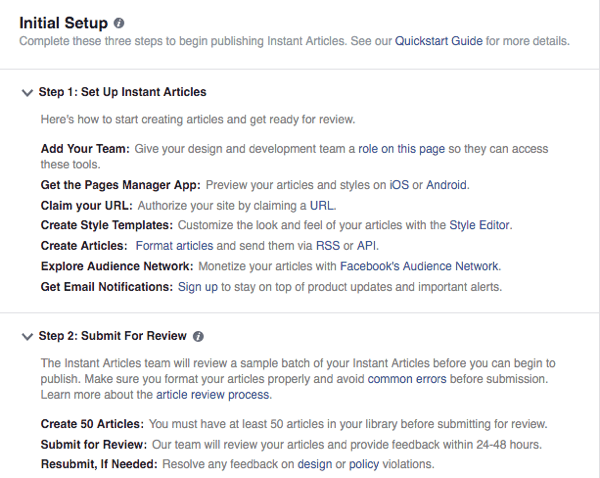
Beneath that, you'll see the initial tools you need to get your content submitted for review for Instant Articles.
#3: Get to Know Instant Articles
If you didn't read getting ready for Facebook Instant Articles, now is the time to do so. In addition, I would strongly recommend you read the Quickstart Guide and Documentation Facebook links at the start of the setup before diving into the tools. This will ensure that you properly set up Instant Articles from the start.
Once you know how you want to set up Instant Articles, you should proceed through the following steps.
#4: Claim Your URL
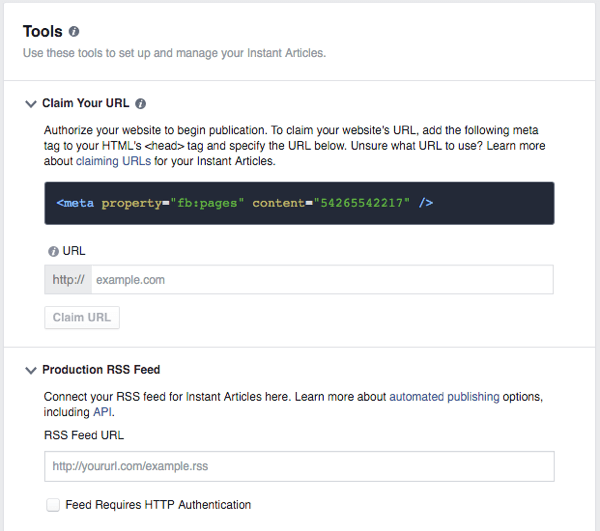
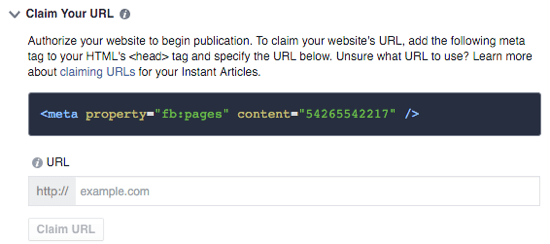
The first option for setting up Instant Articles is to claim your URL. You can read more about what URL to claim for your instant articles here. Once you determine what URL to claim, you add the code provided as directed and enter the URL into your tools.
Get World-Class Marketing Training — All Year Long!
Are you facing doubt, uncertainty, or overwhelm? The Social Media Marketing Society can help.
Each month, you’ll receive training from trusted marketing experts, covering everything from AI to organic social marketing. When you join, you’ll also get immediate access to:
- A library of 100+ marketing trainings
- A community of like-minded marketers
- Monthly online community meetups
- Relevant news and trends updates
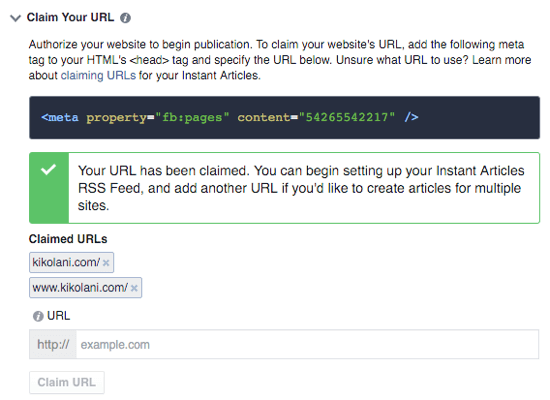
Once you successfully complete this step, you'll receive a confirmation message and have the ability to add URLs if needed.
#5: Set Up Your RSS Feed
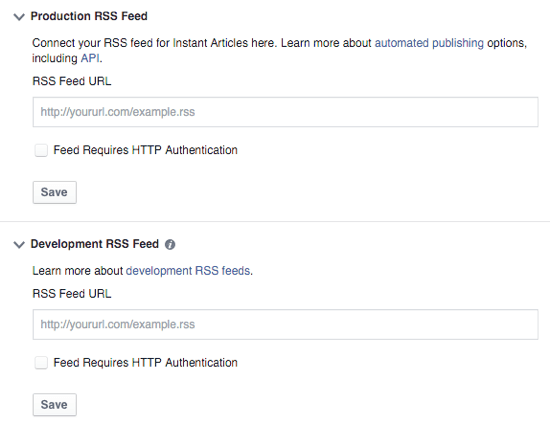
To automatically publish your articles to Instant Articles, you need to set up your RSS feed. You can use your production feed (the main RSS feed of your blog) or a developmental RSS feed that only you see for testing purposes. You can read about the differences between these here.
For Self-Hosted WordPress Users
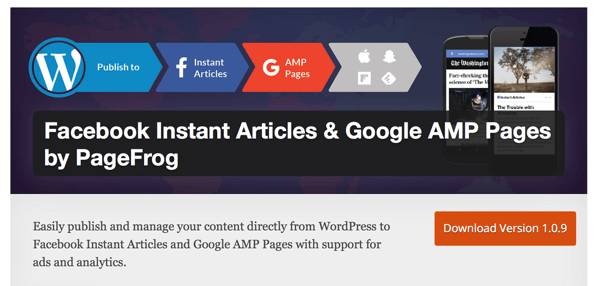
As mentioned in getting ready for Instant Articles, self-hosted WordPress users can install a plugin to get your content and RSS feed optimized for Facebook Instant Articles. You can use the official plugin developed by WordPress and Facebook or the PageFrog plugin that also includes optimization for Google AMP.
The initial setup of the PageFrog plugin is much simpler, because the official plugin requires you to set up a Facebook app for Instant Articles, which sometimes has configuration issues. But the official plugin was developed by WordPress and Facebook, which could make it more reliable.
Note that while these plugins will help optimize your content for Facebook Instant Articles, they won't fix a lot of the errors that Facebook Instant Articles don't allow. You'll learn more about how to find those in step #9.
For Drupal Users
Drupal users can refer to this guide on optimizing your website for Facebook Instant Articles.
For Hosted Platform Users
Those who blog on Medium, Tumblr, WordPress.com, and similar sites will have to wait for those platforms to optimize for Facebook Instant Articles. After some article spot-checking from the official pages of these platforms, it seems they're not optimized for Facebook Instant Articles just yet.
For Platform Users Who Can Edit the Code of Their Site
If you're using a platform and are comfortable with editing the code of your website, you can refer to the developer's guide for Facebook Instant Articles to optimize your content yourself.
Other Ways to Publish
You can also learn about alternative ways to publish content in Facebook Instant Article format. Find out more about creating secure RSS feeds, the API, and third-party partners who provide tools to create Facebook Instant Article-optimized content.
#6: Configure Your Monetization Settings
If you plan to monetize your instant articles, you configure those options here.

If you choose this option, you'll need to set up your Audience Network account and a host of other options. You can't go back once you click Get Started.
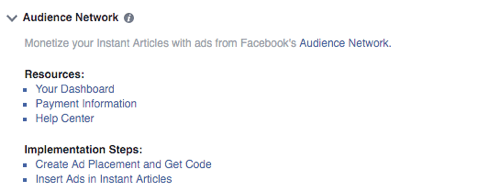
Once you've set up your Audience Network account, follow the implementation steps as shown in the links above.
#7: Brand Your Article Styles
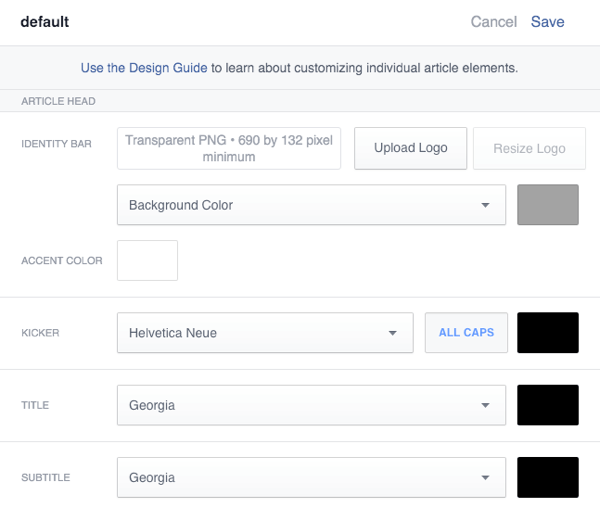
Next, design your instant article styles. This is how your articles will look to visitors in the Facebook app. When you click on the default or add a new style, you get to configure all of the details from header to footer to make it match your brand.
#8: Set Up Email Alerts
The last option under Tools is to set up email alerts. If you'd like to receive emails about any issues with your instant articles, be sure to check them here.

#9: Check for Errors in Publishing Tools
Once you've finished configuring your Instant Articles setup, you can go to your Publishing Tools to see your instant articles.

Discover Proven Marketing Strategies and Tips
Want to go even deeper with your marketing? Check out the Social Media Marketing Podcast! Publishing weekly since 2012, the Social Media Marketing Podcast helps you navigate the constantly changing marketing jungle, with expert interviews from marketing pros.
But don’t let the name fool you. This show is about a lot more than just social media marketing. With over 600 episodes and millions of downloads each year, this show has been a trusted source for marketers for well over a decade.
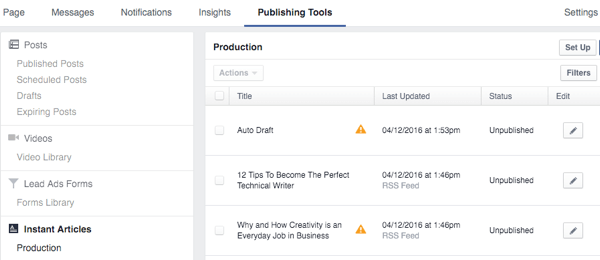
This is where you're alerted to any errors your articles may have before you submit them to Facebook for review, as noted by the Alert symbols.
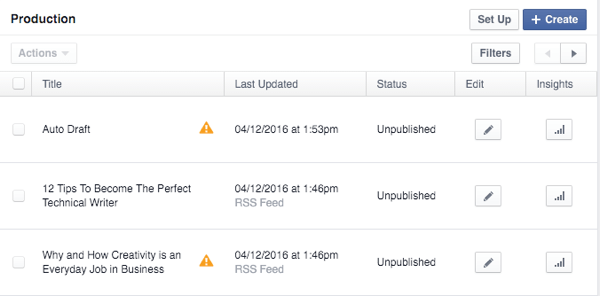
When you click on the Edit icon next to an article, you can see what the issues are with that article.
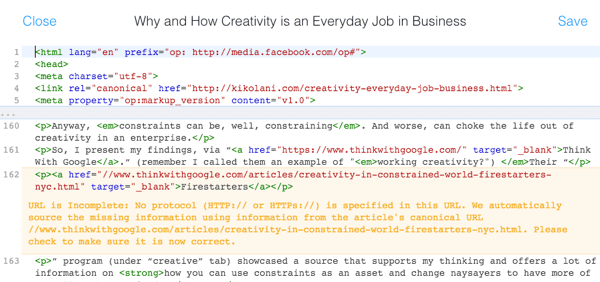
You can make edits within Publishing Tools to correct the error, but in some cases you might want to go back to the original article on your website to make the edits, as the error will affect your regular website visitors as well. Or you can do both.
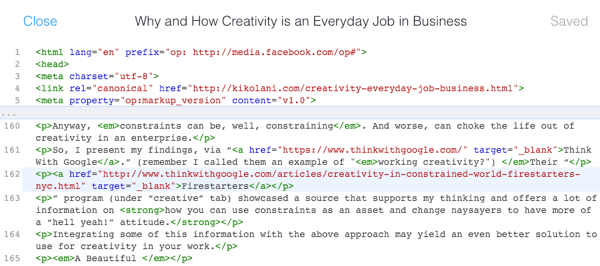
If you can't clean up the error through Publishing Tools, do so on your website and make sure that the change is reflected in Publishing Tools before submitting your article for review. You'll see why this is important in step #12.
#10: Preview Your Articles on the Facebook Pages App
If you don't have it yet, download the Facebook Pages app for your iOS or Android device. This will allow you to preview your instant articles to see how they look to your Facebook app visitors. To do this, go to your page and tap on the three dots at the bottom right for your page's settings. Then tap on Instant Articles.
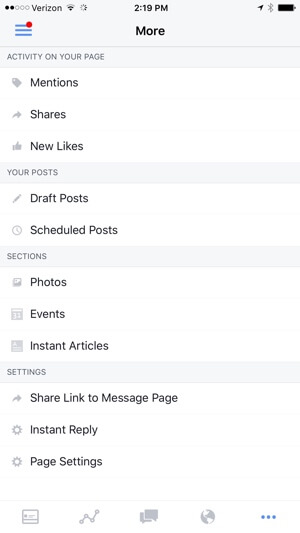
Depending on whether you used a Production or Development feed, you should see articles under one area or the other.
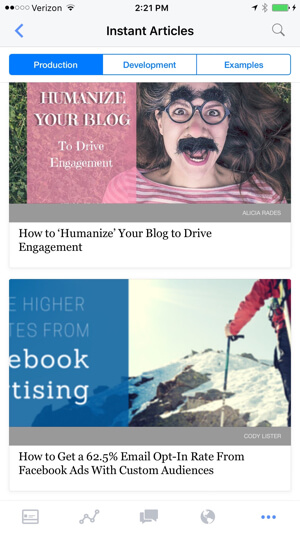
You can tap on those to see how articles from your website look as instant articles.
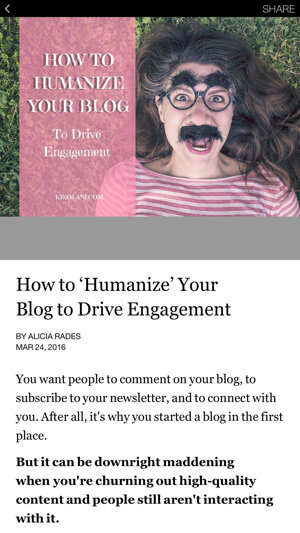
If you don't like something, you can go to your Page Settings > Instant Articles > Tools > Styles on your desktop browser and make changes to your style while previewing your articles in the Pages app. As you save changes to your style, you'll see those changes get applied to the article you're previewing in the app almost instantly. This can help you determine things like the right size for your identity bar logo, background colors, header colors, and other design elements.
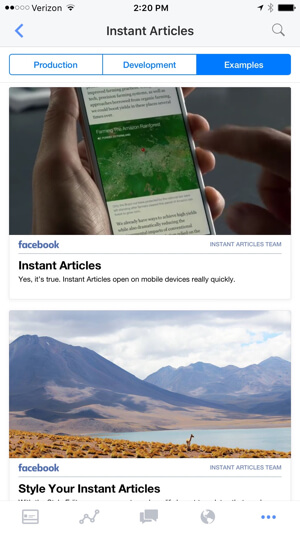
You can also compare your articles to the articles under the Examples to make sure that your articles are where they should be in terms of Facebook Instant Articles optimization.
#11: Submit Articles for Review
If you've completed all of the options correctly and you think your previews are looking good, you should be able to click the Submit for Review button in the Initial Setup area.
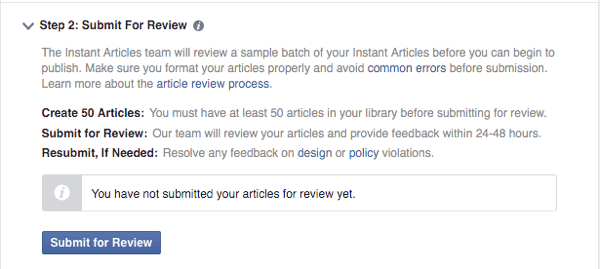
If it's unavailable to you, then go through the Tools below again. Sometimes, there's an error message waiting for you to confirm or change a particular setting that you might have missed. Once that has been cleared up, the button should be active.
Another issue that may cause the button to be unavailable is not meeting the 50-article submission requirement. Be sure to check your Publishing Tools to ensure that there are 50 articles in your library for Facebook to review. If not, you may have to wait until your RSS feed has added 50 articles to your library, at which point you can submit for review.
Once you've done this, you'll have to wait for 24-48 hours for Facebook's team to review your articles to ensure they're optimized properly. Then your articles will be ready to become Facebook Instant Articles.
#12: What Happens If You Don't Get Approved the First Time
If you submit your content with a lot of errors (see step #9 if you skipped past it), then after 24-48 hours, you may find this notification in the Instant Articles section of your page settings. Note that you may not get a notification or email about this, so you'll need to check that area frequently.
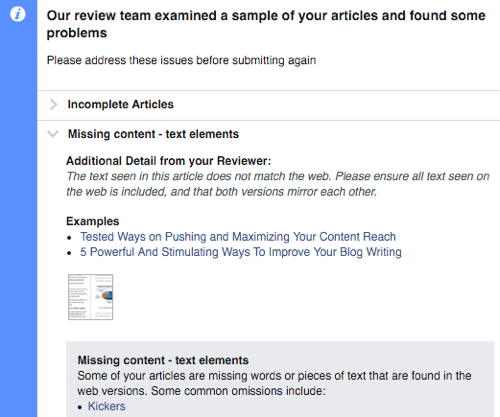
The good news is that you'll get detailed reasons why Facebook didn't approve your content, all the way down to which articles on your website broke which rules.
The bad news is that you must clean up the errors that Facebook found and resubmit your content for review after you've created 10 new articles on your website. Depending on the amount of content you produce, this could take days, weeks, or potentially even months. This is why it's extremely important that you make sure your content is optimized properly for Facebook Instant Articles the first time around.
At this stage, if you weren't able to edit your instant articles in Publishing Tools, you should be able to do so now, although some issues may be better to edit on your website than just on Facebook. Once you have 10 new articles in your library, the Resubmit for Review button will be enabled. Again, be sure to review your newest 10 articles in Publishing Tools to ensure that none have any alerts next to them to ensure your success!
#13: Once You've Been Approved
Once you've been approved for Facebook Instant Articles, you will see the following in your Page's Instant Articles Settings.
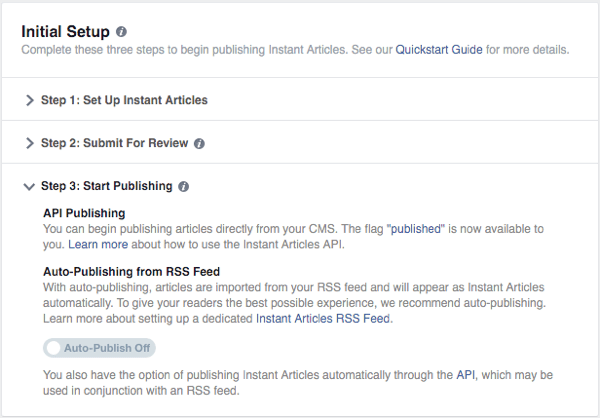
If you want to automatically turn each article that you publish into a Facebook Instant Article, you can toggle the Auto-Publish setting to On, which will give you this notice.
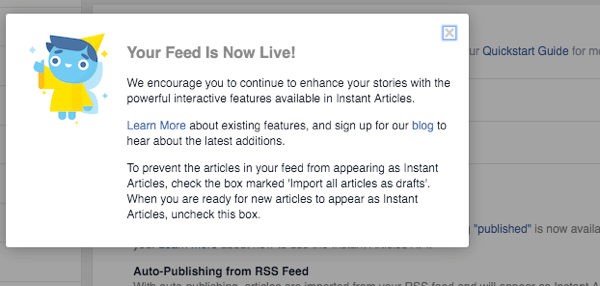
From this point, you can use your Publishing Tool to continue to edit your articles as needed (such as add in bonus content for Facebook app users or remove content that doesn't work well on mobile), publish articles that you submitted for review, or delete articles that you don't want in your Instant Article lineup.

You can also click the Insights icon next to each article to see how it's performing among Facebook app users, as shown in this example from the Developers documentation.
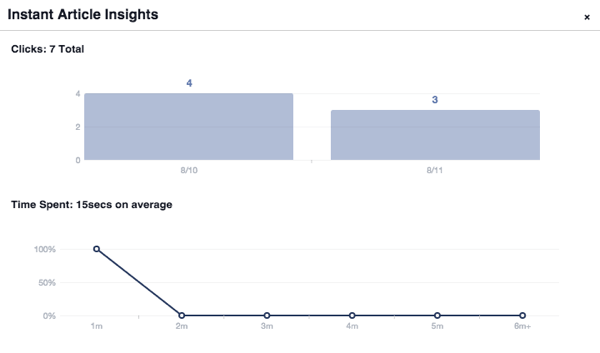
You may also want to start looking into additional tools to help you get more out of your Facebook Instant Articles experience.
For example, if you haven't already, you should learn how to ensure your analytics tools are tracking your Facebook Instant Article readers. You may want to try the A/B testing tool that Share This is specifically releasing to test headlines for Facebook Instant Articles. Or, if you didn't want to monetize your content in the beginning, but do now, you can learn more about the Facebook Audience Network.
Note that all mobile app screenshots and directions referenced in this article are for the iPhone versions of Facebook mobile apps. Android mobile app options may exist, but vary in detail.
What do you think? Do you plan to optimize your content for Facebook Instant Articles? What has been your experience so far? Let us know in the comments below!
Attention Agency Owners, Brand Marketers, and Consultants

Introducing the Marketing Agency Show–our newest podcast designed to explore the struggles of agency marketers.
Join show host and agency owner, Brooke Sellas, as she interviews agency marketers and digs deep into their biggest challenges. Explore topics like navigating rough economic times, leveraging AI, service diversification, client acquisition, and much more.
Just pull up your favorite podcast app, search for Marketing Agency Show and start listening. Or click the button below for more information.

