Does your local business need more walk-in customers? Want to know how to use Facebook ads to drive more foot traffic?
In this article, you'll discover how to run Facebook ads with the Store Traffic objective to generate more business for your local business.
To learn how to properly set up and run a store traffic campaign, read the article below for an easy-to-follow walkthrough or watch this video:
Note: If you haven't already set up your business as a local Facebook page, you'll need to do that before you can use the Store Traffic campaign objective. Read this article to learn how to set up a Facebook location page for each of your storefronts.
#1: Create Your Store Traffic Facebook Ad Campaign
Facebook's Store Traffic campaign objective can help you generate more foot traffic for your local business. It lets you add a Get Directions call-to-action (CTA) button to your ad that will open a map to your store location.
For this tutorial, we'll be setting up a Facebook campaign for a fictional restaurant to target people in the local geographic radius around the restaurant. However, these same principles apply to whatever local business you're running.
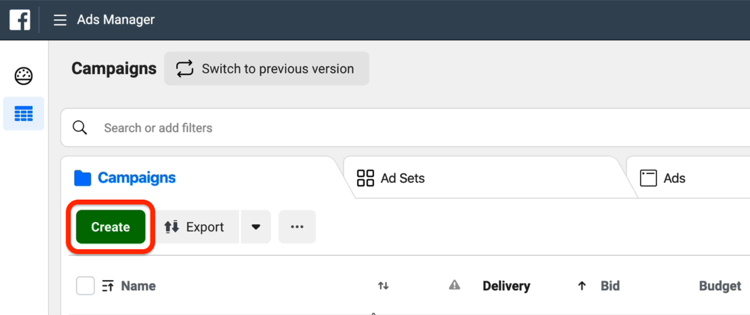
To set up your campaign, open Ads Manager and click the Create button.
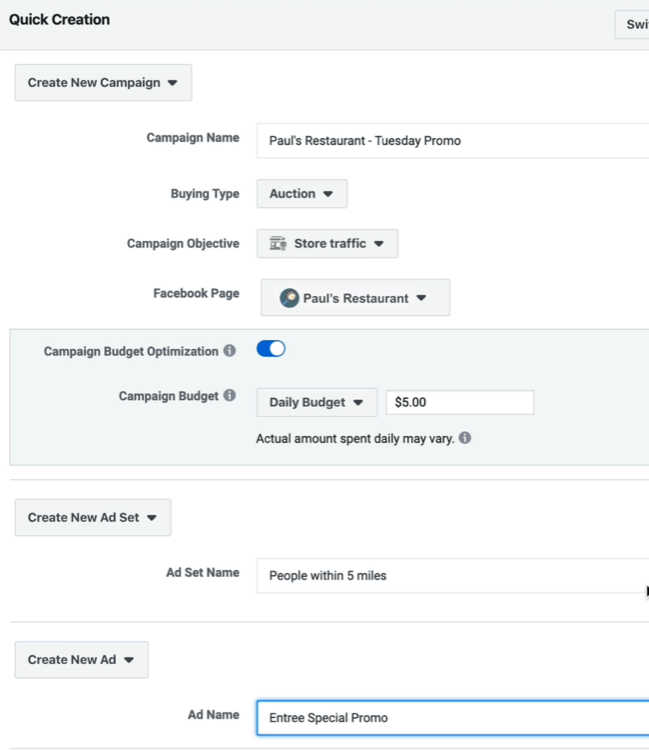
In the Quick Creation window, give your campaign a name. Then select the Store Traffic campaign objective and your Facebook page.
Next, set a budget for your campaign. I recommend starting with a low daily budget such as $5.
For the ad set name, I like to choose a name that's related to the audience (such as “People within 5 miles”). For the ad name, select something that's based on the ad creative (“Entree Special Promo,” for instance) so when you hop into your campaign, you'll immediately know what it is.
When you're done, click Save to Draft to move to the ad set.
Get World-Class Marketing Training — All Year Long!
Are you facing doubt, uncertainty, or overwhelm? The Social Media Marketing Society can help.
Each month, you’ll receive training from trusted marketing experts, covering everything from AI to organic social marketing. When you join, you’ll also get immediate access to:
- A library of 100+ marketing trainings
- A community of like-minded marketers
- Monthly online community meetups
- Relevant news and trends updates
#2: Choose Your Targeting
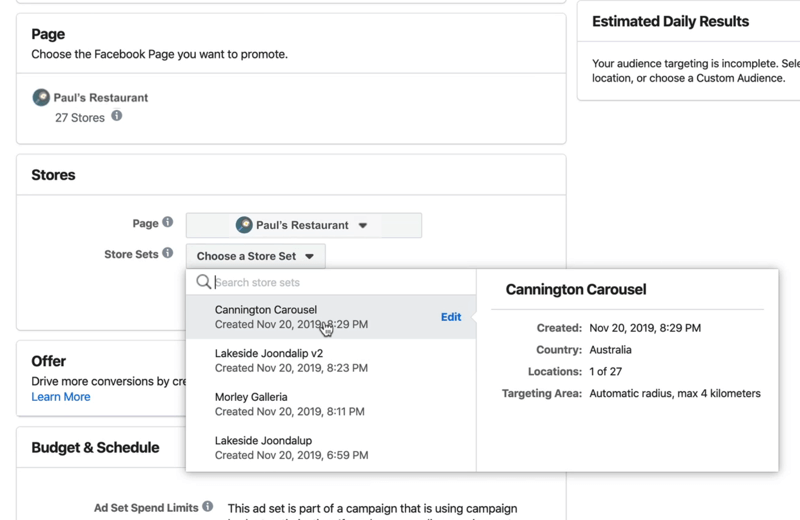
At the ad set level, choose your store page and select a store set.
It's important that you have your local Facebook store / page correctly integrated with Facebook Business Manager so that you can use your local store as a page identity at the ads level. When you do it correctly, you'll be able to choose all of the stores and their respective locations.
Now finish building out your targeting. In this example, we're targeting people between the ages of 22 and 35 in an area around the store set.
But what if you don't already have a local store set up inside Facebook? In this case, click Target a Geographical Area Instead in the Locations section.

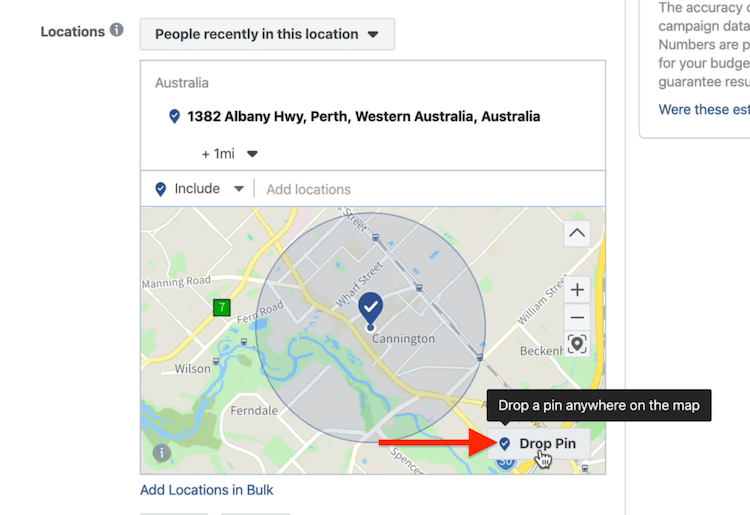
In the Add Locations field, type in the actual physical location of the geographic area you want to target. Ads Manager then puts a radius around that address, as shown below.
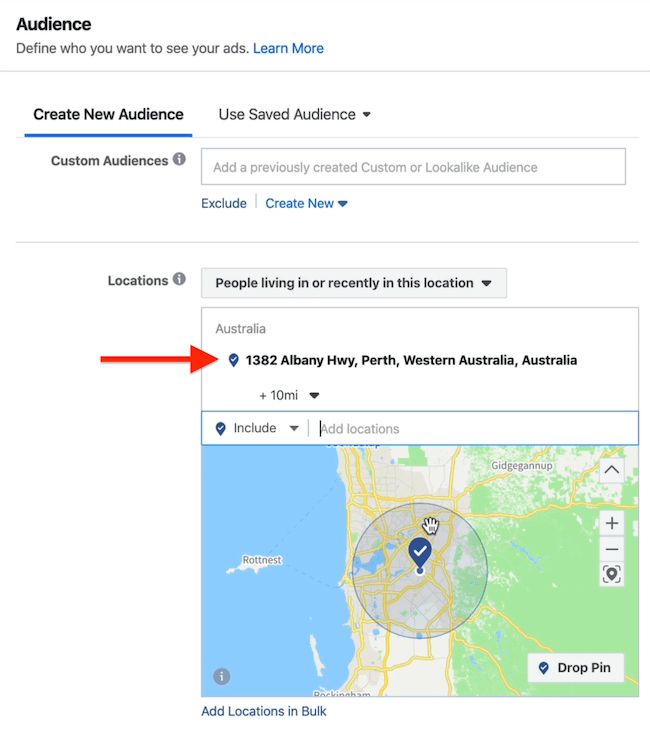
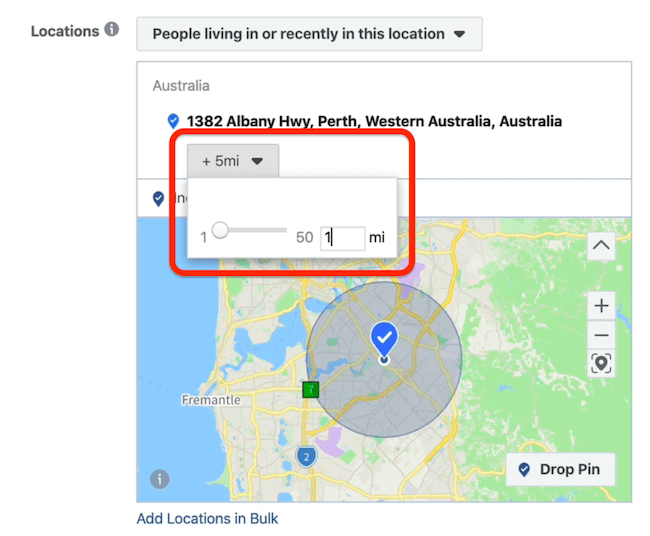
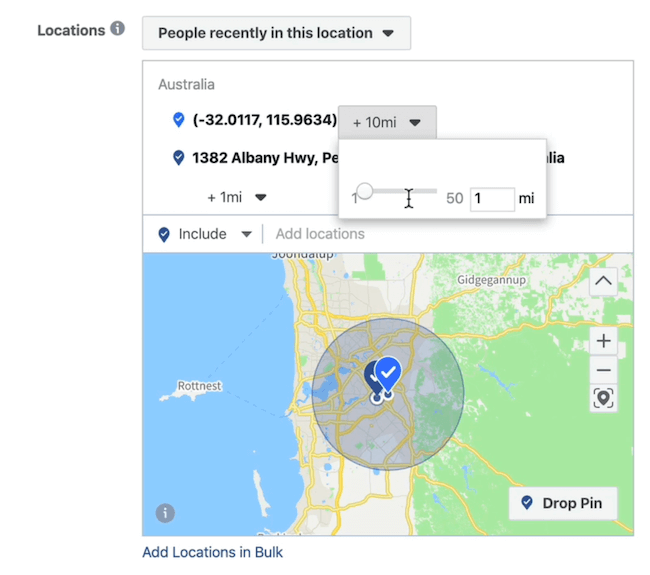
If you click the drop-down menu below the address you just entered, you can change the targeting to anywhere between 1 mile and 50 miles.
We want to make the radius as small as possible around our store location so choose 1 mile.
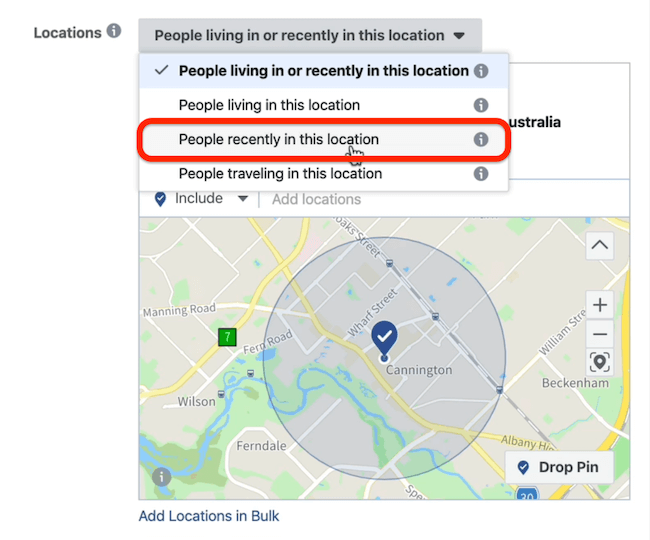
From the Locations drop-down menu, you have the option to run your ads to people who live in or were recently in this location, people who live in this location, people who were recently in the location, or people who are traveling in this location. We'll be choosing people who were recently in this location.
Refine Your Geographic Targeting With Exclusions
If you want to further refine your location mapping, you can exclude areas from your targeting inside of the ad set. This allows you to reach more of the relevant targeted audience area when you're running your ads.
For this example, we're targeting a shopping center and we only want to target the people who are physically inside the shopping center and our store's location. So how do you do that when the minimum radius you can tie it to is 1 mile? By using exclusion pins.
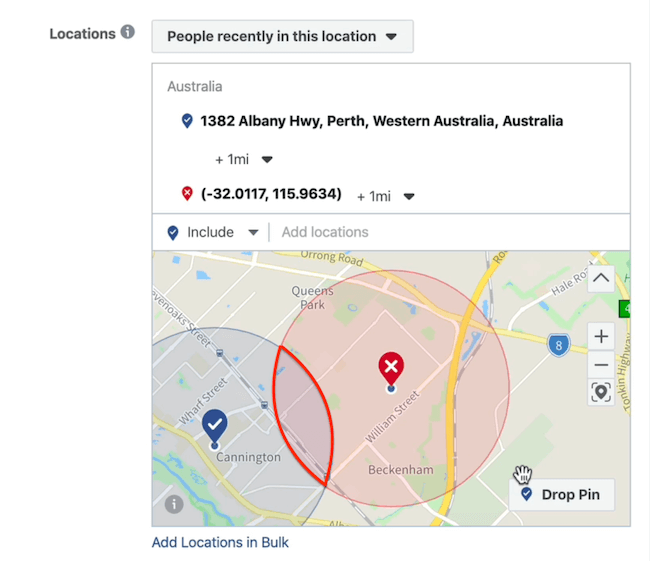
To do this, click the Drop Pin button and then click on the map near your other pin to drop this second pin.
Now decrease the pin size to 1 mile.
Next, click the down-arrow button next to the longitude and latitude of the pin you just dropped and select Exclude Location from the drop-down menu.
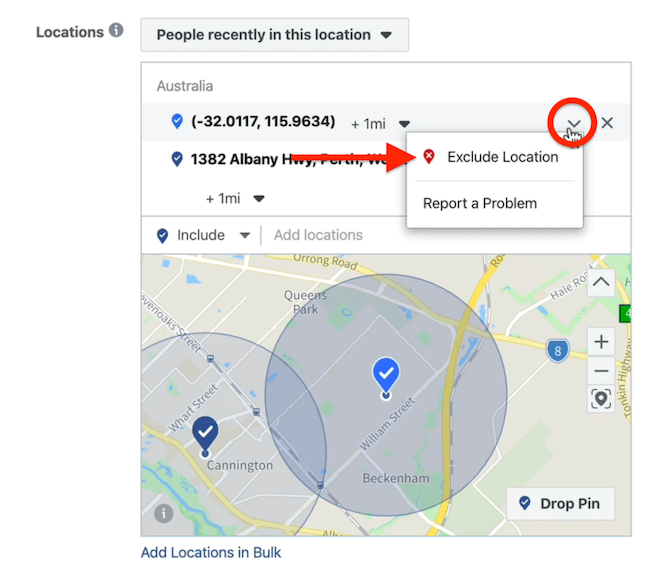
You now see a red radius around your second pin. In the Venn diagram below, the overlap between the red radius and blue radius represents the area you're excluding from your targeting.
Now repeat this process to add other areas to exclude from your targeting.
In the image below, all of the areas of overlap are excluded and we're only targeting the nice little blue Venn diagram area in the middle. The potential reach has decreased from about 27,000 people to 12,000 people.
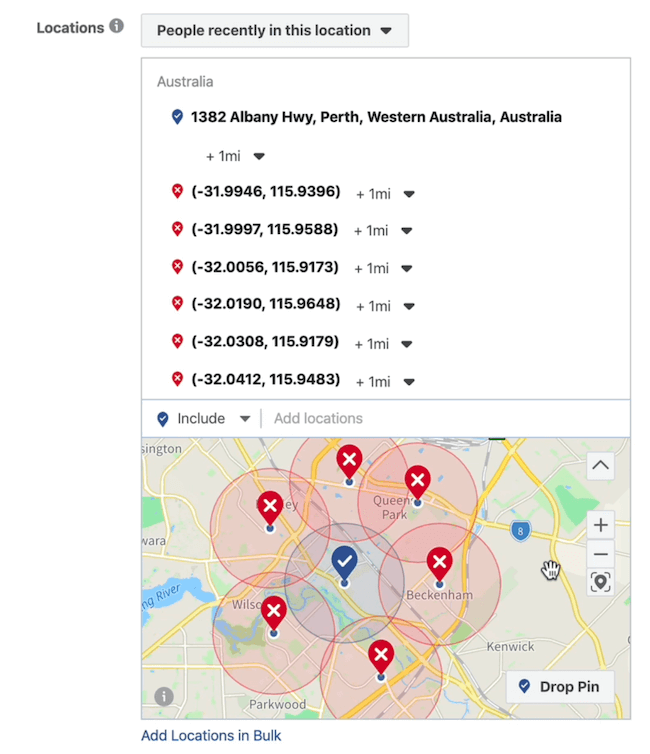
If you have a highly populated area, this is fantastic to use. However, if the area is less densely populated, this may not be the best approach.
The other really cool thing about exclusions is that they allow you to target your audiences wherever they may be at a certain time, like at an event.
Discover Proven Marketing Strategies and Tips
Want to go even deeper with your marketing? Check out the Social Media Marketing Podcast! Publishing weekly since 2012, the Social Media Marketing Podcast helps you navigate the constantly changing marketing jungle, with expert interviews from marketing pros.
But don’t let the name fool you. This show is about a lot more than just social media marketing. With over 600 episodes and millions of downloads each year, this show has been a trusted source for marketers for well over a decade.
Let's say there's a baseball game next weekend and your bar is located close to where the game is. You can run ads promoting a post-game happy hour to everyone attending the baseball game in that geographic location. This will help drive more foot traffic and awareness of your bar to a relevant audience that's ready to have a drink.
#3: Select Facebook Ad Placements and Set Your Budget and Schedule
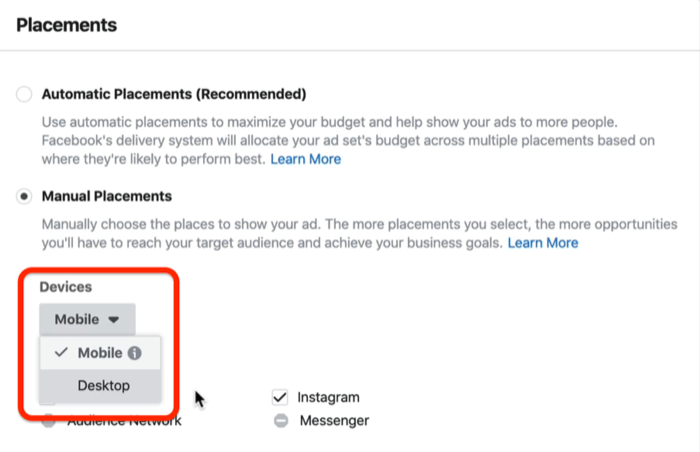
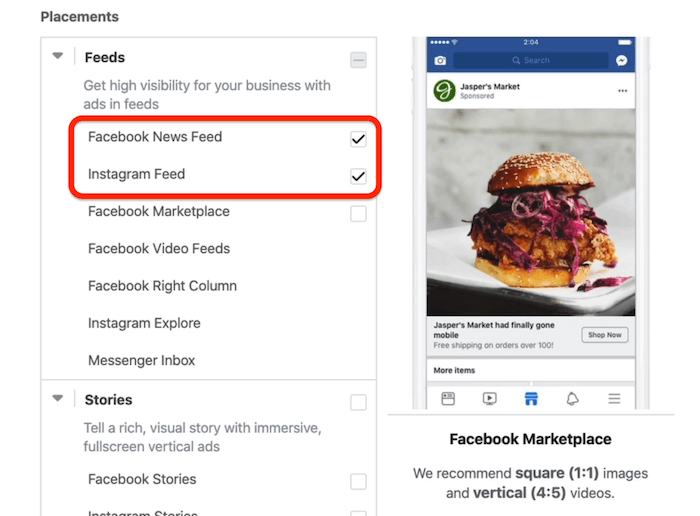
Once you've finished setting up your targeting, move to the Placements section and select Manual Placements.
For our campaign, we're promoting a time-sensitive offer that we want to run during our least profitable time (Tuesdays). We want to run it to people who are on their mobile phones in the geographic area of our targeting. If we were to target someone's laptop as a placement or news feed on desktop as a placement, it wouldn't be as effective as targeting people on their mobile devices.
So uncheck Desktop from the Devices drop-down menu.
After you make your selection, the only checked placements are Facebook News Feed, Instagram Feed, Marketplace, and Stories. We'll just go with Facebook News Feed and Instagram Feed for this example.
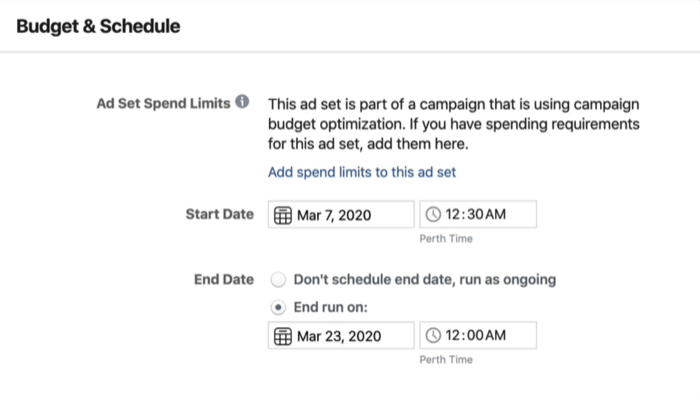
The last thing you need to do in the ad set is set up the budget and schedule for your campaign.
Facebook is constantly adding and removing features, and in a perfect world, we'd be able to add a budget and schedule in this area of the ad set and only run our ads on Tuesdays from 11 AM to 6 PM, for instance. If you have the ability to customize your delivery, please do it.
However, in this case, we're going to run this ad for 2 weeks in the geographic location we targeted above, which will be a great test because it will allow us to stay top of mind and relevant to our target audience.
#4: Set Up Your Ad Creative
Now you're ready to set up your ad.
Start by selecting your Facebook page and relevant Instagram account.
Below that, you'll see a feature called Ad Voice, which allows you to customize whether the ad is coming from your main brand page or your local page. For this ad, choose the main page as the ad voice.
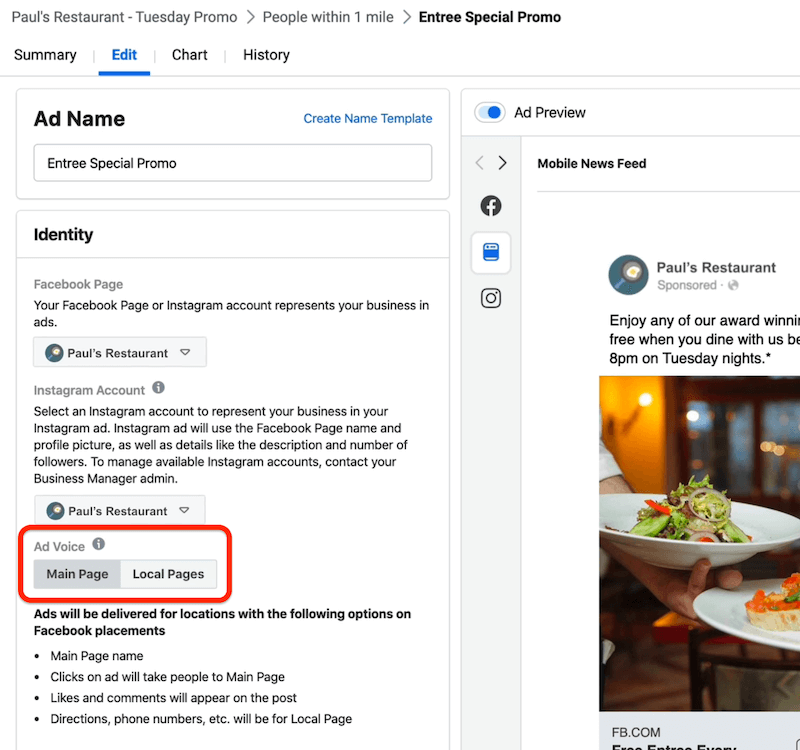
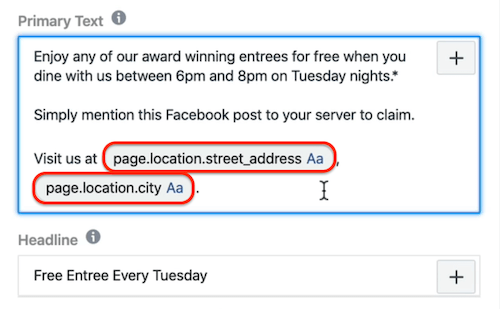
Next, select your ad format and add the media you want to use and the copy. We'll use this copy for our campaign: “Enjoy any of our award-winning entrées for free when you dine with us between 6 PM and 8 PM on Tuesday nights. Simply mention this Facebook post to your server to claim.”
One of the biggest challenges a lot of local businesses face is tracking real-life conversions from digital spend. Because there's no pixel in real life, it's hard to determine which ad led to which conversion. One way to do it is to go old-school and track it manually.
To do this, we added this CTA to the ad: “Simply mention this Facebook post to your server to claim.” We'll then ask the servers at the restaurant to note how many people mentioned the Facebook ad. If five people mention the ad, that would be five conversions as a result of the ad spend for that night.
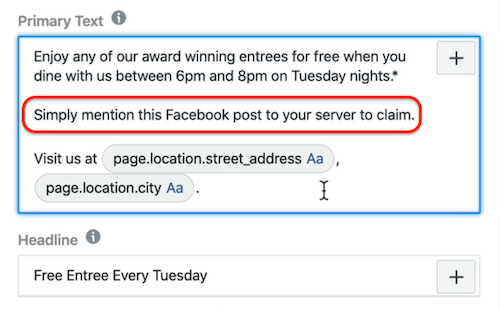
When you've got your Facebook local pages set up, you can actually choose the Facebook location street address and the location city from the back end of Facebook, which is dynamically populated.
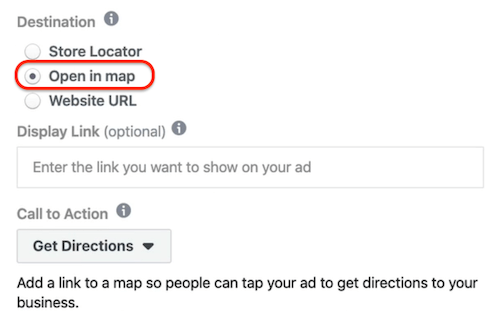
Add a Map and Directions to Your Ad
Now comes the fun stuff. When people see this offer in their news feed, you want them to click Get Directions in the ad, directing them from their current physical location to the restaurant itself.
All you need to do is select Open in Map as your destination. Because you've pre-populated all of your local business information with Ads Manager in the back end, your address will automatically populate inside of the ad.
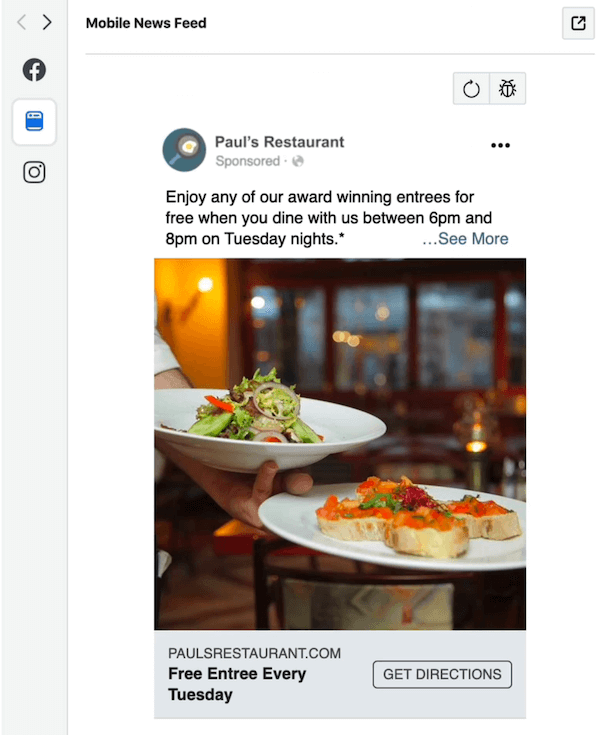
Here's the final ad with a Get Directions CTA button:
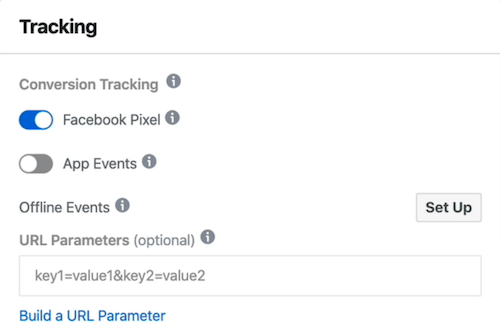
Now just double-check that the Facebook pixel is on and then click the green Publish button to see how your first test works at a low daily budget of $5.
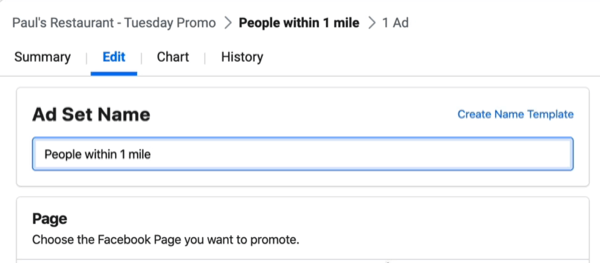
After you've published the ad, the last thing you want to do is make sure everything is correct. If we hop back into the ad set level for this example, we'll see that we left the name of the ad set at “People within 5 miles.” Because we changed our targeting to 1 mile, we'll need to change the ad set name to “People within 1 mile.”
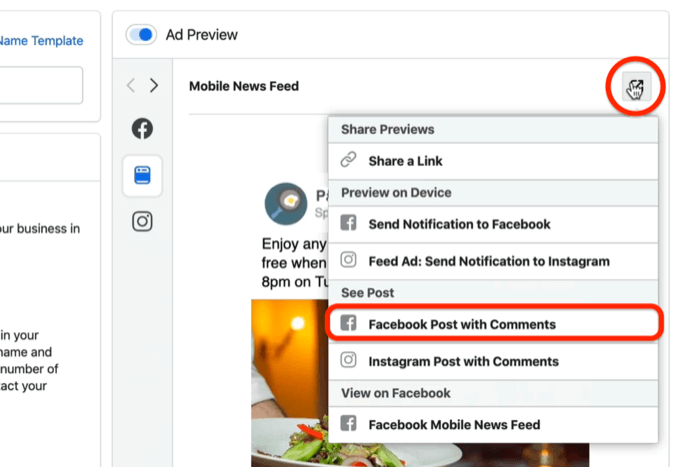
To see a preview of what the ad will look like in the Facebook feed, click the button circled below and select Facebook Post with Comments.
This is what the completed ad looks like. You can see it's been dynamically populated with the location's address.
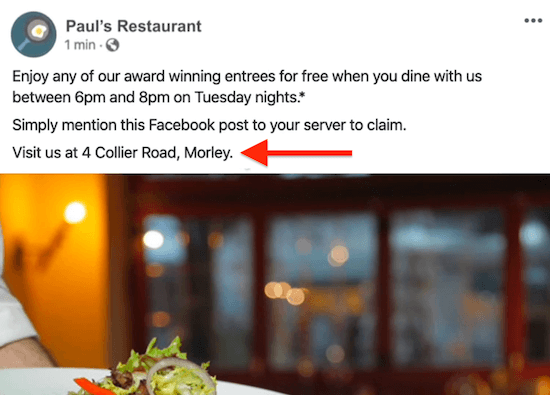
To check that the directions are working correctly, click Get Directions in the ad preview, which will fire up a map in your browser. Make sure the ad is leading people to the correct store.
Double- and triple-checking your work is very important. When everything looks okay, go back into Ads Manager and activate the campaign.
Conclusion
If you own a local business and want more walk-in customers, run Facebook ads with a Store Traffic campaign, add a map and directions to your ad, and use manual placements to reach mobile users. If you want to refine your targeting, use exclusion pins to target specific geographic areas to reach a more relevant audience.
More articles on Facebook ads for local businesses:
- Learn how to start advertising a local business on Facebook.
- Discover how to use Facebook video ads to reach local customers.
- Explore three ways to promote your local business on Facebook.
Attention Agency Owners, Brand Marketers, and Consultants
Introducing the Marketing Agency Show–our newest podcast designed to explore the struggles of agency marketers.
Join show host and agency owner, Brooke Sellas, as she interviews agency marketers and digs deep into their biggest challenges. Explore topics like navigating rough economic times, leveraging AI, service diversification, client acquisition, and much more.
Just pull up your favorite podcast app, search for Marketing Agency Show and start listening. Or click the button below for more information.