Do you create written content? Wondering how to drive more traffic to your articles, eBooks, or white papers with less effort?
In this article, you'll discover a system for easily promoting each piece of content you produce.
#1: Start With an Optimized Title
You've written an article, eBook, or white paper so you've done the hard part, right? Not so fast. The “hard part” of content marketing isn't the content creation—that's the fun part—but rather getting the word out about it.
If you've taken the time to create high-quality content, you deserve to reap the benefits and this is only possible if you have the time to devote to promoting it. A solid repurposing strategy will help you be more efficient with your time while increasing the visibility of your written content.
Before we get ahead of ourselves though, I recommend spending some time crafting your headline. Headlines drive clicks. You don't want to spend hours writing a great article that no one reads because of a weak headline.
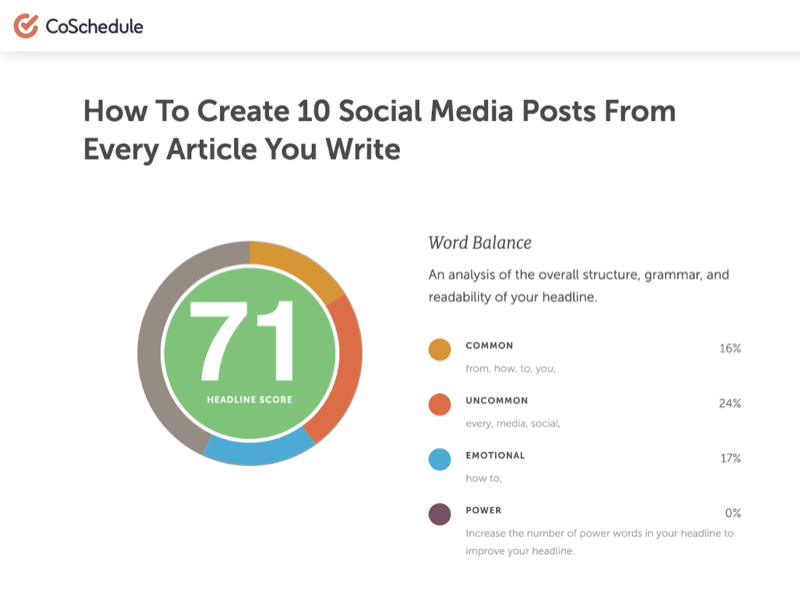
CoSchedule's free Headline Analyzer tool makes it quick and easy to optimize your headlines. Spend 10–15 minutes trying to get the headline to score over 70 and you can be more confident it will perform well on social media.
Once you have a killer headline for your content, publish it, and then you can move on to promoting it.
#2: Create Your Social Media Post Spreadsheet
The next step is to generate 10 posts from your content to share on social media. Saving this data in a Google sheet or Excel spreadsheet will make it a snap to bulk upload your posts into a social media scheduling tool.
To get started, you need to create a new Google sheet that contains the queue of social media posts you're going to create. Add tabs for each of your content sources (Blog, eBook, etc.) and tabs for formatted posts for each of your social media platforms (OUT Twitter, OUT LinkedIn, etc.) so you can import those posts directly into your scheduling tool.

For this example, we're creating 10 posts to promote a blog post on Twitter, LinkedIn, and Facebook, but you can easily adapt this approach for other written content and social channels.
Here are the columns to add to your spreadsheet:
Get World-Class Marketing Training — All Year Long!
Are you facing doubt, uncertainty, or overwhelm? The Social Media Marketing Society can help.
Each month, you’ll receive training from trusted marketing experts, covering everything from AI to organic social marketing. When you join, you’ll also get immediate access to:
- A library of 100+ marketing trainings
- A community of like-minded marketers
- Monthly online community meetups
- Relevant news and trends updates
- Title: Title of the blog post (repeat 10x)
- Excerpt: Excerpt/meta description (repeat 10x)
- URL: URL of the blog post (repeat 10x)
- Twitter Image, LinkedIn Image, and Facebook Image: Filenames for the images you'll share in your social media posts
- Twitter Text, LinkedIn Text, and Facebook Text: Draft copy for your social media posts

- Length: Length of the tweet to verify the copy is within the 280-characters limit
- Twitter Approved, LinkedIn Approved, and Facebook Approved: To trigger the final output once social media posts are approved
- Twitter Final, LinkedIn Final, and Facebook Final: Formatted output for your social media posts (tied to OUT Twitter tab, OUT LinkedIn tab, and OUT Facebook tab)

Now let's talk about how to use this spreadsheet.
Start by filling in 10 rows with the title and excerpt/description of the content you're promoting. These first two columns will help you identify which post you're working on as you scroll from left to right filling in other details in the sheet.
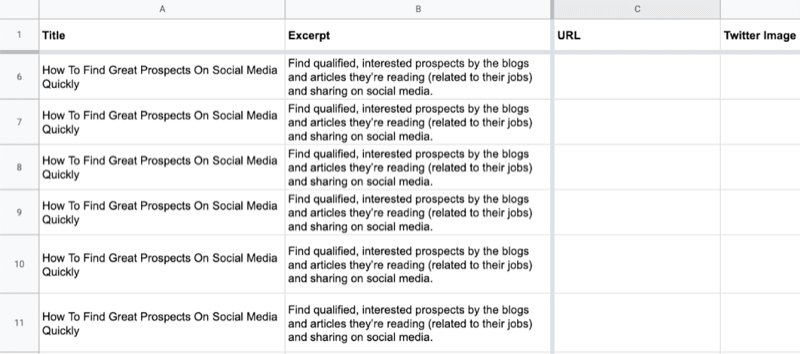
In the URL column, enter the URL for the blog post. Use UTMs to track incoming traffic in Google Analytics.
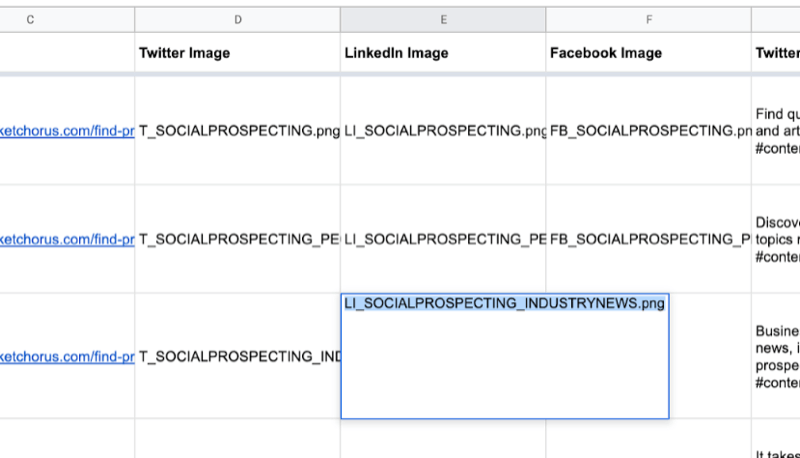
In the Image columns (Twitter Image, LinkedIn Image, and Facebook Image), add the filenames of the images you'll use for each social post. The post copy goes in the Text columns (Twitter Text, Facebook Text, and LinkedIn Text).
When the copy and images are approved, select the checkboxes in the Approved columns (Twitter Approved, LinkedIn Approved, and Facebook Approved) and copy the approved text to the Final columns (Twitter Final, LinkedIn Final, and Facebook Final).
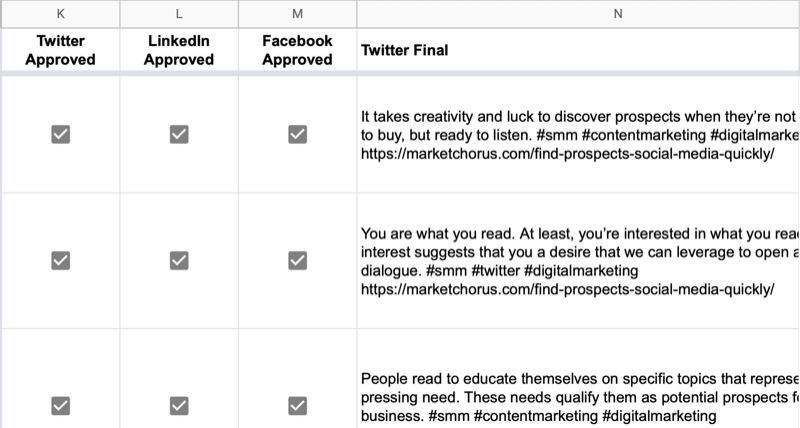
The last step is to copy each Final column to the relevant social media tab (OUT Twitter, OUT LinkedIn, or OUT Facebook), download it as a CSV file, and upload it to your social media management platform as discussed later in this article.
#3: Identify 10 Key Quotes or Statistics
Now that you've set up your spreadsheet and understand how to use it, you're ready to start filling it in.
First, grab 10 quotes, statistics, or other snackable (easily consumable) bits of text from your article. Scan your article for sentences that are particularly meaningful and self-explanatory. Pull quotes, actual quotes from interviewees, statistics, and other data points are all good options.
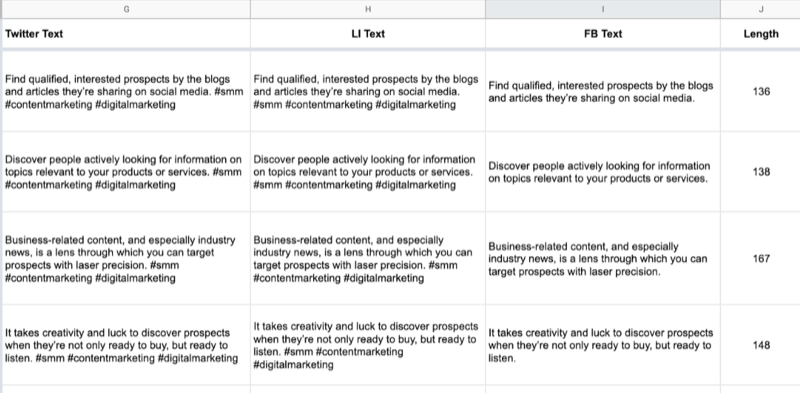
Paste the first snippet you want to share into the Twitter Text, LinkedIn Text, and Facebook Text columns in the first row. Tweak the text to fit the best practices for each social platform and add relevant hashtags to the copy.

Pro Tip: Reuse your blog post excerpt as the first of your 10 social posts since it's already been edited for brevity.
Once you've finished the text for your first social post, repeat this process with other quotable bits from your blog post. When you're done, you'll have 10 rows filled with text for Twitter, LinkedIn, and Facebook posts.
#4: Create and Customize Branded Graphic Templates
Now turn your attention to creating branded images for the 10 social media posts you just created.
In your preferred graphic design tool, select a template that has space for a headline, tagline, and branding, and features versions for all of your social media platforms.

Discover Proven Marketing Strategies and Tips
Want to go even deeper with your marketing? Check out the Social Media Marketing Podcast! Publishing weekly since 2012, the Social Media Marketing Podcast helps you navigate the constantly changing marketing jungle, with expert interviews from marketing pros.
But don’t let the name fool you. This show is about a lot more than just social media marketing. With over 600 episodes and millions of downloads each year, this show has been a trusted source for marketers for well over a decade.
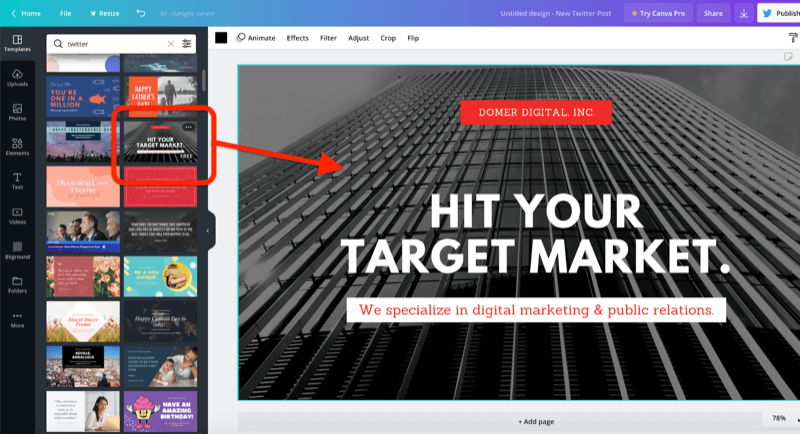
Edit the template to fit your brand style (fonts, colors, etc.). You can ignore the background graphic in the design because you'll swap it out each time you use the template. Just make sure your company branding and your website address (if included) are visible. When you're done, save this design to your account.
Canva is a free, easy-to-use tool for creating attractive graphics quickly from stock materials. Other options include RelayThat, PicMonkey, Snappa, Easil, and others.
#5: Produce 10 Quote Graphics for Each Social Platform
Armed with your new design template, you can quickly mass produce graphics by copying and pasting the text for each social media post into the graphic and tweaking it to fit. Remember—the shorter, the better.
Make sure you choose a different background each time you create a set of social posts to promote a new blog article, eBook, or white paper. Your graphic design tool is likely to offer stock images to choose from or you can find images from royalty-free sites like Pexels, Unsplash, and Pixabay.
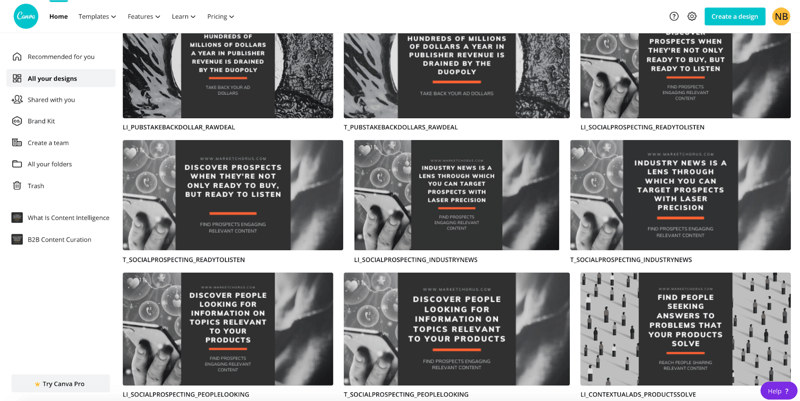
Because you'll sprinkle your 10 posts throughout a much larger social media calendar, it's okay to repeat the background on these 10 images. People won't see the posts one after the other on your social channels so it won't be obvious you repeated the design.
Remember you'll need to create multiple versions of each image to meet the specs of your different social platforms.
When you're done creating your images, download them to your computer and paste the image filenames into your spreadsheet.
#6: Schedule Your Social Media Posts
At this point, you've published a new article, copied 10 of your best quotes from it into a queue, edited your quotes into copy to post to each social network, and created graphics to go with each post. All that's left to do is import your posts into your social media management platform and schedule them.
Most social media management tools feature a bulk import/upload feature or you can devise a workaround using IFTTT or Zapier.
For this example, I'll demonstrate how to bulk-upload to Buffer (available in free and paid plans, starting at $15/month). You'll export CSV files of your posts from your Google sheet and then import them into the appropriate Buffer queue with a third-party tool. The CSV file has a very simple format—one column that contains the text of the post (including the link).
Export a CSV File With Your 10 Posts
Once your 10 posts are approved and ready to be scheduled, open your Google sheet and copy the data from the Final columns (Twitter Final, LinkedIn Final, and Facebook Final) to the OUT tabs (OUT Twitter, OUT LinkedIn, and OUT Facebook).
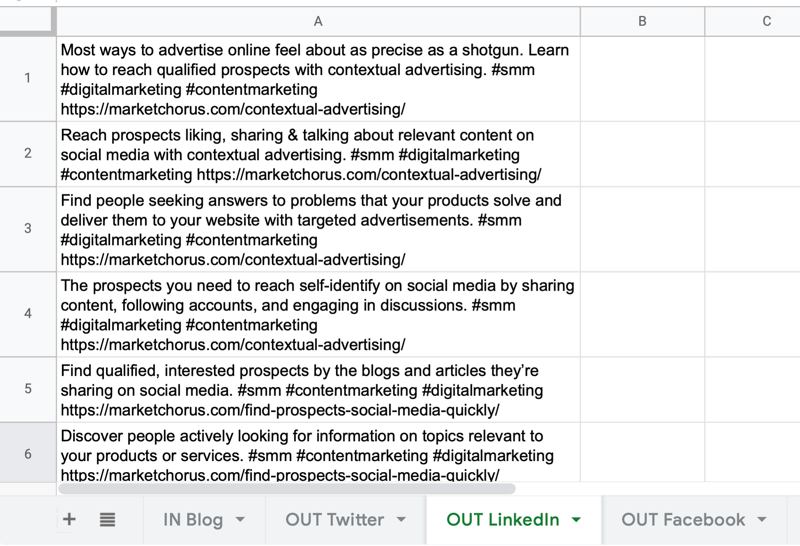
To visualize this, here's what the final text might look like on the OUT LinkedIn tab.
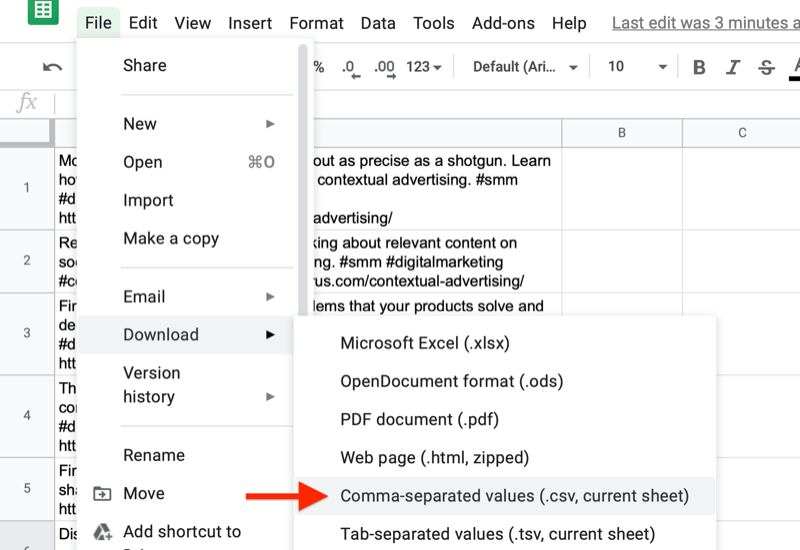
To export the content from each tab as a separate CSV file, choose File > Download > Comma-Separated Values.
Import Your CSV File Into Your Scheduling Tool
Once you have CSV files of the posts for each social channel, the next step is to import those posts into your scheduling tool. This process will be very similar in any social media management tool: Perform a bulk-upload using the CSV file and attach images one by one to each post.
While Buffer doesn't directly allow bulk imports, there's a free tool you can use as a proxy called Bulk Buffer. After you authorize your account, drag and drop a CSV file to your Bulk Buffer dashboard to load your posts, select the social profile you want them delivered to, and click Send to Buffer.
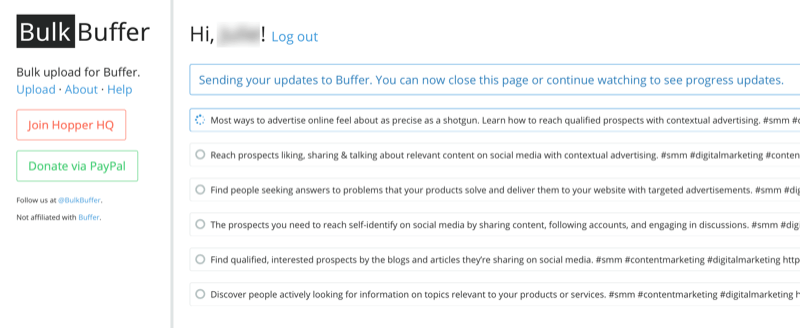
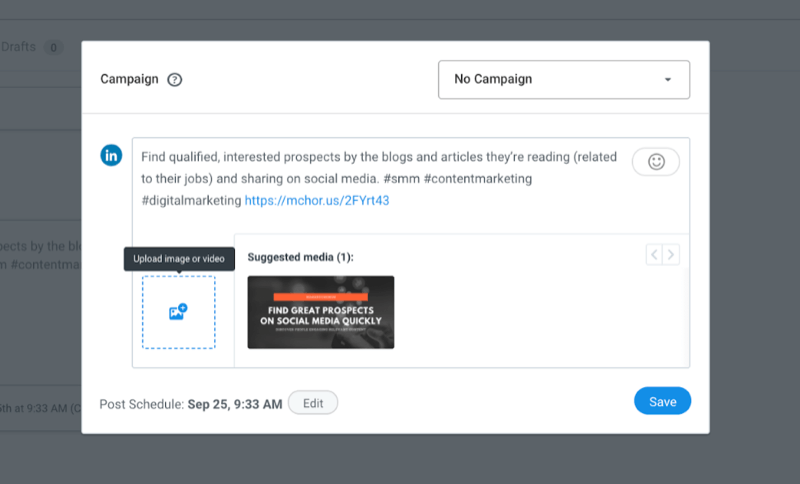
When the import process is complete, open your Buffer dashboard and add the images manually to each post. Since you're only uploading 10 posts, it should take just a few minutes to edit each one to add the appropriate image.
Note: If you're interested in automating this process, there's a workaround involving a Zapier integration for Google Sheets and Buffer.
Repeat this process to schedule the posts for all of your social media platforms.
Randomize Your Queue
Buffer includes another useful feature when scheduling content in bulk—the ability to randomize your queue with the click of a button. You'll need to upgrade to a Buffer paid plan in order to get access to this feature.
To randomize your queue, select your social profile on your Buffer dashboard, click Settings, and click the Shuffle Queue button. In the pop-up that asks “Are You Sure?”, click Shuffle Queue to confirm your choice. Now all of the posts you just imported into Buffer will be posted randomly to that particular social media account.
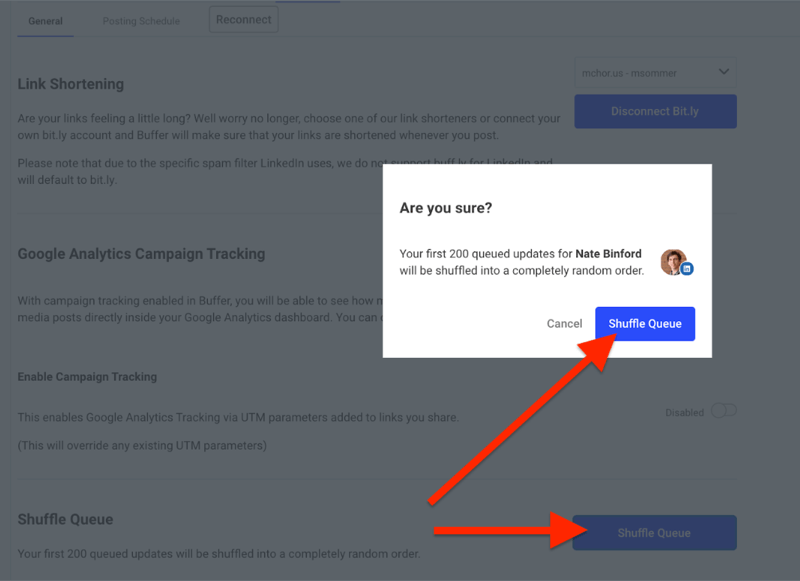
After the quick automated randomization, scroll through the posts and move any posts that were shuffled together too closely. Dragging and dropping a few errant posts should be all you need to do at this point.
Conclusion
Promoting your published article, eBook, or white paper with multiple social media posts will ensure it receives the attention it deserves. With this simple repurposing system, you can maximize the value of your written content, save time creating content for social media, and greatly increase the visibility of your content to drive traffic.
What do you think? Will you try this process to promote your written content on social media? Share your thoughts in the comments below.
More articles on social media marketing:
- Explore five ways to use visual content to tell stories that engage your audience.
- Discover a strategic plan you can model to convert prospects into qualified leads and customers on social media.
- Find 14 mobile apps to help you make branded social media visuals.
Attention Agency Owners, Brand Marketers, and Consultants

Introducing the Marketing Agency Show–our newest podcast designed to explore the struggles of agency marketers.
Join show host and agency owner, Brooke Sellas, as she interviews agency marketers and digs deep into their biggest challenges. Explore topics like navigating rough economic times, leveraging AI, service diversification, client acquisition, and much more.
Just pull up your favorite podcast app, search for Marketing Agency Show and start listening. Or click the button below for more information.

