Want to make square videos that work on any social platform? Looking for tools to help?
In this article, you'll discover six tools to crop, brand, and optimize square videos to perform better on Facebook, Instagram, and LinkedIn.
Why Square Video on Social Media?
Brands and businesses of all sizes are jumping on the video marketing bandwagon. Just head over to Facebook, Instagram, or LinkedIn and the shift toward video is apparent. But as with other forms of content marketing, if your video doesn't stand out, it's likely to get lost in the social media feeds.
So how do you get people to stop scrolling and actually watch your videos? After all, you've put a lot of time and energy into filming and editing them.
Encouraging people to engage with your video content is as simple as making your production pop with custom dimensions, branding, and subtitles. And the best part? You don't have to be a special-effects pro or buy fancy software to enhance your videos. If you're just testing the waters with video and don't want to invest time and money into a robust editing program, the following tools will help you get the job done.
#1: Transform Existing Videos From Horizontal to Square
The first step in creating branded videos that grab attention in social media feeds is to make them square instead of horizontal. Why? Square video takes up more space in the feed, so it's likely your audience will see only your video on the screen, especially on mobile. Horizontal video, on the other hand, will share screen space with someone else's content, making it easier for users to become distracted by surrounding content.
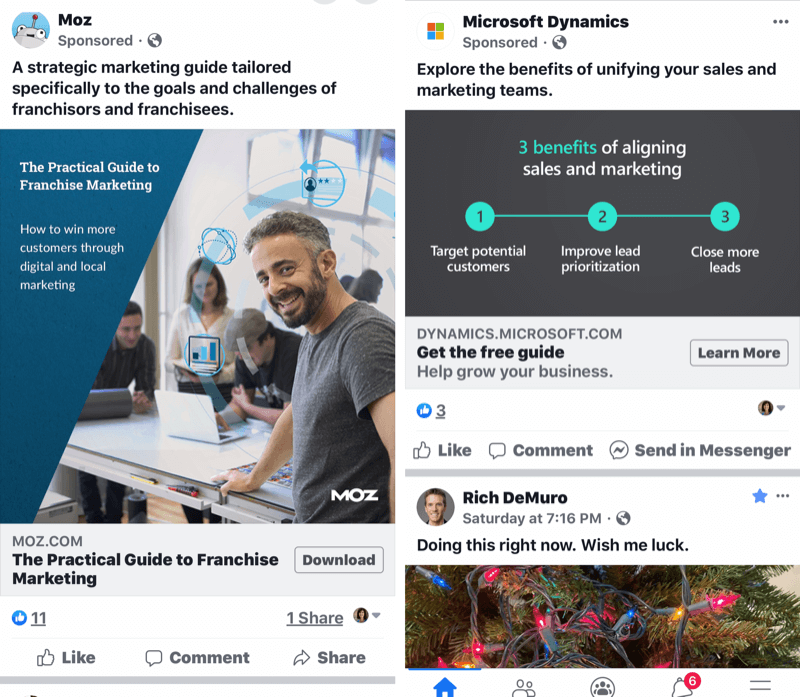
Here are some tools that you can use to convert horizontal video to square video.
Use Keynote to Create Square Videos
Keynote is presentation software that comes standard with Apple products so if you use a Mac computer or an iPhone, you can simply add your horizontal or vertical videos to Keynote and make a few tweaks. The instructions in this article are specifically for the mobile version.
After you install the app, tap Create a Presentation to get started.
First, choose your slide background. Most people go with a basic black or white slide but use whatever works best for your brand. Then tap the plus sign and choose your desired video.
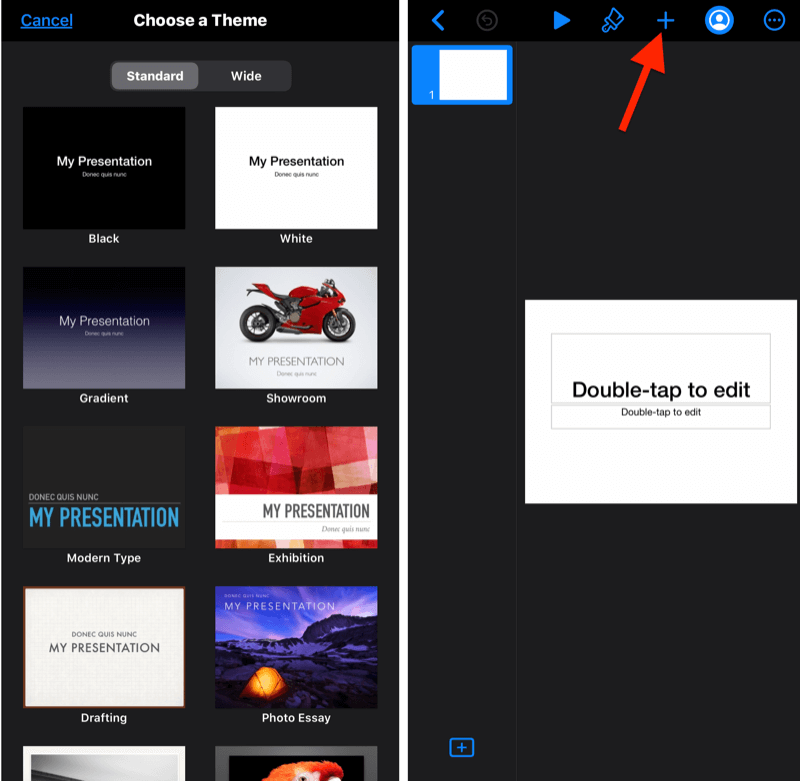
After you've imported your video, tap the three dots in the top-right corner of your screen and go to Document Setup.
Get World-Class Marketing Training — All Year Long!
Are you facing doubt, uncertainty, or overwhelm? The Social Media Marketing Society can help.
Each month, you’ll receive training from trusted marketing experts, covering everything from AI to organic social marketing. When you join, you’ll also get immediate access to:
- A library of 100+ marketing trainings
- A community of like-minded marketers
- Monthly online community meetups
- Relevant news and trends updates
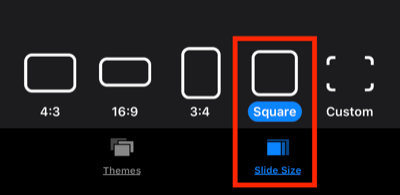
Then at the bottom of the screen, tap Slide Size and change the size of your video to square. Your video is now ready to be branded as you see fit.
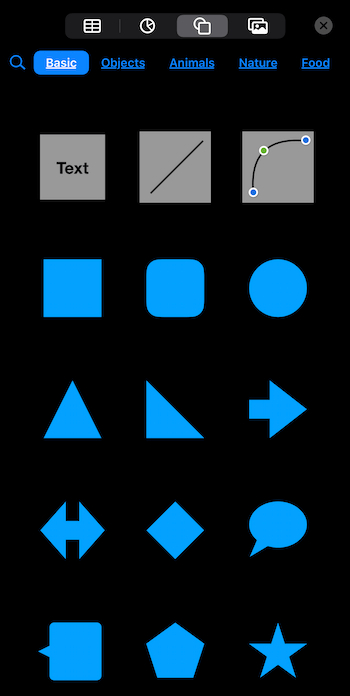
Tap the + button at the top of the screen to add text, shapes, animations, and other elements provided by Keynote. You can also bring in images and graphics you've saved to your phone from elsewhere. Later in this article, you'll learn how to use Canva to make your video design even more polished and on-brand.
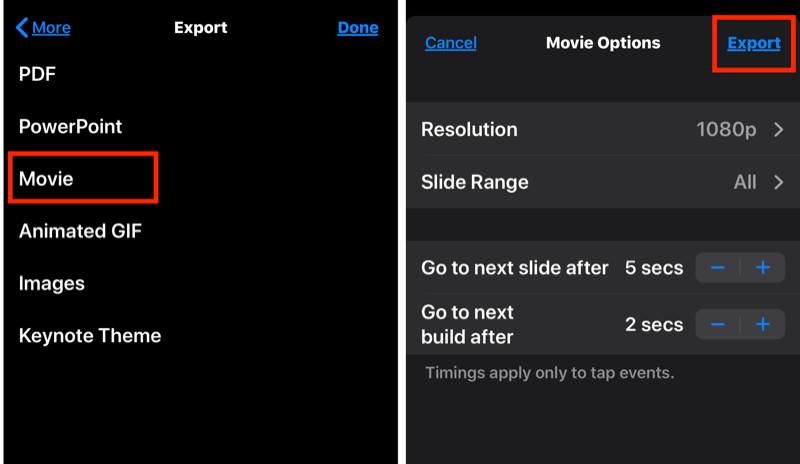
When you're finished designing your video, tap the three dots again, navigate to Export > Movie, select your movie options, tap Export, and voilà! You've created a branded video that's sure to stand out on social media.
Use PowerPoint to Create Square Videos
Like Keynote, PowerPoint allows you to add your own videos to a presentation and change the slide dimensions. If you're not an Apple user, PowerPoint is available on most Windows PCs, and chances are good you've used the software for presentations before. It can be purchased as part of an Office 365 suite, which start at $6.99 a month.
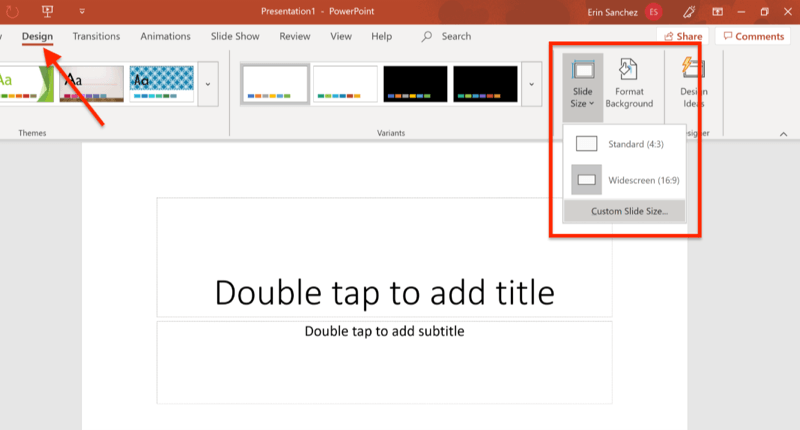
To use PowerPoint to create a square video, start with a blank slide, which you can later customize. Click the Design tab on the ribbon menu and choose Slide Size > Custom Slide Size. Enter the same size in the height and width fields (12 x 12, for instance) to create a square slide. Just don't make it too small, or your resolution will suffer!
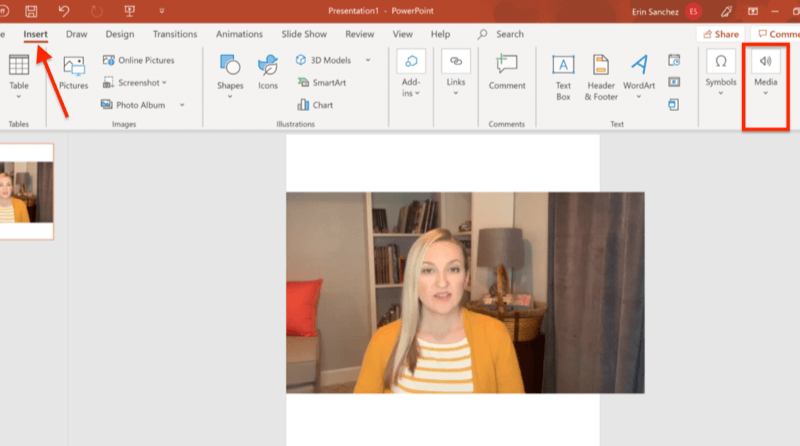
Now open the Insert tab and choose Media > Video. Navigate to your video file to import it into PowerPoint.
Pro Tip: In both Keynote and PowerPoint, you can drag the corner handles to expand your video beyond the slide. So if you want to crop the video for better fit or aesthetics, this is an easy solution.
Finally, you can insert graphics, pictures, text, and animations provided by PowerPoint or from your hard drive. When you're satisfied with your design, it's time to export the presentation as a video.
With PowerPoint, you must take one additional step to ensure your presentation exports correctly. Click on the video you've embedded on the slide and click the Playback tab on the ribbon menu. Click the Start pop-up menu and select Automatically. If you skip this step, you'll end up with an incomplete clip of your video.

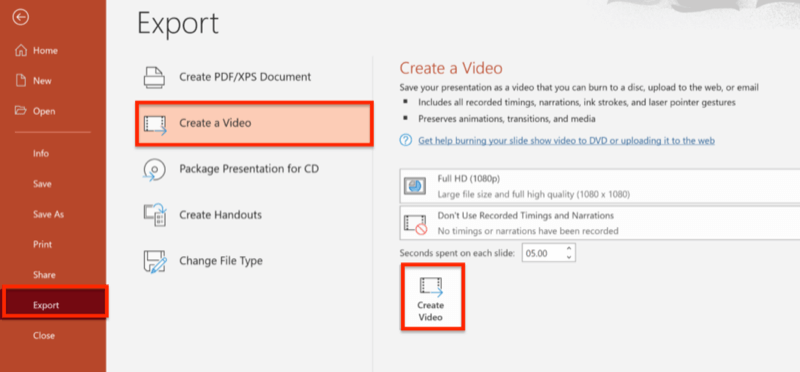
Finally, navigate to File > Export > Create a Video, and share your video with the world.
#2: Create Square Videos Using Mobile Video Editing Apps
It's no surprise that developers have already begun building video apps to address the demand for square videos. While there are several options available, none of them provide quite the level of customization that Keynote and PowerPoint do. Still, if you're looking for a simple way to get started, here are two video editing apps worth looking into.
Optimize Square Videos With Clips by Apple
Clips is a free iOS app specifically made for creating square video with more flair than a typical point-and-shoot video. Clips has a lot of options for customizing your video including stickers, labels, emojis, and even music.
Start by creating a new project. From here, you can record a new video directly in the app using the Camera tab or choose a video you've already shot via the Library tab. If you import a horizontal video, you can pinch the video (using two fingers) on the screen to resize it to fit your desired look. Note that Clips videos max out at 60 minutes.
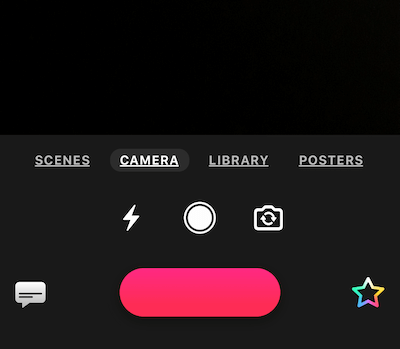
Clicking the rainbow-colored star will bring up an additional menu with all of the bells and whistles for decorating your video.
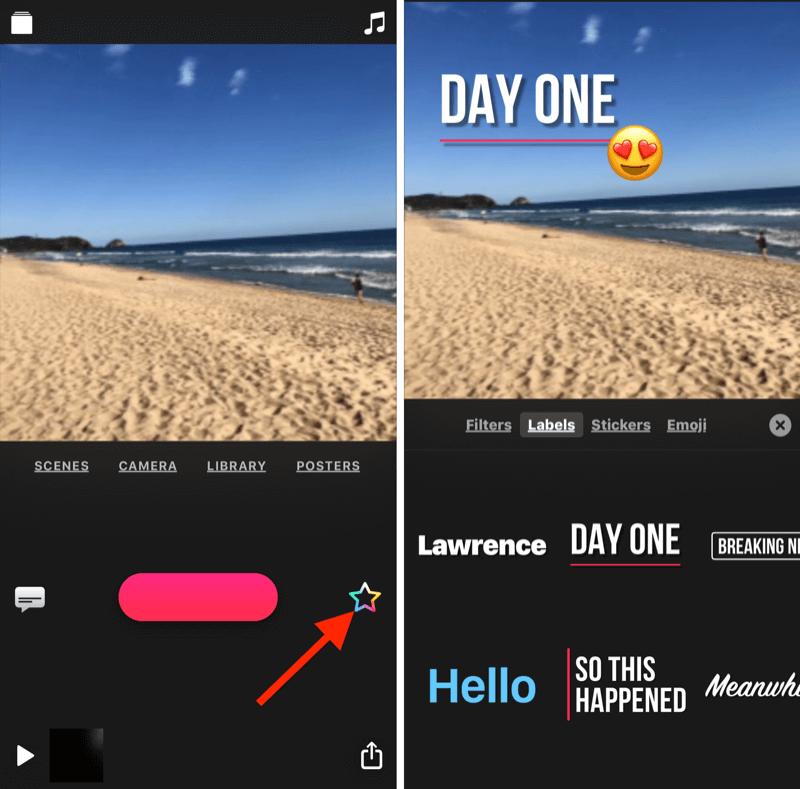
Note that while Clips does enable live captioning, it tends to be incomplete, inaccurate, and a challenge to edit in the app. Additionally, you can't use the app to add subtitles to a video you imported from your iPhone library. (More on subtitles later in this article.)
Exporting your video from Clips is easy. Just tap the arrow in the lower-right corner of the screen and save your video to the desired location. The best part? Unlike most free apps, there's no watermark on your video.
Optimize Square Videos With Squaready for Video
The Squaready for Video mobile app won't add a watermark to your video even if you're using the free version, which is why it's a user favorite. The fact that the app is available on both iOS and Android is another big plus. Upgrading to the Pro version ($3.99) gets you access to additional features.
The downside is that Squaready for Video's visual branding features are lacking. But if you're looking for a quick way to turn your rectangular video files into square videos and maybe add a splash of color, this app will do the trick.

Discover Proven Marketing Strategies and Tips
Want to go even deeper with your marketing? Check out the Social Media Marketing Podcast! Publishing weekly since 2012, the Social Media Marketing Podcast helps you navigate the constantly changing marketing jungle, with expert interviews from marketing pros.
But don’t let the name fool you. This show is about a lot more than just social media marketing. With over 600 episodes and millions of downloads each year, this show has been a trusted source for marketers for well over a decade.
Creating a square video is a snap. Just tap the Squaready icon in the center of the app's home screen and locate your video file to import it.
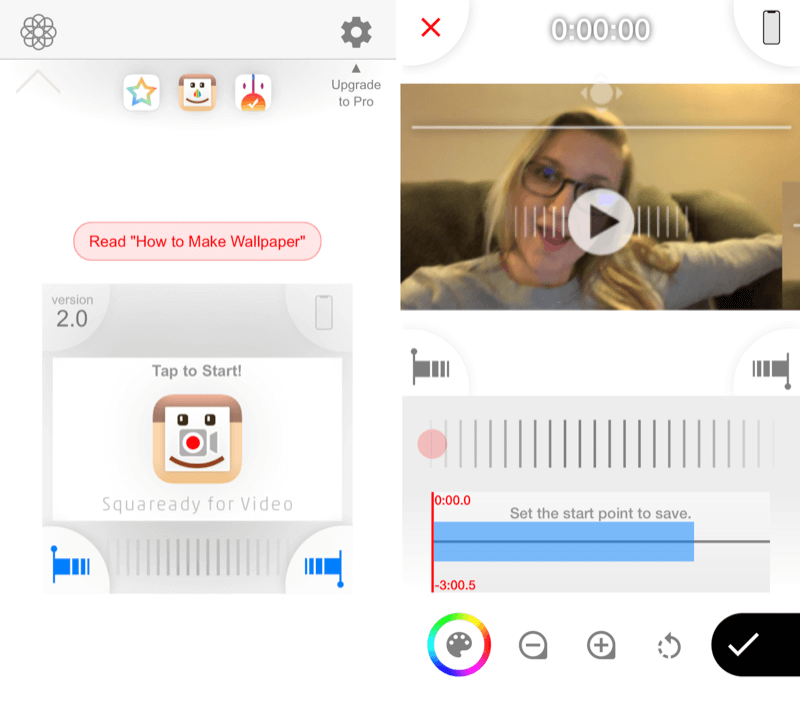
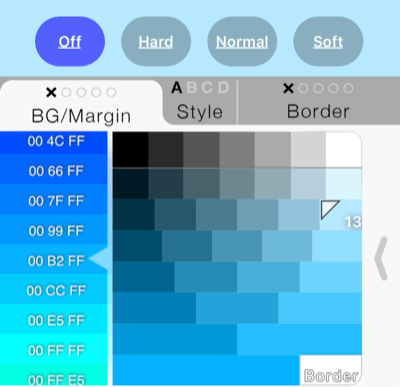
Navigation is fairly intuitive as well. Tap the paint palette at the bottom of the screen to change the background and border colors of your video. When you're done choosing your customizations, tap on your video to exit the color menu.
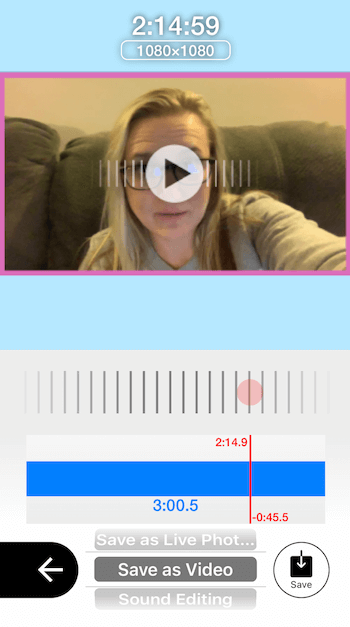
To save your video, tap the checkmark at the bottom of your phone screen, choose your format, and tap Save.
While Squaready for Video and Clips both have some fun features, neither allow for quite as much custom branding and design as tools like Keynote and PowerPoint. And of the two apps, Clips boasts far more features than Squaready for Video.
#3: Customize Your Square Video With Text and Graphics
Making your videos square is a step toward gaining more visibility and views but custom branding will make them even more compelling, not to mention more memorable. Plain videos without any branding start to look the same after a while. With everyone creating videos these days, another selfie-style video taken at your desk or in the car isn't enough to capture attention anymore.
Why should people take the time to watch your video? If they don't read your caption, they won't know what to expect, and if you don't have a strong lead in your video, viewers will bounce. On the other hand, you can use the branding area to create a hook or promise of what viewers will gain by watching, as you can see in the examples below.
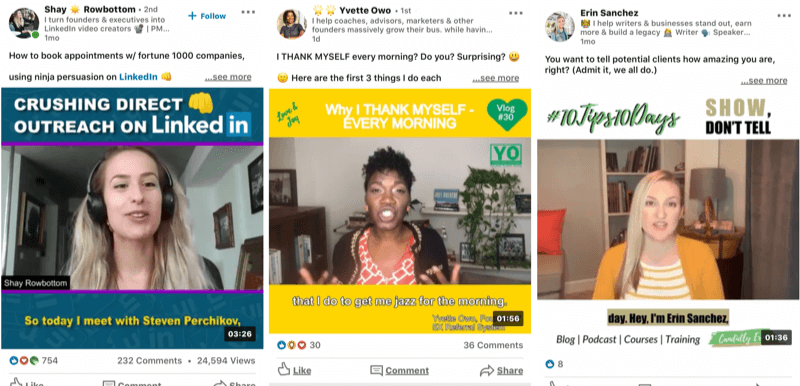
Keynote and PowerPoint provide an array of options for customizing your video including various fonts, color schemes, shape elements, and more. However, you can level-up your design even further by creating elements in Canva and pulling them into your Keynote or PowerPoint video.
To illustrate, if you want to create a logo or emblem specifically for your video series or campaign, Canva has robust design capabilities. Additionally, including a title or call to action in a specific font and color is simple. Canva is intuitive to use and the basic version is free.
Let's look at a few ways to use this tool for your branded video graphics.
Design a Complete Video Template in Canva
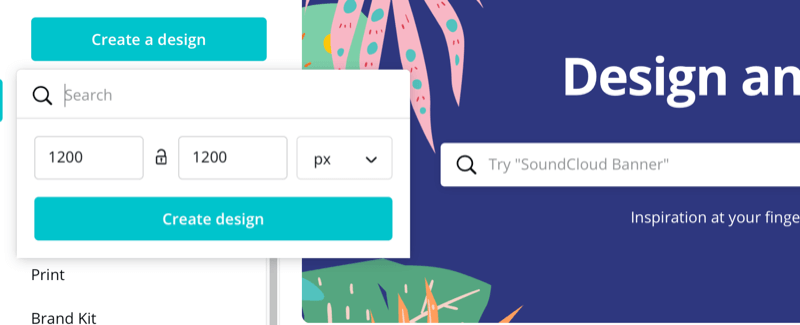
Canva makes it easy to design the entire background of your video in a square template. To start, create a new design with custom dimensions or select a square template. If you choose custom dimensions, make sure your design is at least 1200 x 1200 pixels so your resolution will be crisp.
Next, design your graphic to match your brand, but remember that your video will ultimately appear across the middle. Limit your text and graphics to the top and bottom borders of your design so they won't be obstructed by your video in the final production.
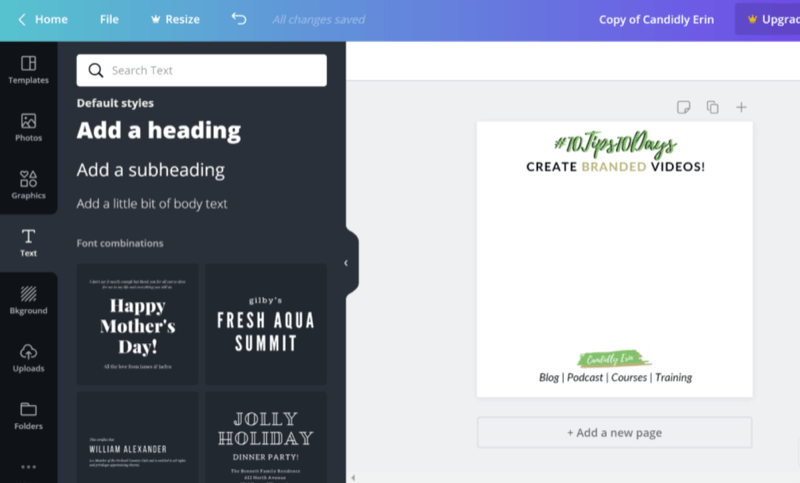
As a final step, tap the arrow button at the top right of the screen to download your design as a PNG or JPEG file.
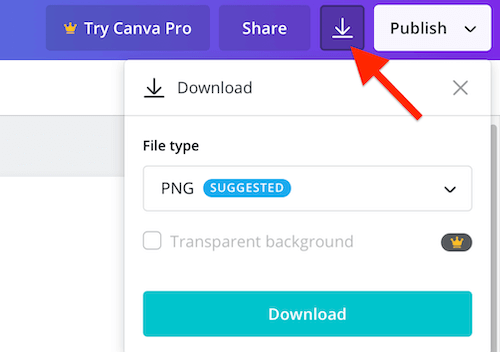
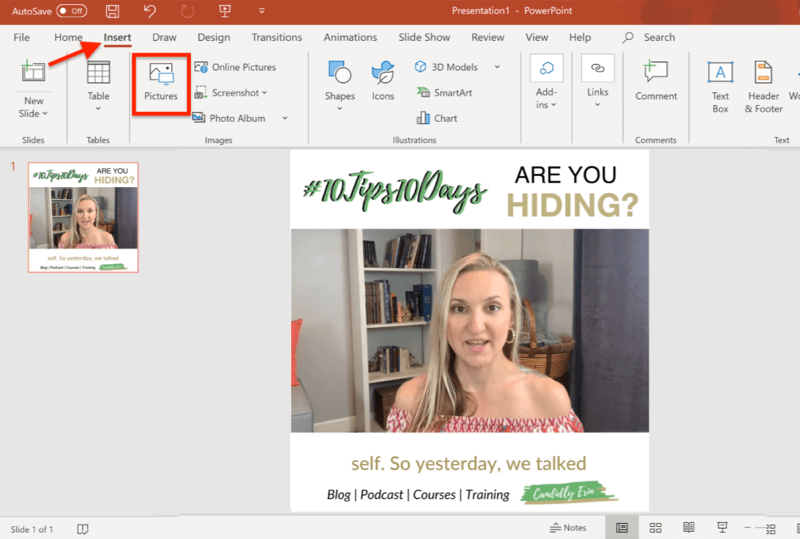
Once you've saved the graphic to your phone or computer, you can import it into Keynote or PowerPoint using the same process for adding any visual to your presentation.
In the Keynote mobile app, tap the plus sign at the top of the screen and select your image.
In PowerPoint, go to Insert tab on the ribbon menu, click the Pictures icon, and locate your Canva design.
Design Separate Elements for Your Videos in Canva
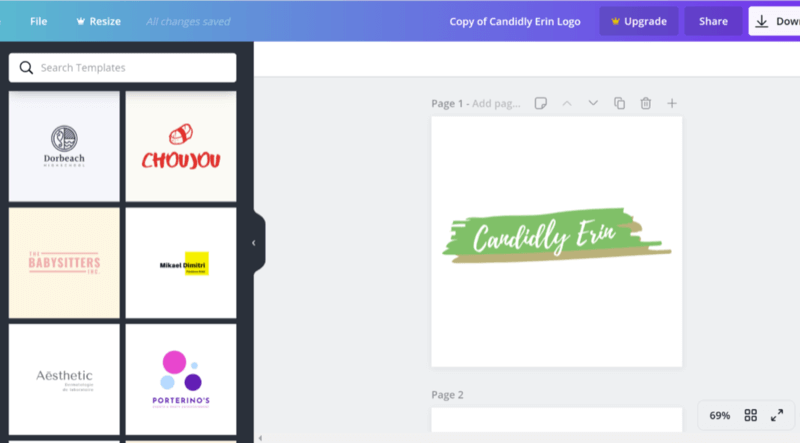
Instead of designing your video background as a single graphic in Canva, you can create all of the desired elements separately (i.e., logo, headline, etc.) and save them as separate image files.
If you go this route, make sure your images have a background color that matches your Keynote or PowerPoint slide background color. You also need to upgrade to a paid Canva subscription ($12.95/month) to download images with transparent backgrounds.
With separate elements, you can play around with your design in Keynote or PowerPoint to customize the fit and look of your branding alongside your video.
#4: Add Subtitles to Optimize Square Video for “Sound-Off” Video Views
Now that you have some options for resizing and visually designing your videos to match your brand, it's time to consider the importance of subtitles. Because many people surf social media with the volume turned off, subtitles are critical for getting eyes on your videos.
Imagine your potential viewer is at work, in school, or on mass transit and they can't turn up the sound on your video. Without subtitles, they'll keep scrolling. However, if they see that your video does include subtitles, they're much more likely to consume your content.
Take Advantage of Quicc for Your Captions
One of the best captioning tools available right now is Quicc, a cloud-based service (free and paid plans, starting at $12/month). When you sign up for an account, you get 10 free minutes for the first month. After that, the free plan provides only 2 minutes of captioning a month so you'll likely want to upgrade to a paid plan. Quicc offers a range of packages to meet various budgets.
You can use Quicc to add subtitles to any video file. So whether you've used one of the video creation methods mentioned in this article or another one altogether, you can upload the video to Quicc and take advantage of its auto-transcription features and variety of customization options.
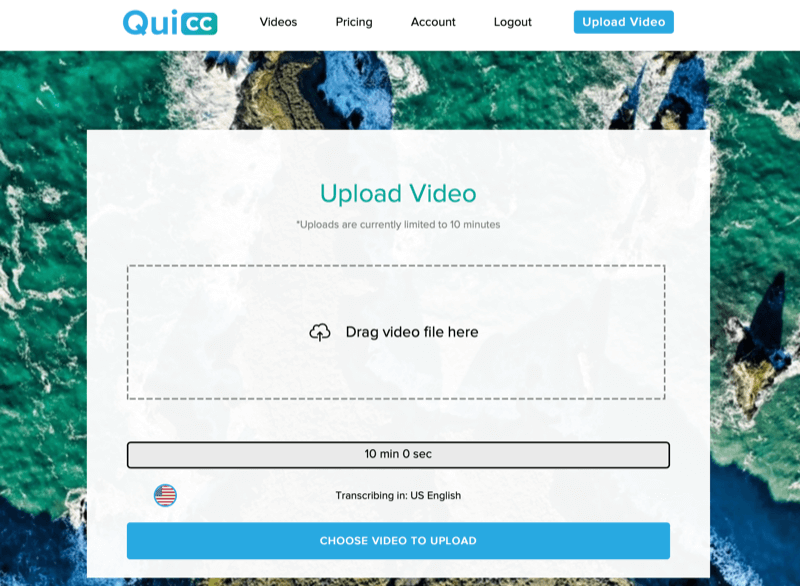
After you log in, click Upload Video and then drag and drop the video you'd like to caption.
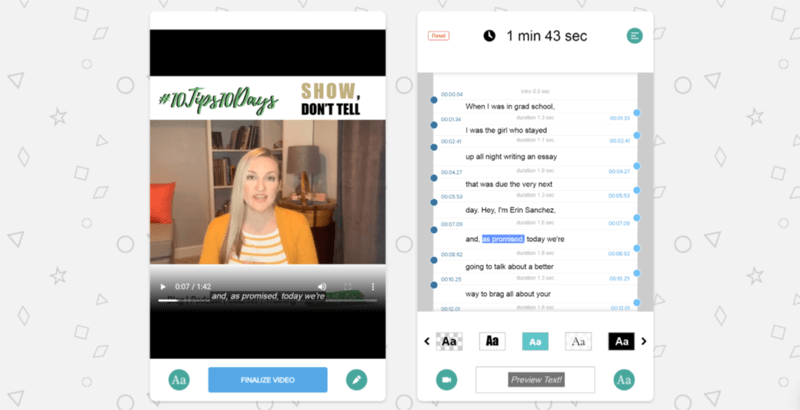
Quicc will automatically transcribe your video with impressive accuracy, and if there are mistakes, they're easy to fix. Just click on a line of text and make your changes.
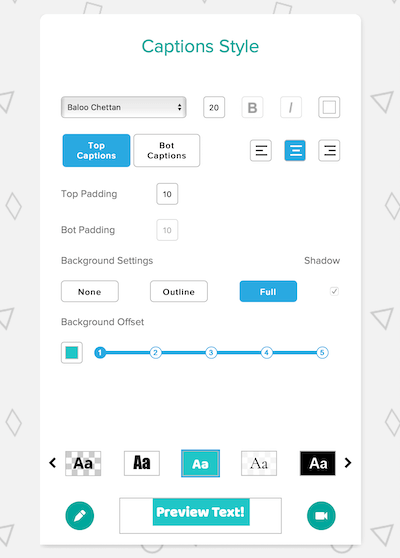
Next, click on the Aa button below your video. From here, you can completely change the look of your subtitles including font style, size, and color, and where they're positioned on your video.
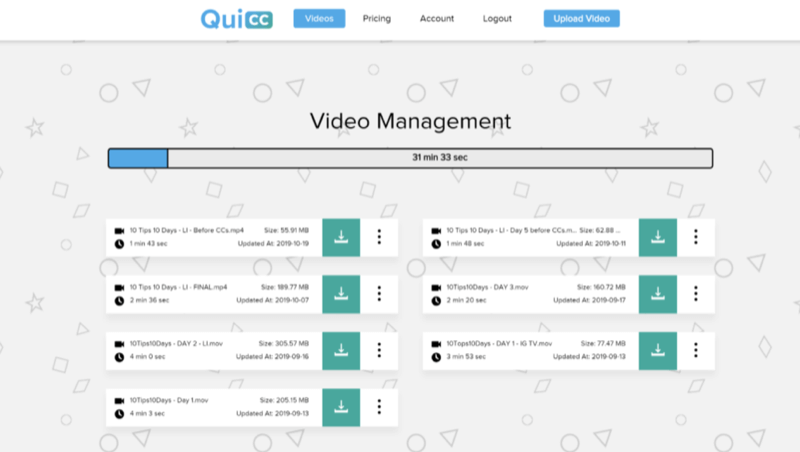
Once you're satisfied, click the pencil icon and then click the Finalize Video button below your video. That's it! You can download (or re-edit) your video from the Video Management page where all your videos are stored.
Your final video will look polished and on-brand. Thanks to the subtitles, you'll increase your chances of capturing more viewers.
Conclusion
As video continues to gain popularity on social media, more apps and platforms will undoubtedly spring up for creating spiffy, branded videos. In the meantime, the methods in this article will help you create custom videos that stand out and get more views using tools you already have on hand, or can access for free or a few bucks a month.
Even with the apps currently available, Keynote and PowerPoint are great alternatives because you can incorporate a wide variety of elements—like your logo, brand fonts and colors, and even images—without having to learn any complicated editing software.
What do you think? Is video part of your social media marketing strategy? If you haven't tried customizing your videos yet, will you test some of these tools for yourself? Please share your thoughts in the comments!
More articles on social media video:
- Explore the key elements of the customer journey when it comes to video.
- Find four tips for adding video to your social media marketing.
- Discover how to create short, snackable videos for Instagram and beyond.
Attention Agency Owners, Brand Marketers, and Consultants

Introducing the Marketing Agency Show–our newest podcast designed to explore the struggles of agency marketers.
Join show host and agency owner, Brooke Sellas, as she interviews agency marketers and digs deep into their biggest challenges. Explore topics like navigating rough economic times, leveraging AI, service diversification, client acquisition, and much more.
Just pull up your favorite podcast app, search for Marketing Agency Show and start listening. Or click the button below for more information.

