Want to streamline your Twitter workflow and improve your results?
Looking for tools to analyze and automate your Twitter marketing?
In this article, you'll discover four tools to help you get more out of Twitter while spending less time on the platform.

#1: Grow an Optimized Audience by Assessing Twitter User Behavior With Followerwonk
Moz’s Followerwonk tool analyzes the behavior of your Twitter followers and finds the optimal people for you to follow.
Moz has several Followerwonk pricing plans that you can choose from. The most popular one is the Target plan, which lets you connect up to three Twitter profiles to your account and costs $29 per month. If you have a Moz Pro account, you can purchase the Followerwonk app. You can link this to your Twitter profile and use it to explore stats for other Twitter accounts.
Analyze a Twitter Account’s Followers
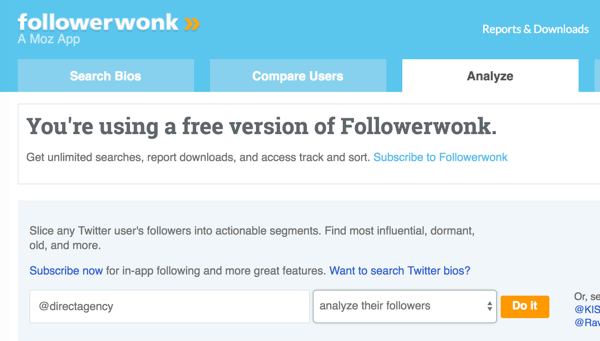
To get started, sign into your account and click the Analyze tab.
In the boxes provided, type the Twitter username of the account you want to analyze and select whether you want to analyze which users this Twitter account follows or which users follow this account. Then click Do It.
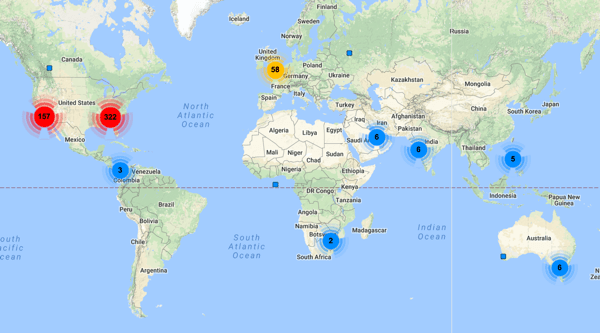
From here, you get access to a bunch of statistics about this account’s followers/following. For example, you can view a map of user locations.
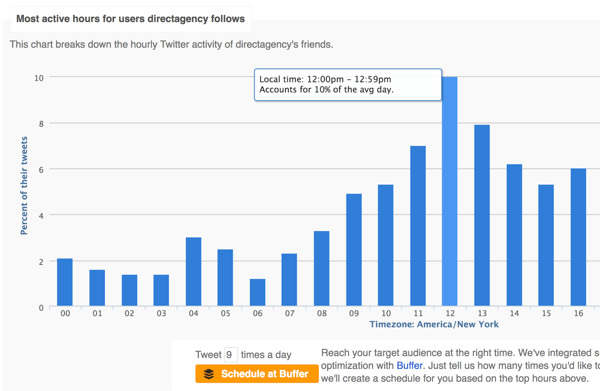
Scroll down to see a graph of when this account’s followers are most often engaging on Twitter (and look for a link to help you schedule your tweets at these times on Buffer).
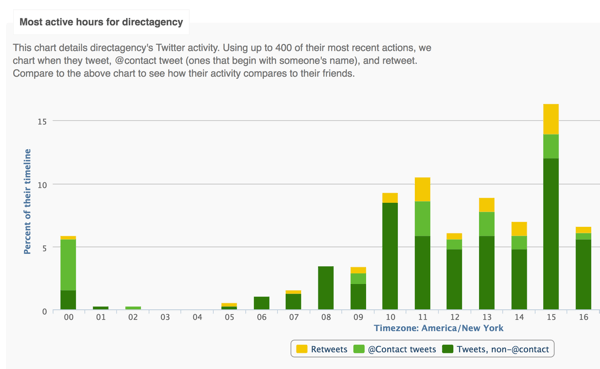
Compare these stats to when this account is engaging, based on retweets, shout-outs, and tweets.
Scroll down to the word cloud to see the words that come up most often in this account’s content, which could get the wheels turning when it comes to your content.
These are just some of the analytics you can view for any Twitter account. You’ll also find graphs on social authority, account ages, percentage of tweets that link to web pages, and more. Recency of account activity is especially important as you choose users from this list to follow. The last thing you want to do is follow someone who’s never around.
Get World-Class Marketing Training — All Year Long!
Are you facing doubt, uncertainty, or overwhelm? The Social Media Marketing Society can help.
Each month, you’ll receive training from trusted marketing experts, covering everything from AI to organic social marketing. When you join, you’ll also get immediate access to:
- A library of 100+ marketing trainings
- A community of like-minded marketers
- Monthly online community meetups
- Relevant news and trends updates
Analyze Your Twitter Followers
Searching for new followers is all well and good, but what about the ones you already have? With Followerwonk, you can sort and analyze followers specifically for the profile you linked to your Moz account.
Go to the Sort Followers tab and click Do It.

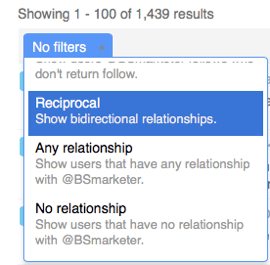
A (potentially overwhelming) list of your followers appears. Fortunately, you can add filters to narrow the list of results.
For instance, add a filter to view the accounts that never returned your follow. Or study up on the followers whom you follow back.
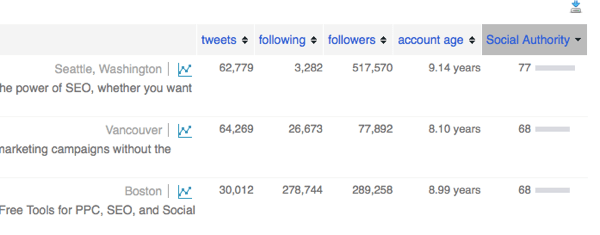
Sort your smaller list based on a variety of metrics. To illustrate, select Social Authority to view your most influential followers first.
If you find audience segments you want to market to or reach out to later, export lists as CSV or Excel docs.
Compare Up to Three Twitter Accounts
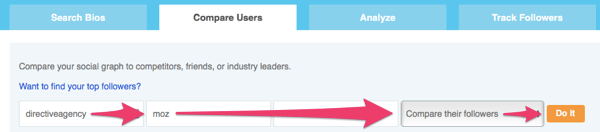
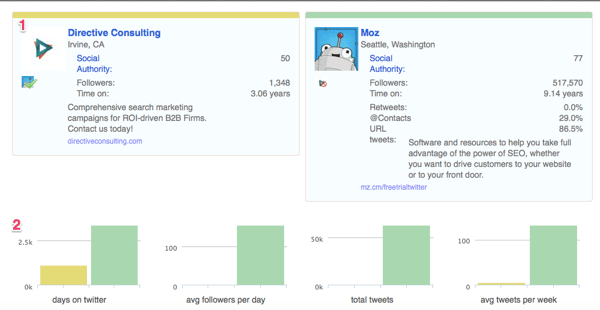
Followerwonk lets you compare up to three accounts on the Compare Users tab. Just type the Twitter usernames of the accounts you want to compare, select followers or followings, and click the Do It button.
At the top of the page, see how many followers/followees each account has and how many they have in common.
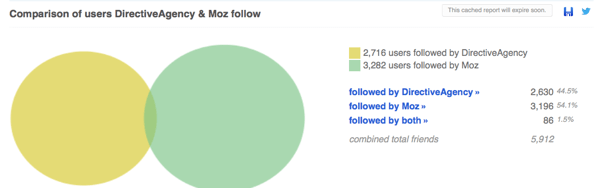
This Venn diagram lets you see which accounts follow two or more of your competitors. These are accounts that may be willing to follow you.
As you continue to scroll through your Followerwonk comparison report, you’ll get an overview of each account’s profile, including its social authority score, follower count, and account age. Compare the two accounts based on account age, new followers per day, total tweets, and number of tweets per week.
#2: Optimize Your Twitter Scheduling and Posting With Buffer
While Buffer is primarily known as a scheduling tool, it has a few hidden talents that can help any business. It gives you detailed statistics on post performance and post times, as well as streamlines the process of posting content.
Prices vary based on which Buffer plan you go with. With the free plan, you can connect multiple accounts, but only one per platform (one Twitter, one Facebook, etc.). You can also store 10 scheduled posts at any given time for each account.
Set Up a Posting Schedule
While some of Buffer’s distant cousins require you to set a specific time and date for every post, Buffer makes it easier with its queue feature. All you have to do is create your posting schedule. Once you do, Buffer will pull from your queue to post at the specified times.
First, though, you’ll need to create a tweet and add it to your Buffer queue.
After you sign in, navigate to the Content tab and select Queue. Then choose the Twitter account this content will go to and enter your tweet text. Your message needs to be as short as the character limit for your most limiting platform (in this example, 140 characters for Twitter).
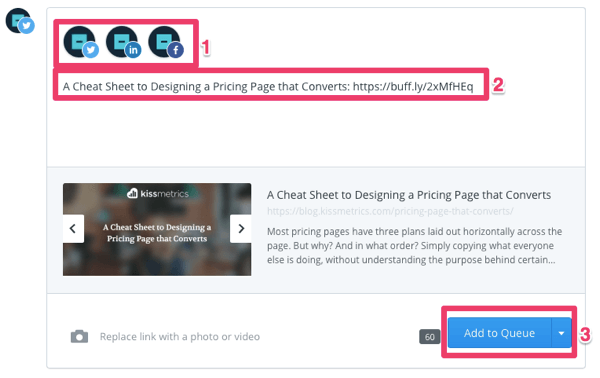
When you’re finished, click the arrow to the right of the Add to Queue button and choose one of the scheduling options:
- Share Next will add the tweet at the top of your queue so that it will run at the next scheduled time.
- Share Now will post your tweet immediately, just like it would if you were posting from Twitter.
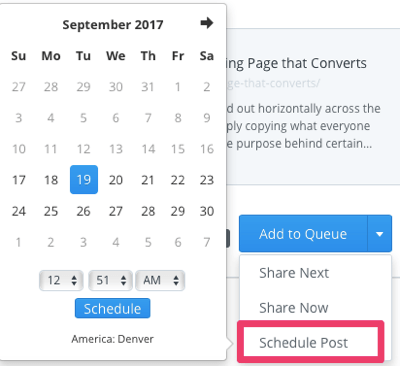
- Schedule Post will open a calendar where you select the time and date you want the tweet to be published.
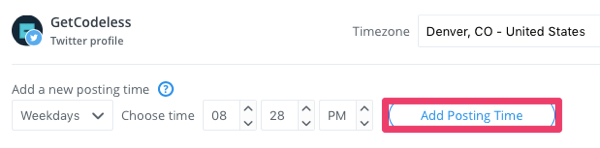
After you’ve added posts to your queue, you need to choose when Buffer will send out your queued posts. To access your posting schedule, click Settings and select Posting Schedule from the drop-down menu.

Next, click Add Posting Time and choose the day or type of day (e.g., weekdays) and time.
When you’re finished setting up your posting times, scroll down to view your weekly schedule. This schedule will depend on how much content you’re publishing and what platforms you use. After all, what works for Twitter may not work for Facebook or LinkedIn.
The best times to post on Twitter are from 8 – 10 AM, 11 AM – 1 PM, and 4 – 7 PM. These suggestions are great starting points but you’ll also want to do your own research to figure out when your tweets get the most engagement.
To do this research on Buffer, click the Analytics tab and analyze posts by recency or popularity. After sorting your past posts, scroll down to check them out.
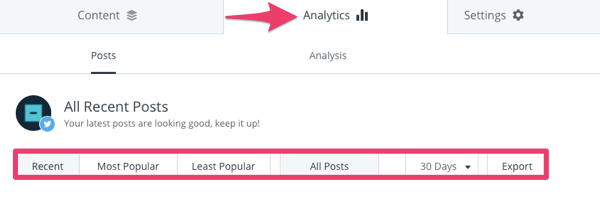
Look at a popular post to see what time you posted it and how much engagement it received. How many people clicked your link? If you received clicks upon clicks, this is a good time to direct people to your site.
Also, examine how many people saw your post; that’s your reach. The higher your reach is, the more users were online at that time (2:55 PM MDT in the example below):
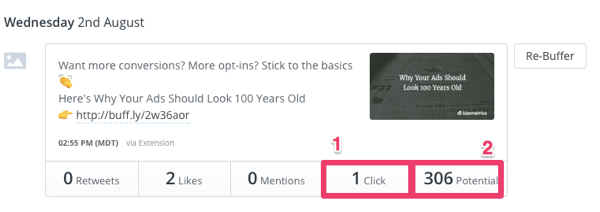
While doing your research, you may come across an old post you want to recycle. Just click the Re-Buffer button to the right of the post and Buffer will fill in everything for you to create a new post.
#3: Refine Campaign Delivery by Analyzing Custom Audience Segments With Audiense
Audiense is a Twitter analytics tool that leaves no stone unturned. It lets you access community analytics, manage social campaigns, and listen in on social conversations. You can quickly learn when you should be tweeting or whom you should be targeting when running a direct message campaign. You get all of these features and more with the Professional plan, which is $31.15 per month.
Create an Audience to Analyze

Discover Proven Marketing Strategies and Tips
Want to go even deeper with your marketing? Check out the Social Media Marketing Podcast! Publishing weekly since 2012, the Social Media Marketing Podcast helps you navigate the constantly changing marketing jungle, with expert interviews from marketing pros.
But don’t let the name fool you. This show is about a lot more than just social media marketing. With over 600 episodes and millions of downloads each year, this show has been a trusted source for marketers for well over a decade.
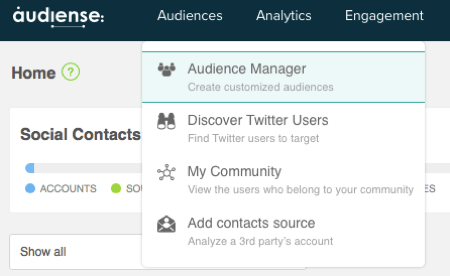
After you sign up for an account, start by creating an audience. Click the Audiences tab and select Audience Manager.
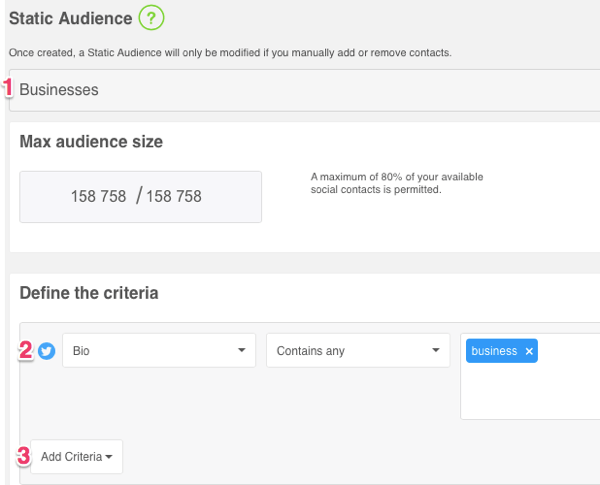
In the pop-up window, name your audience something catchy or practical, and then set the criteria for this audience. As an example, specify that the audience member’s bio must include the word “business.” Select additional criteria to make this segment even more specific. When you’re done, click Finish.
View Insights About This Audience
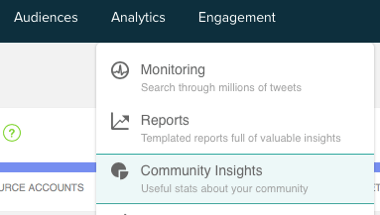
Depending on the size of your audience, Audiense may take several hours to load the data into your system. But once it does, there’s no time to waste! Navigate to the Analytics tab and select Community Insights.
You can segment your audience even further from here, which (unless you plan on sending a DM to 150,000 users) is something to consider.
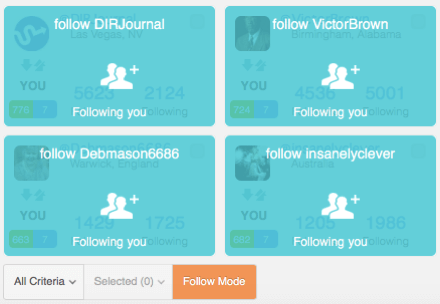
Segment this broad audience based on the relationship to your account. For instance, choose to view only members of this audience who follow you.

From here, you can complete a handful of tasks quickly. For example, click Follow Mode to see anyone in this group whom you don’t follow. You can then start following these accounts with the click of a button.
You also get access to a variety of reports for this segment. Click All Criteria to see options to send a DM campaign to this entire segment, get an insights report for this group, or find out the best time to tweet for this audience.

While other tools require you to sort through old posts to find the best time to tweet, Audiense tells you everything you want to know in one graph. Choose Best Time to Tweet Report from the All Criteria menu and name your new report.
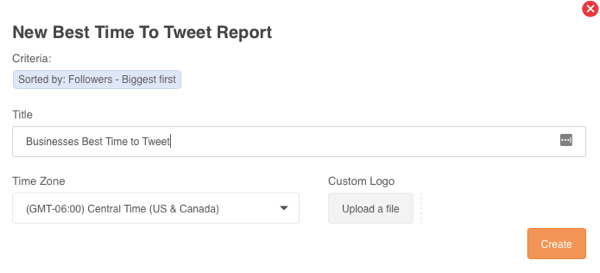
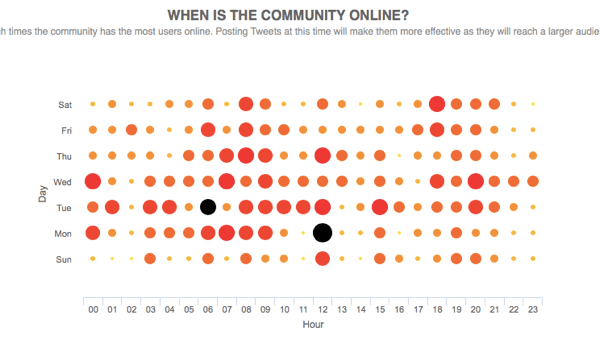
After you click Create, you’ll see a graph like this. For this example, Monday at noon is the best time to tweet for this audience. However, there are many other excellent times (and a lot of not-so-great times) to keep in mind as well.
#4: Schedule Your Content by Category With MeetEdgar
MeetEdgar lets you tailor your posting schedule by category, which means you can post certain types of content at specified time slots. For instance, instead of publishing the next tweet in your queue at 3 PM on Tuesday, you send out the next blog post tweet in your queue at 3 PM on Tuesday.
MeetEdgar’s categories feature can be extremely helpful if you’re planning to post a lot of content. And it’s likely you are. According to Fronetics, B2B companies are most likely to succeed when they tweet 40 times per day. And no, that’s not a typo.
Give it a whirl during a two-week free trial. After that MeetEdgar costs $49/month and lets you link 25 accounts from Twitter, Facebook, and LinkedIn. You can schedule unlimited posts, so you’ll never have to delete content from your library.
Add Content to Your Library
Once you connect your Twitter account to MeetEdgar, you’re ready to add content to your library. First, select your Twitter account and choose a category for this content.
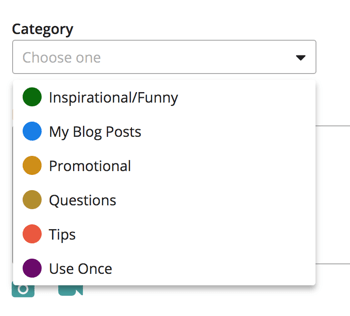
You can choose from six MeetEdgar categories:
- Inspirational/Funny posts are meant to engage a broader audience.
- My Blog Posts link to your site blog.
- Promotional posts sell products to your audience.
- Questions engage your audience by seeking answers from them.
- Tips are quick suggestions that aren’t connected to a blog post.
- Use Once is content that’s posted once and not recycled back into your queue.
The category feature is a good reminder to switch up the type of content you’re posting. The best social media accounts produce content for each stage of the buyer’s journey. And of course, only 20% of your content should be focused on selling stuff. The rest should engage and educate, which is where a category like Inspirational/Funny comes into play.
After choosing your category, write your post. MeetEdgar will let you know how many characters you have left to use.
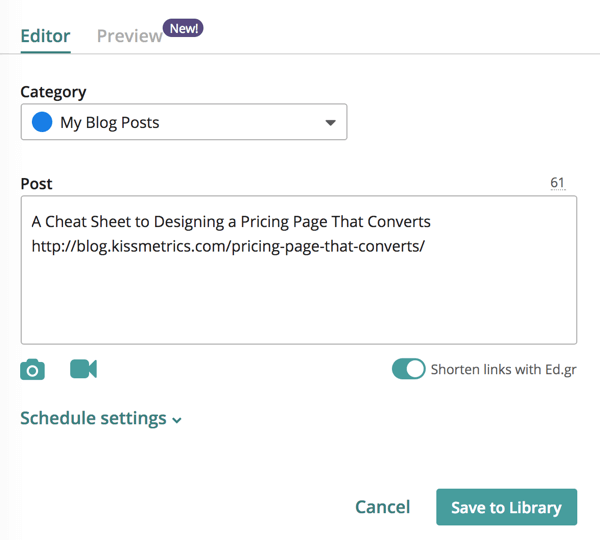
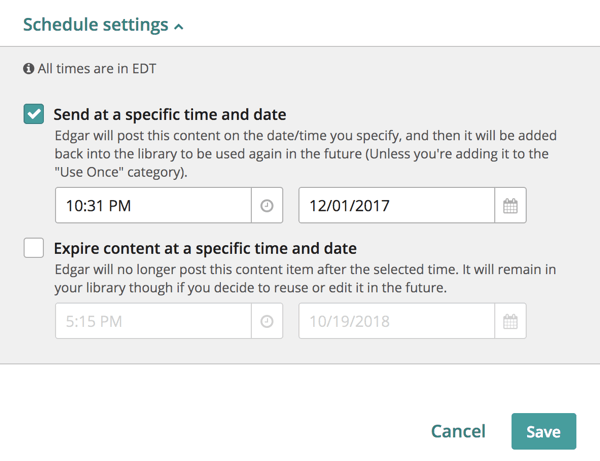
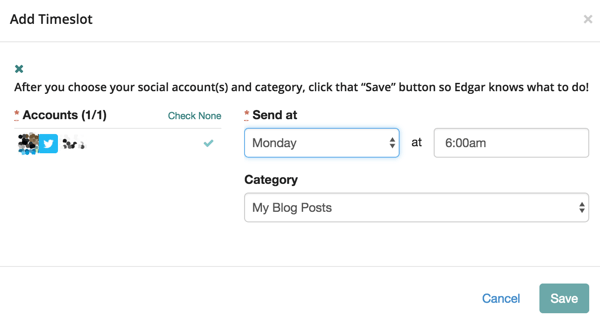
Next, scroll down and click Schedule Settings. Select the Send at a Specific Time and Date checkbox, and choose the time you want this tweet to publish.
If you want, you can also set an expiration date for your tweet; MeetEdgar will no longer post this content after that date. When you’ve finished scheduling, click Save to add the tweet to your library.
Access Your Content Library
To access your library, click the Library tab at the top of the page. Select a category filter on the left to see what’s in the queue for that specific type of post.
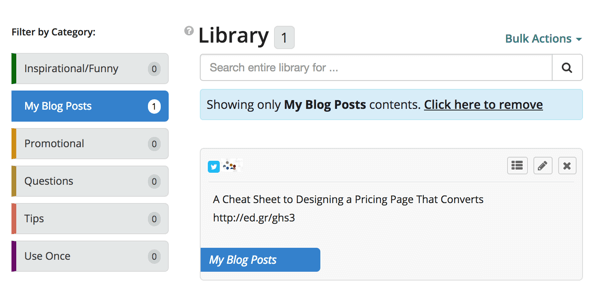
You can also use the search box to find posts about a specific topic. This is handy when you want to post about a popular topic but don’t have time to create new content.
Set Up a Posting Schedule
Once you’ve created and categorized your content, it’s time to set your schedule. Open the Schedules tab and click the yellow + Add Timeslot button.

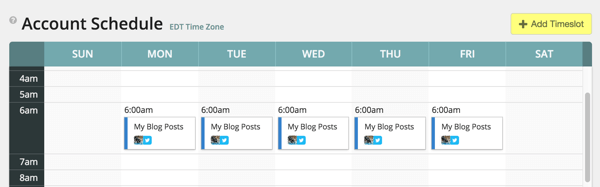
Then choose which account you want to post to during this timeframe, and set the day and time. Also, select the category of post you’d like to send out regularly at this time. For example, you might choose to share your blog posts every Monday through Thursday at 6 AM. Click Save to add this timeslot to your account schedule.
Scroll down to view your account schedule, which provides a clear view of what, when, and where you’ll be posting. Don’t like what you see? Click on a timeslot to edit it right from the calendar.
Connect an RSS Feed
If your schedule is looking a little light, consider sharing a relevant article from someone else. You can connect an RSS feed to MeetEdgar to receive a list of content to add to your library, which makes it easy to share your blog posts or someone else’s.
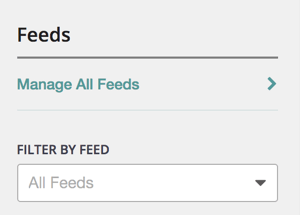
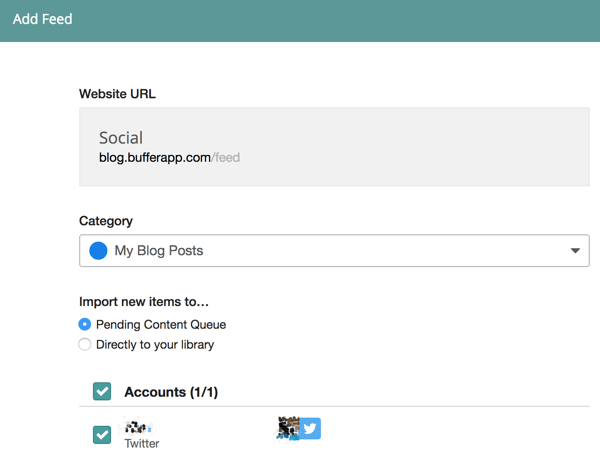
Go to the Feeds tab at the top of the page and click Manage All Feeds. On the next page, click Add Feed.
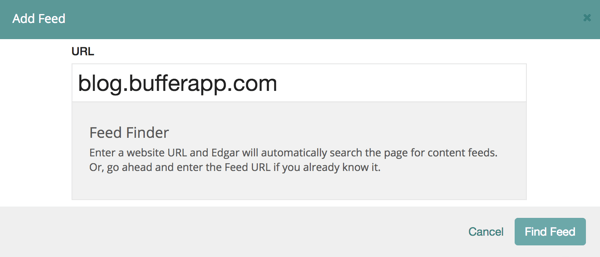
Next, MeetEdgar will help you find the content feed you want to add. Type in the URL of the website and click Find Feed.
You’ll then see content feeds related to that URL. In the Add Feed window, choose a category for this content and specify whether the content from the feed will go straight to your library or to a Pending Content Queue.
Then choose the account you want this content to post to and click Add Feed.
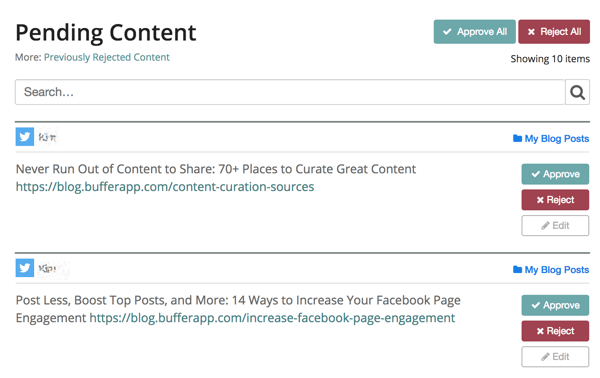
If you choose to add the content to the pending list, you’ll have the chance to approve it before it goes to your library or queue. Go to the Feeds tab to find your pending content. Adjust the filters on the left side of the page to sort the content for a specific feed, category, platform, or account.
Click the Approve button to add the content to your library or click the red button to reject it. Click Edit if you want to edit the text for this post.
By incorporating extra blog posts in your library, you’ll prevent your queue from turning over too quickly. As a bonus, you’ll give plenty of publicity to someone else’s blog or your own.
Conclusion
As your small business evolves into a not-so-small business, your social media strategy will need to evolve as well. But the good news is that you don’t have to go it alone.
You and your social media team can rely on the expertise of some of the most efficient and budget-friendly tools on the market. These four tools will help you track tweet performance and analyze follower demographics as you design a Twitter presence that converts.
What do you think? Do you use some of these tools to manage your Twitter presence? What tools would you add to the list? Please share your thoughts in the comments below.
Attention Agency Owners, Brand Marketers, and Consultants

Introducing the Marketing Agency Show–our newest podcast designed to explore the struggles of agency marketers.
Join show host and agency owner, Brooke Sellas, as she interviews agency marketers and digs deep into their biggest challenges. Explore topics like navigating rough economic times, leveraging AI, service diversification, client acquisition, and much more.
Just pull up your favorite podcast app, search for Marketing Agency Show and start listening. Or click the button below for more information.